Ballarat
The rails reached Ballarat on April 11 1862, (only 8 years after the Eureka rebellion), when the line from North Geelong was opened for traffic. Extravagently, the line was double track. Ballarat would be the end of the line until 1874 when the line from Ballarat to Creswick was opened on July 7 1874 and from Ballarat to Beaufort on Aug 11 1874. A direct line to Melbourne would come much later, in stages, when the line from Warrenheip to Gordon was opened on May 7 1879 and from Gordon to Ballan on Dec 22 1886, the final section that allowed through running from Melbourne to Ballarat was not opened until Dec 4 1889 (Bacchus Marsh to Ballan). In 1917 the Ballarat North workshops were opened which built and overhauled locomotives and rollingstock until the end of the Victorian Railways. A major locomotive depot was established at Ballarat East which included two under cover turntables. Ballarat had five signal boxes: Ballarat East, A box, B box (Lydiard street), C box (Nth Ballarat Junction) and D box (more commonly known as Linton Junction). It was an important marshalling yard.
Ballarat was a major station on the Melbourne to Adelaide broad gauge track but when the two capitols were linked by standard gauge it was decided to bypass Ballarat and use the line through Cressy instead. (this line avoided the steeply graded Ingliston bank) So from May 1995 when the new standard gauge line was opened, Ballarat became a much less busy station.
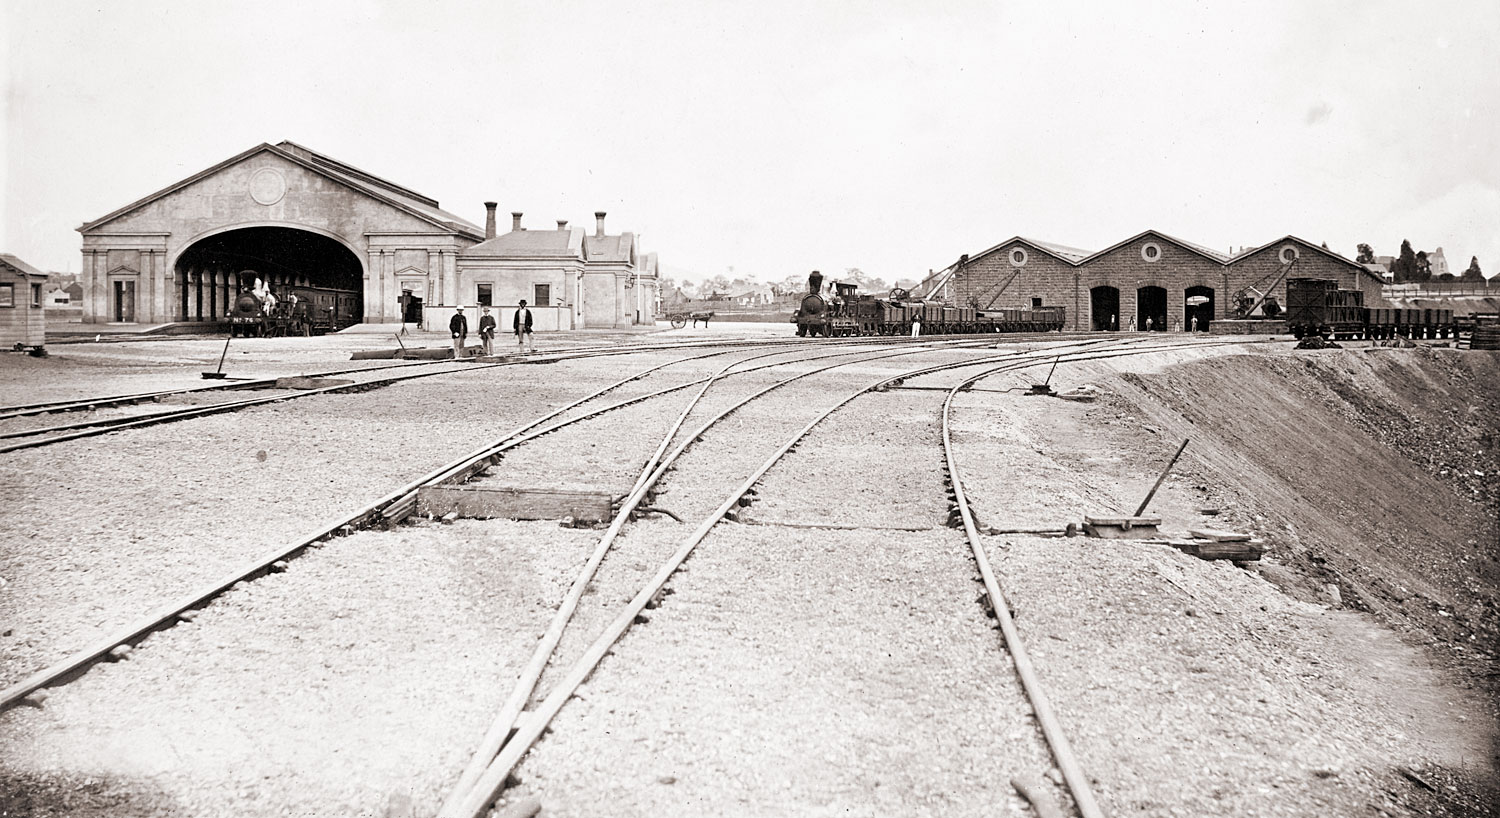
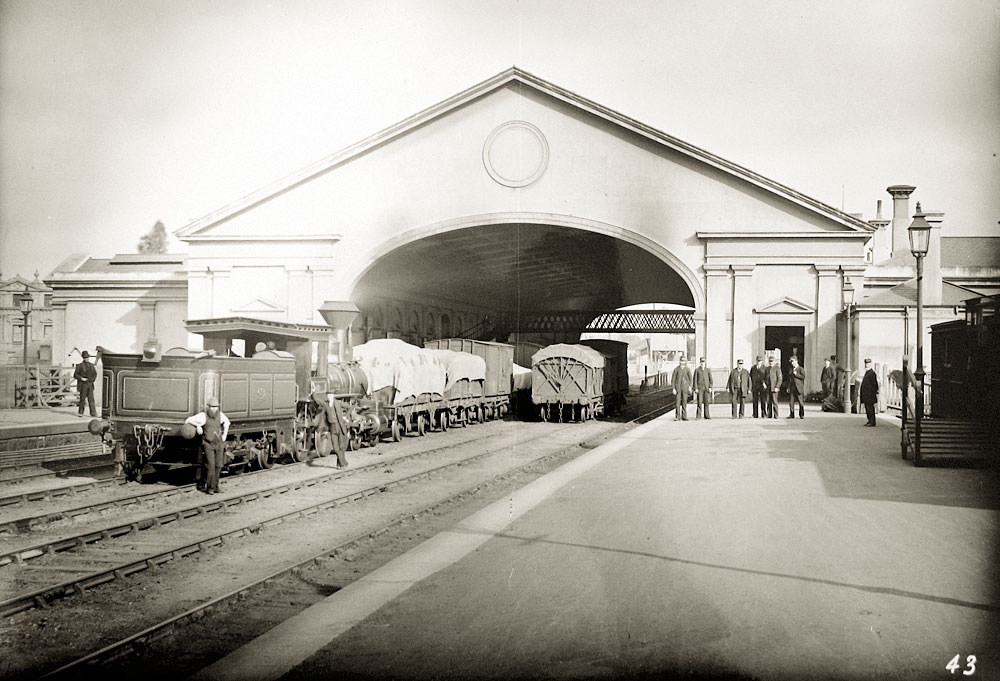
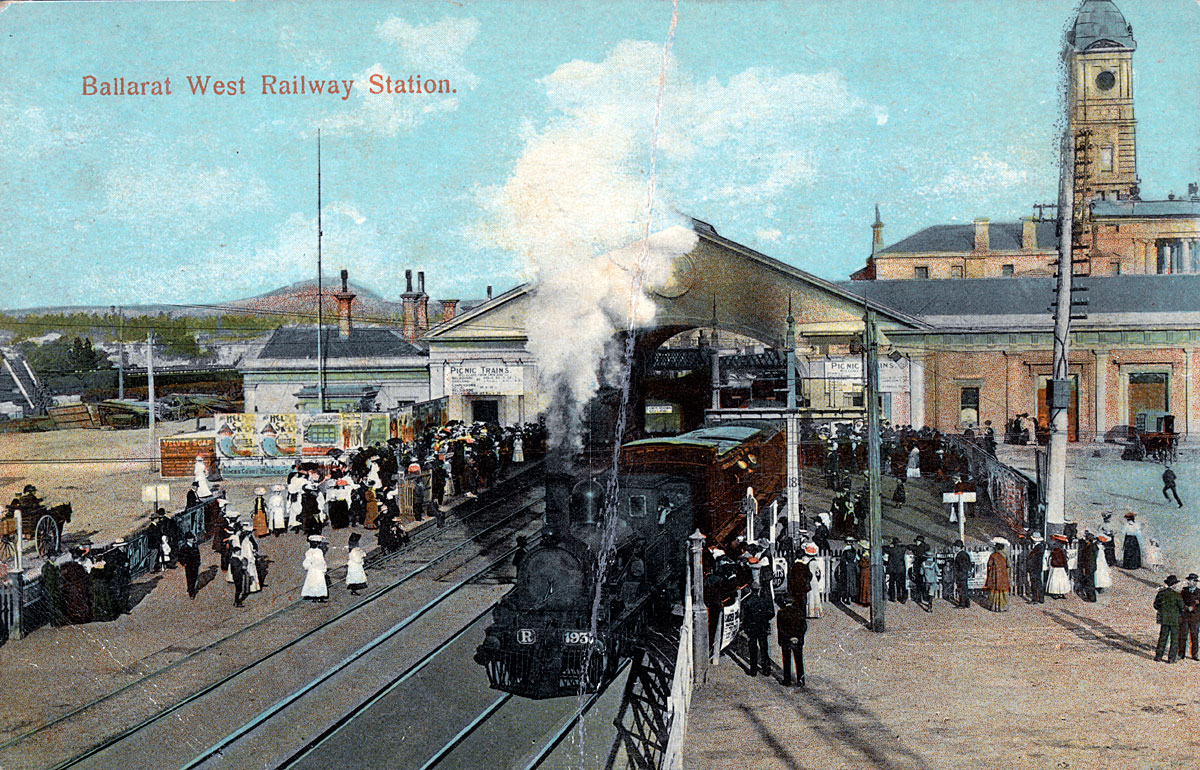
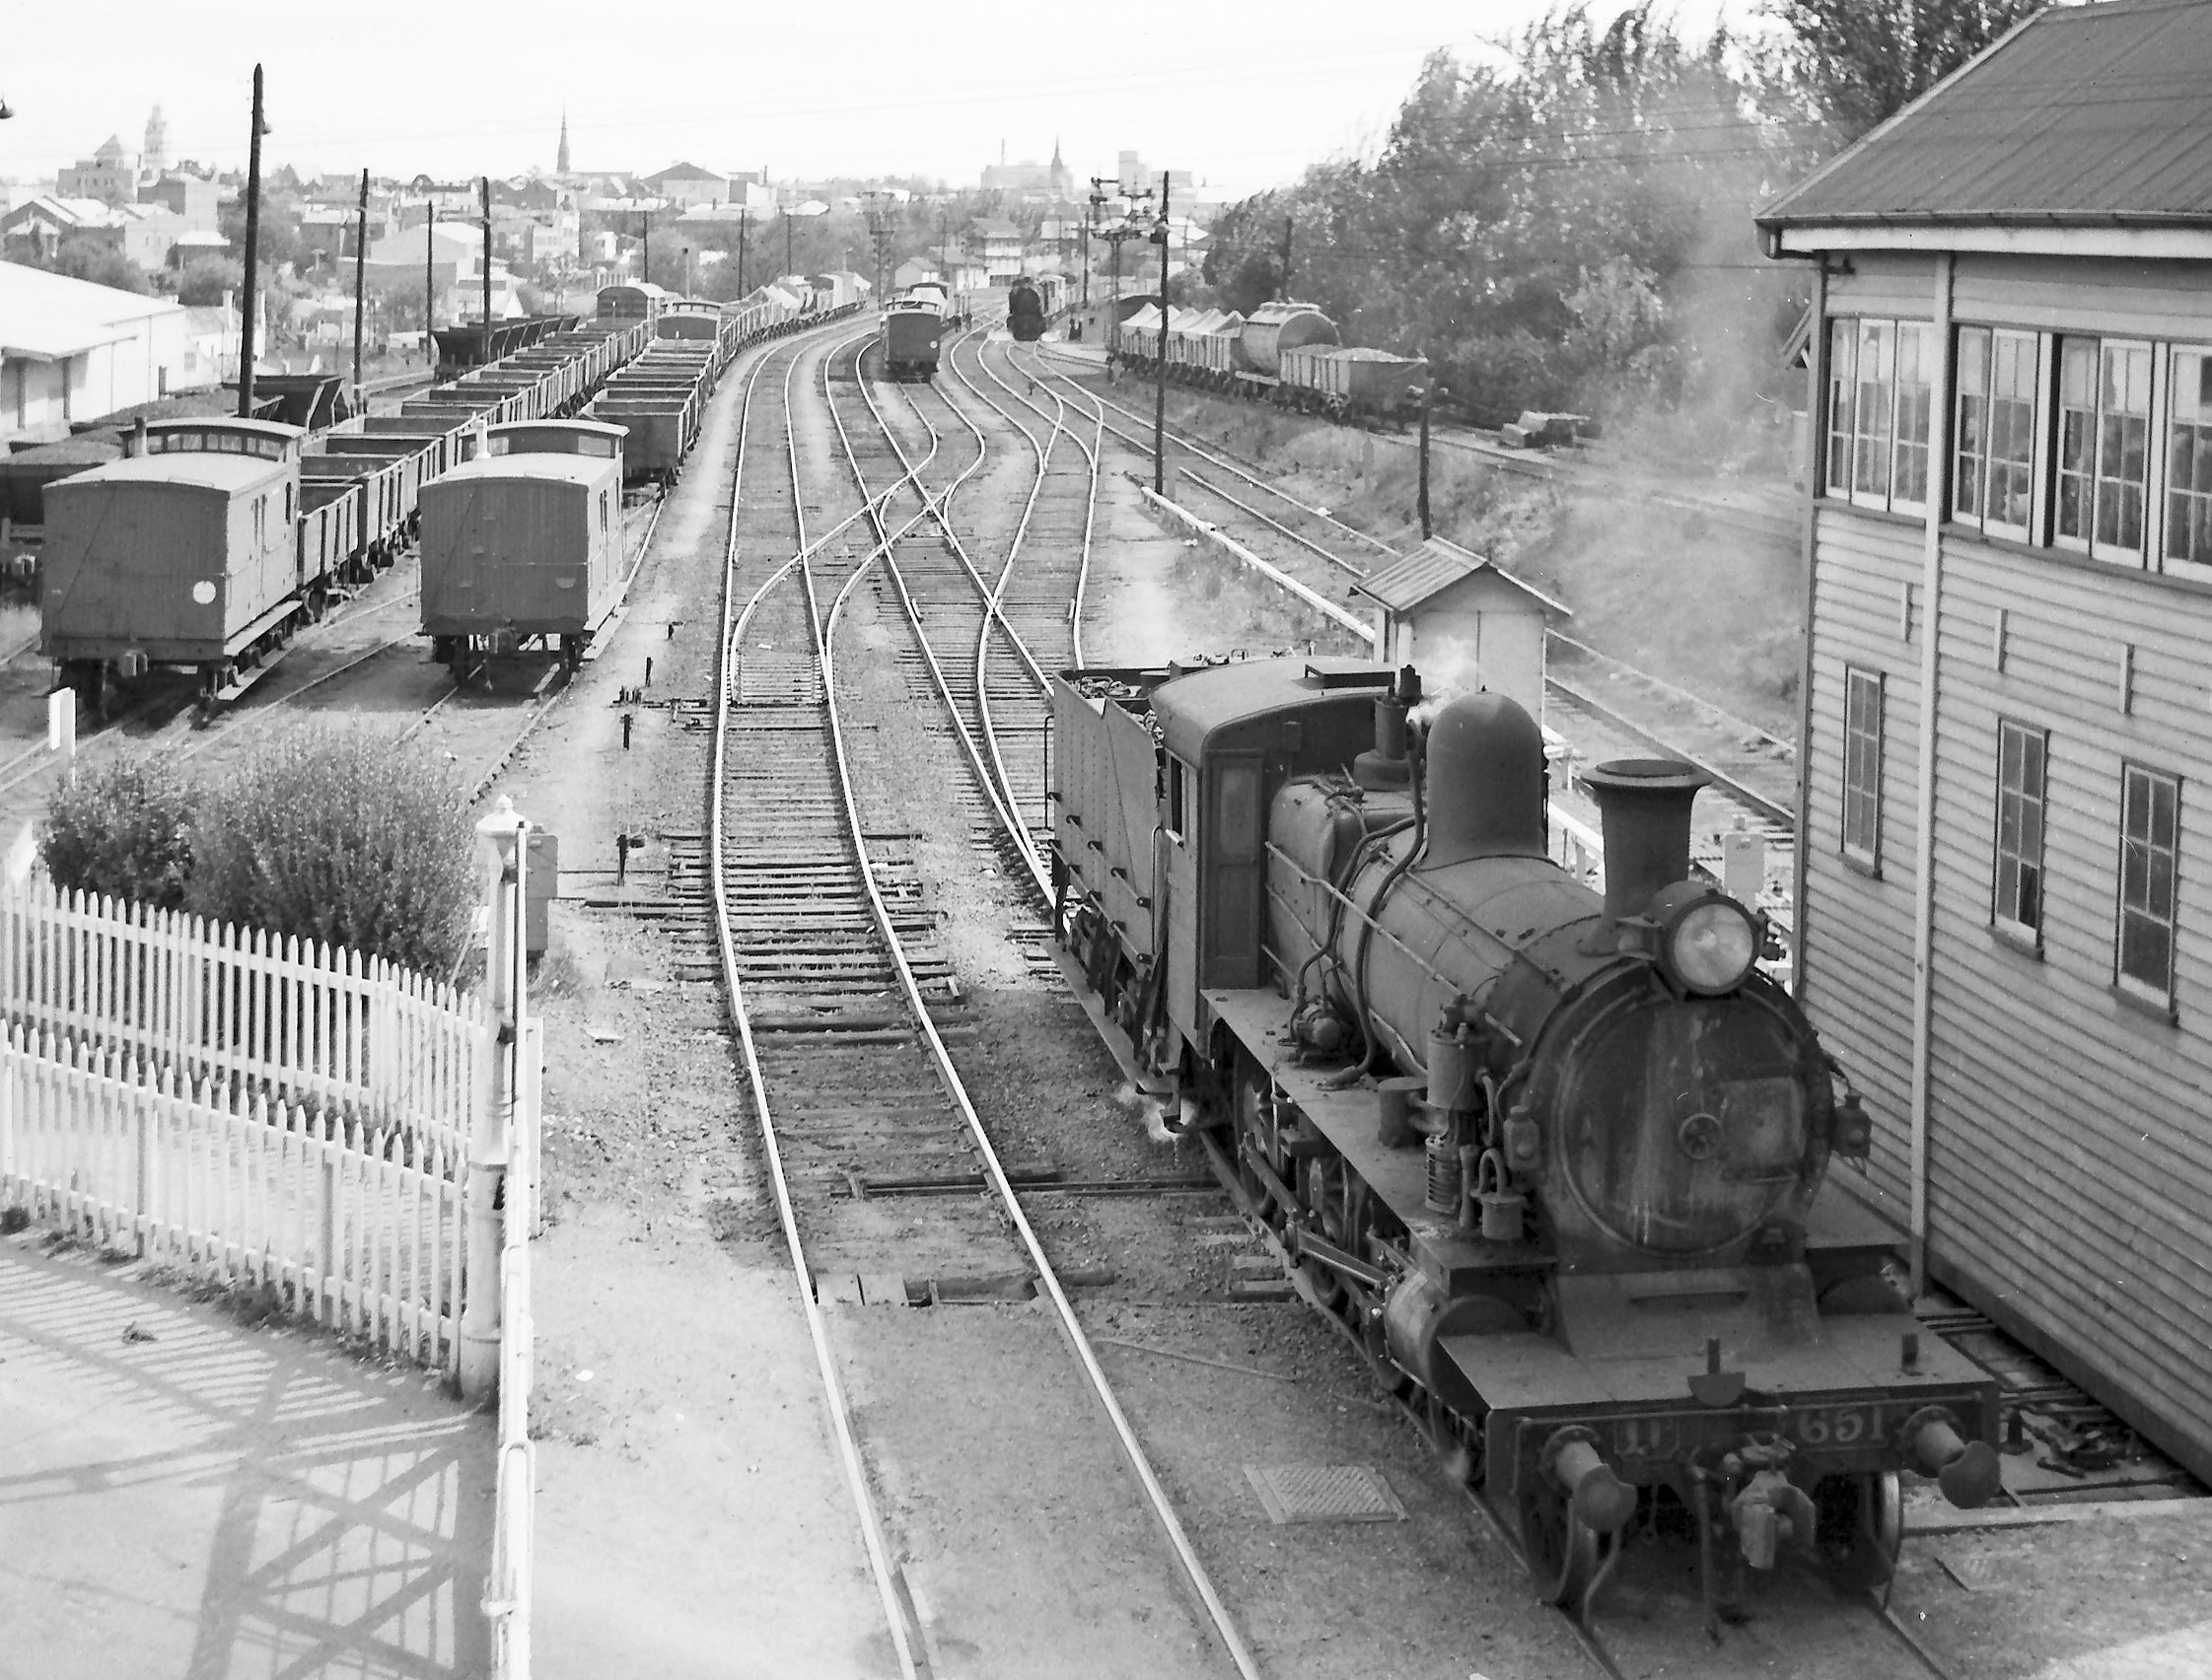
ABOVE: A circa 1862 view, looking west, of Ballarat, called Ballarat West in the caption, shows a up passenger train and another loco making up a goods train. Notice how the platform ends at the end of the arch.
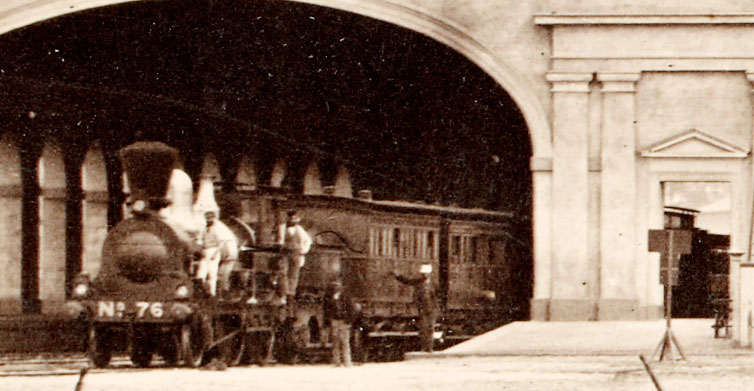
ABOVE & BELOW: Close up scans of the two trains in the top photo. (photos courtsey State Library Victoria.)
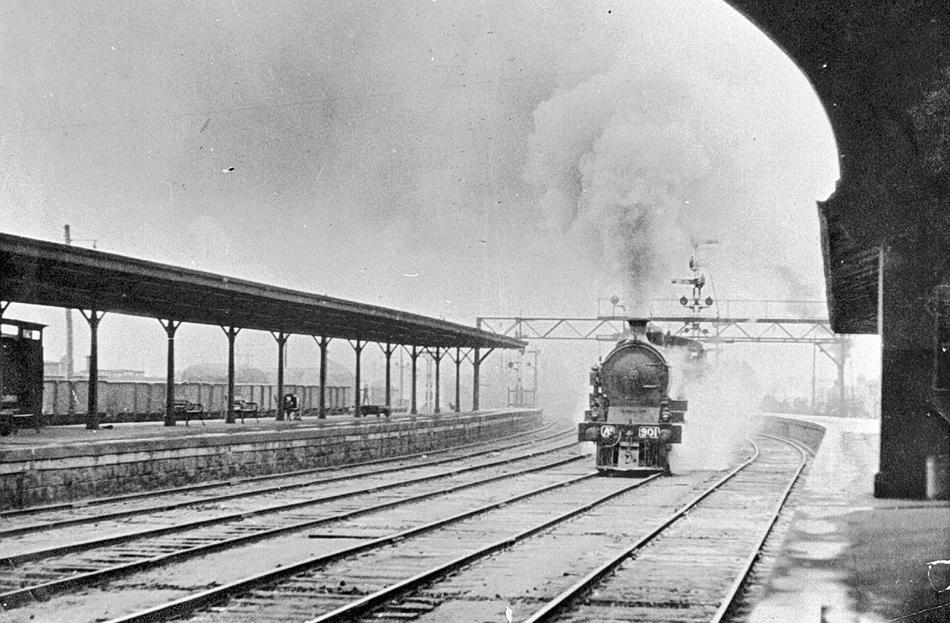
ABOVE: Phoenix built S class 4-6-0. probably on the yard pilot pauses for this fine view at Ballarat looking west in 1885. In this photo the platform has been extended considerably beyond the arch. Photo by Emma Nettleton
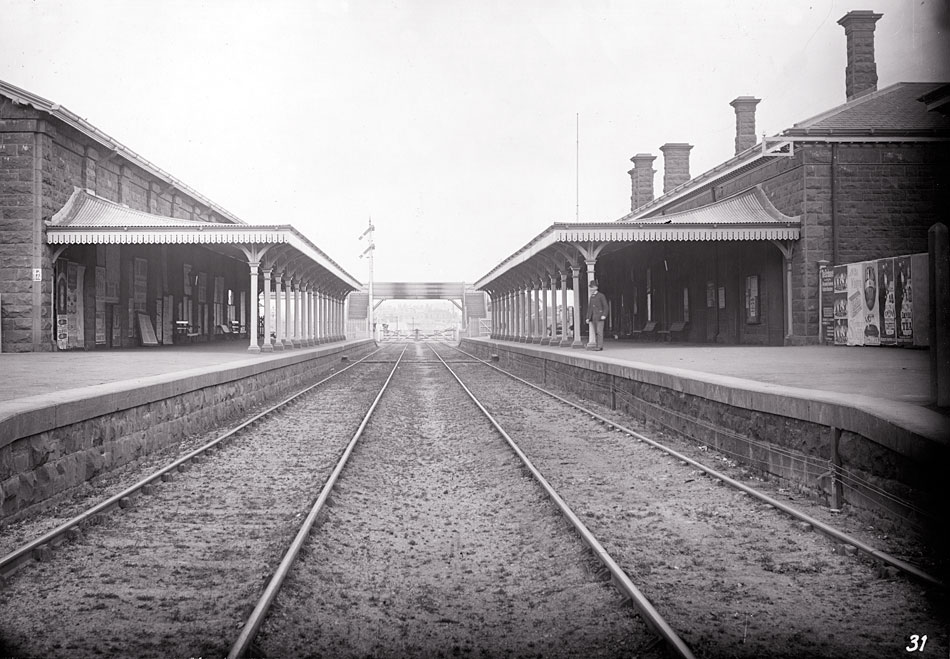
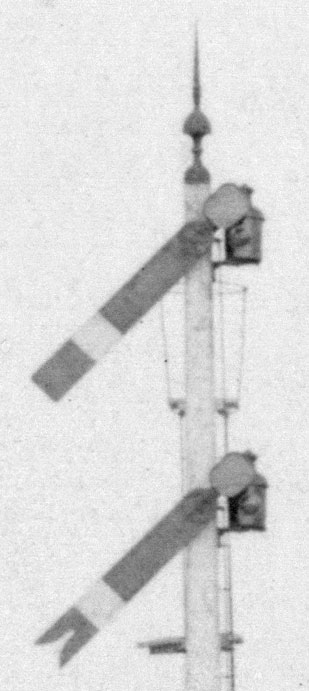
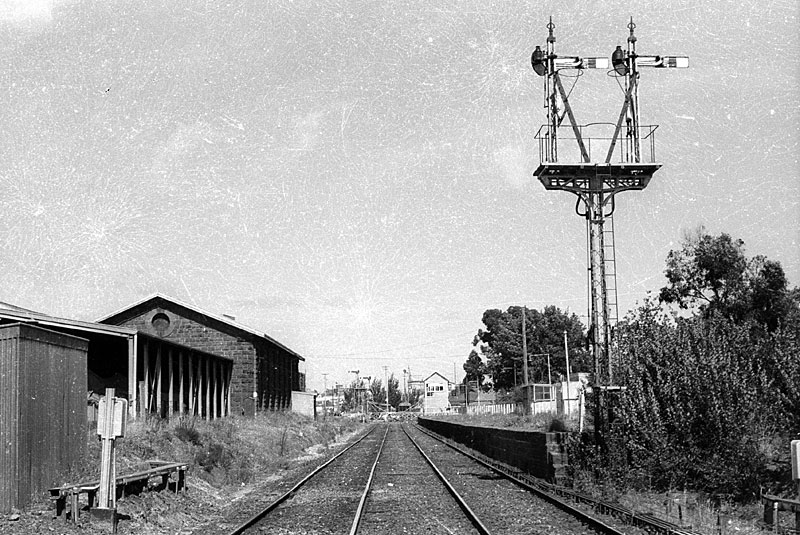
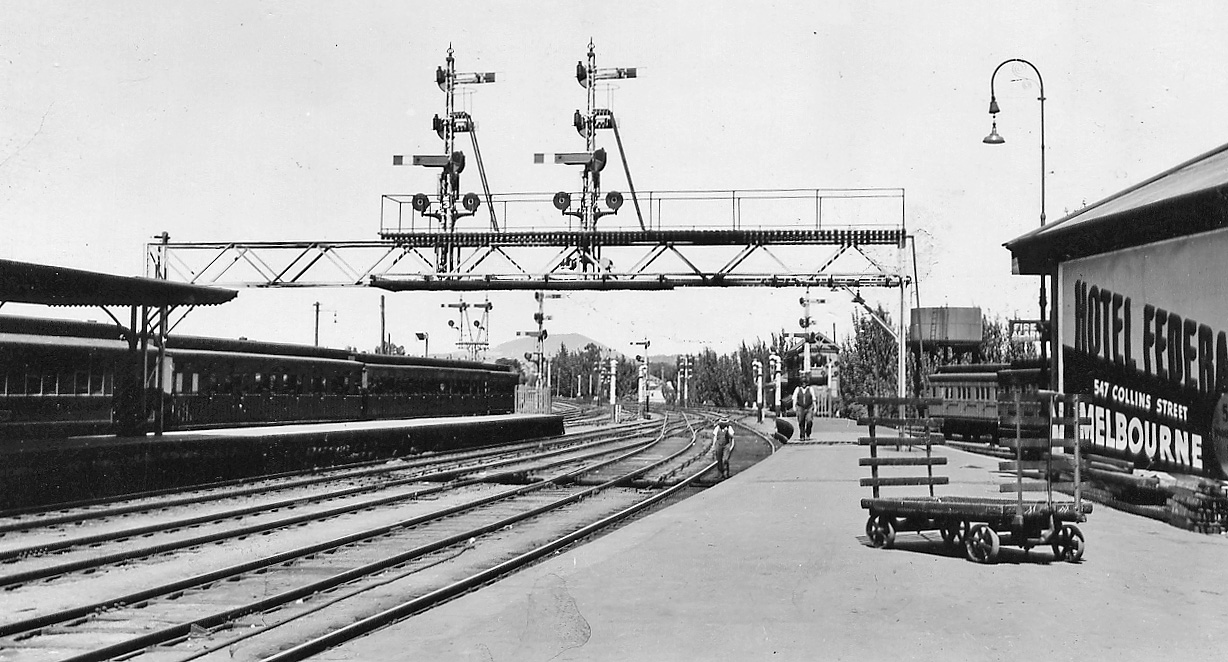
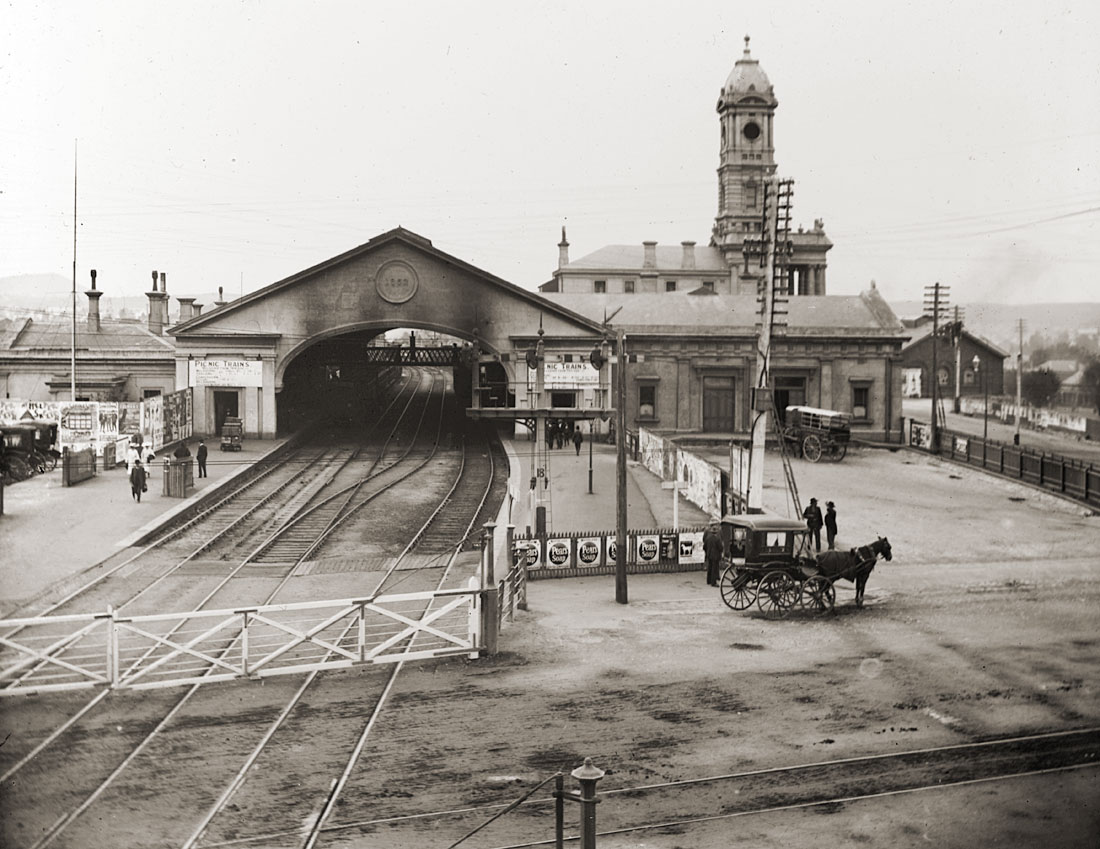
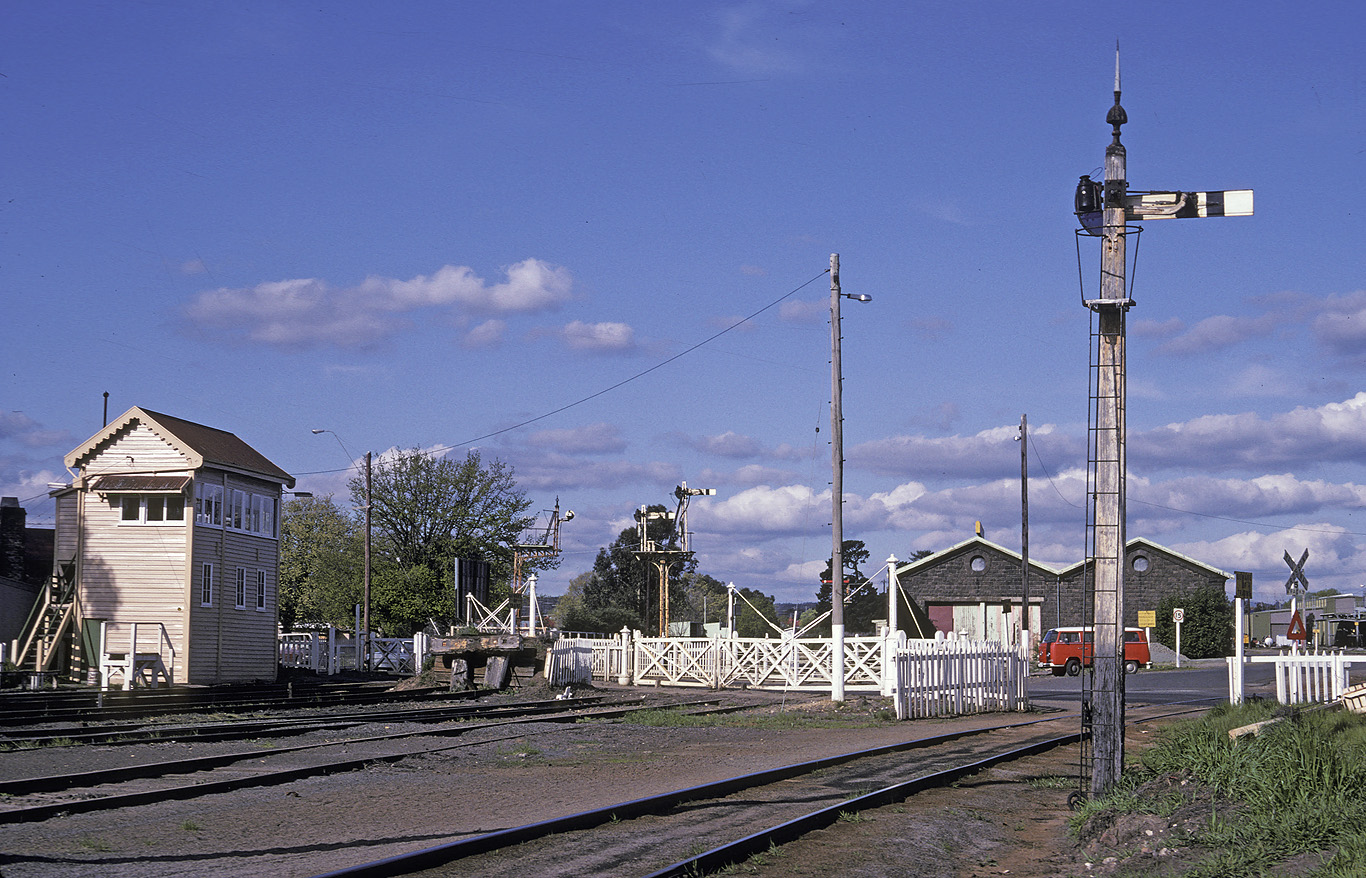
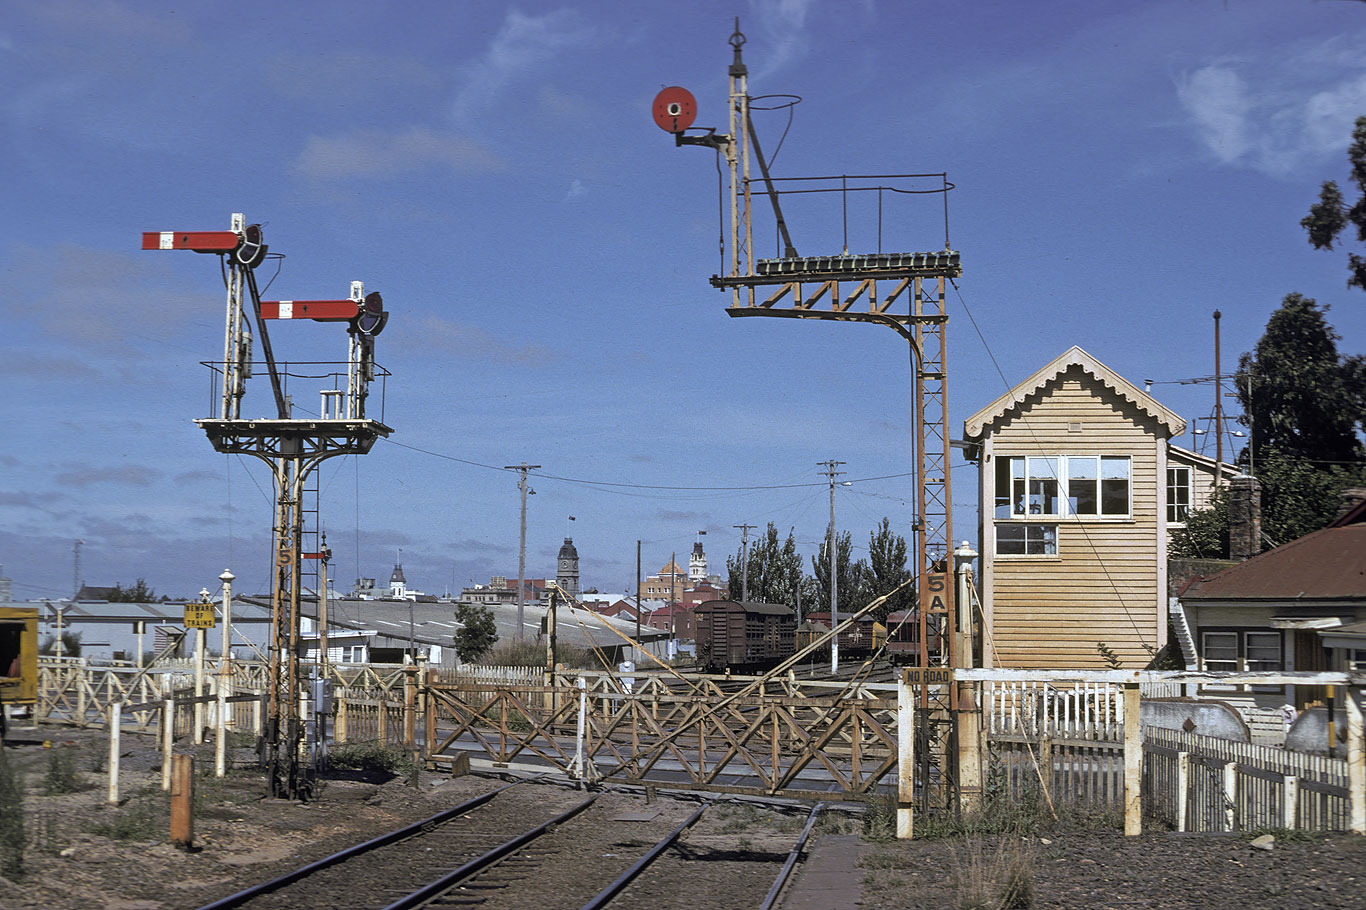
ABOVE: Ballarat East looking towards Ballarat circa 1885. Obviously the home signal at the end of the platform was not interlocked with the hand gates shown across the tracks! BELOW is a close up scan of the same photo showing the type of signal in use prior to the introduction of VR's famous somersault signals. Photo by Emma Nettleton
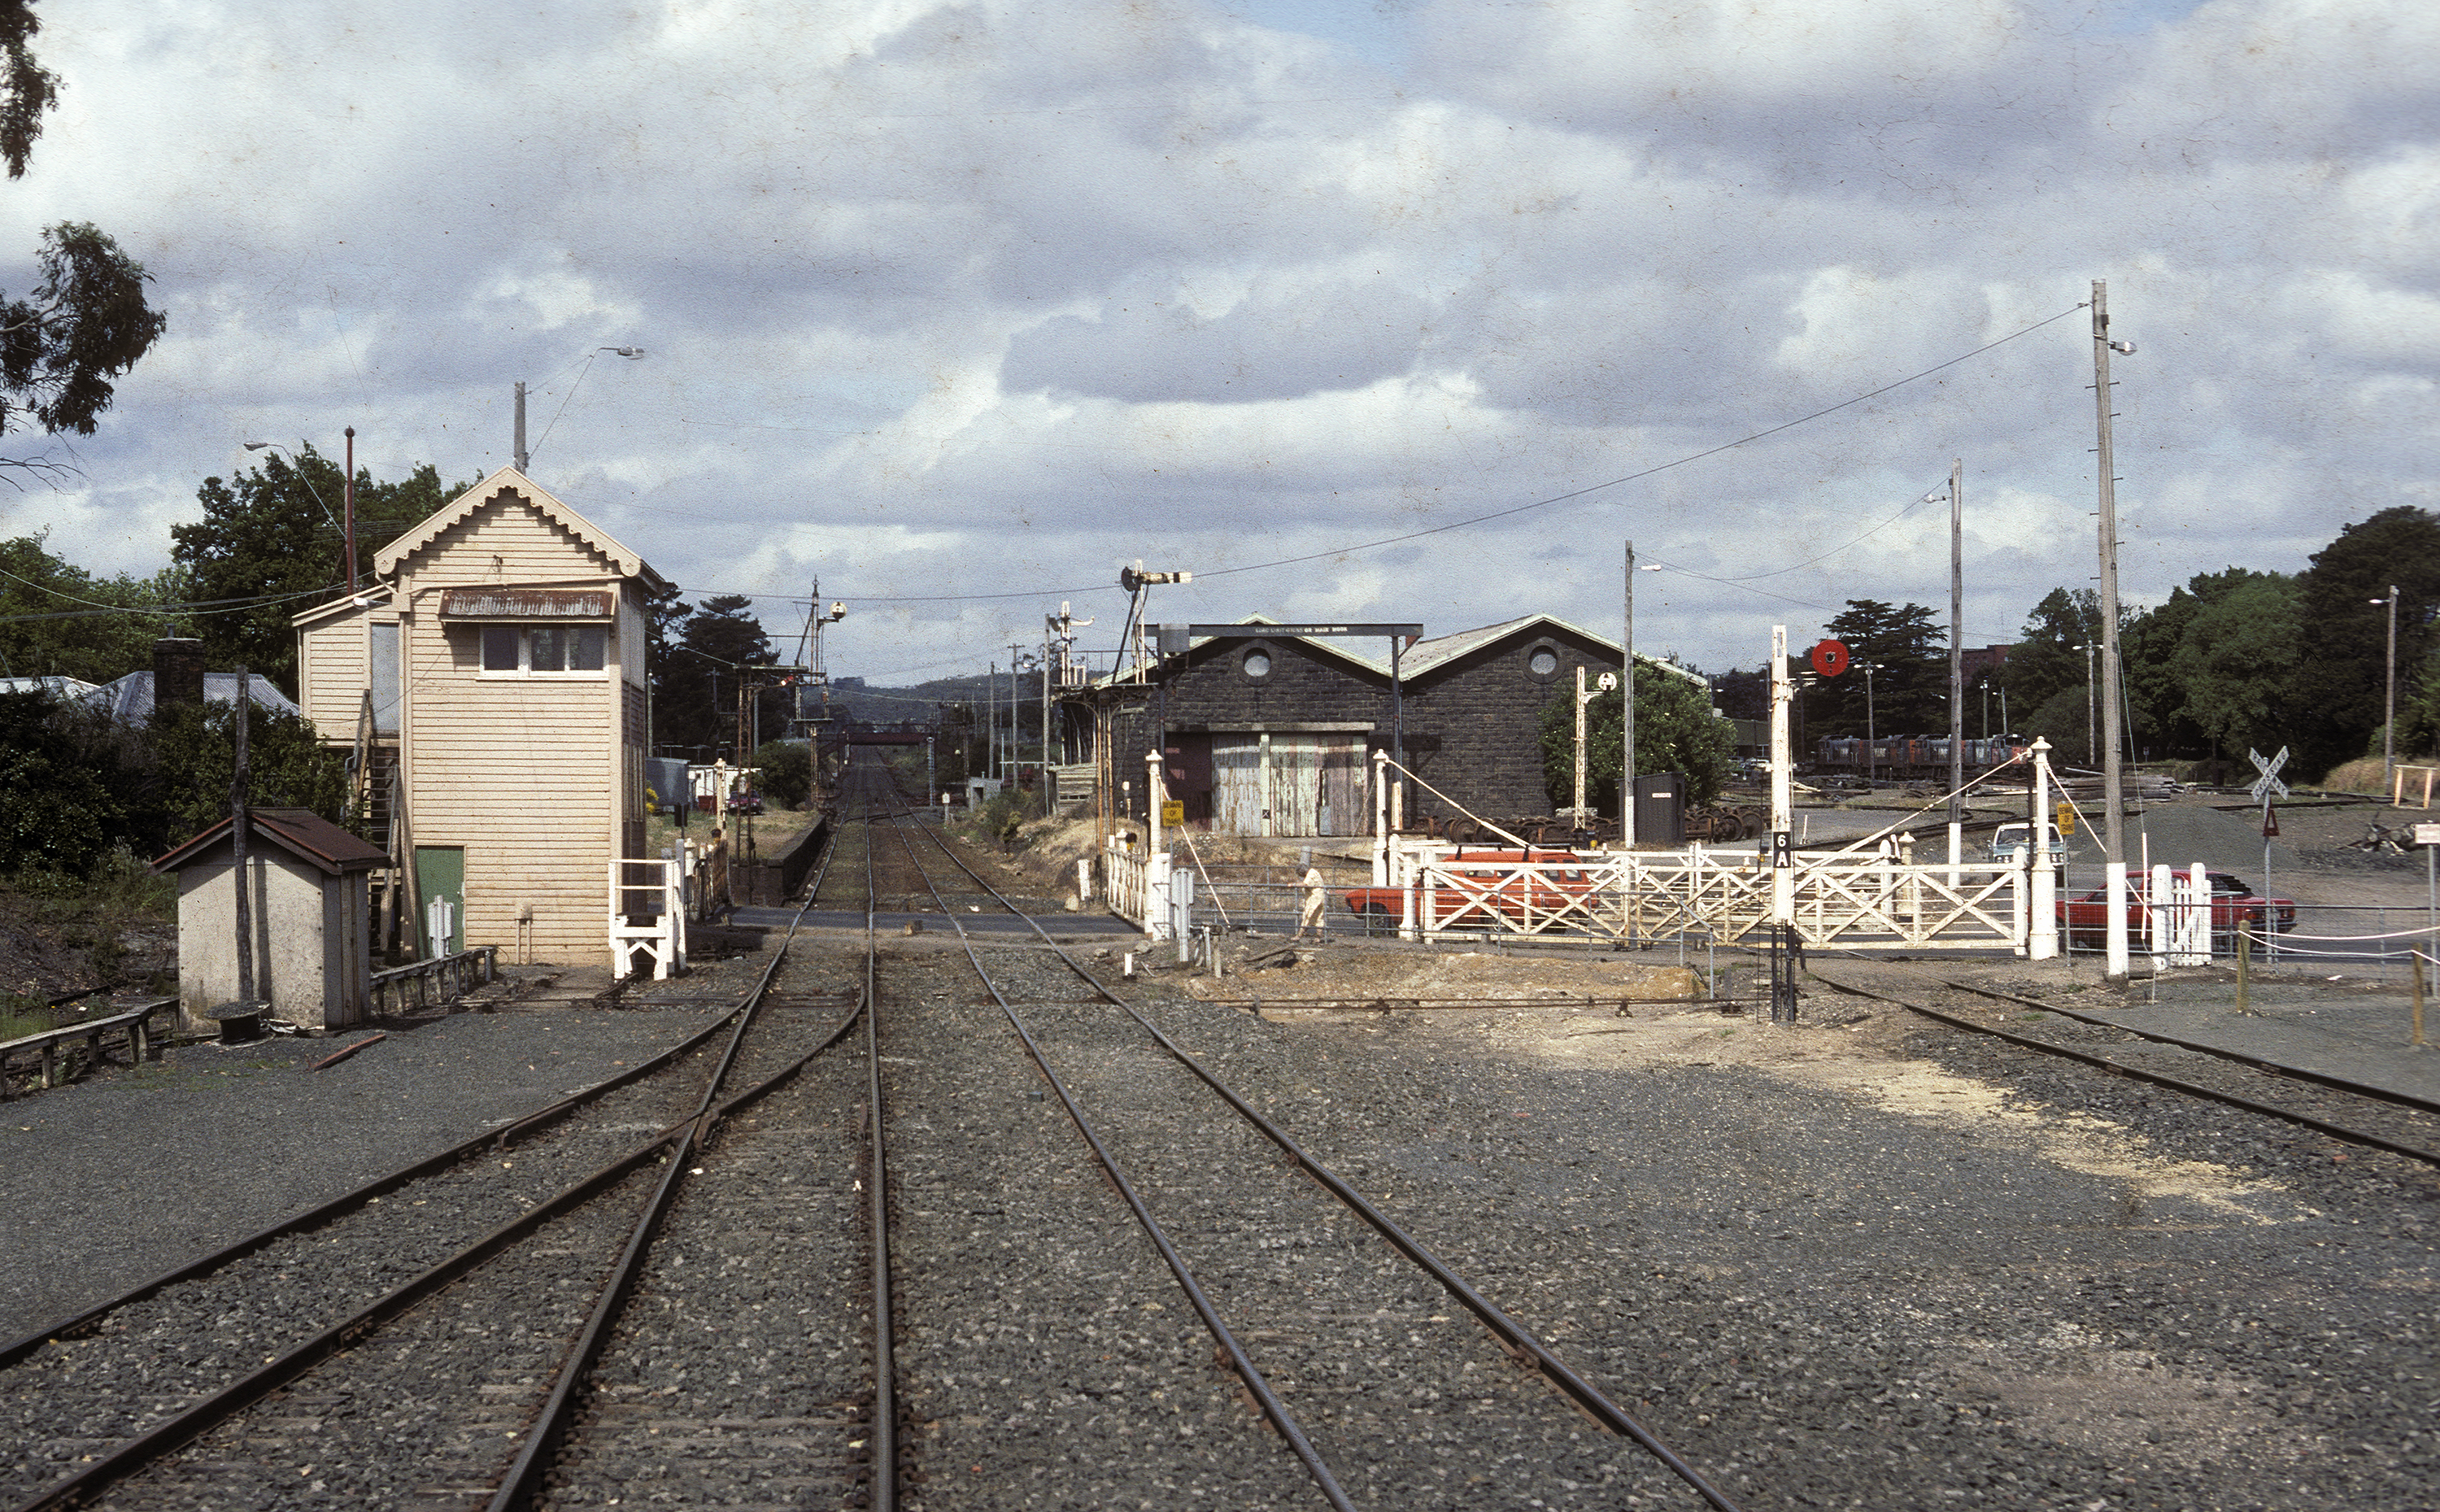
ABOVE: A view of Ballarat East looking West, towards Ballarat. The first time I remember travelling by train to Ballarat the down platform was still extant and I believe our train stopped there, that would be about 1977. Compare this photo to the 1885 view taken from almost the same spot! Photo date 1981
ABOVE: The view from the cab of an up train showing the Ballarat East signalbox at the foot of Warrenheip Bank. Nov 1991.Photo courtesy Noel Bamford.
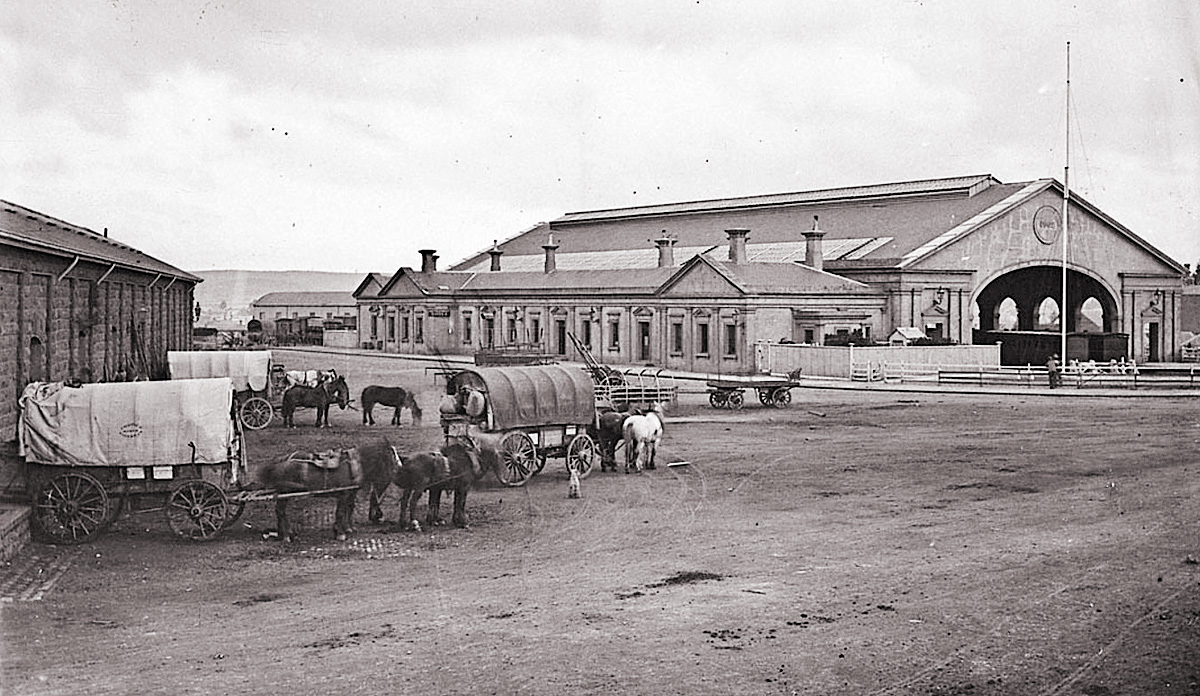
ABOVE: A very early photo of the goods yard and station at Ballarat. The main offices at the station were originally on the up side.
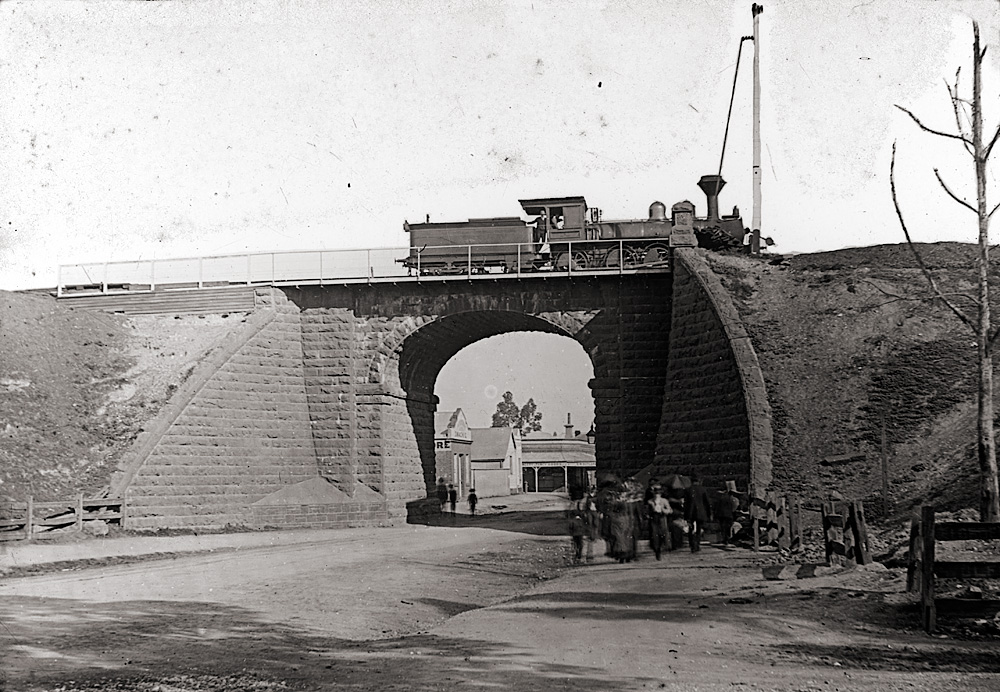
ABOVE: An S class sits on the Peel street bridge. This bridge and embankment was vastly widened to accomodate a much enlarged Ballarat yard.
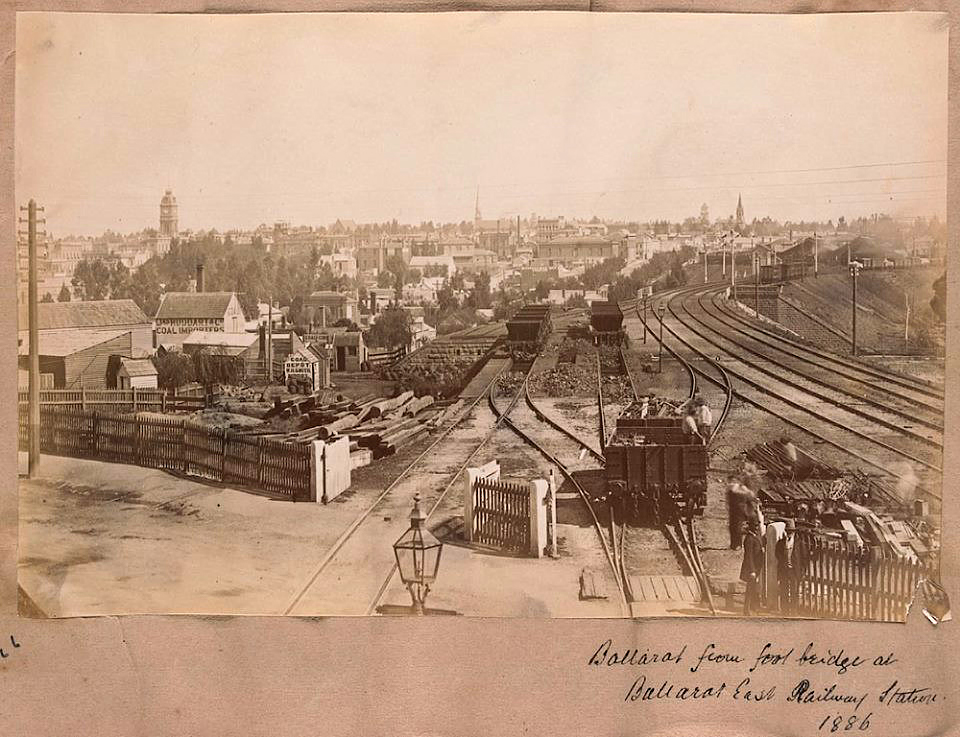
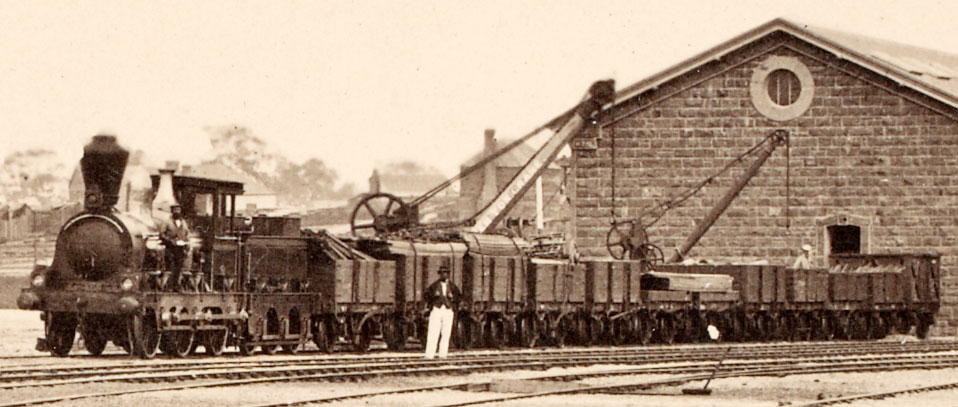
ABOVE: Looking west at the coal gears and original smaller yard. 1886
ABOVE: An A2 moves through one of the middle roads in a circa 1920 view.
ABOVE: Standing on the down platform looking towards Mebourne, 1947.
ABOVE: A down train stands at the platform circa 1910. Photo taken from Ballarat B box BELOW: A similiar view taken from around the same time. State Library of Victoria collection.
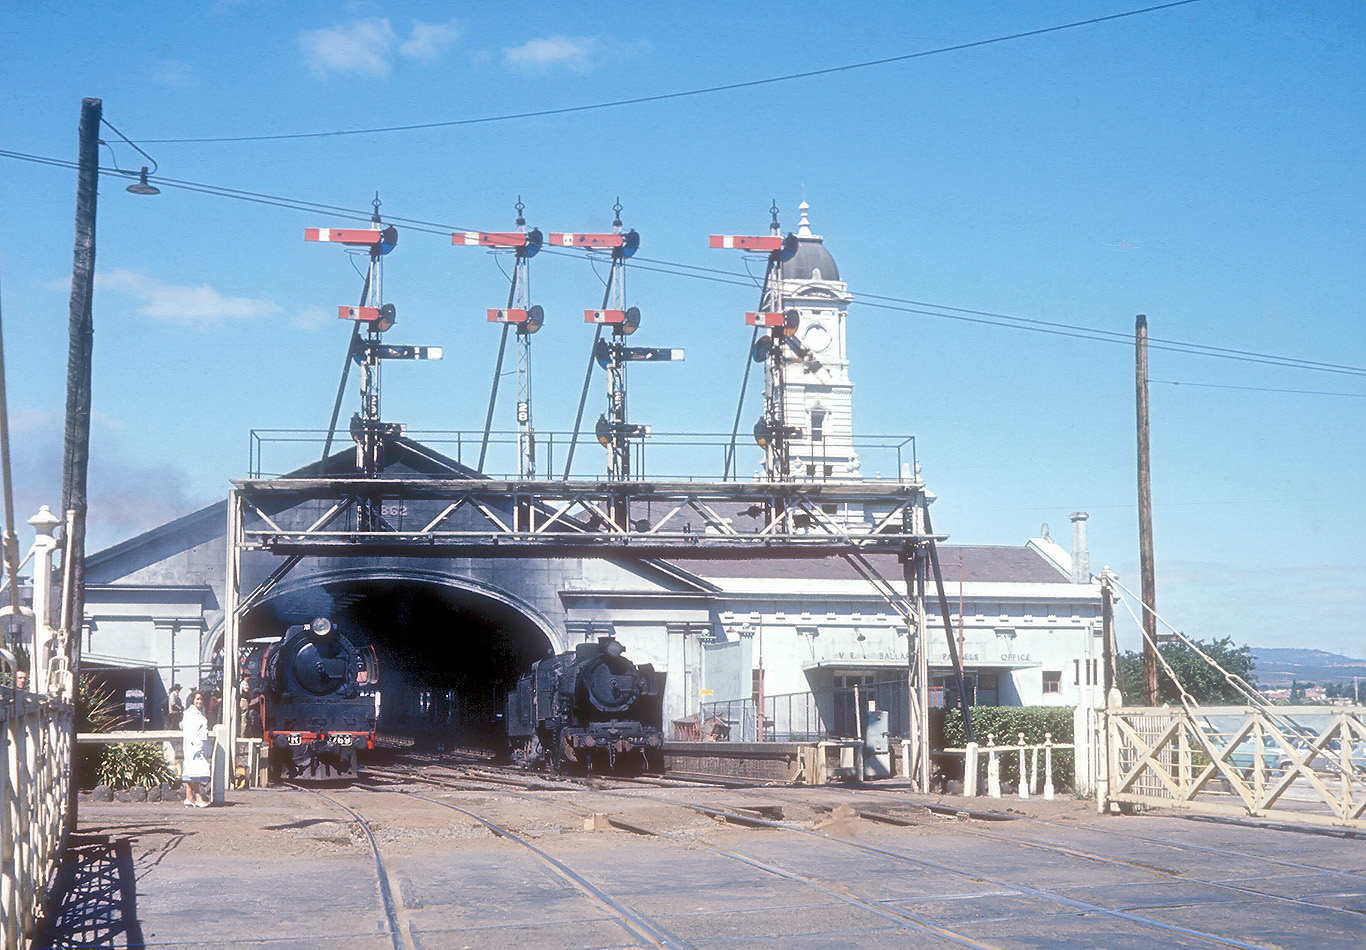
ABOVE: The impressive signal gantry at the west end of the main station building with the Lydiard street crossing the foreground. R 749 and J 517 go about their business. June 14 1965. (photo courtesy John Ward)
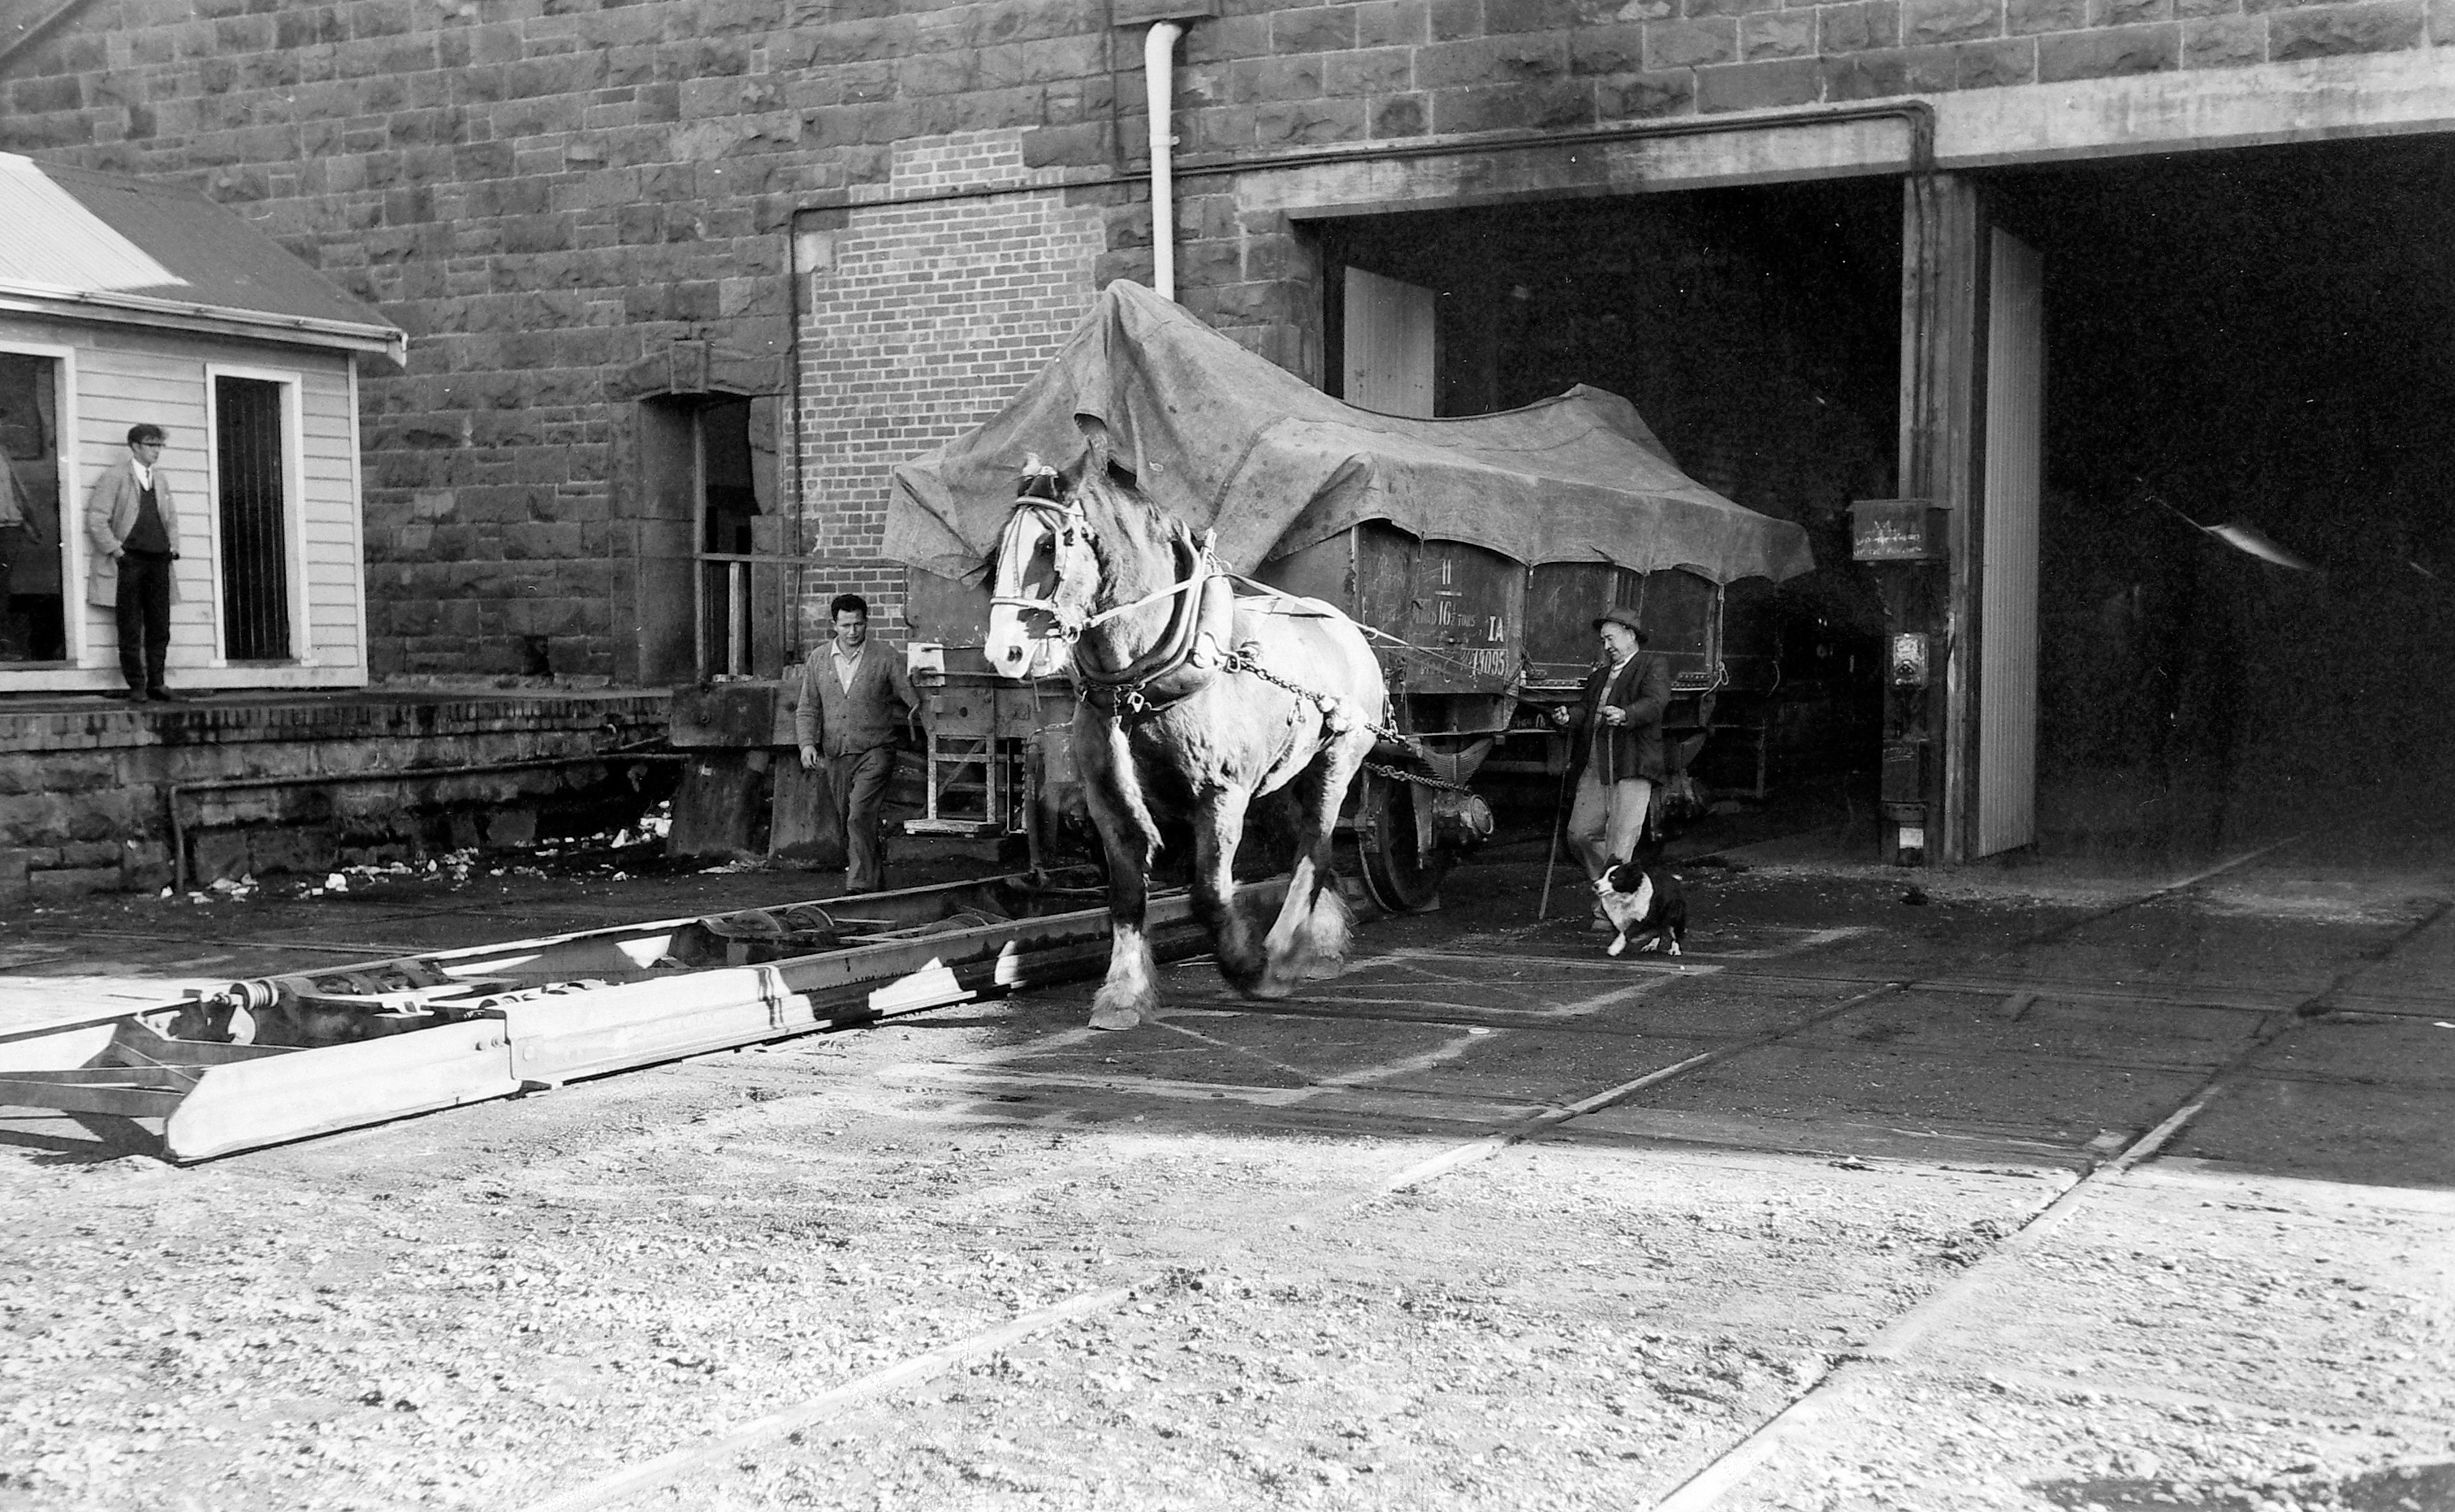
ABOVE: A one horsepower shnter working at the Ballarat goods shed June 1966. Apparently the horse's name was Prince. official VR photo PR314
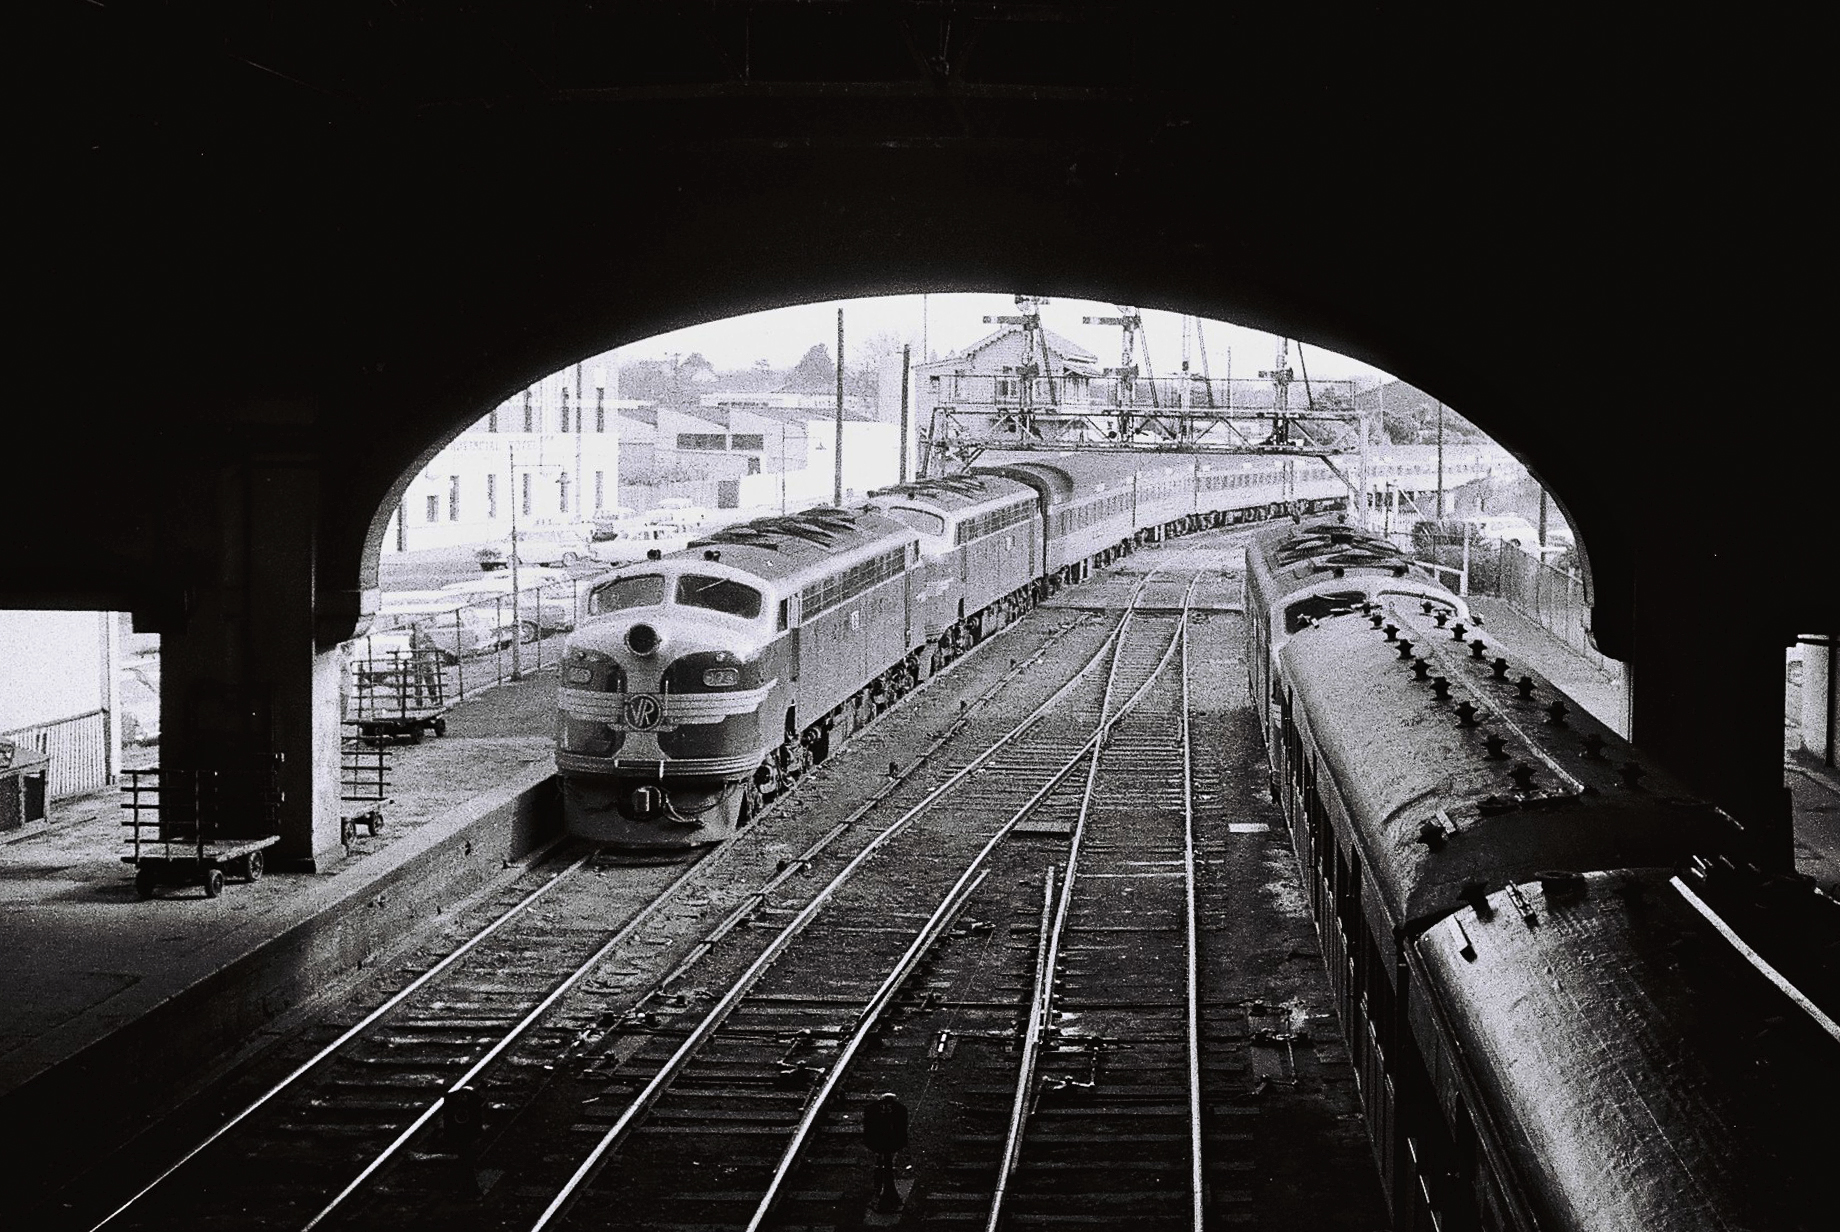
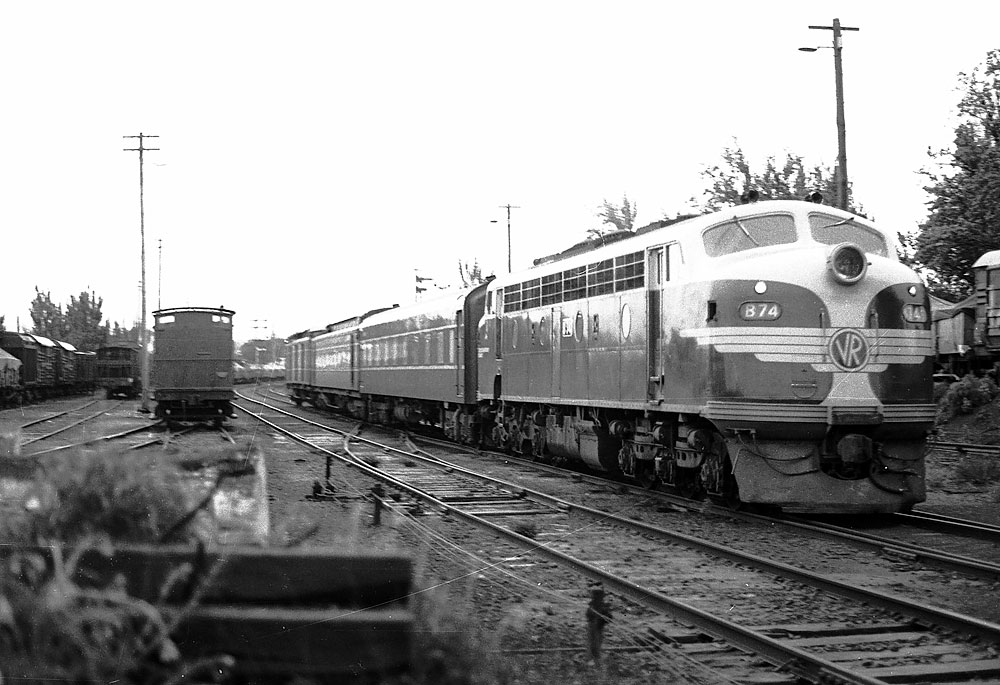
ABOVE: Photographed from the footbridge, we see 2 B's arriving on the up Overland. Photo courtesy David Langley.
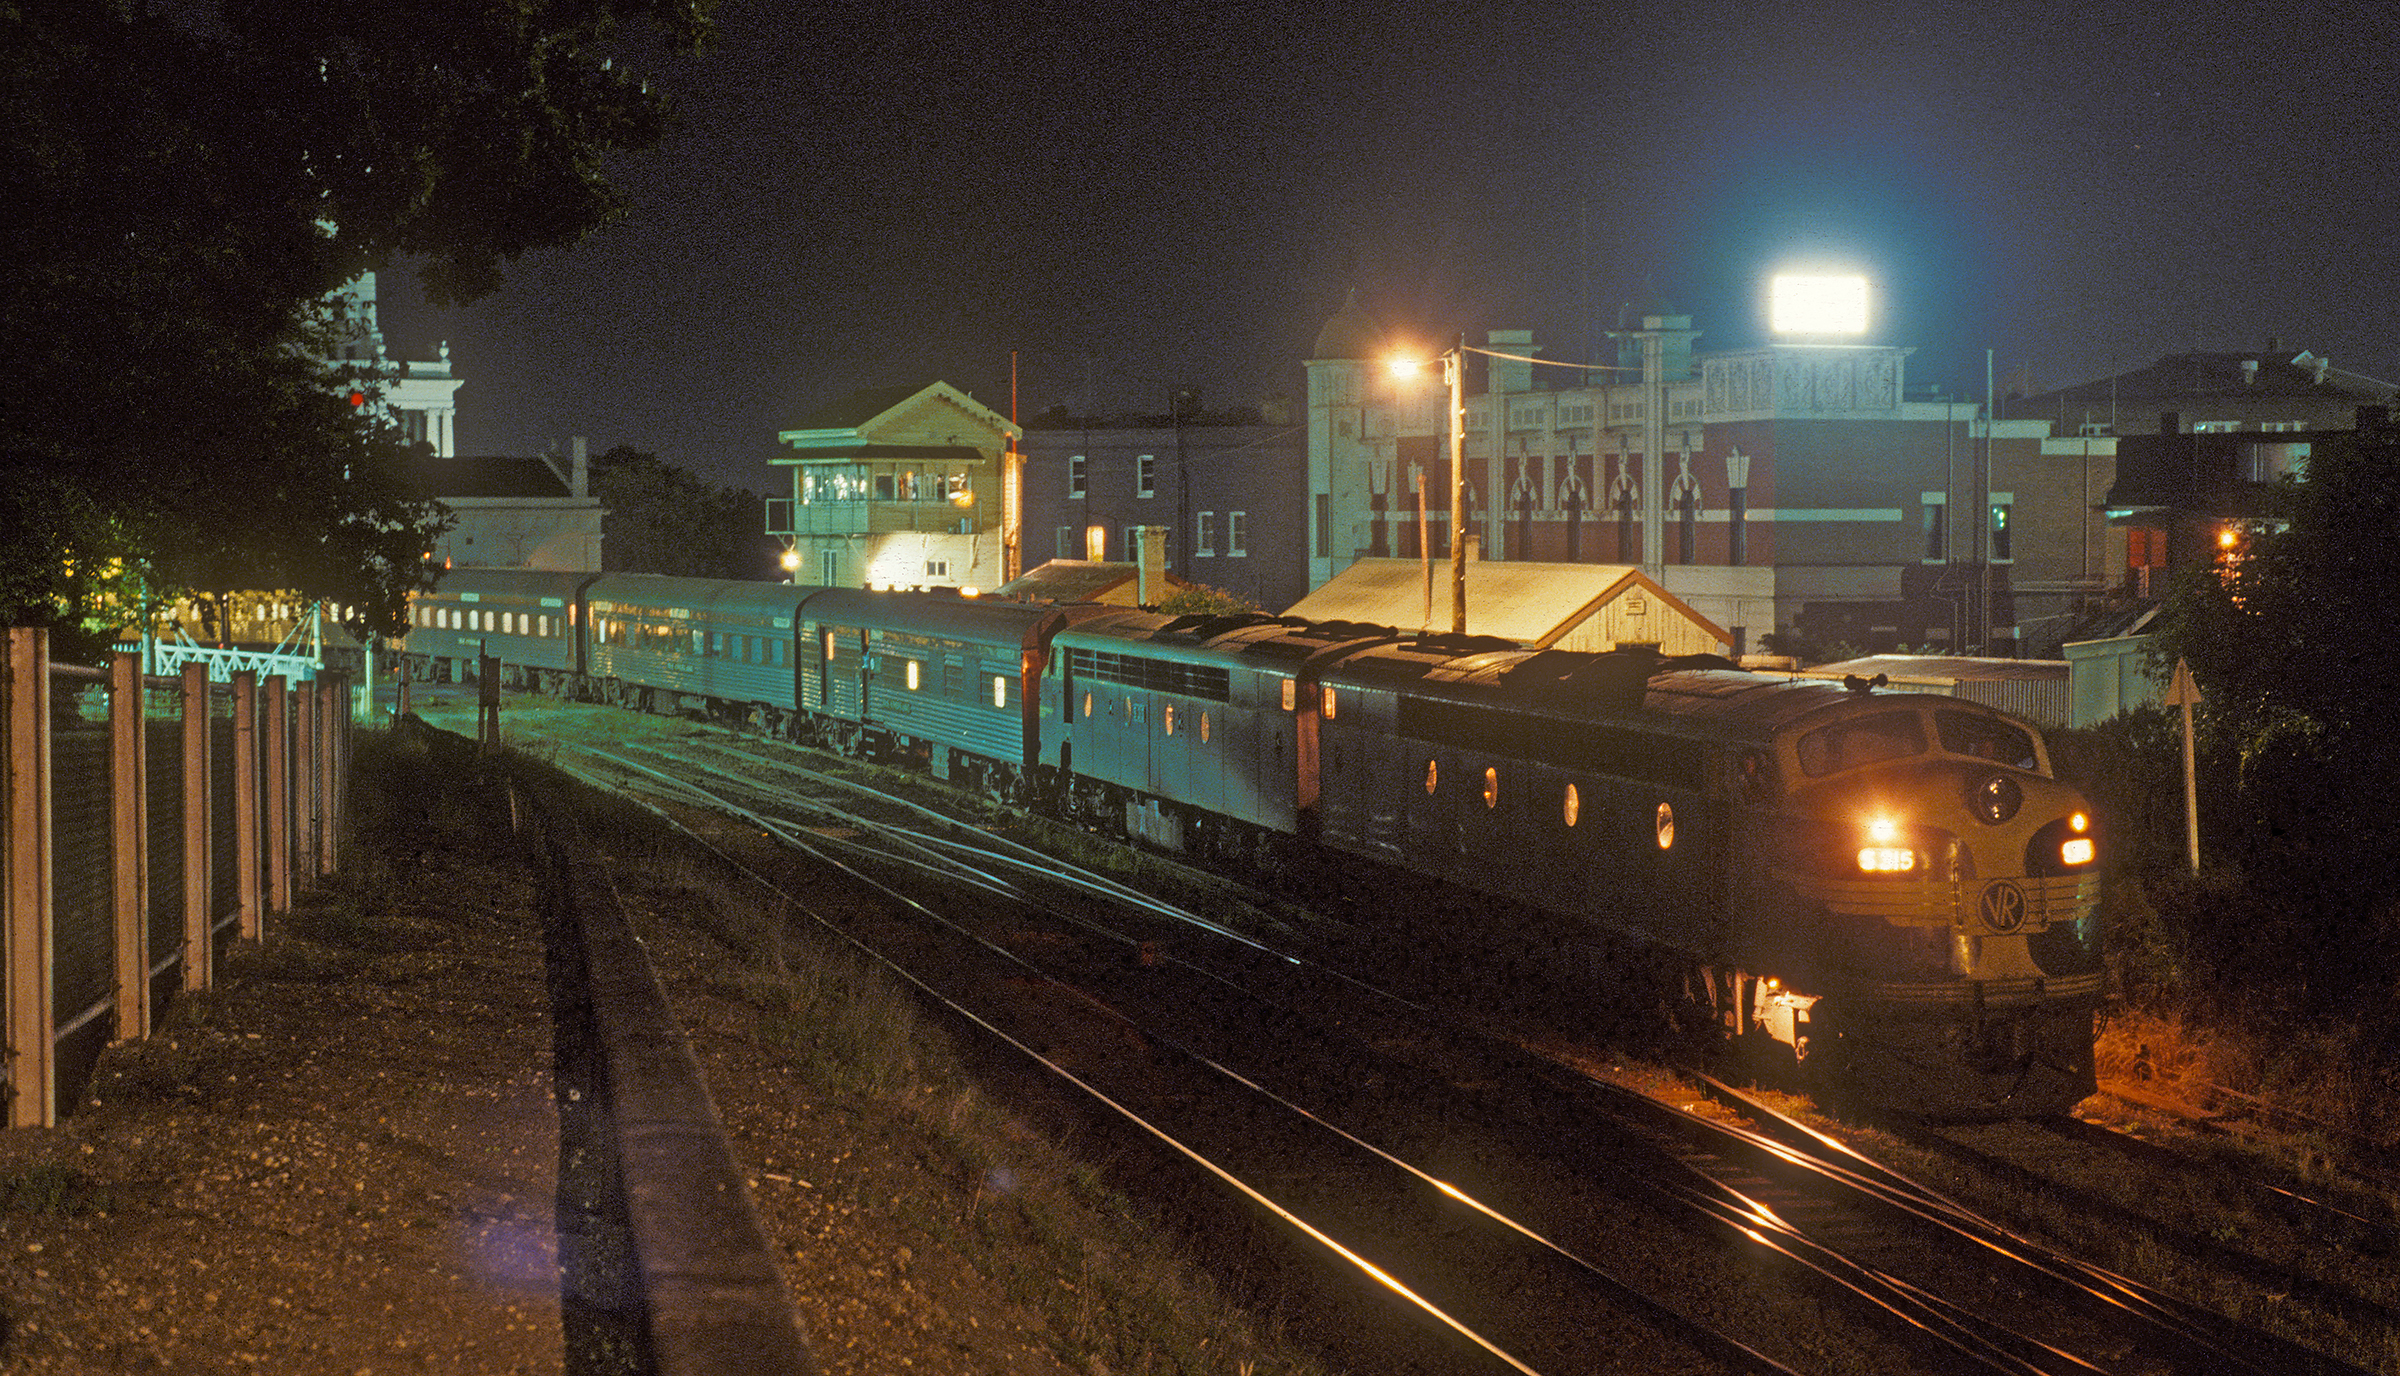
ABOVE: S 315 - S 313 on the Adelaide bound Overland. The timetable allowed for a 6 minute stop at Ballarat. Feb 12 1978 @ 11.00 p.m. (photo courtesy Geoff Winkler)
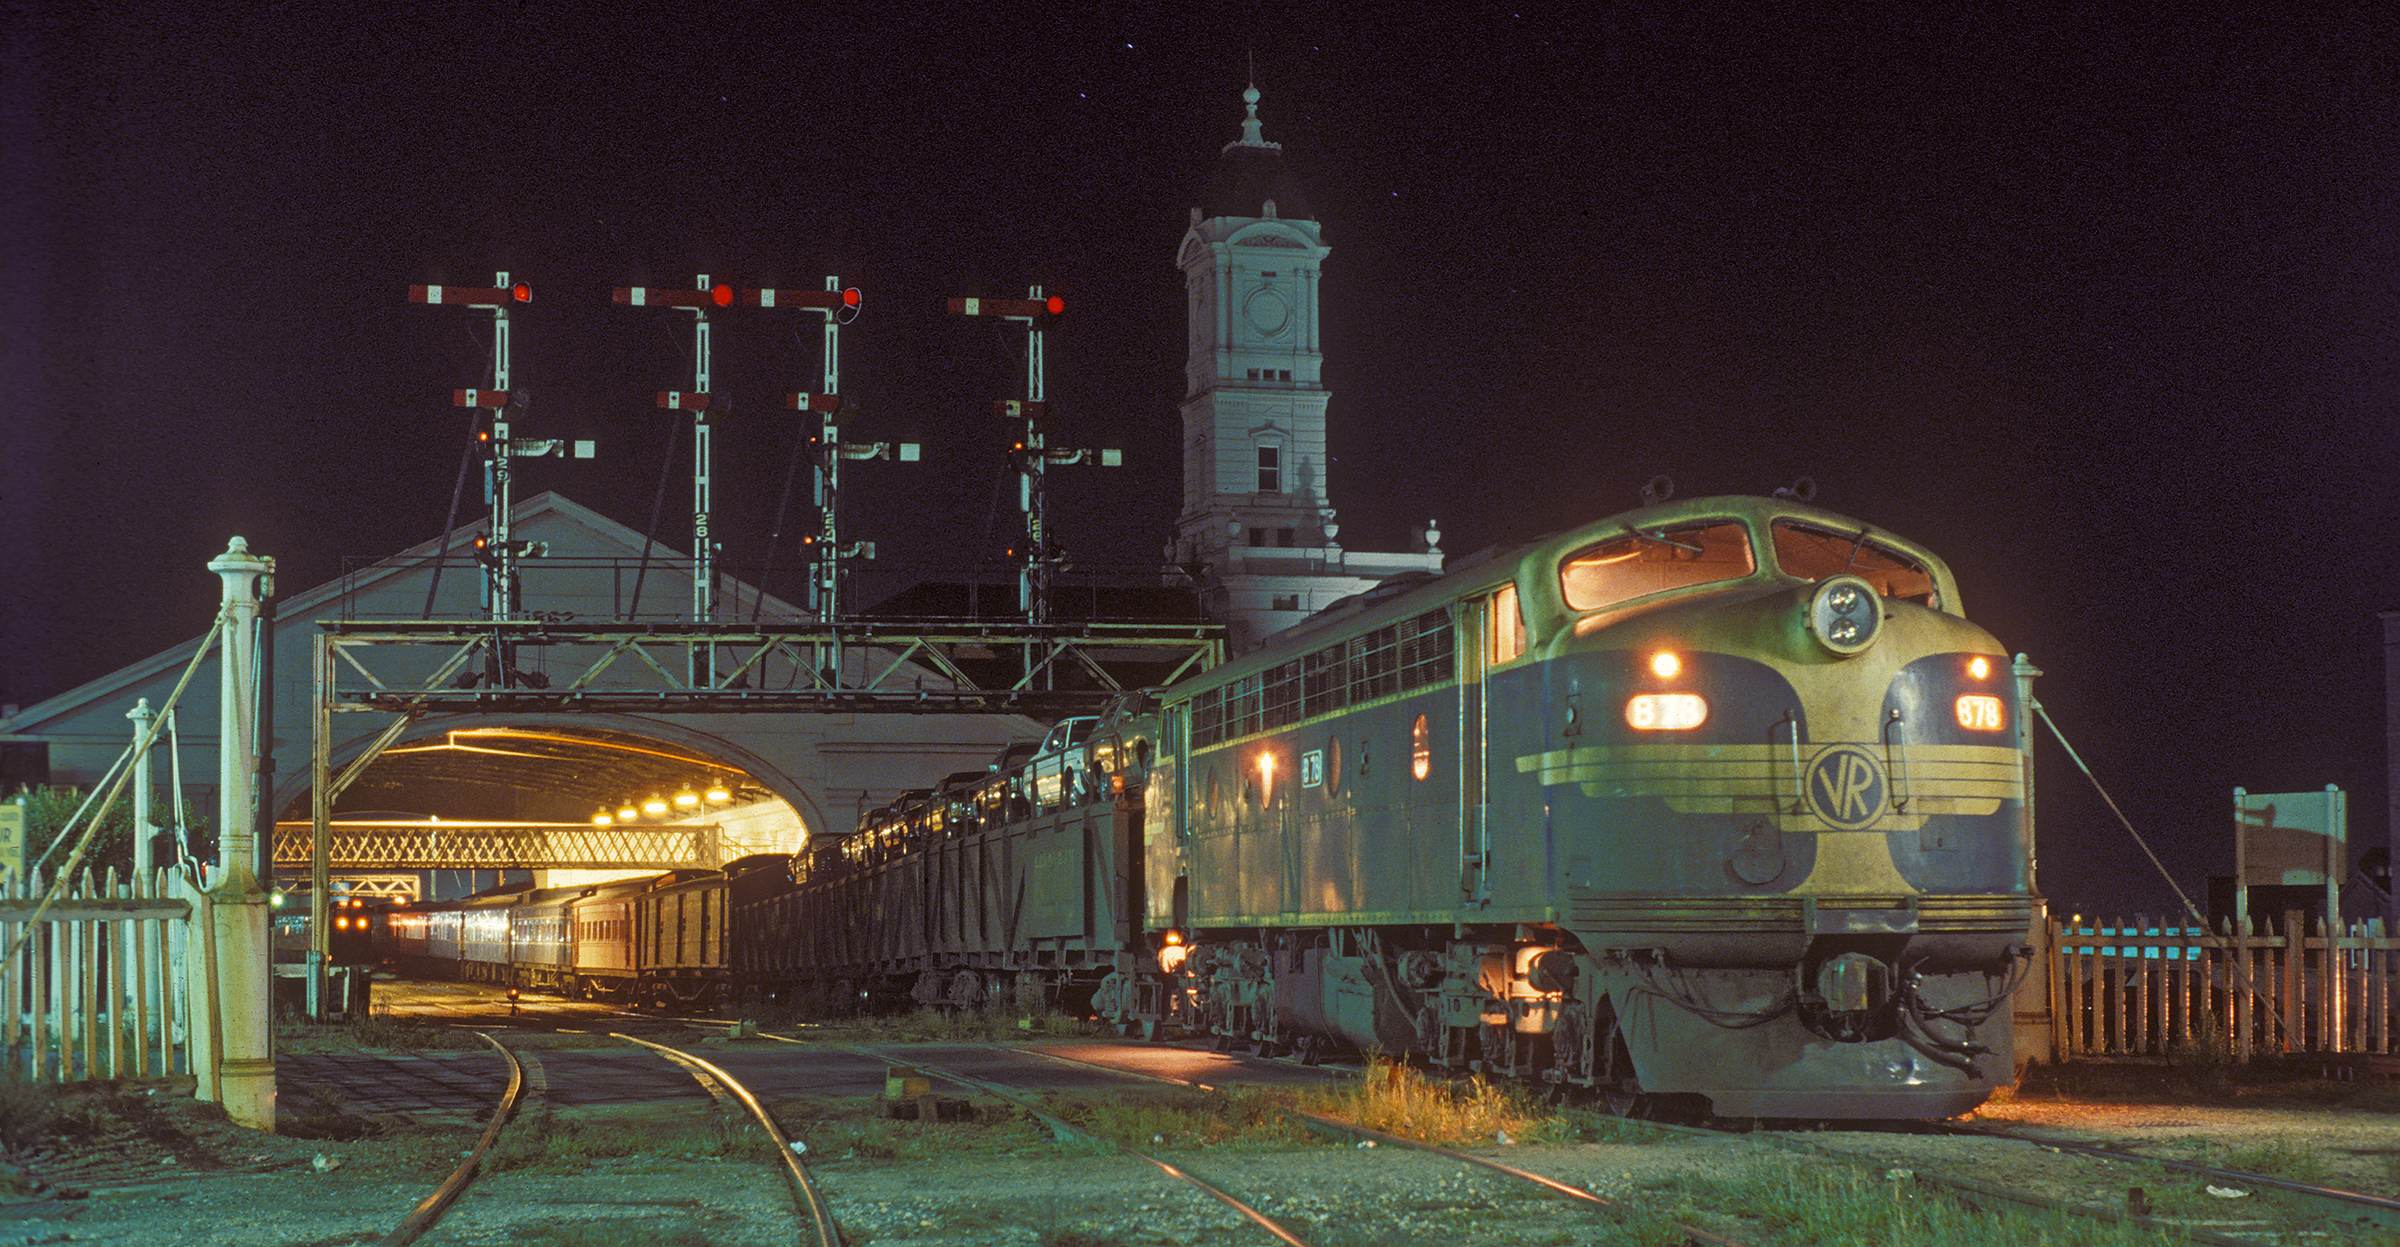
ABOVE: B 76 on the down Vinelander overnight train to Mildura pauses at Ballarat, Feb 12 1978 @ 11.42 p.m. (photo courtesy Geoff Winkler)
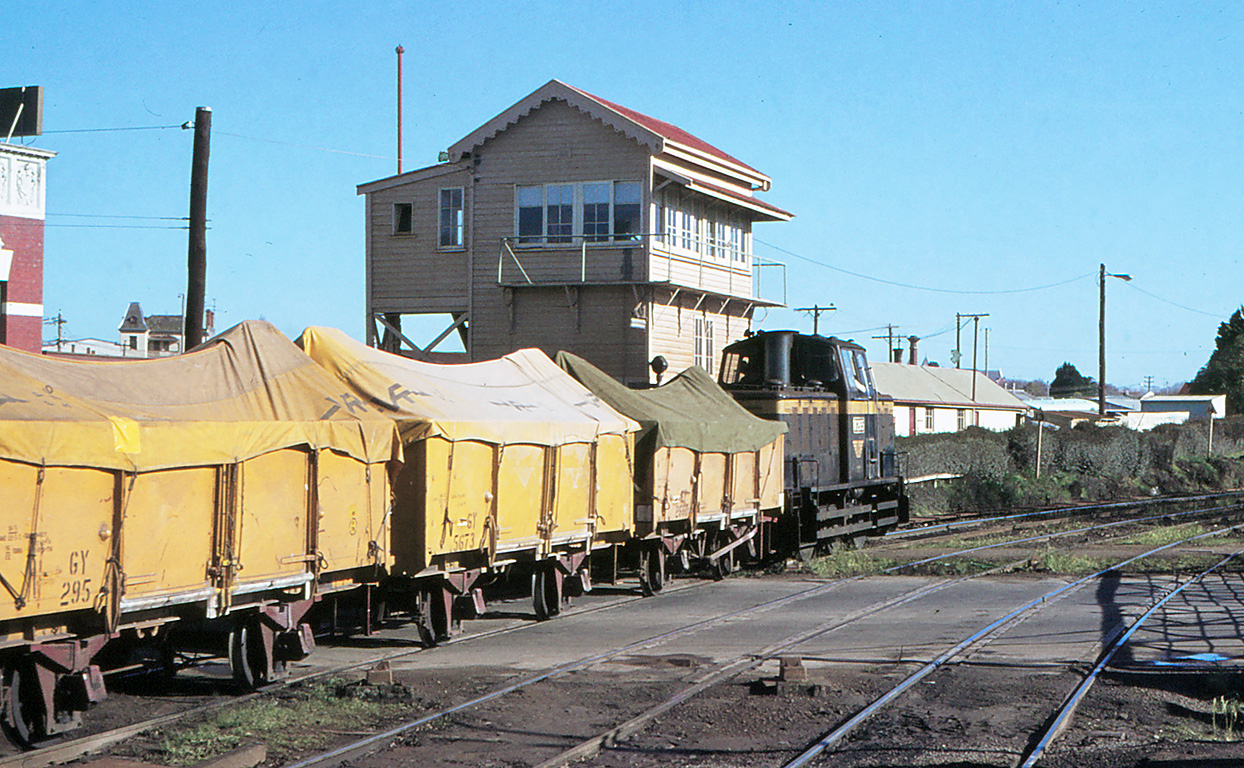
ABOVE: W 265 shunts a rake of GYs over Lydiard st past the imposing Ballarat B box, July 25 1978. (photo courtesy Bob Wilson)
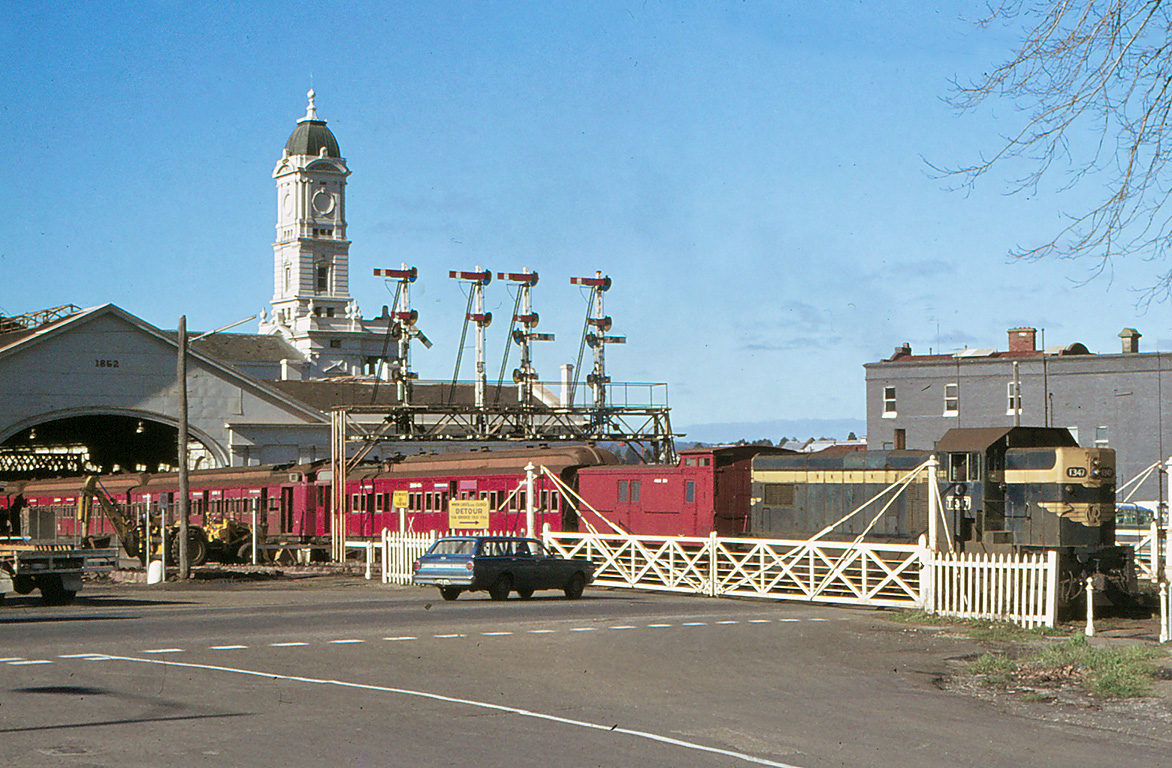
ABOVE: T 347 hauls a rake of Tait cars for burning at Kingston over Lydiard street July 25 1978. (photo courtesy Bob Wilson)
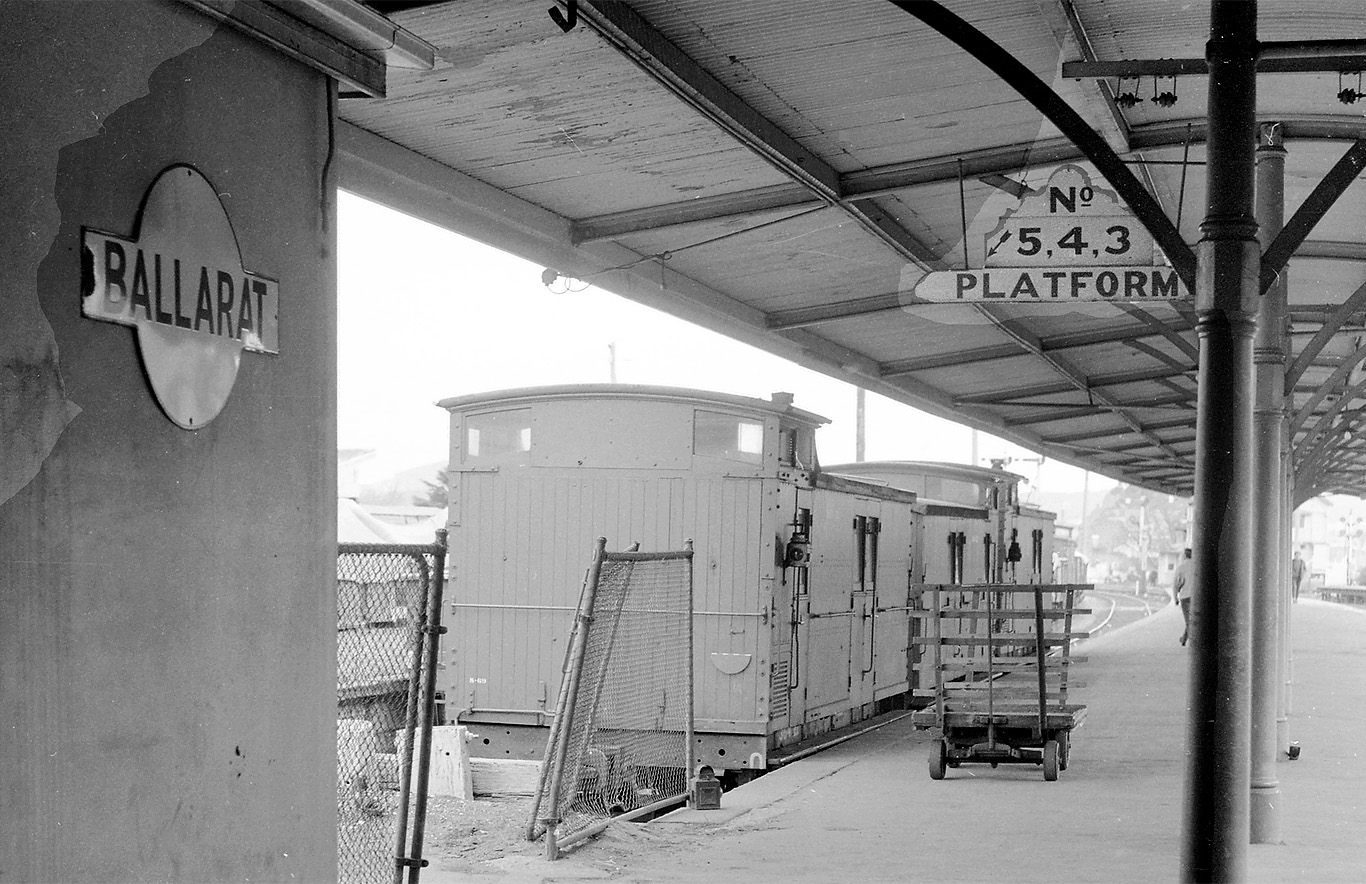
ABOVE: The award for country station with the most passenger platforms was won by Ballarat, boasting no less than 5 platforms. Even in its heyday with Buninyong and Geelong services in addition to the mainline traffic it's hard to fathom how 5 platforms were needed. Sep 13 1969. (photo courtesy Bob Wilson)
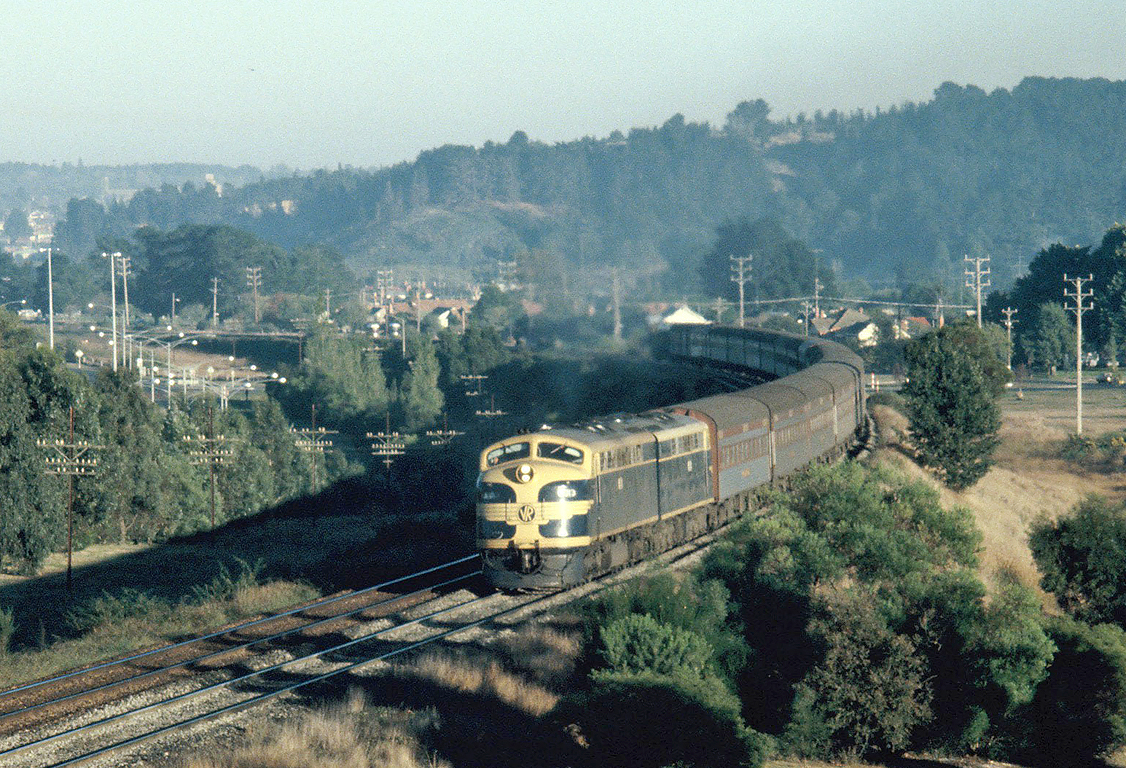
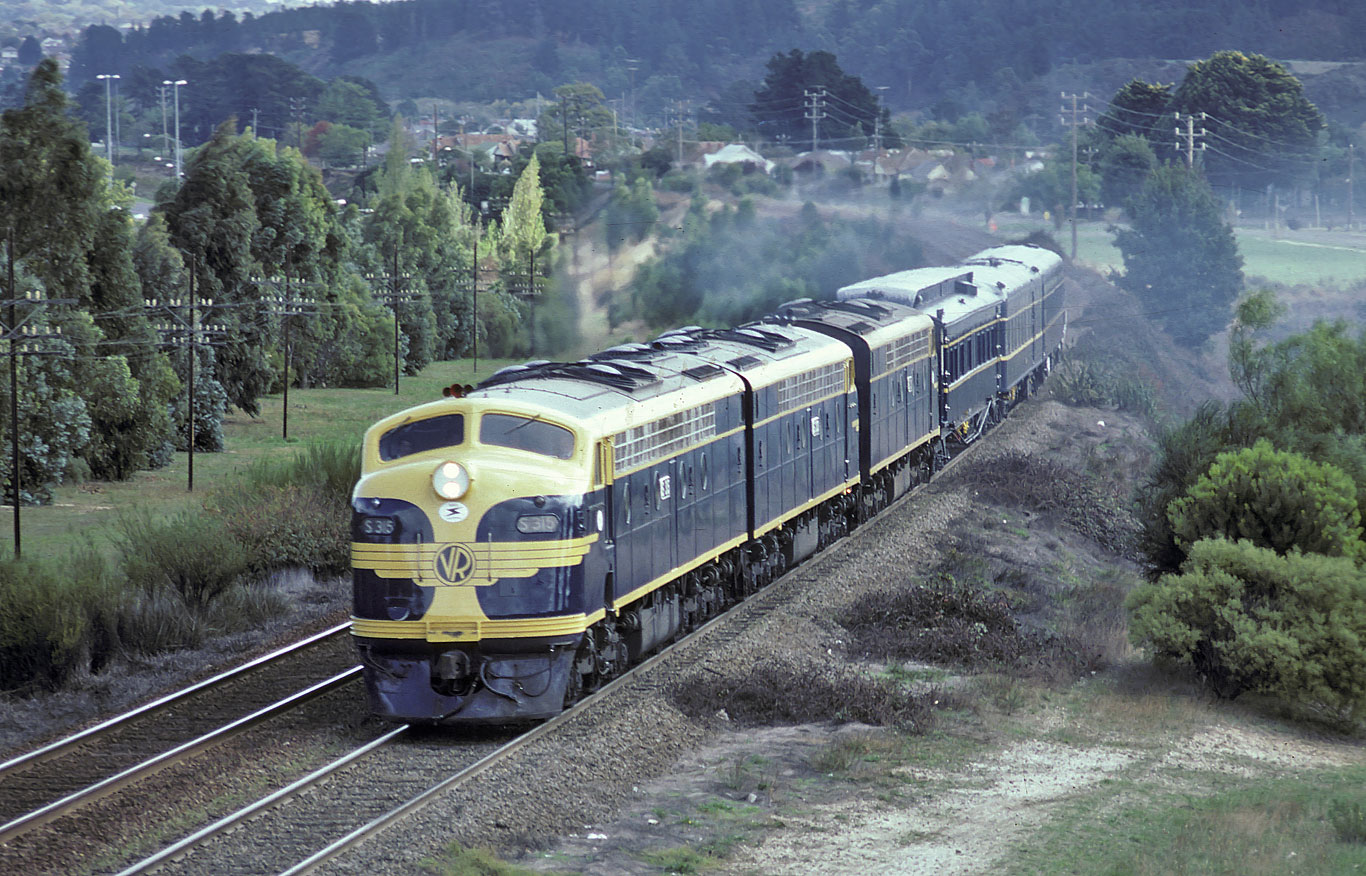
ABOVE: In what many regard as the classic look for "The Overland", S313 + S315 climb Warrenheip Bank on 21 April 1981. The train has just crossed the Caledonian Bridge and is about to pass under the new highway overpass at the entrance to Ballarat. (photo courtesy Ron Woods)
ABOVE: The royal train empty return working climbs Warrenheip bank, April 15 1983.
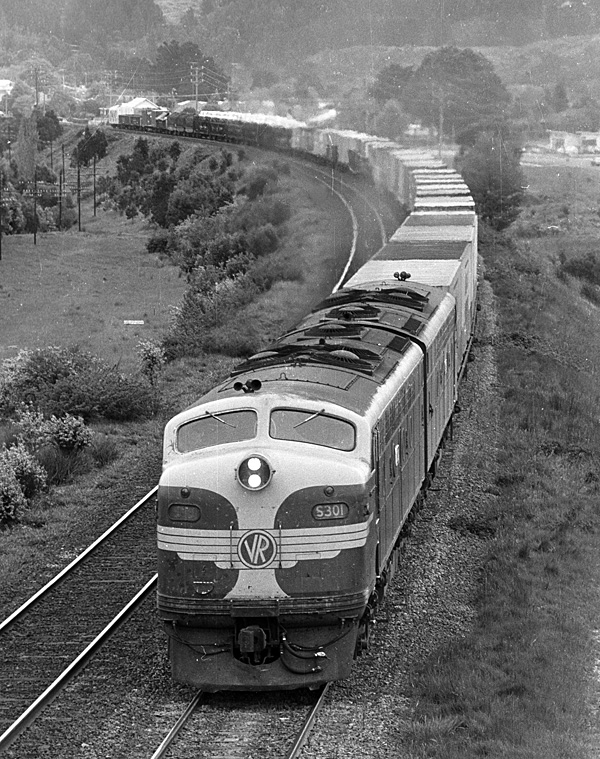
ABOVE: 2 S class on an up "jet" on Warrenheip bank photographed from the old highway overbridge. 1980
ABOVE: On November 11 1985, VR ran its first 2 man goods train in which the guards van was removed. The 2 man trains were confined to the Murtoa to Portland track for a year but by late 1986, 2 man trains started to become widespread over the entire system. I'm not positive but I believe this was the first Victorian train without a guards van I ever photographed, a Melbourne to Horsham petrol train descending Warrenheip bank as it approaches Ballarat East. December 1986
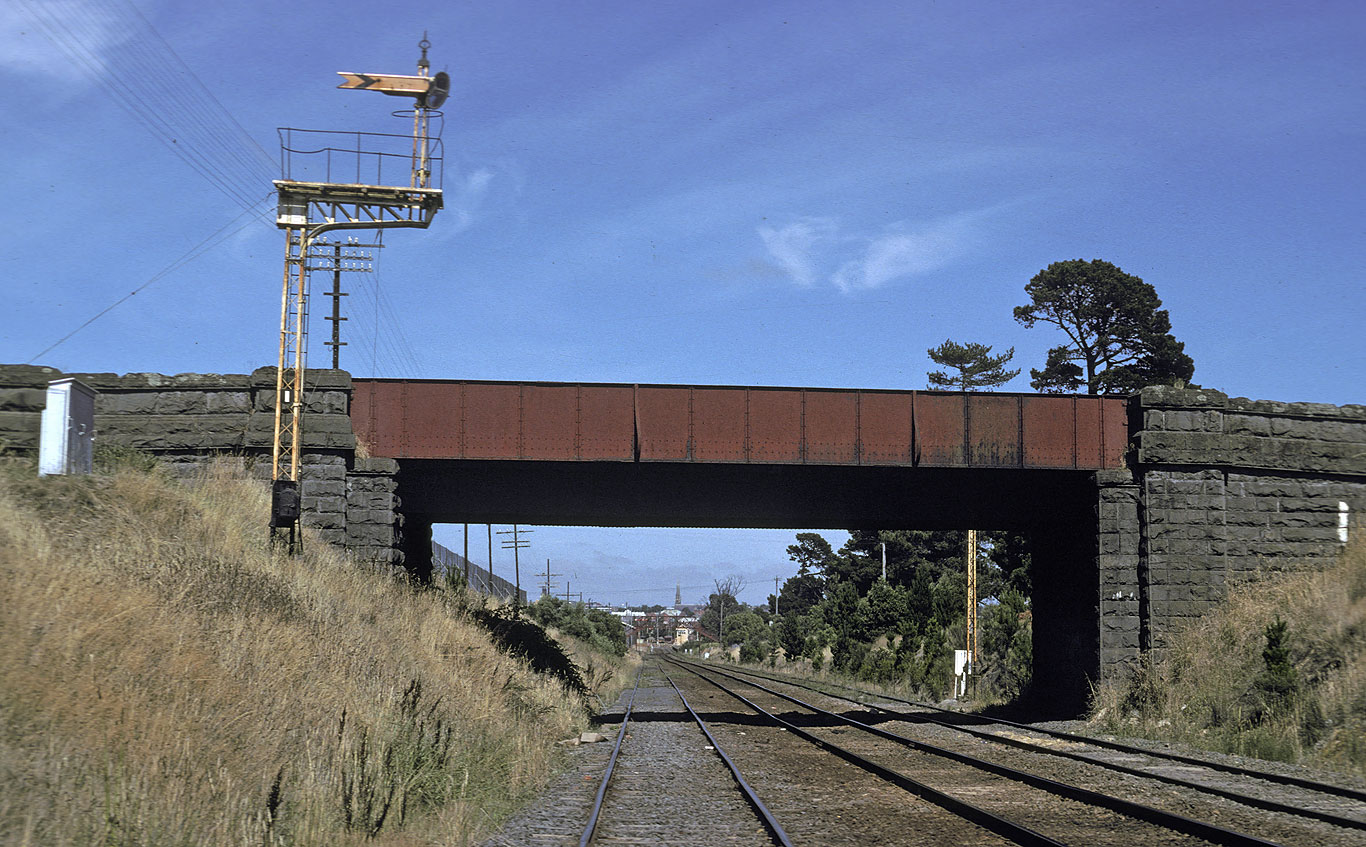
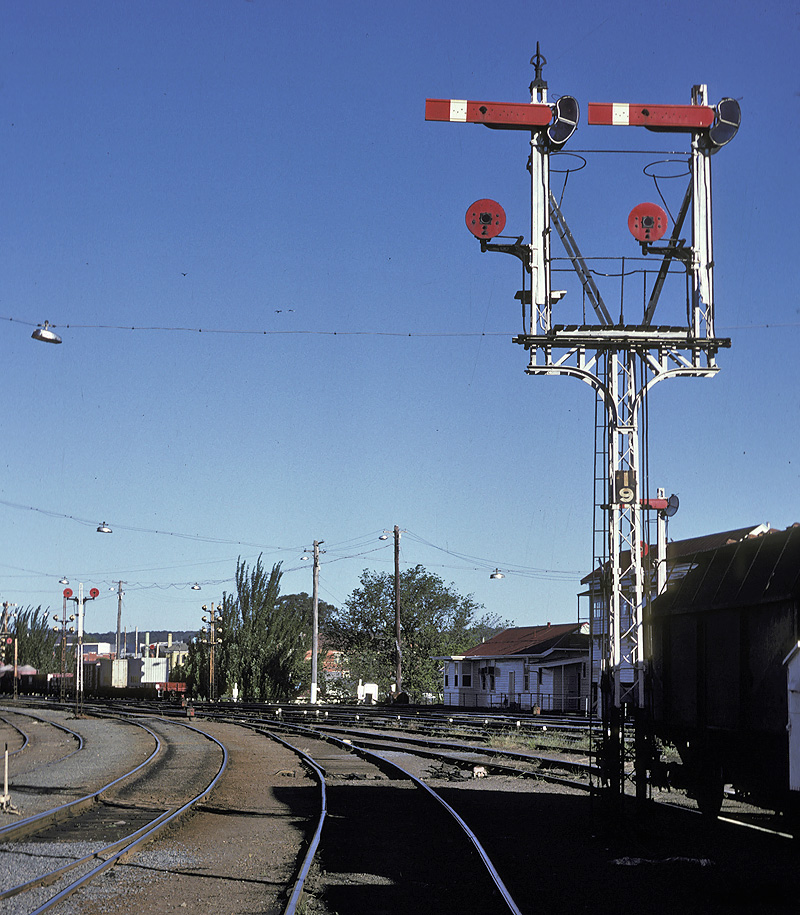
ABOVE: The down distant signal from the Warrenheip line controlled by Ballarat East box which can be seen in the distance.(853 metres) The track on the left was the remains of the Buninyong line and this line had a distant signal on this post until 1967. Over the years, many drivers would be praying that this distant signal was at proceed as they descended Warrenheip bank with a heavy train, Feb 2 1982.
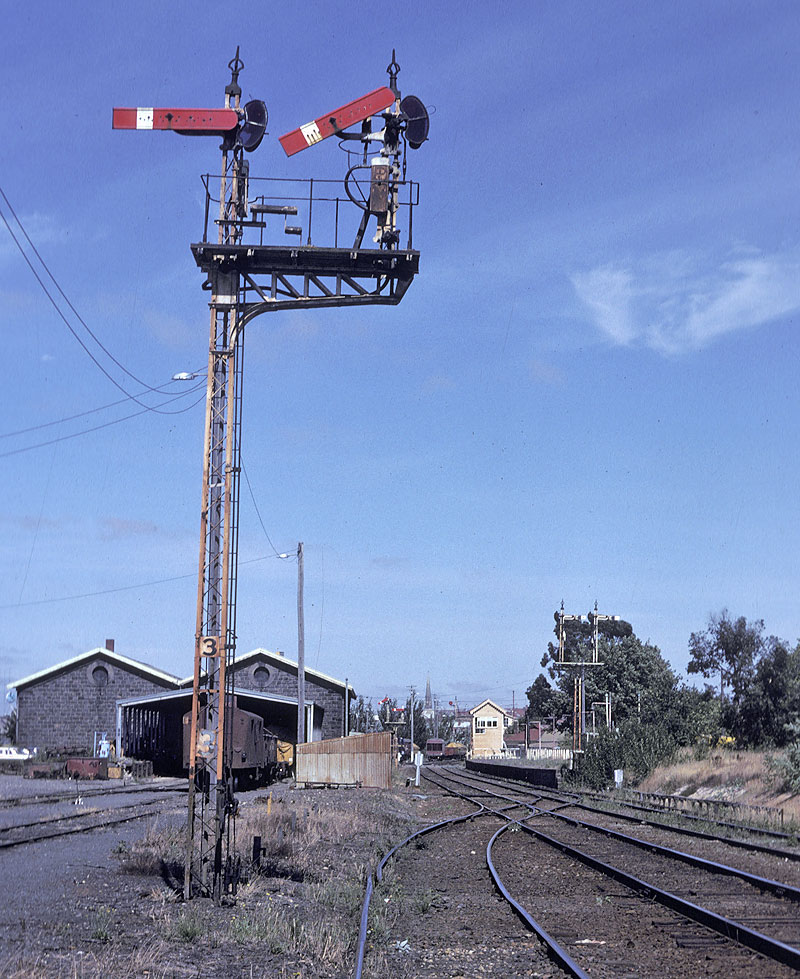
ABOVE: Ballarat East post 3. This signal controlled the junction from the Buninyong (Eureka) line and the line from Melbourne. Ballarat East box is seen just beyond the Ballarat East up platform. Feb 2 1982.
ABOVE: D3 651 comes off the goods line and onto the up mainline as it passes Ballarat East signalbox. It was possibly about to attach to the rear of an up goods to bank it up Warrenheip bank. circa 1962. (photo courtesy Bob Wilson)
BELOW: Ballarat East signal box on the left, the track on the right was for movements to and from Ballarat East loco depot. The signal on the right is the same signal as in the photo below, Oct 1983. (photo courtesy Noel Bamford)
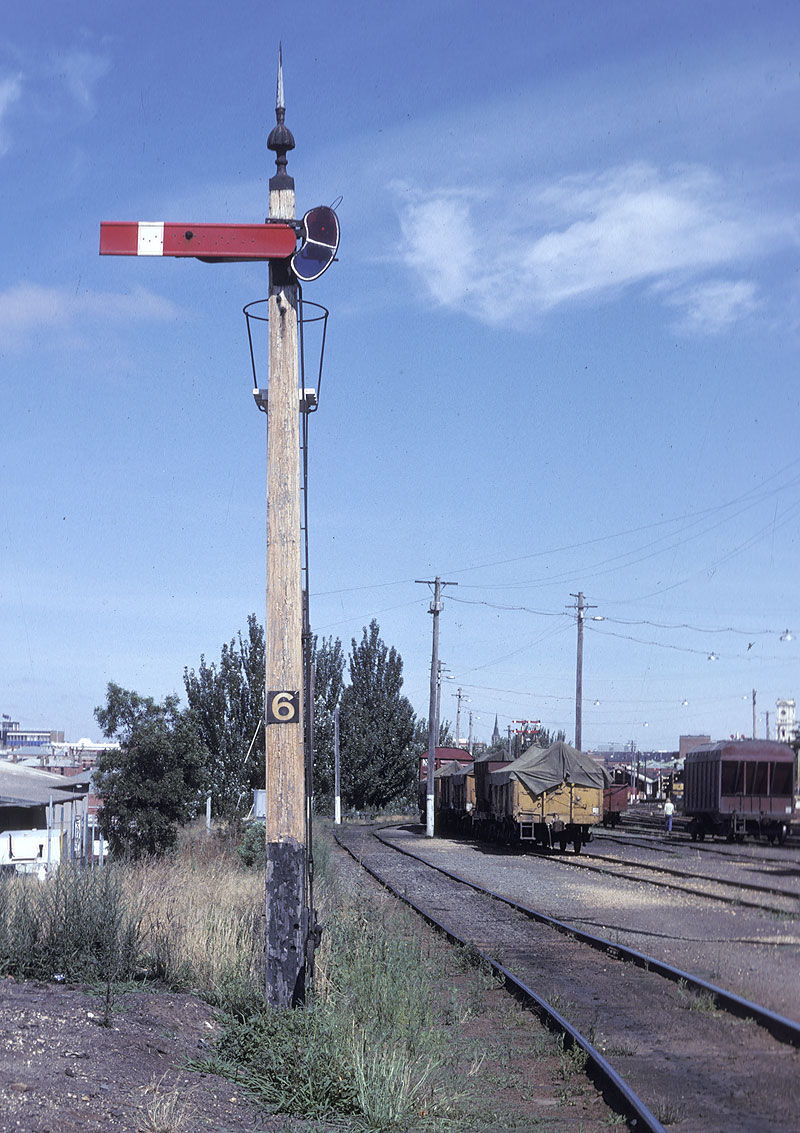
ABOVE: Post 6 controlled moves from the loco depot into Ballarat yard. It can be glimpsed above the cab of the loco in the photo below. Feb 2 1982.
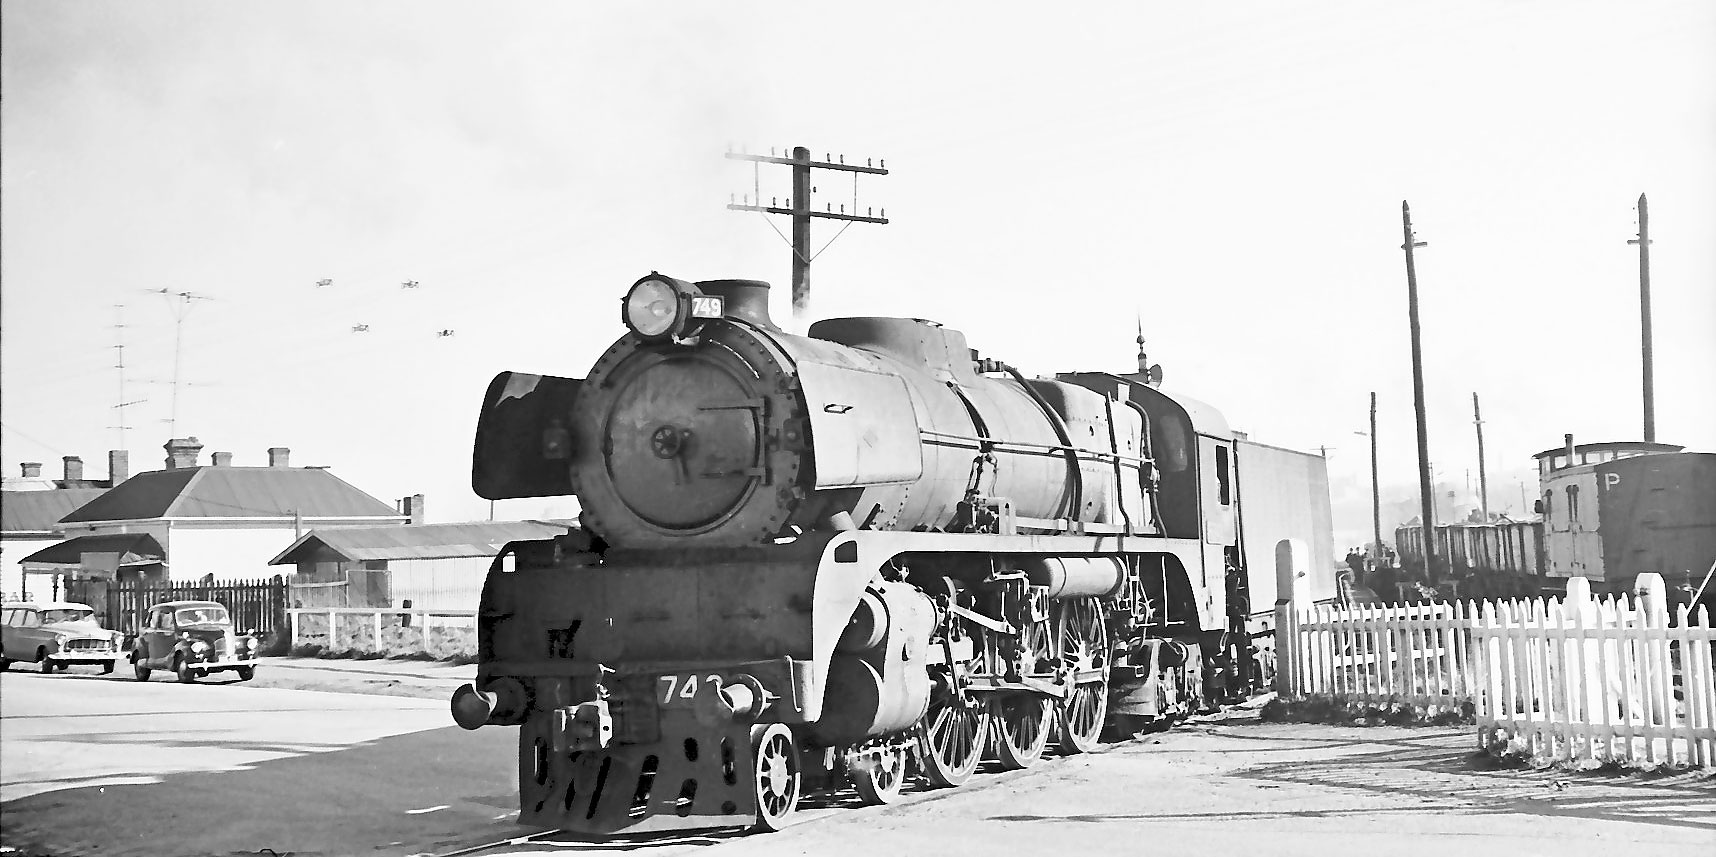
ABOVE: R 749 trundles over Humffray street on its way to Ballarat East loco for servicing. June 14 1965. (photo courtesy Bob Wilson)
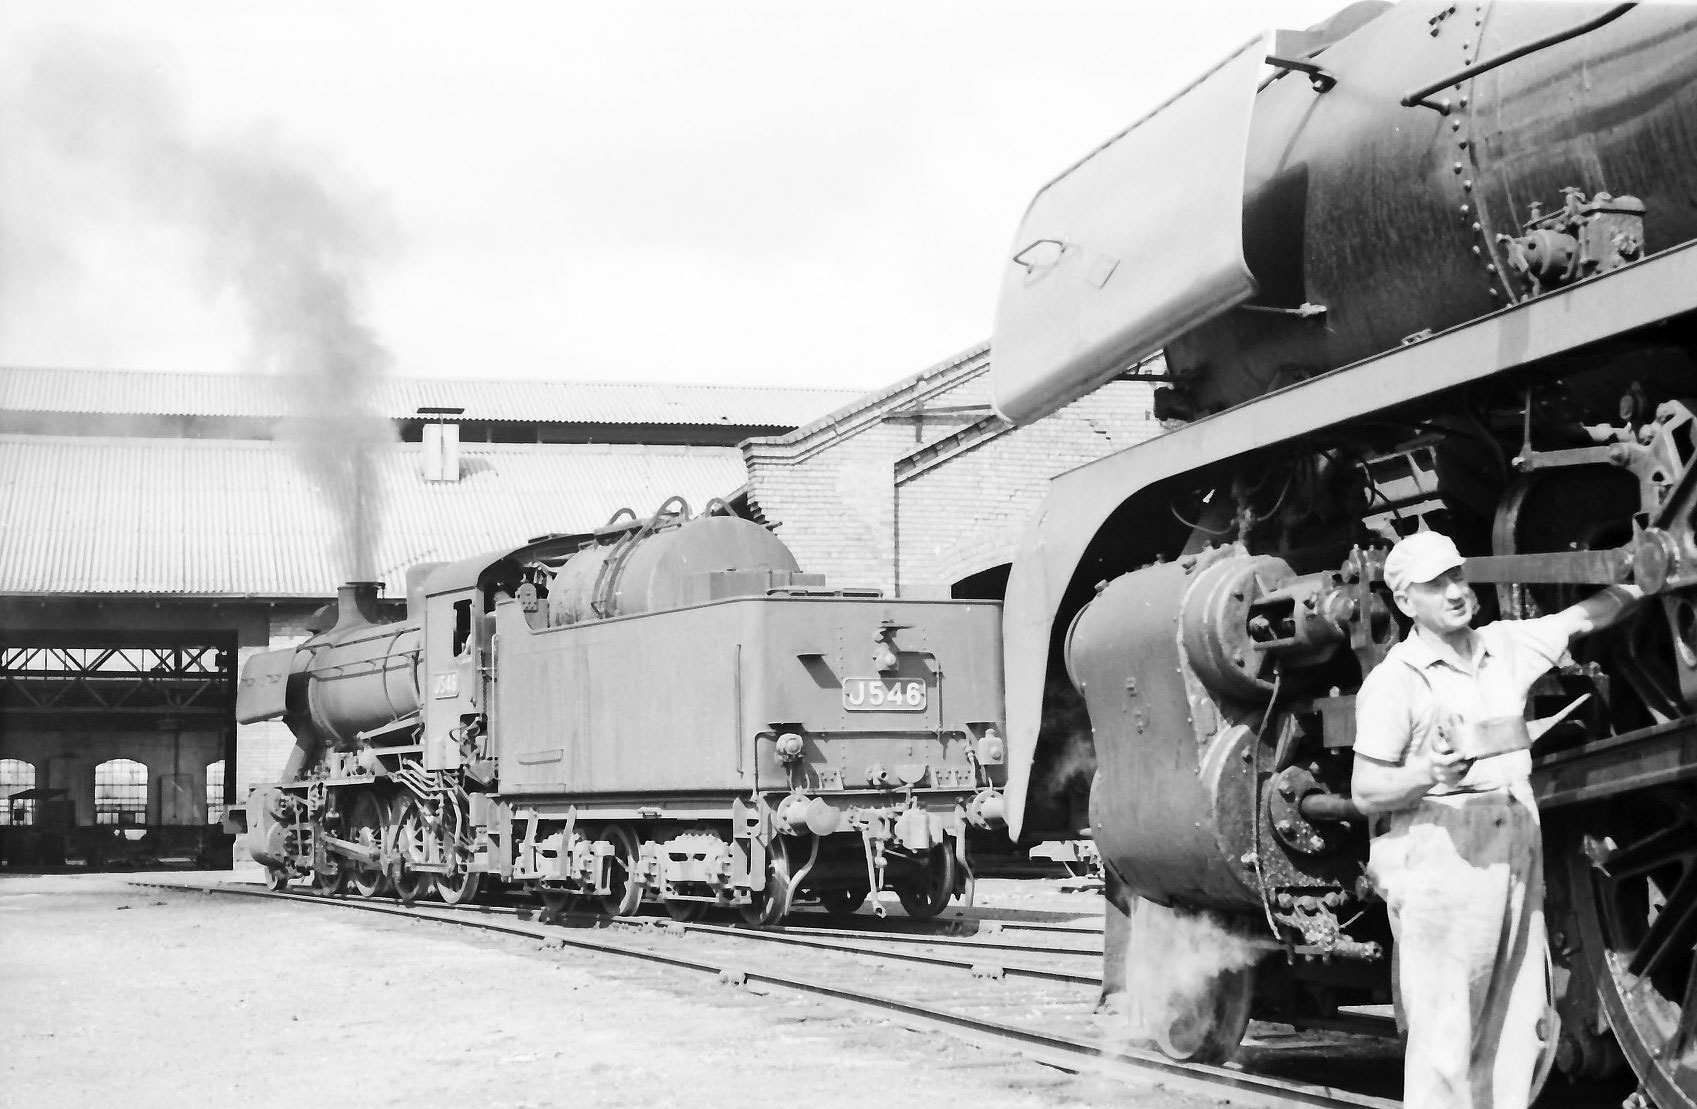
ABOVE: J 546 and R 769 at Ballarat East loco depot, March 1967. (photo courtesy Bob Wilson)
ABOVE: A D3 shunts at Ballarat East in the late 1960s (photo courtesy John Ward)
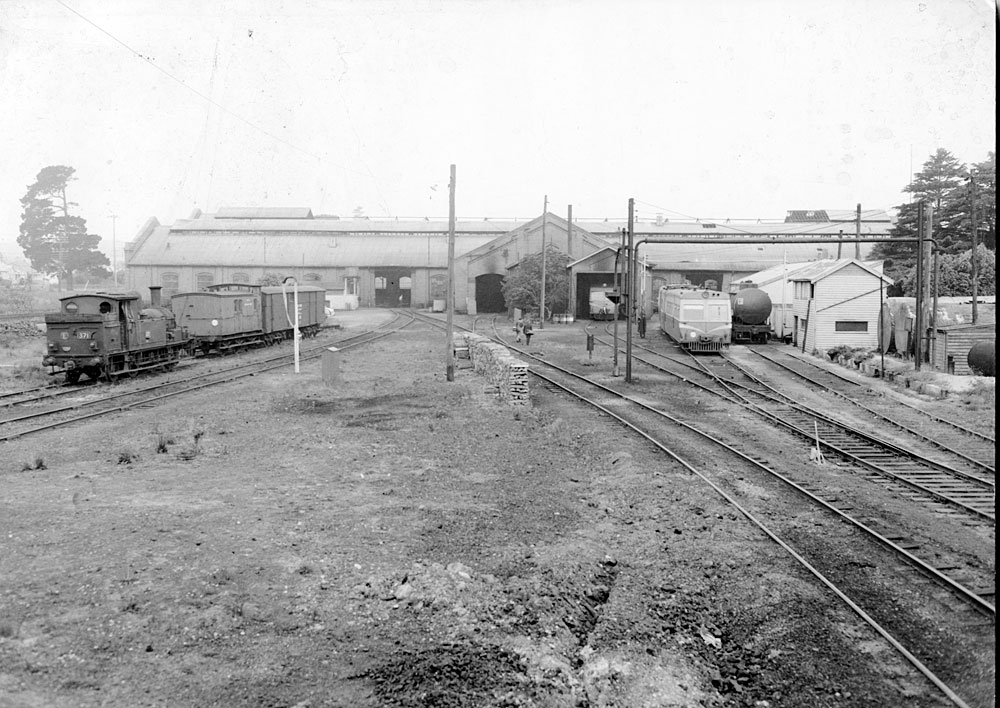
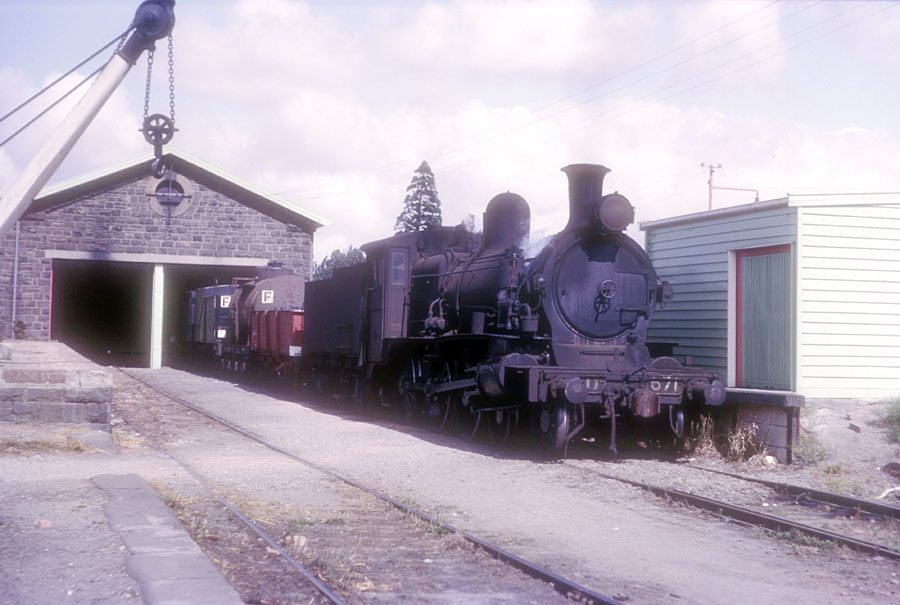
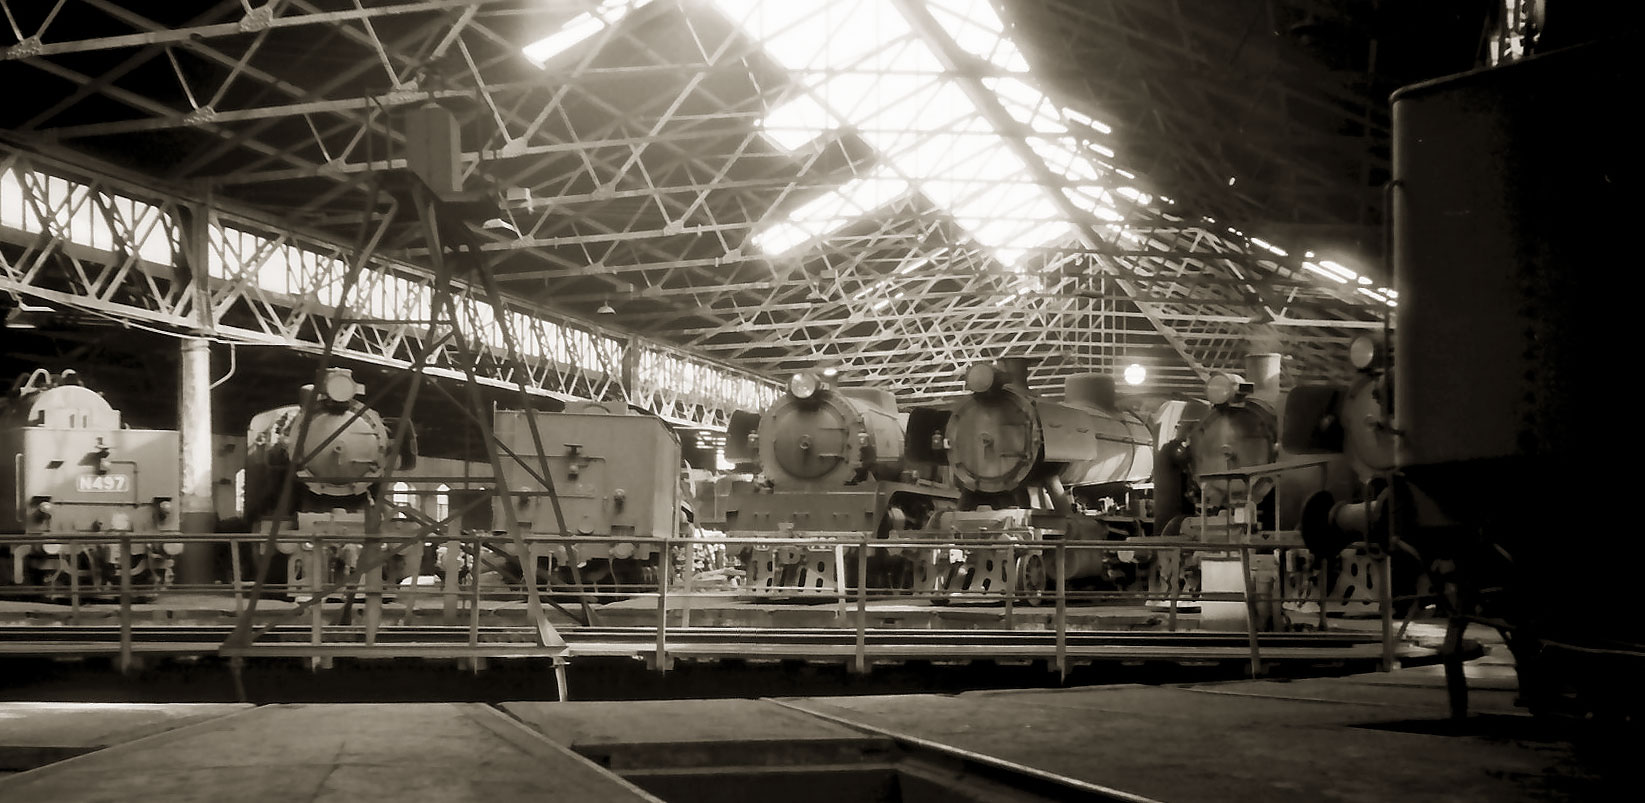
ABOVE: Looking east at Ballarat loco depot, sometime in the 1960's Official VR photo, Stuart Lodington collection. BELOW: The scene inside the long demolished loco shed at Ballarat East. Dec 21 1963 (photo courtesy Bob Wilson)
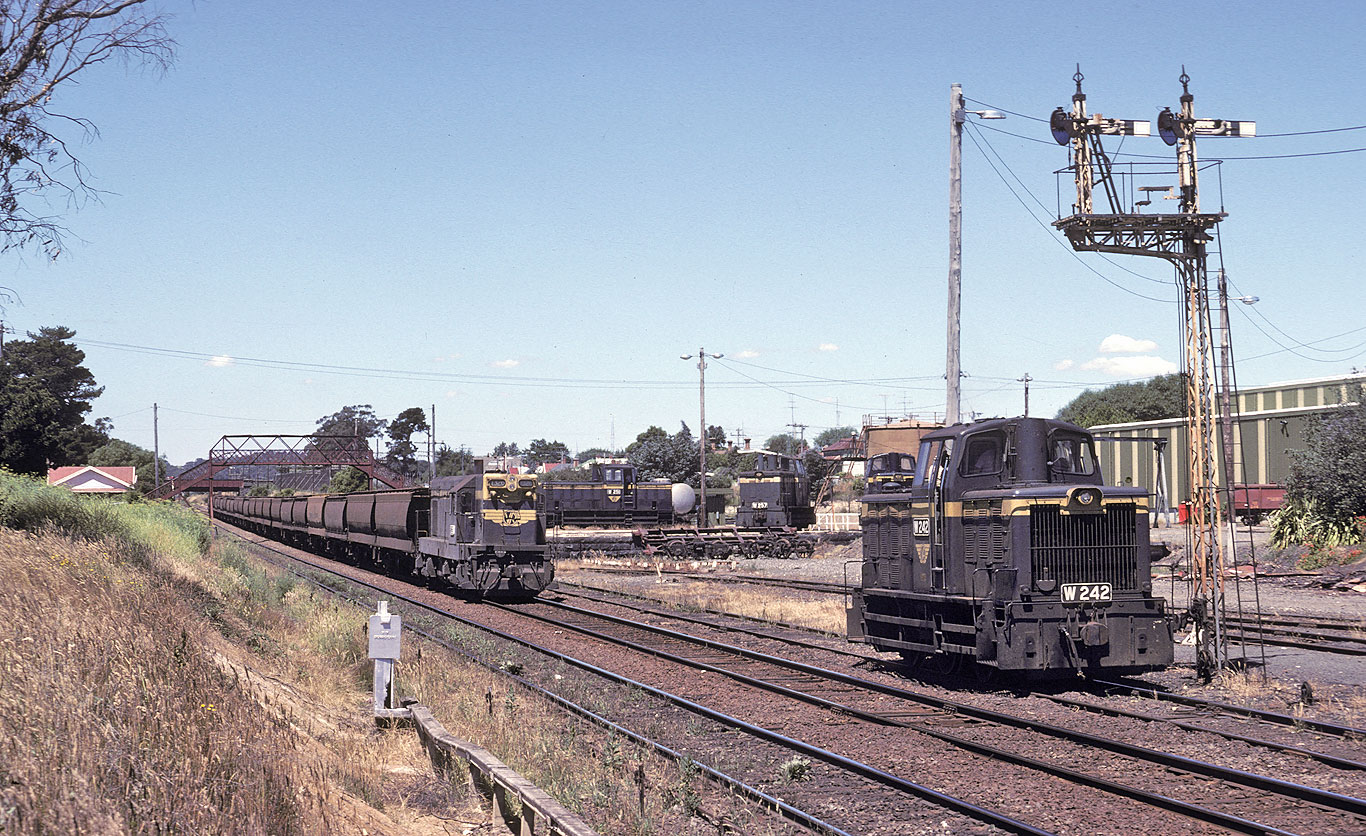
BELOW: T 326 arrives Ballarat East on a empty wheat train from Geelong. At least 3 W class can be seen around the outdoor turntable at Ballarat East loco, this is the same turntable as seen in the photo above. W 242 is standing on the remains of the Eureka line. The much maligned W class diesel hydraulics performed much of the shunting in and around the Ballarat area for many years. Feb. 1982.
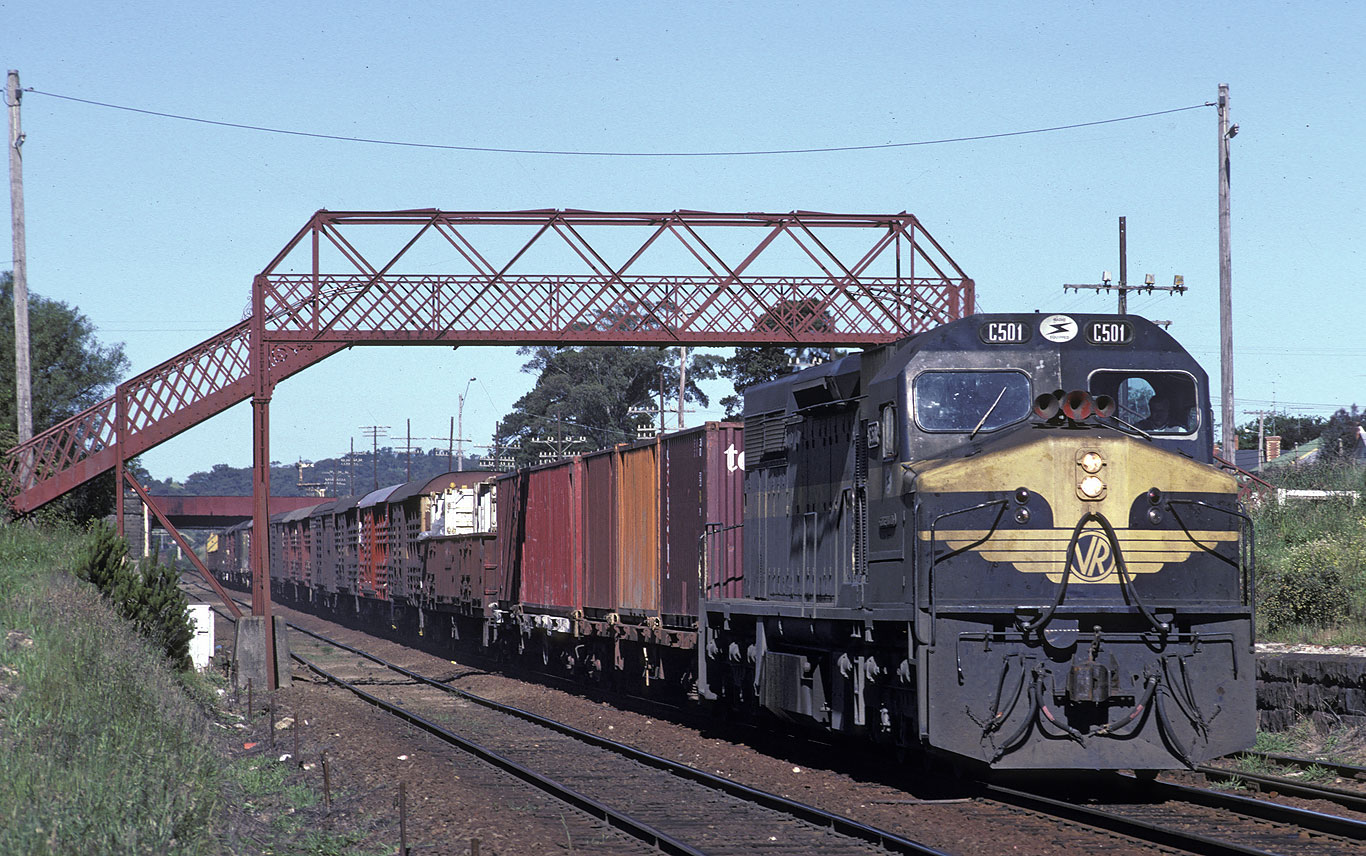
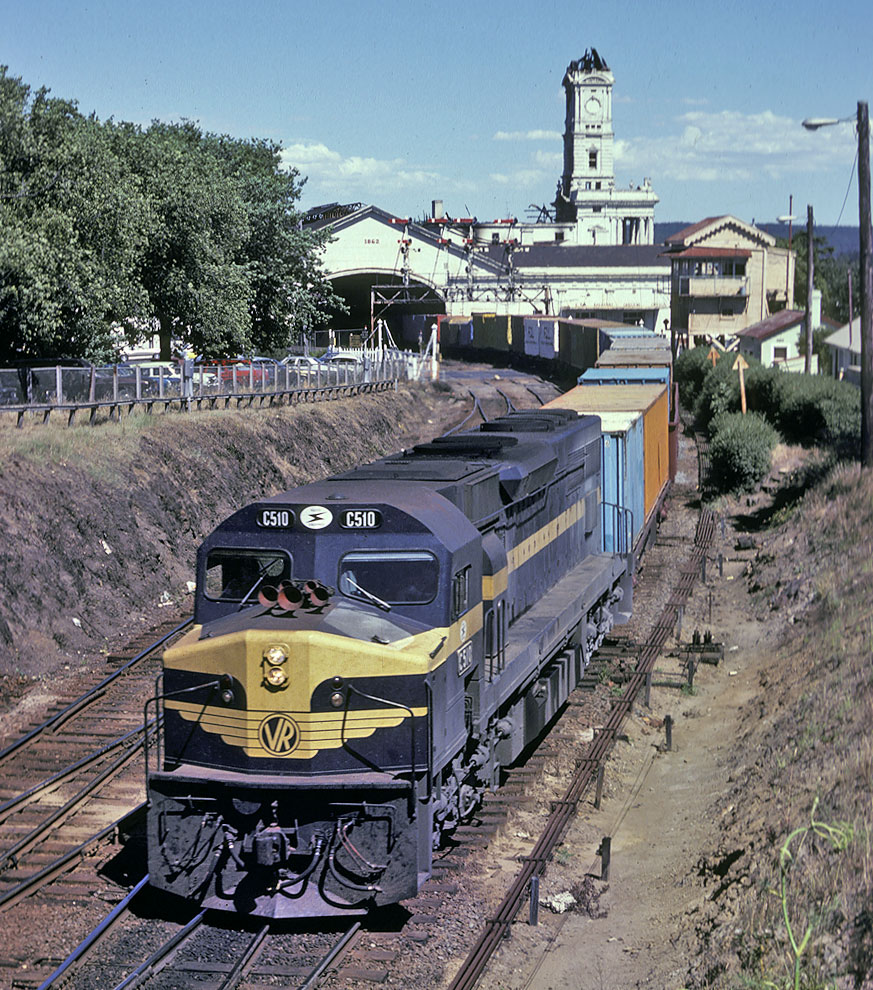
ABOVE: The classleader of the C class decends Warrenheip bank as it approaches Ballarat East on Nov. 23 1985 on a Melbourne to Adelaide "jet"
ABOVE: The up Overland departs Ballarat and passes Ballarat East signalbox as it begins the climb up Warrenheip bank, May 1984. (photo courtesy Noel Bamford)
ABOVE: Standing on the up platform at Ballarat East looking towards Ballarat yard. The signalbox on the right was Ballarat East signalbox, 1982.
ABOVE: B 68 on an up pass. passes Ballarat East as it begins its ascent of Warrenheip bank. Ballarat East loco depot is seen on the left, August 4 1984.
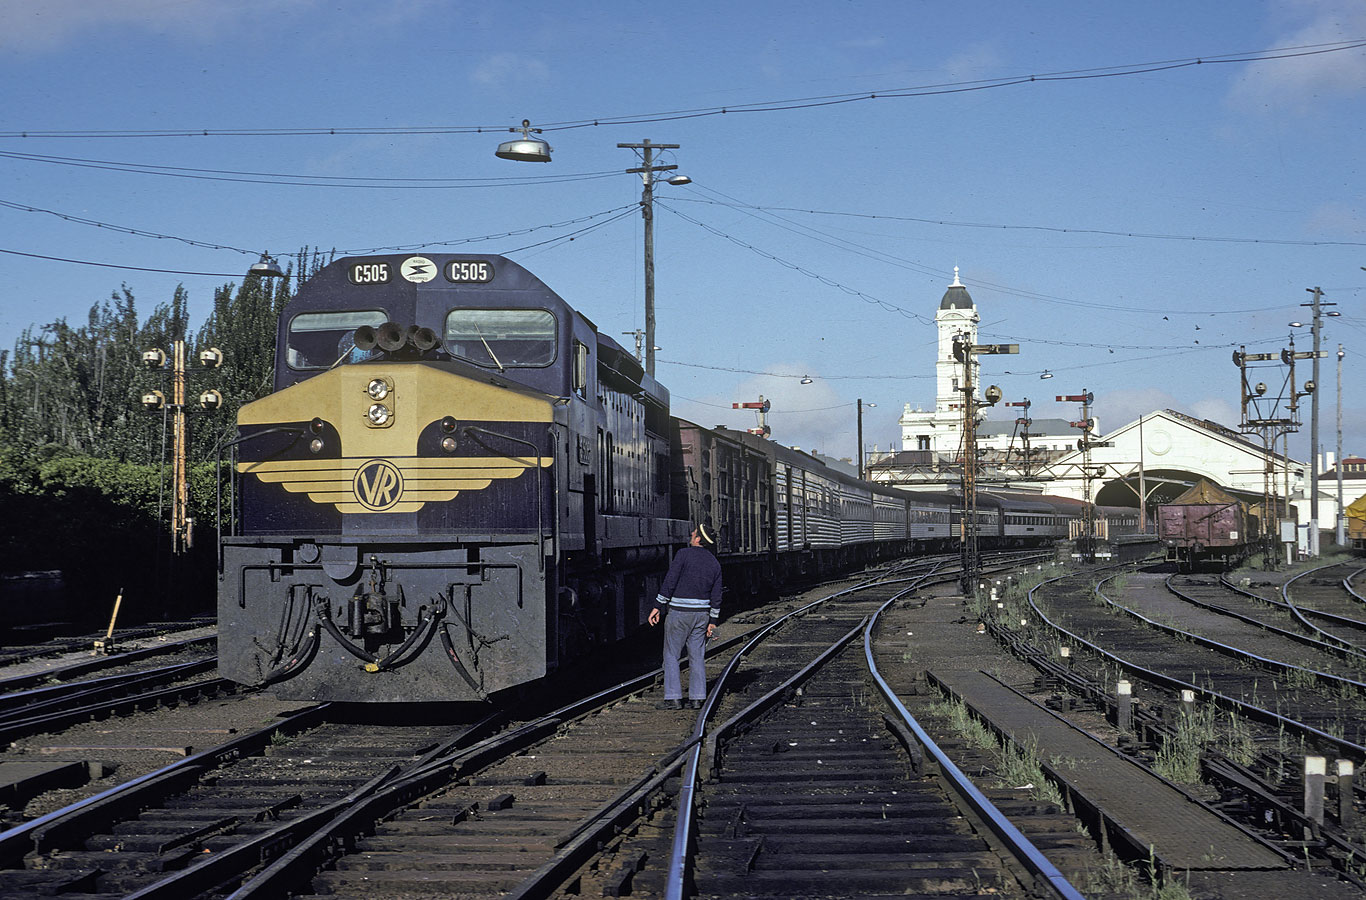
ABOVE: C 505 on a 15 car up Overland at Ballarat. C class were not common on the Overland but from late 1980 it happened sporadically. He we see the train examiner at Ballarat telling the driver to "put 'em on" A modified test was required as the motorail had been shunted from the front of the train to the rear. My work diary says that on this particular trip the dynamic brake on C 505 was defective. Dec. 10 1981
ABOVE: The 8.30am Spencer St to Horsham pass. departs Ballarat, 1978
ABOVE: A down jet passes Ballarat B box as it departs Ballarat. In Dec 1981 a fire broke out in the station building and you can see the damaged clock tower in this photo. The station was repaired and finally, the clock tower got an operating clock, Jan 1982.
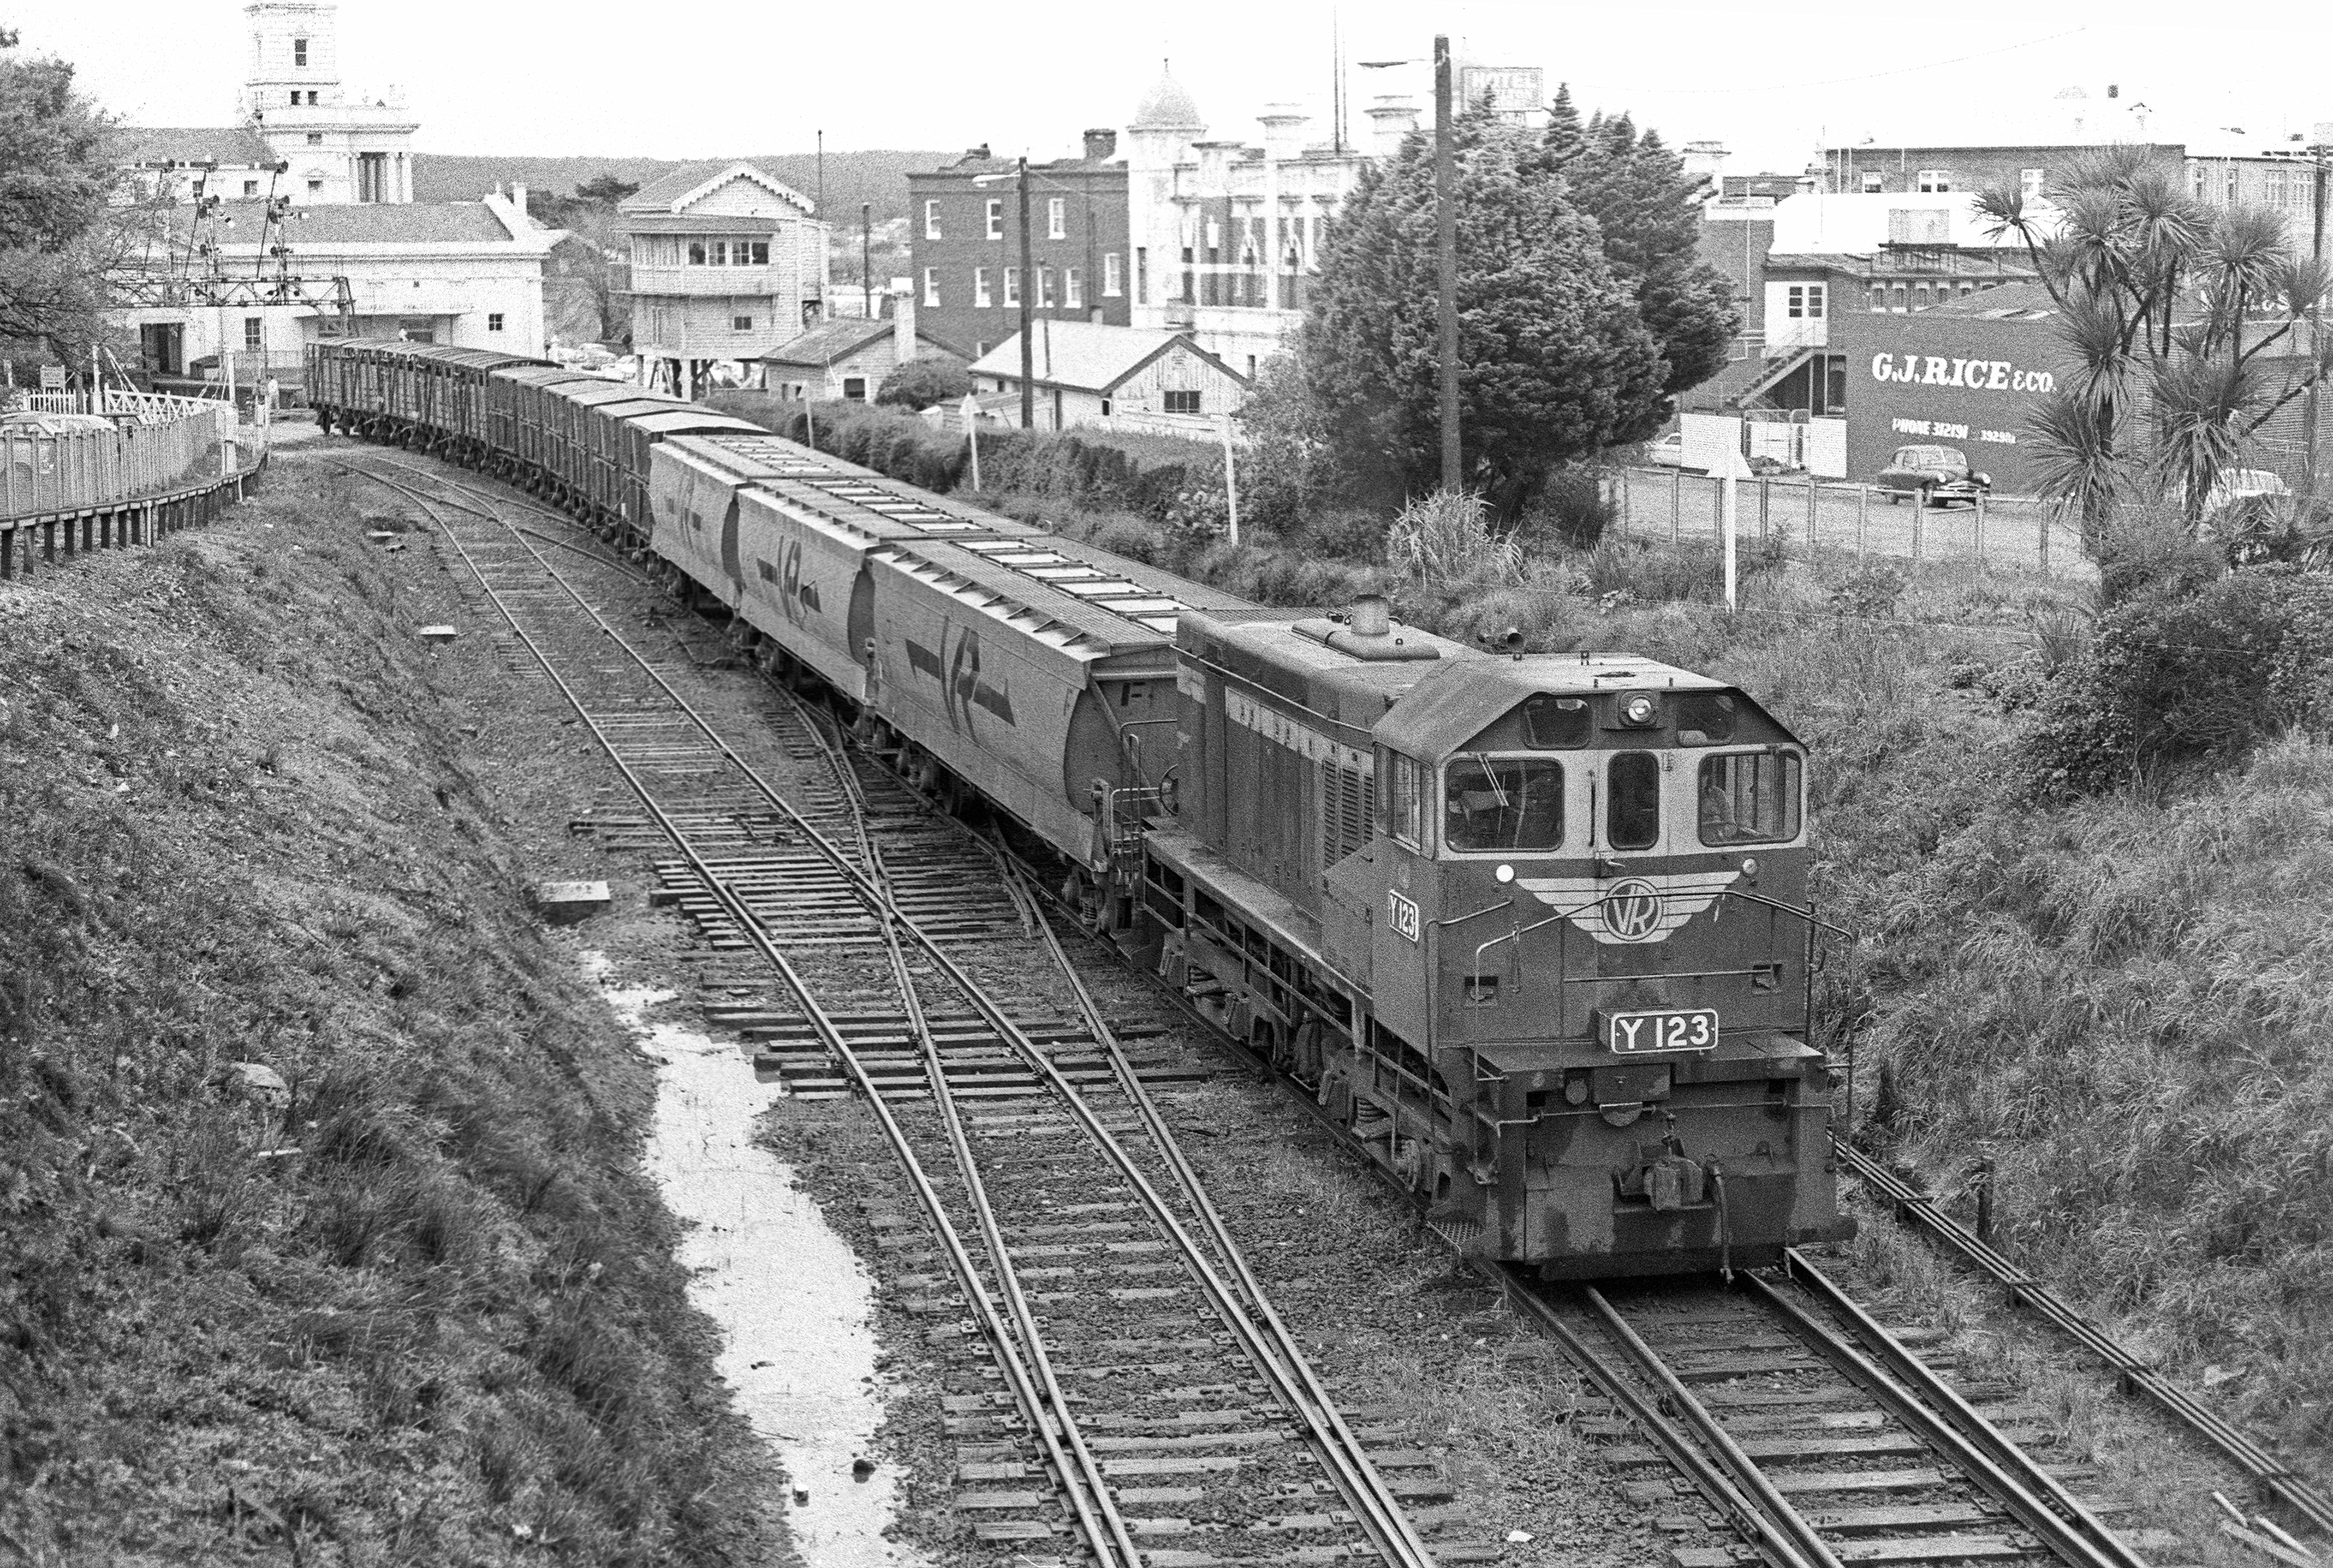
ABOVE: Y 123 on a rake of grain and livestock wagons heads west over the Lydiard street crossing. 1978.
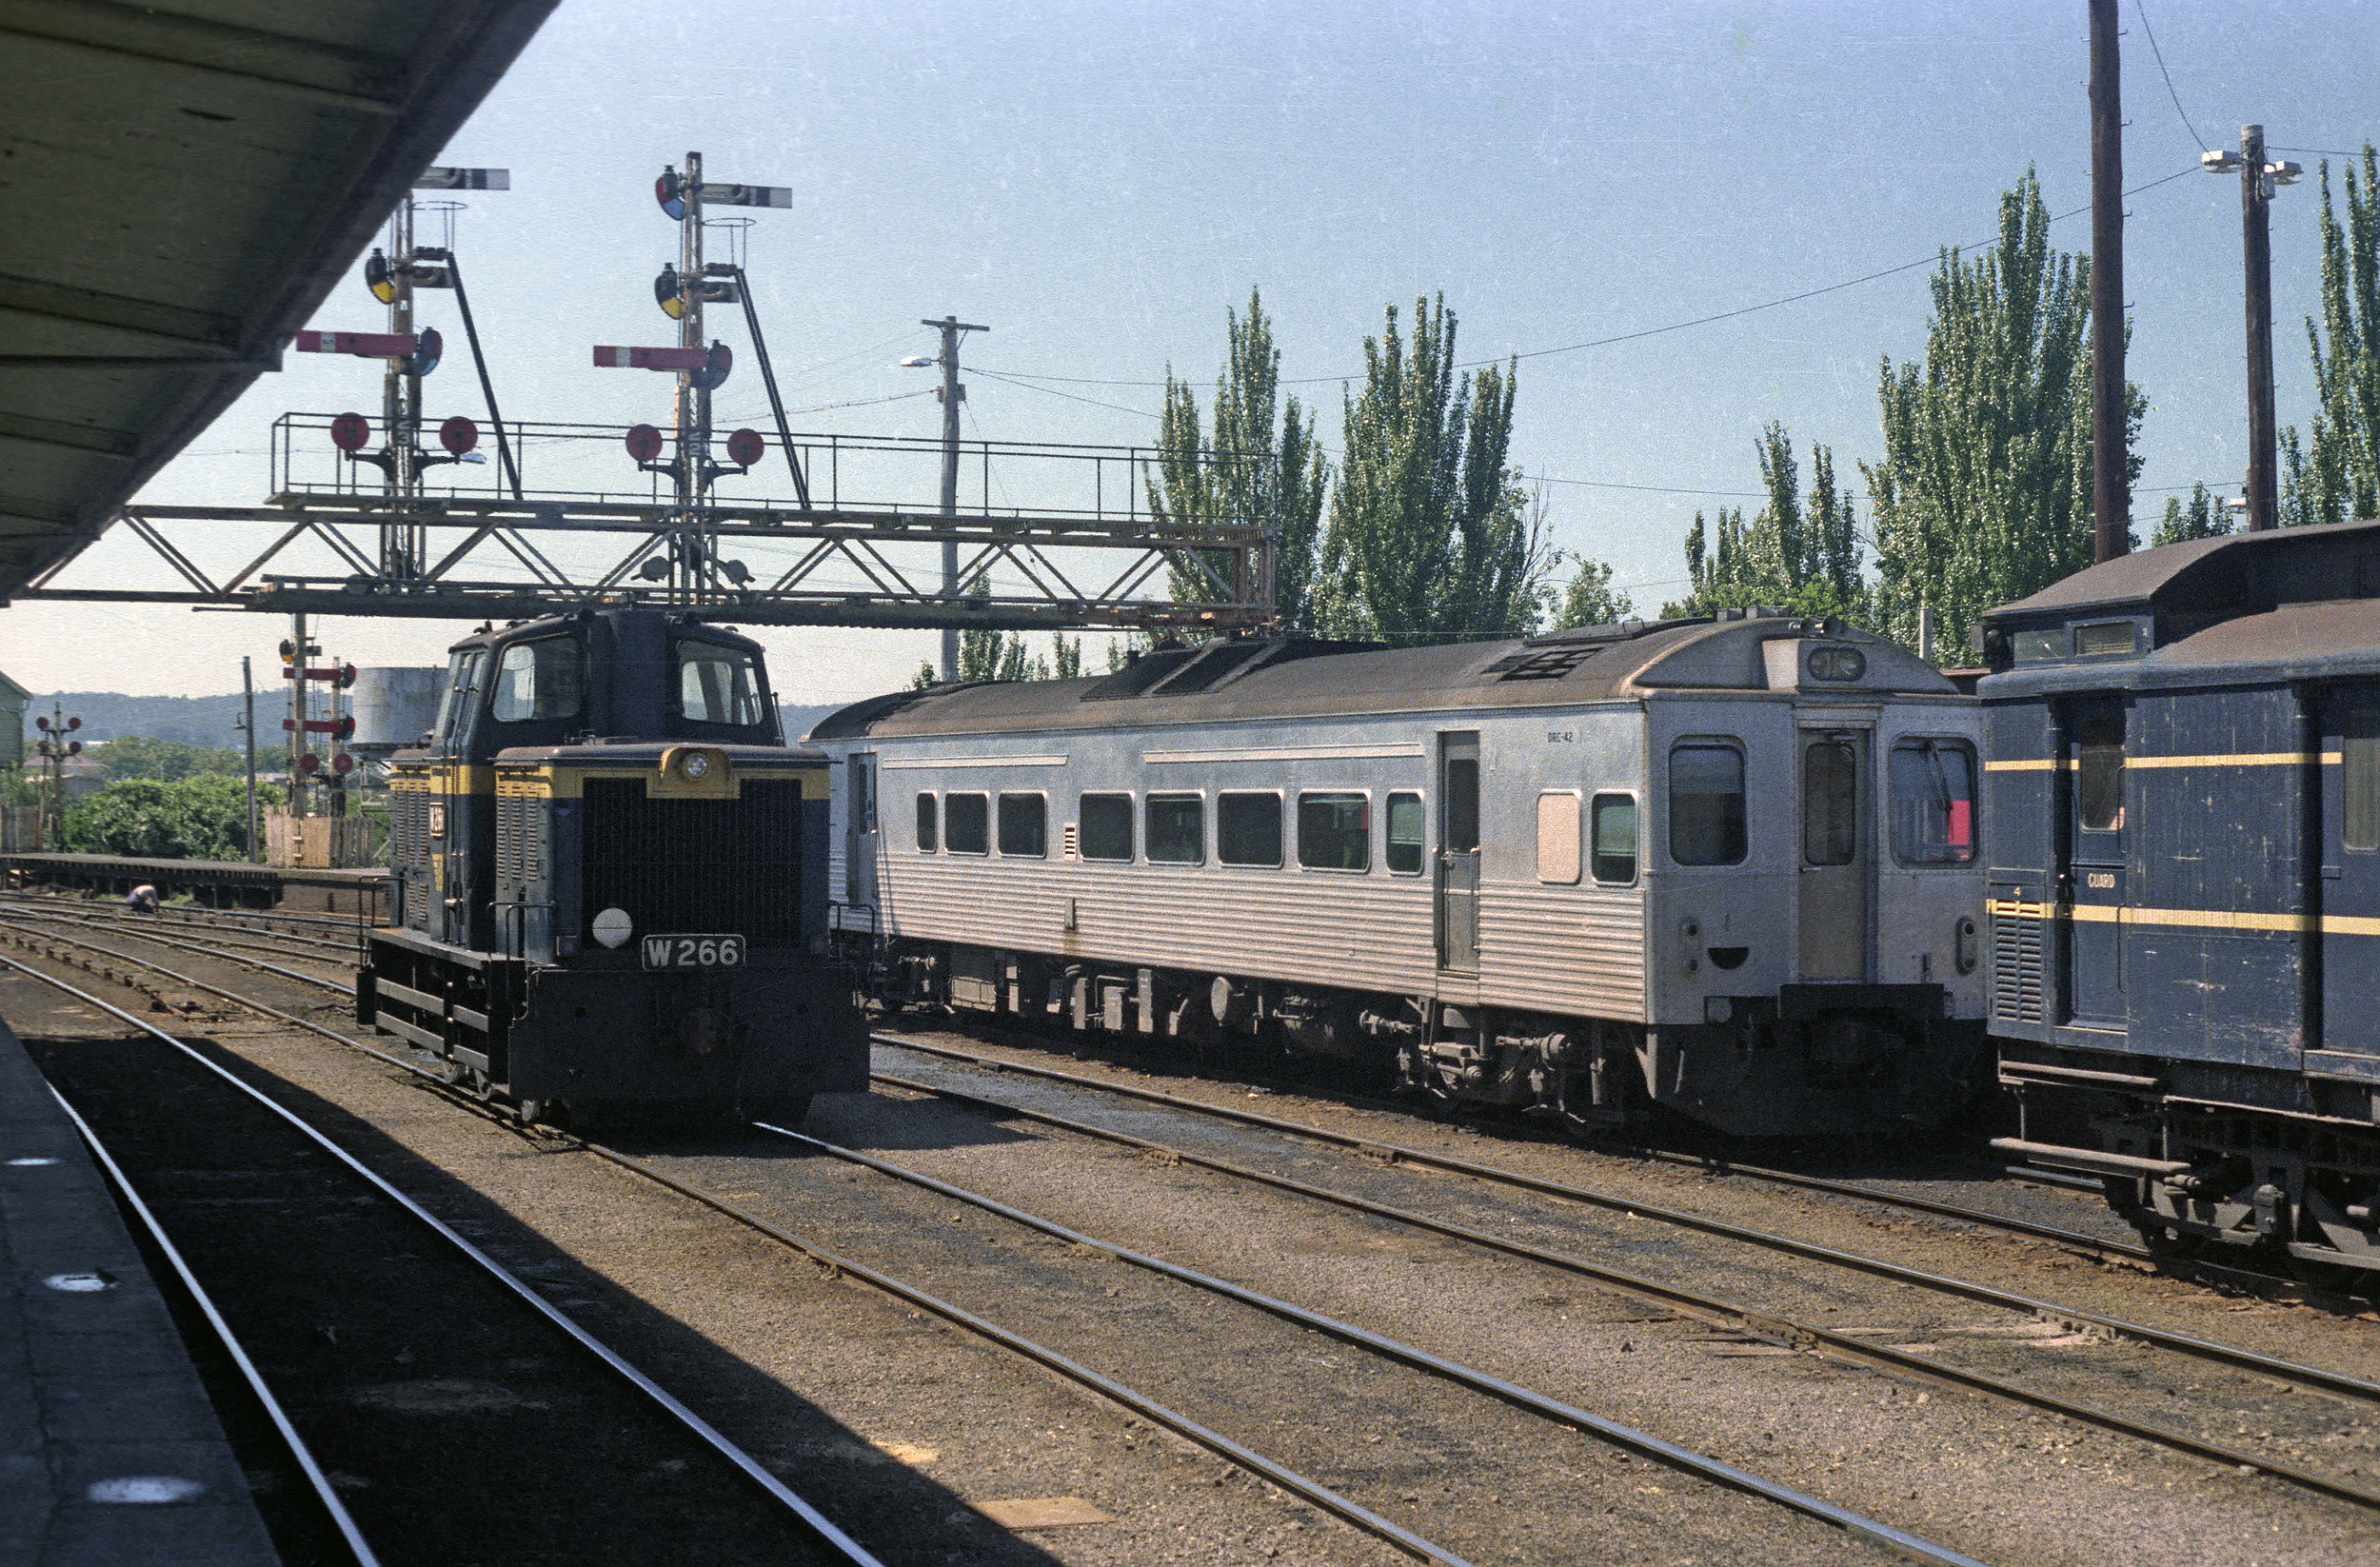
ABOVE: The Ballarat to Donald DRC (42) docks into the platform at Ballarat behind the Spencer St. to Horsham pass. 1978
ABOVE: Looking east, Ballarat A box and the up homes out of the two platforms and two centre tracks, Nov 23 1985.
ABOVE: The up co-acting arrivals (post 30 and 30A) controlled by B box, 1979.
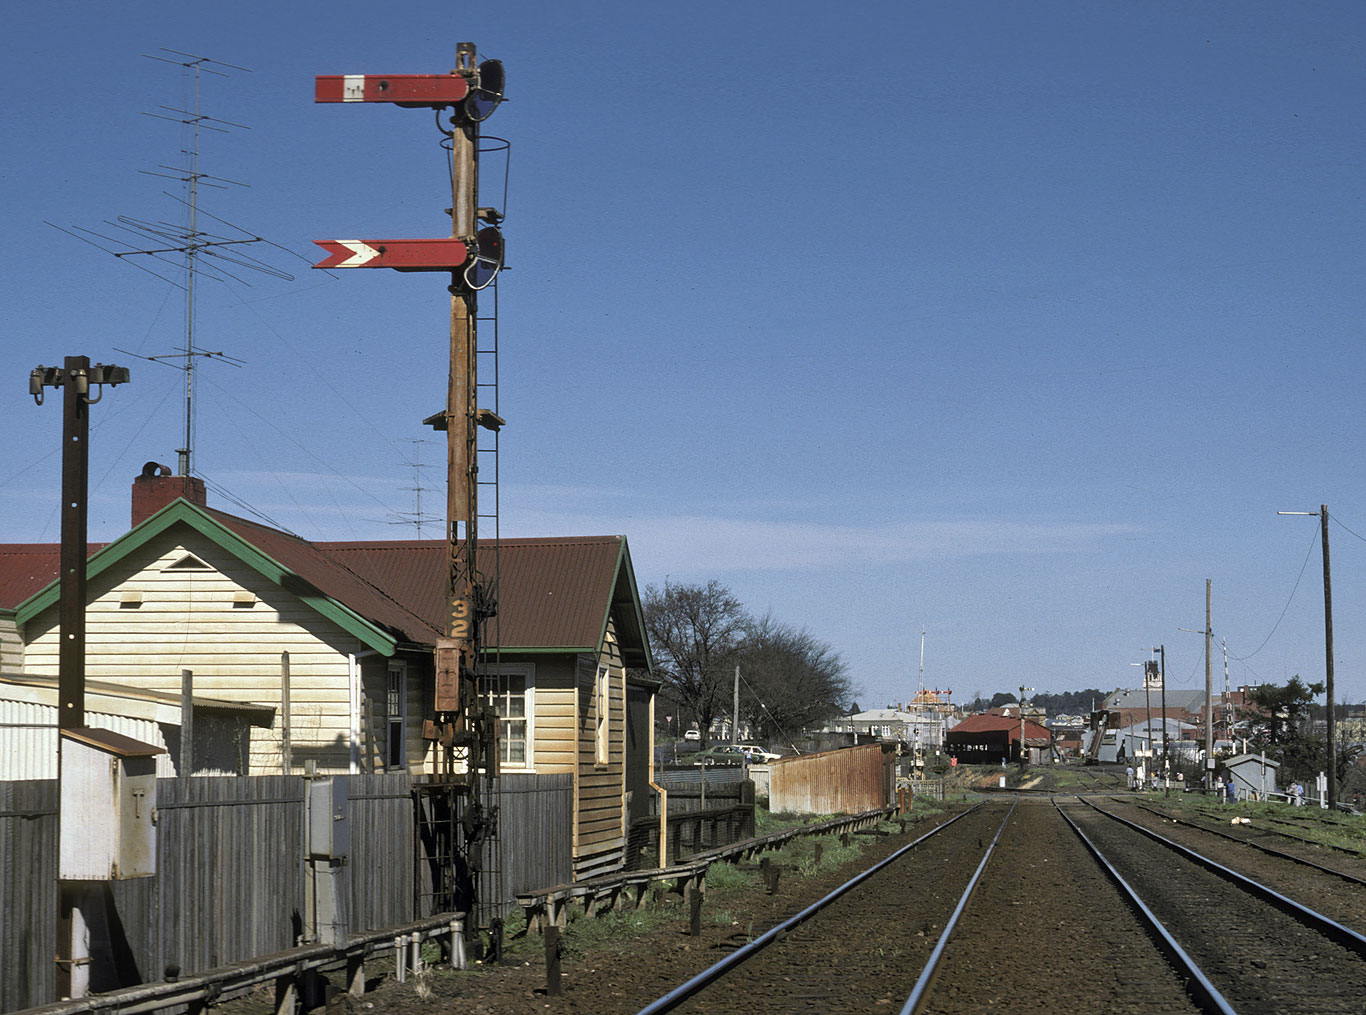
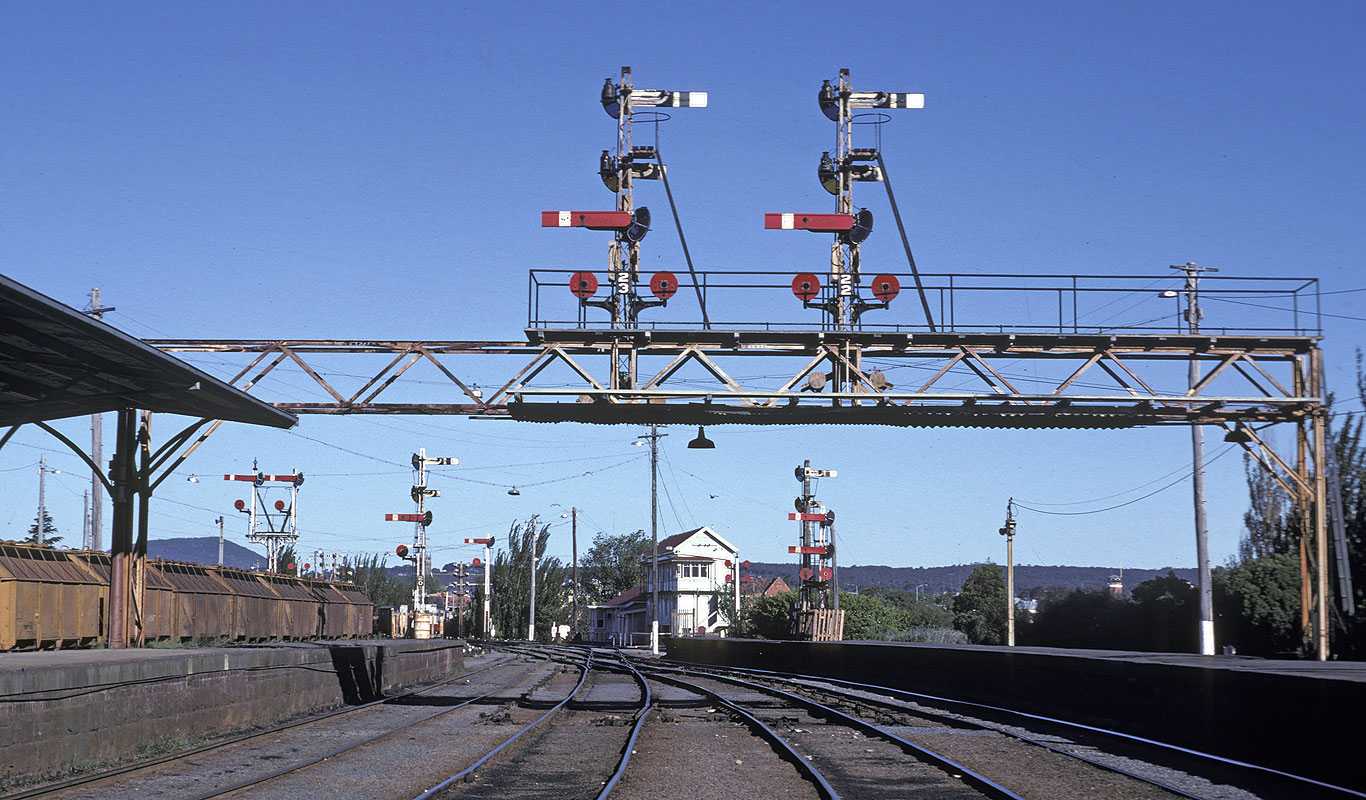
ABOVE: Post 32, Ballarat B box's up distant and the up starting signal controlled by Ballarat C box, Sep 8 1985.
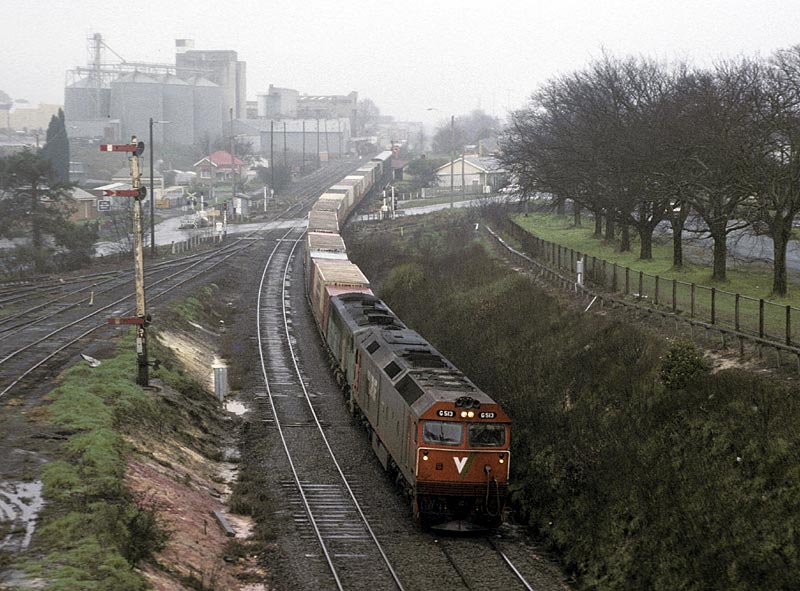
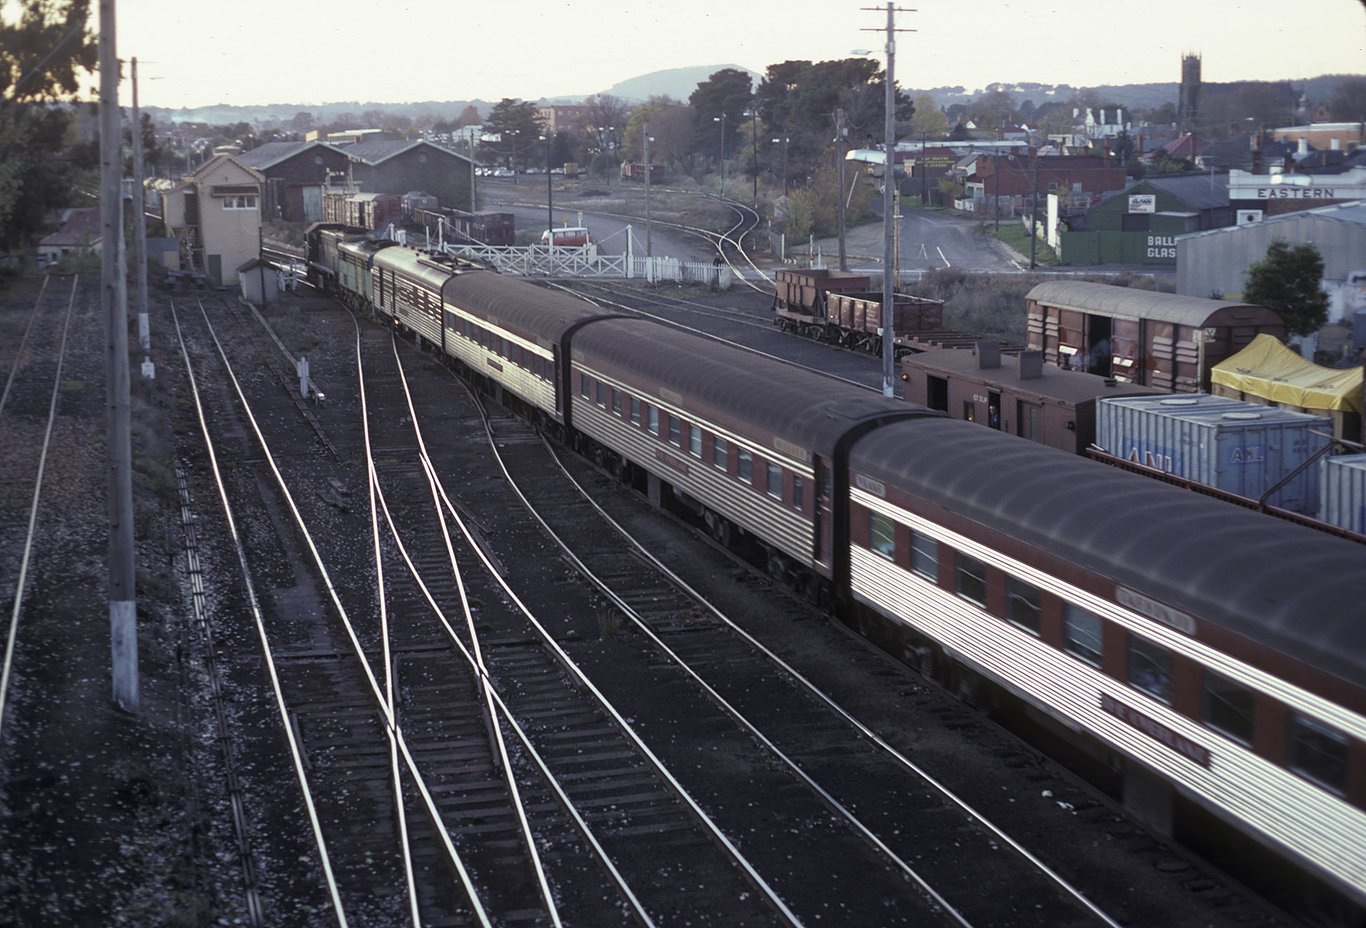
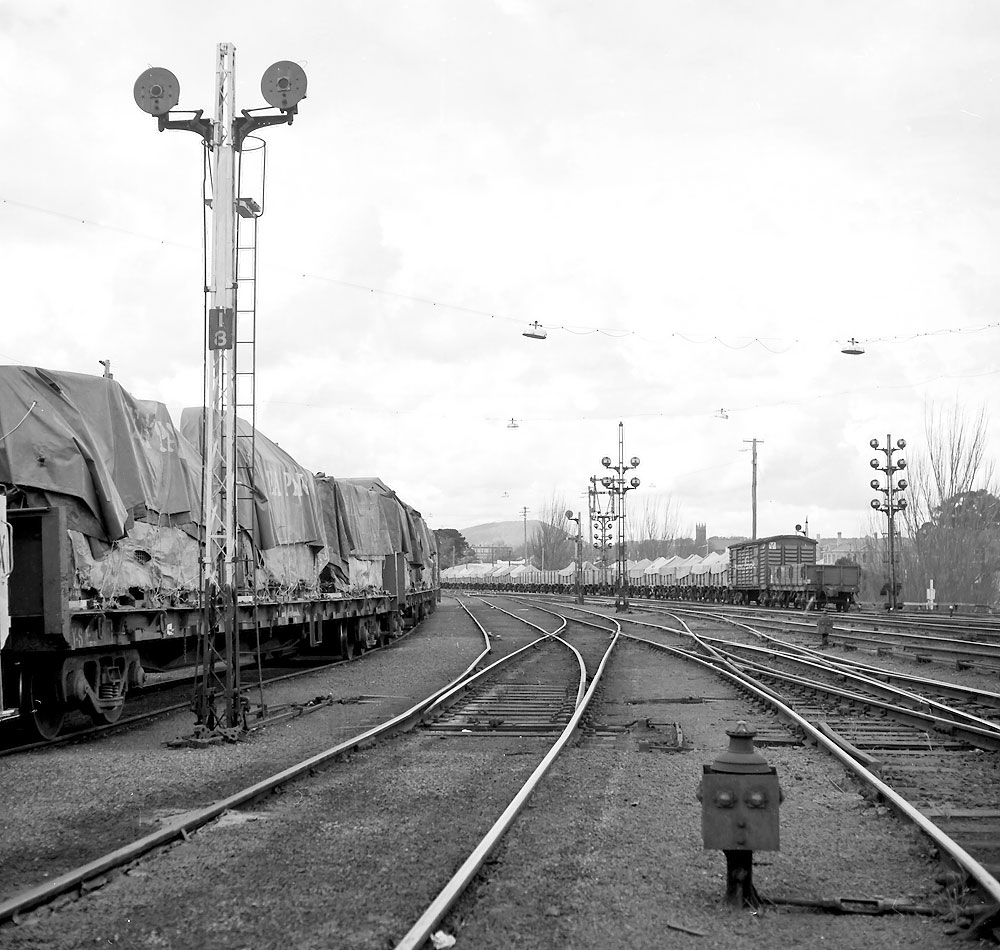
ABOVE: In 1987, two years after I transfered to "the sparks" I was given the chance to relieve at Dynon due to staff shortages. I worked out of Dynon for 3 months and managed to get myself teamed up with other railfans. Here is a train Stuart Loddington and I ran from Dimboola to Melbourne. (G 513 - 934, 1420 tonnes #9128) We had a long wait at Ballarat so the time was used to climb a signal to make this photo on a very typical cold, dreary, wet, Ballarat winter day. August 8 1987.
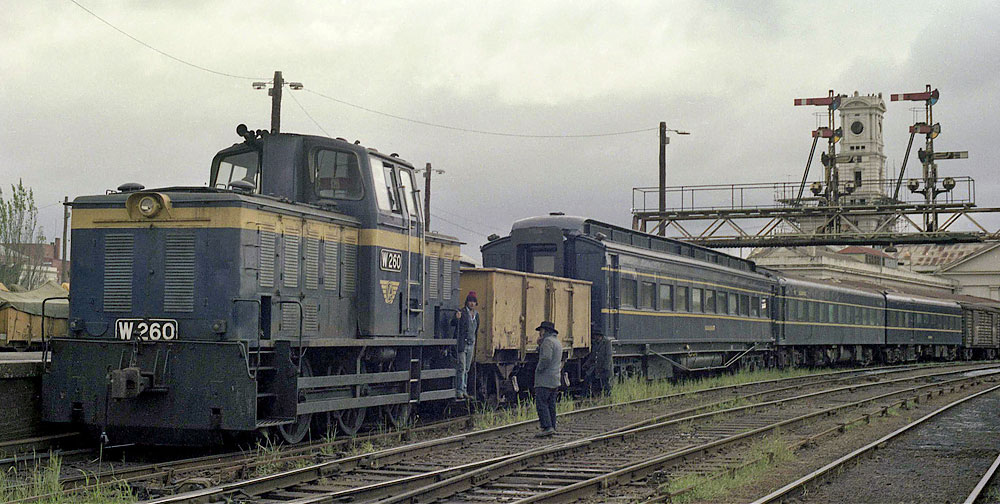
ABOVE: W 260 (with GY attached) on the yard pilot at Ballarat, it looks like it is detaching the vice regal cars off the down morning Horsham pass. Oct 1982. (photo courtesy Andrew Hennell.)
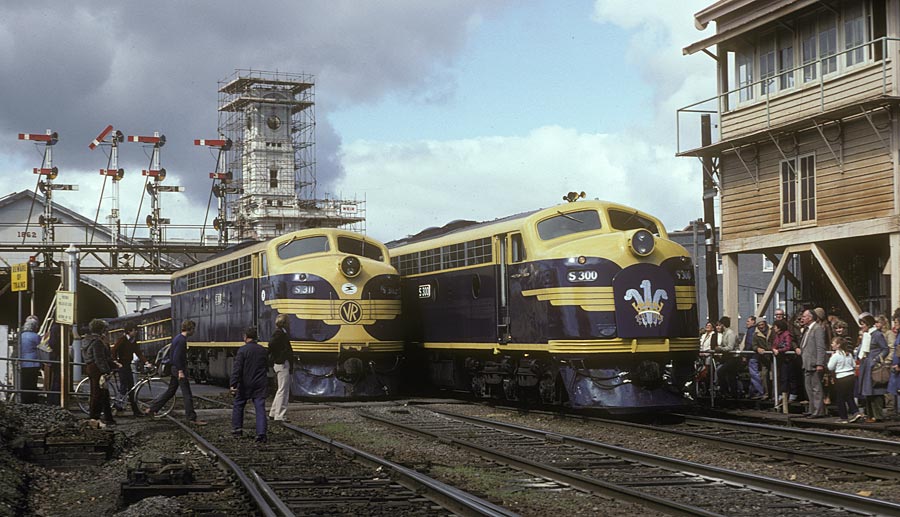
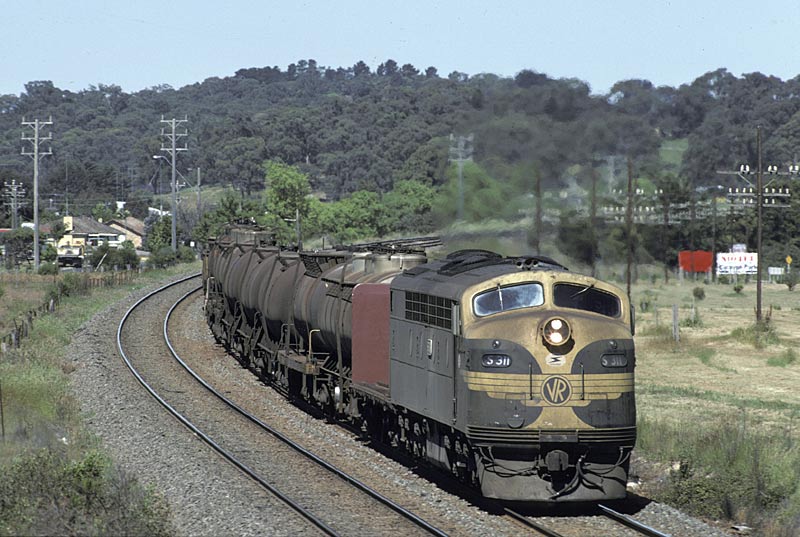
ABOVE: The royal train carrying Charles and Diana has just arrived at Ballarat. S 311 was the "pilot" loco that ran just ahead of the royal train ensuring the track was clear, some wags called it the "minesweeper" April 15 1983.

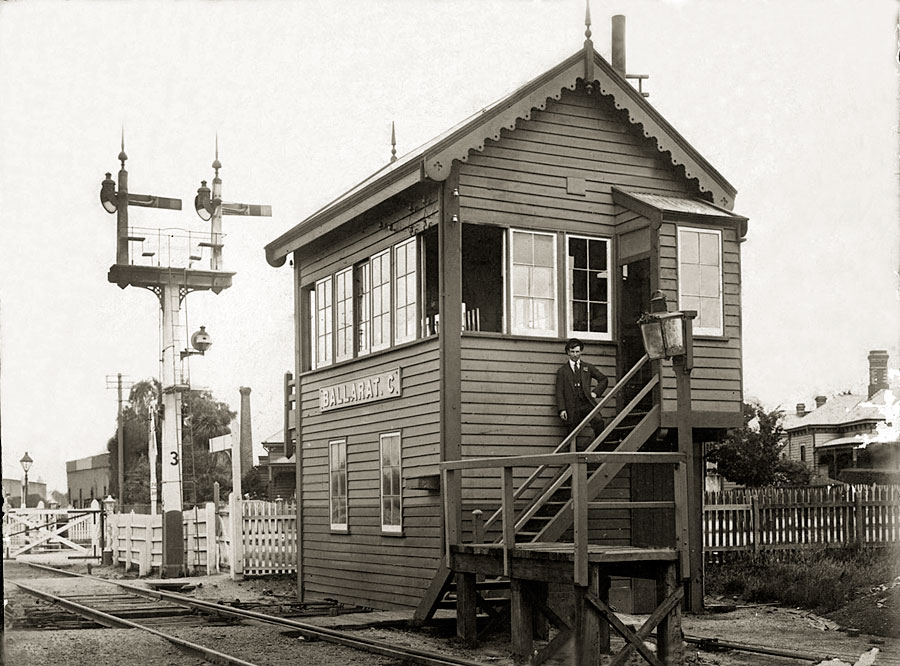
ABOVE: Ballarat C box controlled the junction of the Maryborough and Ararat lines as well as the interlocked gates for Macarthur Street. Circa 1915. Photo courtesy Wayne Salisbury BELOW: Here is another photo of Ballarat C box, this photo was taken a bit earlier than the one above as electric light has yet to arrive judging by the huge lamp on the staff exchange platform.
My mate Peter Bruce writes as follows:
"G'day all, I've had the attached photo of Ballarat C Box for ages and I've no recollection of how I came by it except that it was in the family. I didn't attach any particular importance to it other than as a record of the early 20th century on the Victorian Railways. But.....not so long ago I found out that my paternal Grandma's younger brother, Bill Howard, met eternity right here, at Ballarat C Box on or about May 9th, 1915. He was hit and run down by a locomotive and died shortly afterward in hospital. His brother-in-law quoted him as saying: " I was a fool to go for the staff, I completely forgot about the other train". Presumably he was the signalman on duty. So maybe he is the sportin' looking chap posing on the steps of C Box. Maybe...."
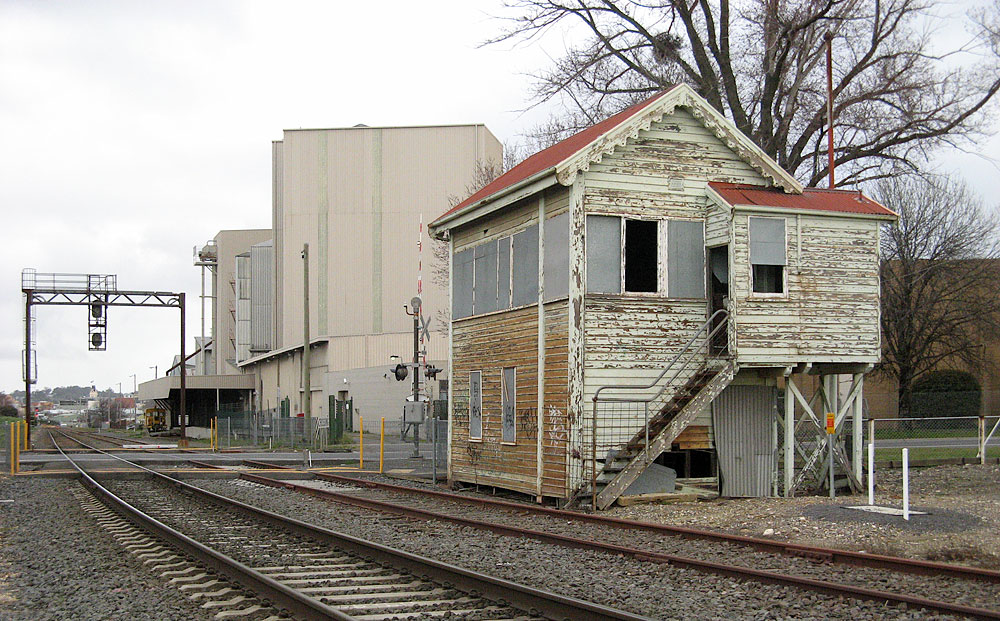
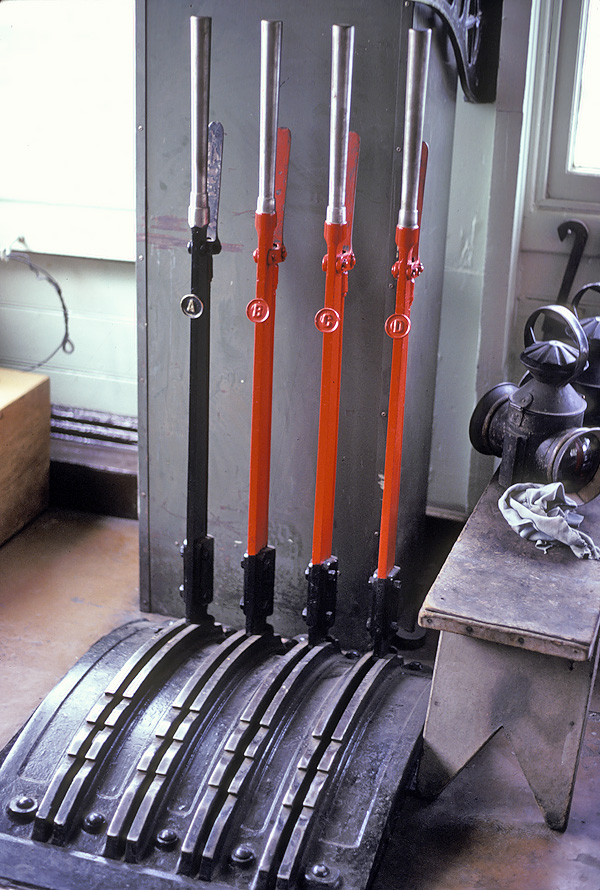
ABOVE: The box was enlarged in 1927 to allow additional levers A, B, C & D to be provided in conjunction with the provision of the works depot siding. The photo below was taken in the early 1980's. The installation of 3 position signals on July 24 1992 made the box redundant, it was burnt to the ground approx 2004 and no trace of it remains. . (photo courtesy Keith Lambert)
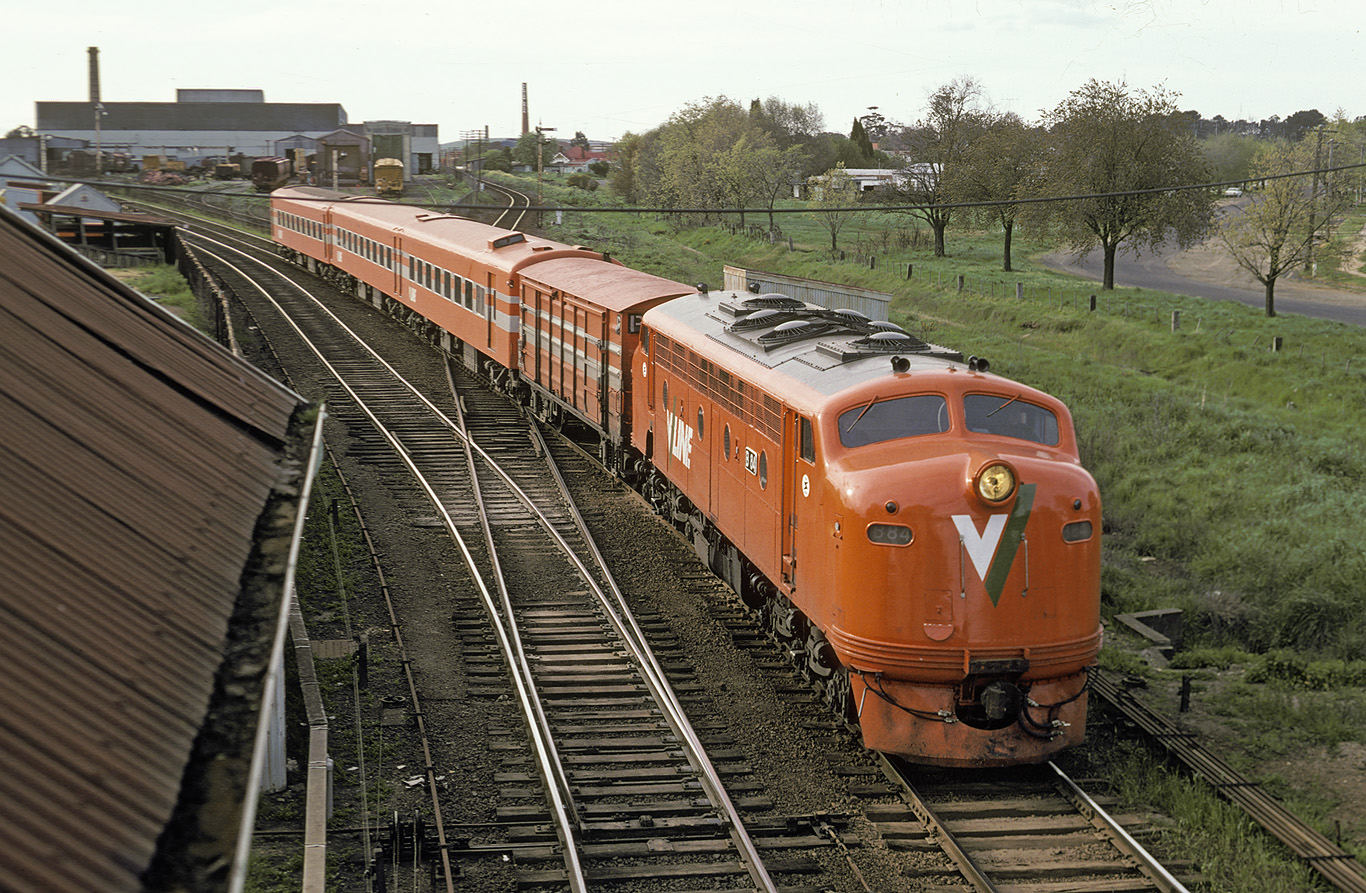
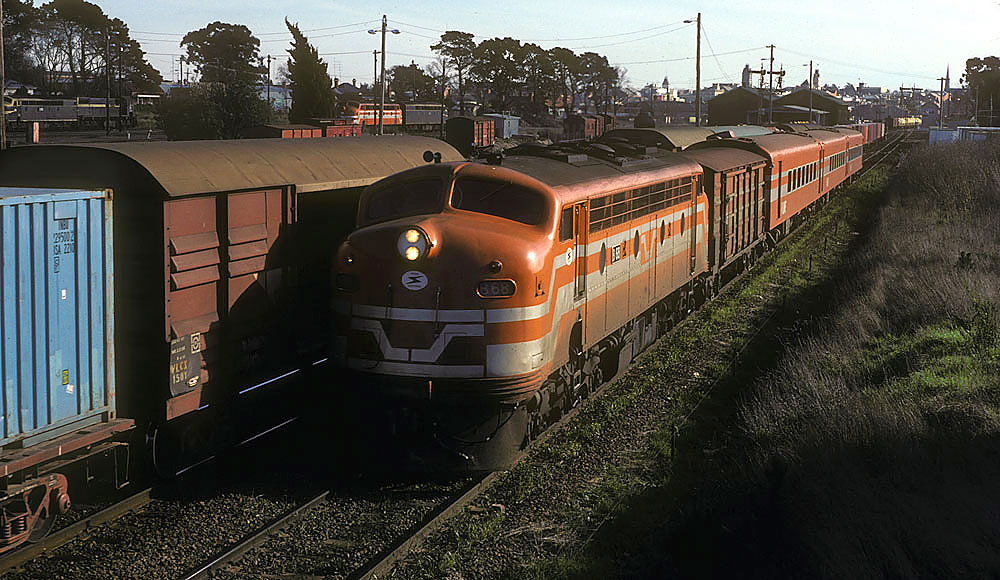
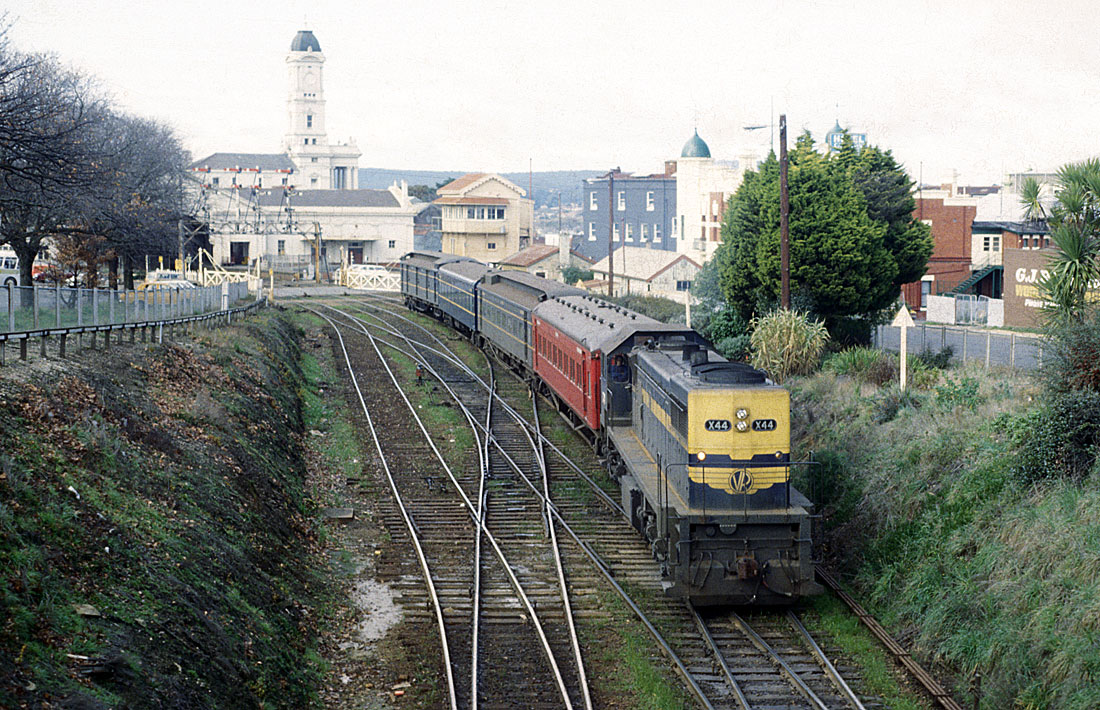
ABOVE: "dipped in orange" B 84 swings around the right hand curve and clatters over the junction to the Maryborough line on an up Horsham pass, Ballarat North workshops can be seen in the background. Oct 1983. (photo courtesy Noel Bamford)
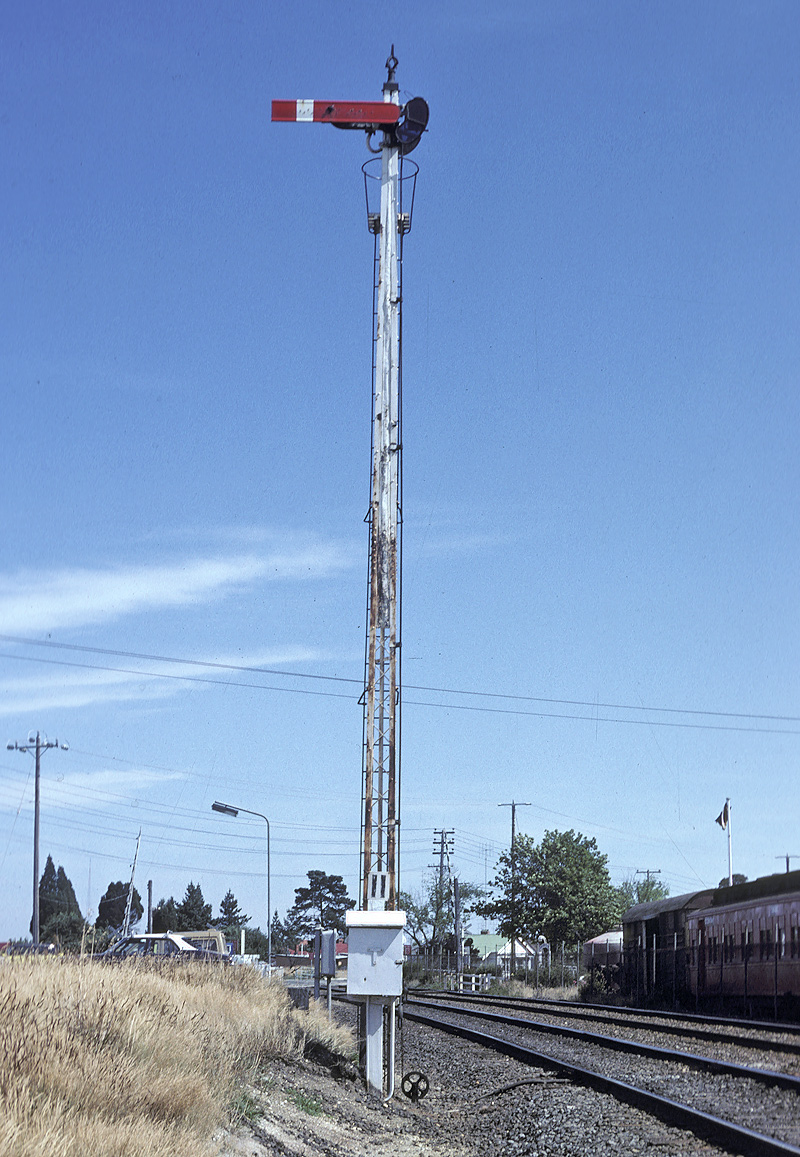
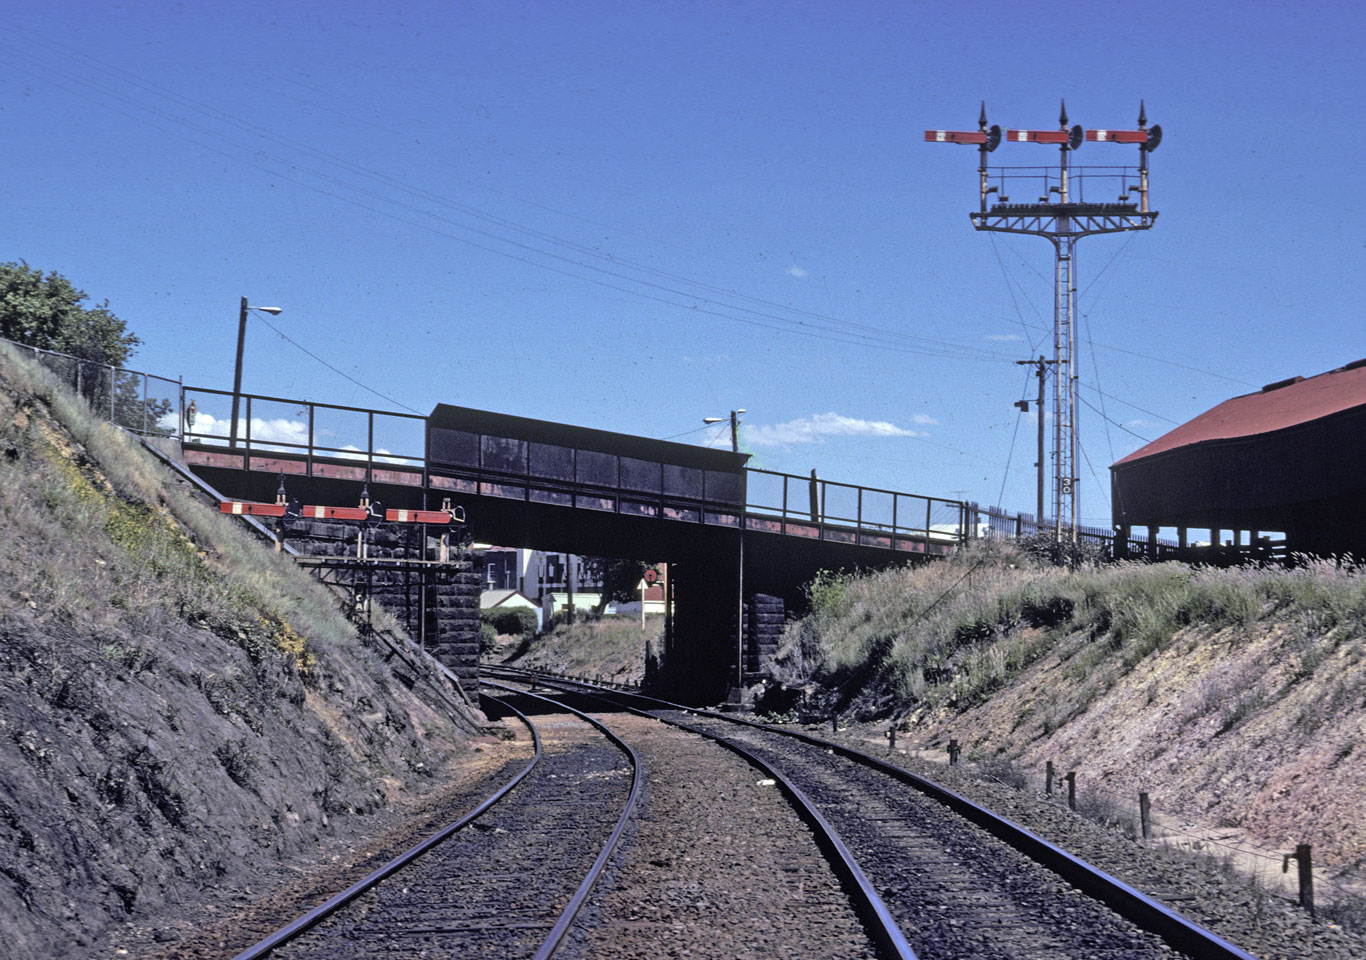
ABOVE: Post 11 was Ballarat C box's starting signal into the Double Line Block section to Linton Jct, Feb 2 1982.

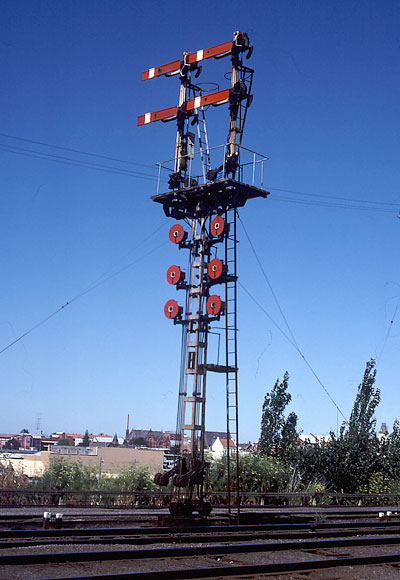
ABOVE: Mounted above the frame of Ballarat C box were these 3 signal repeaters. These were provided when the Signal was a long distance from the signal box and out of sight of the Signalman, or obscured from the Signalman's view. Probably the most common usage of these indicators was for Distant signals (generally being the furthermost signal from the Signal box) and then for Starting signals. When the indicator pointed to "ON" it told the signalman that the signal was at its most restrictive aspect (arm horizontal) "OFF" meant that the arm was showing proceed (arm at 45 degrees) WRONG; indicated the arm was somewhere in between the horizontal position and the position required to display. This could occur during hot weather with expansion in the signal wire, requiring it to be tightened to display a proper indication. Also in cold weather with contraction in the signal wire, could prevent the arm going fully horizontal requiring it to be slackened (photo courtesy Alan Jungwirth)
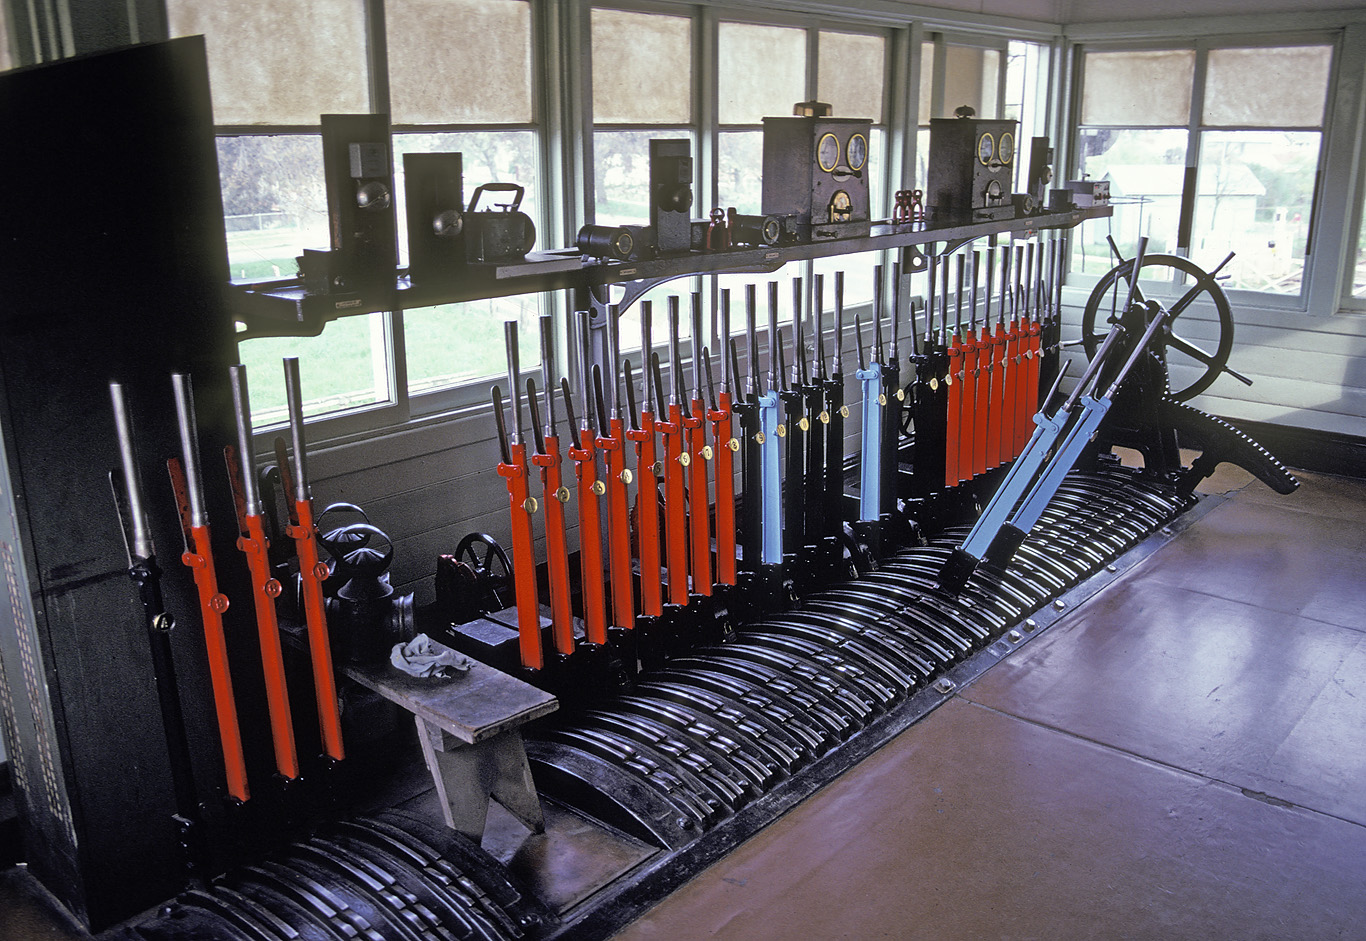
ABOVE: Ballarat C box was opened in 1886 with a 30 lever frame. In 1924 4 levers were added (and the signalbox was expanded) to control the ponts and signals for a new works depot siding. Adding the levers to the right hand end of the frame would have interfered with the gate mechanism so the 4 levers were added to the left hand side of the frame and lettered A-B-C-D, shown BELOW. Oct 1983. (photos courtesy Noel Bamford
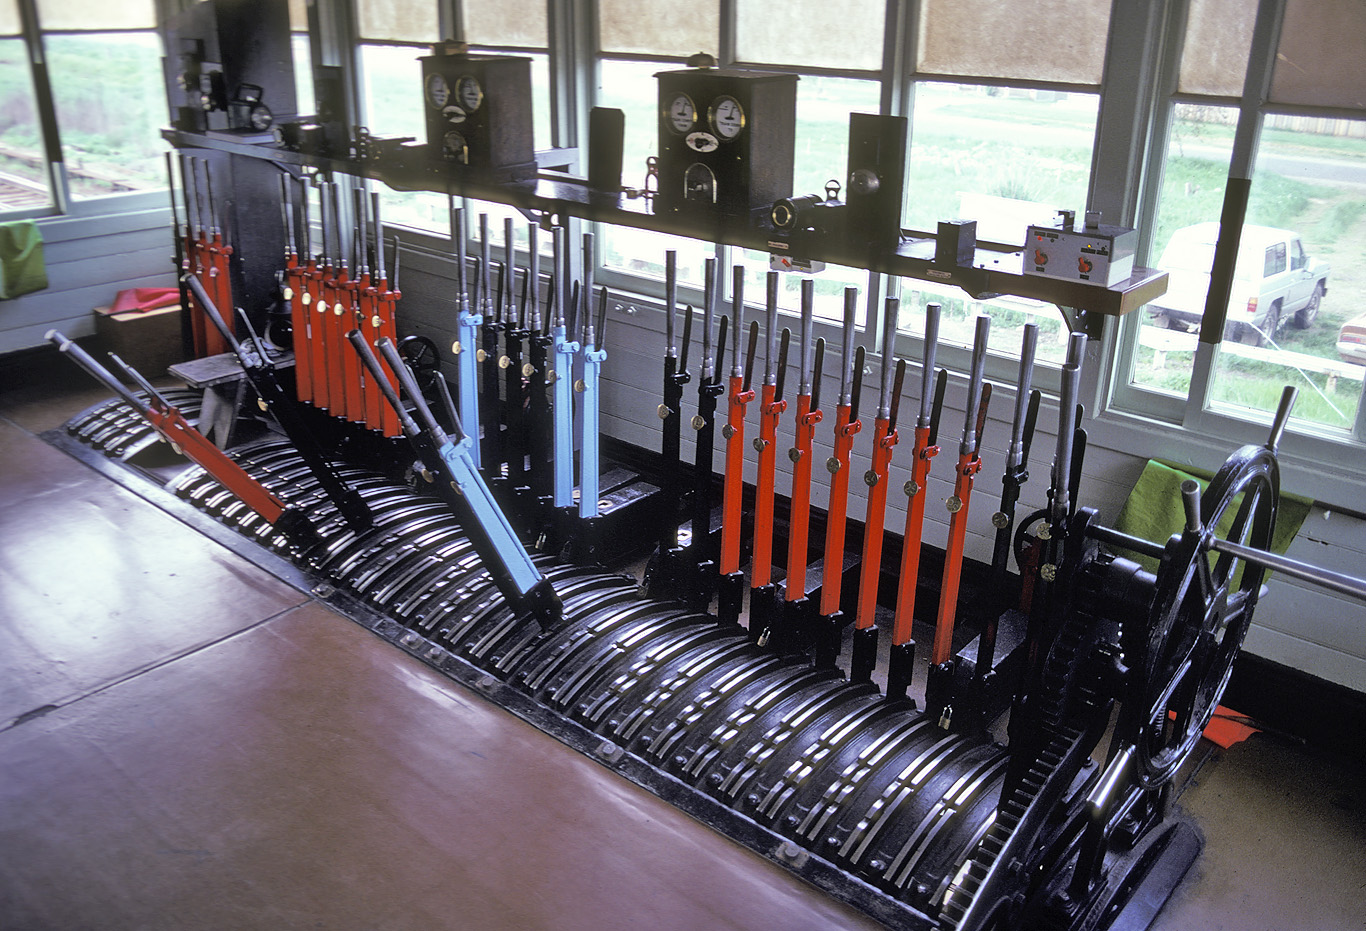
ABOVE: Ballarat C's frame viewed from the up end, the gatewheel is on the extreme right.Oct 1983. (photo courtesy Noel Bamford)

ABOVE: The Master key kept at Ballarat C box (Nth Ballarat) This allowed trains to still operate the points at the SEC siding and Waurbra Junction when normal electric staff working had been suspended. (photo courtesy Dave Harvey)
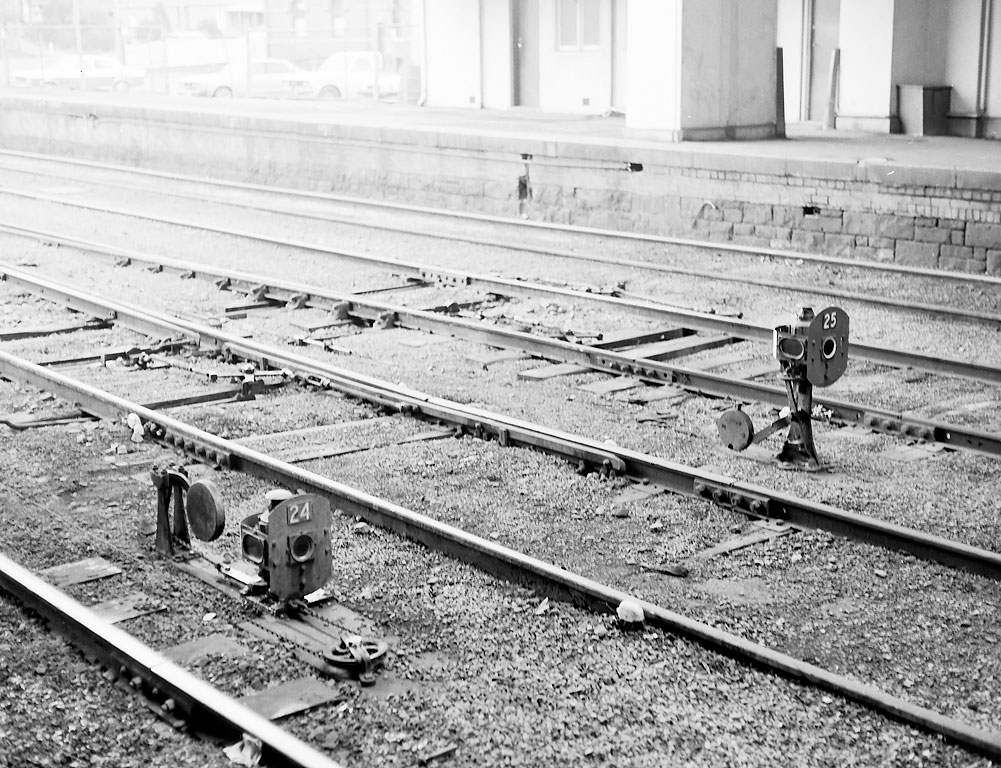
ABOVE: These two down disc signals protected the catch points out of the two middle tracks at Ballarat. Disc 25 was what could be considered a normal ground disc, Disc 24 was lower than normal to fit inside the loading gauge probably due to curvature contraints, this type was quite rare, Aug 31 1986. (photo courtesy Chris Wurr)
ABOVE: To a garden variety gunzel, post 18 at Ballarat was just another signal post with two discs on it, but to a signalling aficionado, post 18 was a rare beast indeed. Mechanical signals, both arms and discs, were operated by wires and points were operated by point rods. For reasons unknown, these two discs were operated by point rods. Aug 31 1985. (photo courtesy Chris Wurr) BELOW, a colour view taken on Nov 23 1985.