
| Macedon | 48Miles 41Chains 58Links / 78.085km | Carlsruhe |
Woodend was the terminus of the second section of line to Bendigo and was opened in 1861; the line was extended to Kyneton in 1862. Situated just north of the summit of the line, Woodend was, for most of its life, an important railway centre with trains being combined to work down the hill in both directions (this became less important from the '20s with the introduction of more powerful locomotives). Woodend was also the source and terminus of the roadside trains that worked north and south on the main line and to Daylesford. The Daylesford line trains also originated and terminated at Woodend, (the actual junction was at Carlsruhe, the next station north).
Blockworking (using the telegraph instrument) was introduced down the hill to Sunbury by 1879; by 1885 block working was in force on both lines from Sunbury, and block instruments had been provided by 1888. Block working was extended north by 1892. Woodend was interlocked in 1891 and the arrangement provided that year remained recognisable for 99 years. The box lasted until 1995 when it was replaced by a signalbay on the Up platform.
(Text from Andrew Waugh's 'Victorian Station Histories')
In 1861, the station building from Sunbury was relocated to Woodend. Shortly thereafter, an "engine house", as well as carriage, engine and coke sheds were also erected.
Official opening of the line from Sunbury occured on July 7, 1861. On April 25, 1862, the line through to Kyneton was also opened.
In late 1863, a contract was let for the removal of goods sheds, and their re-erection as a loco shed at Williamstown.
A turntable was installed in 1887.
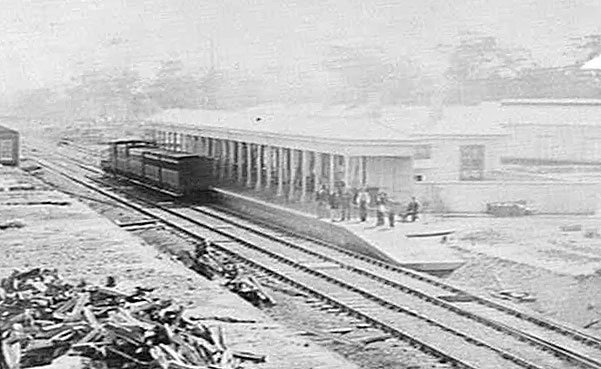
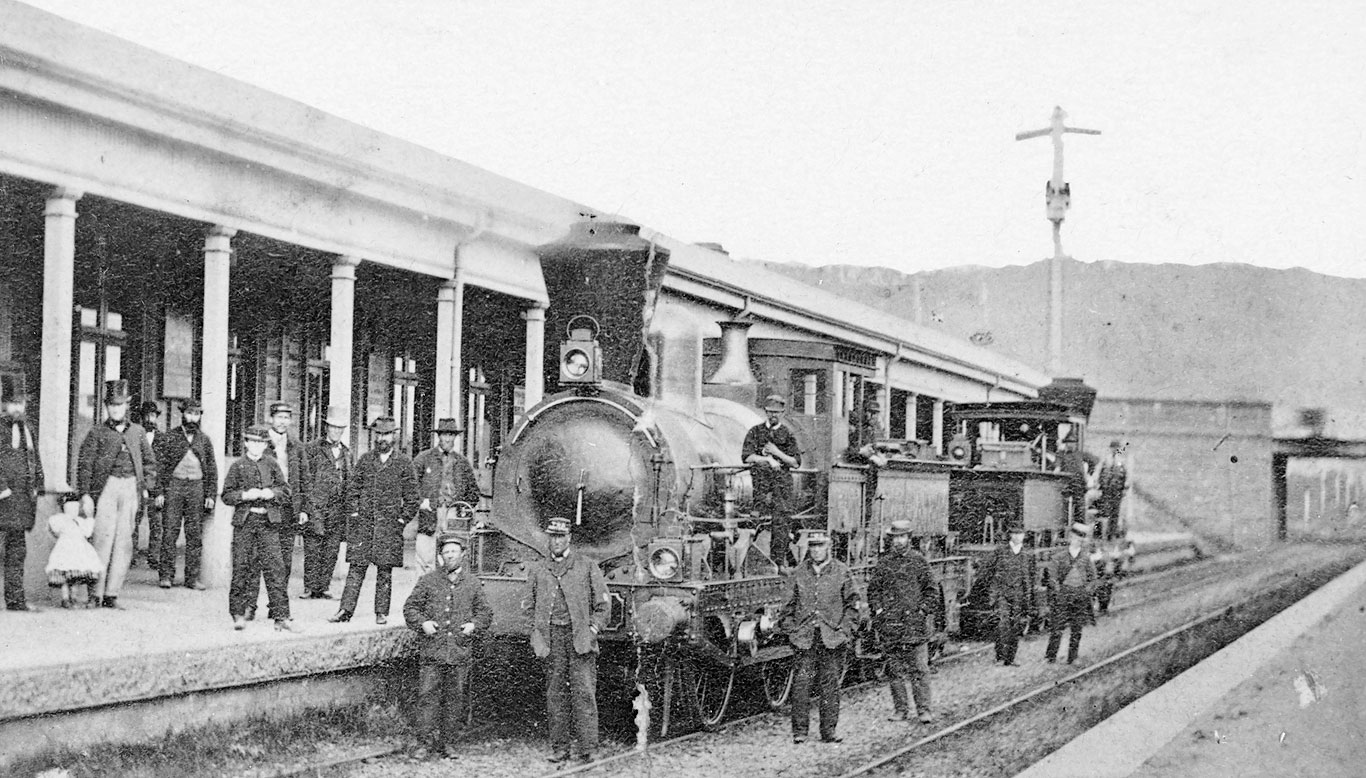
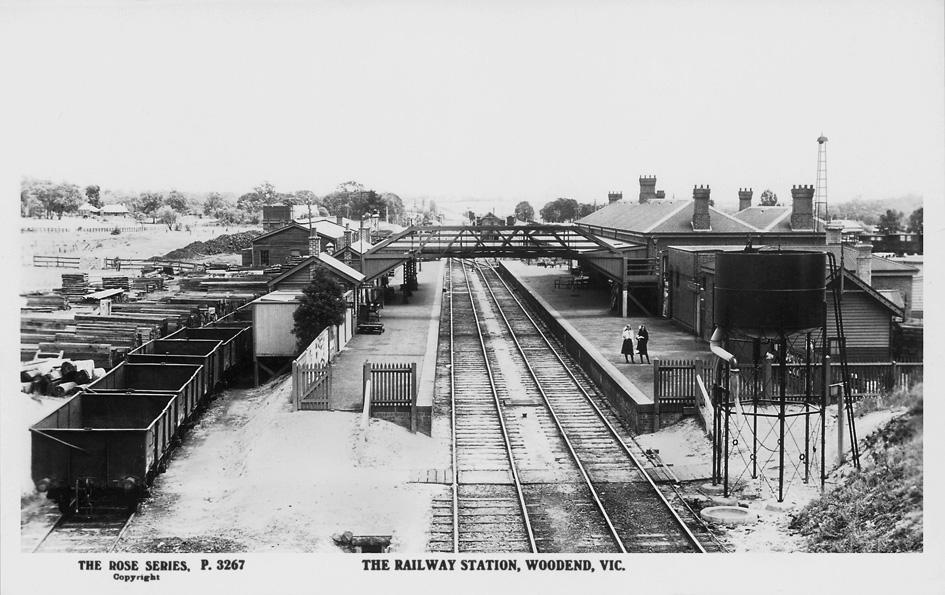
ABOVE: The earliest photo I've seen of Woodend station, this photo was almost certainly taken when Woodend was the terminus due to the abscence of a down platform.
This building, which was moved from Sunbury to Woodend in 1861 was destroyed by a fire in Dec 1897.
Of particular interest in this photo is the presence of a turnout that is from the down line into the platform. Once the line was opened through to Kyneton, normal double line, British practice, was observed where facing turnouts were not allowed on double lines.
(If anyone has a better quality scan of this image, I would love to include it on this page) (photo courtesy State Library Victoria)

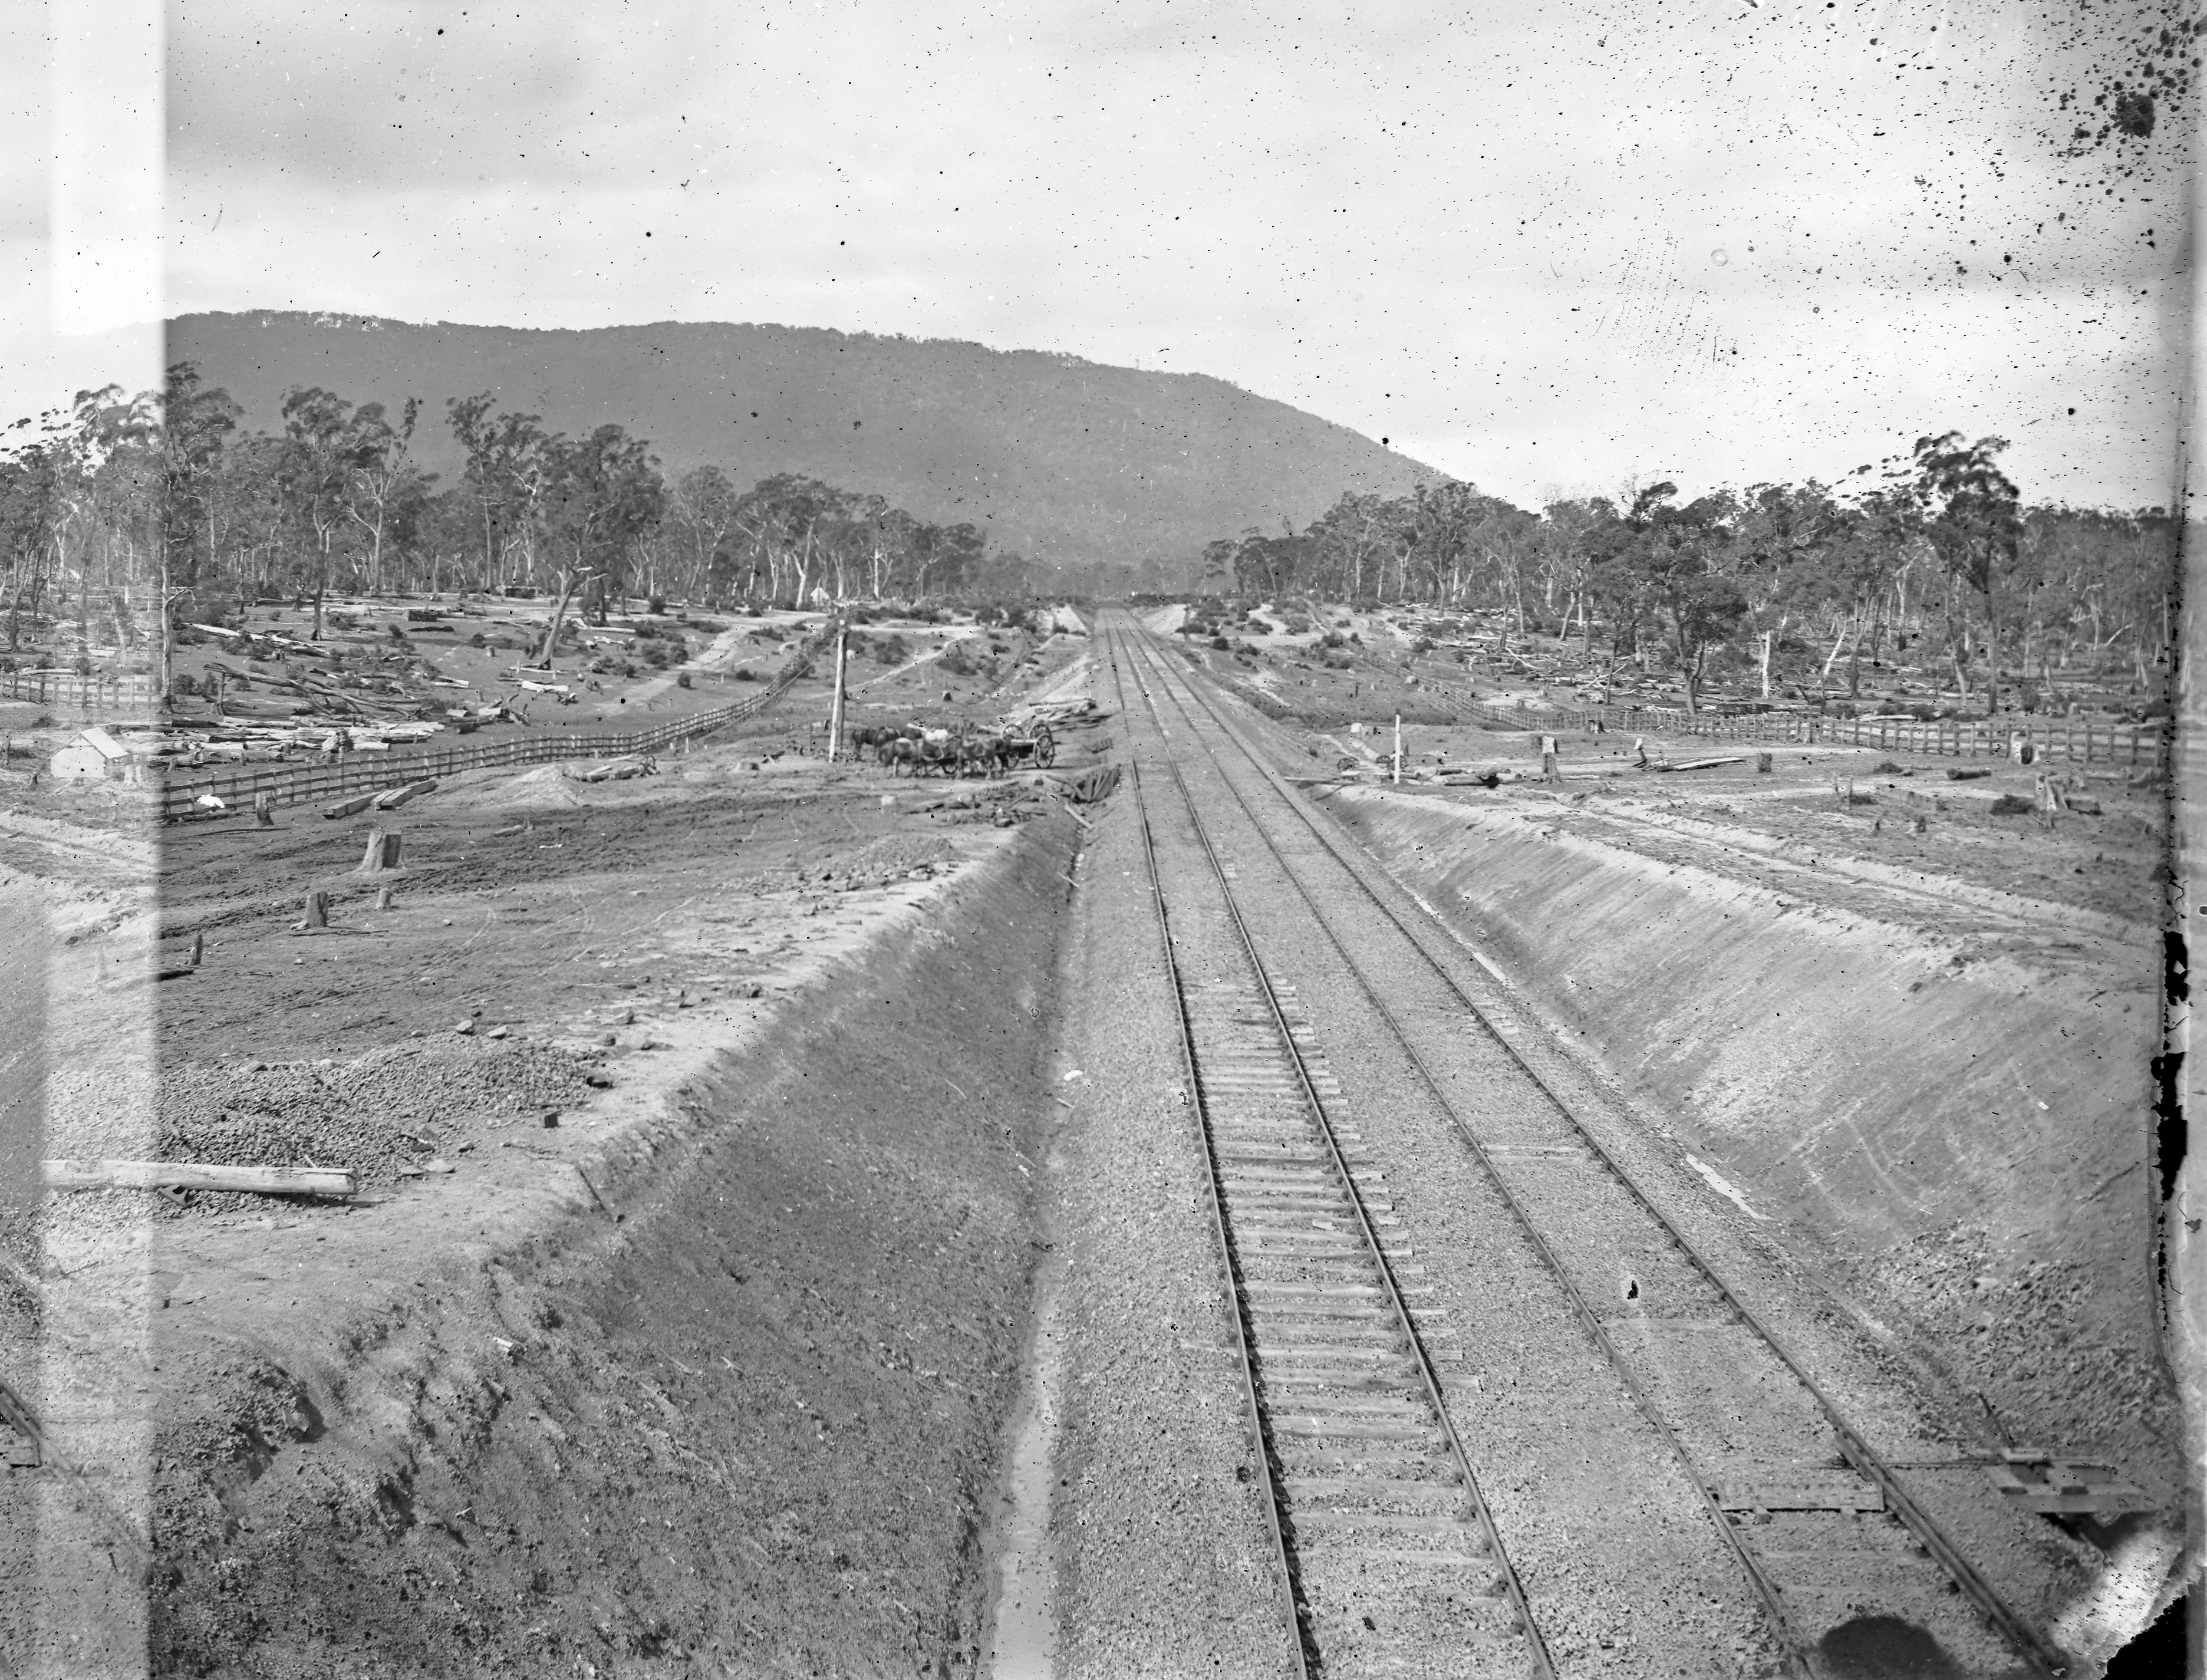
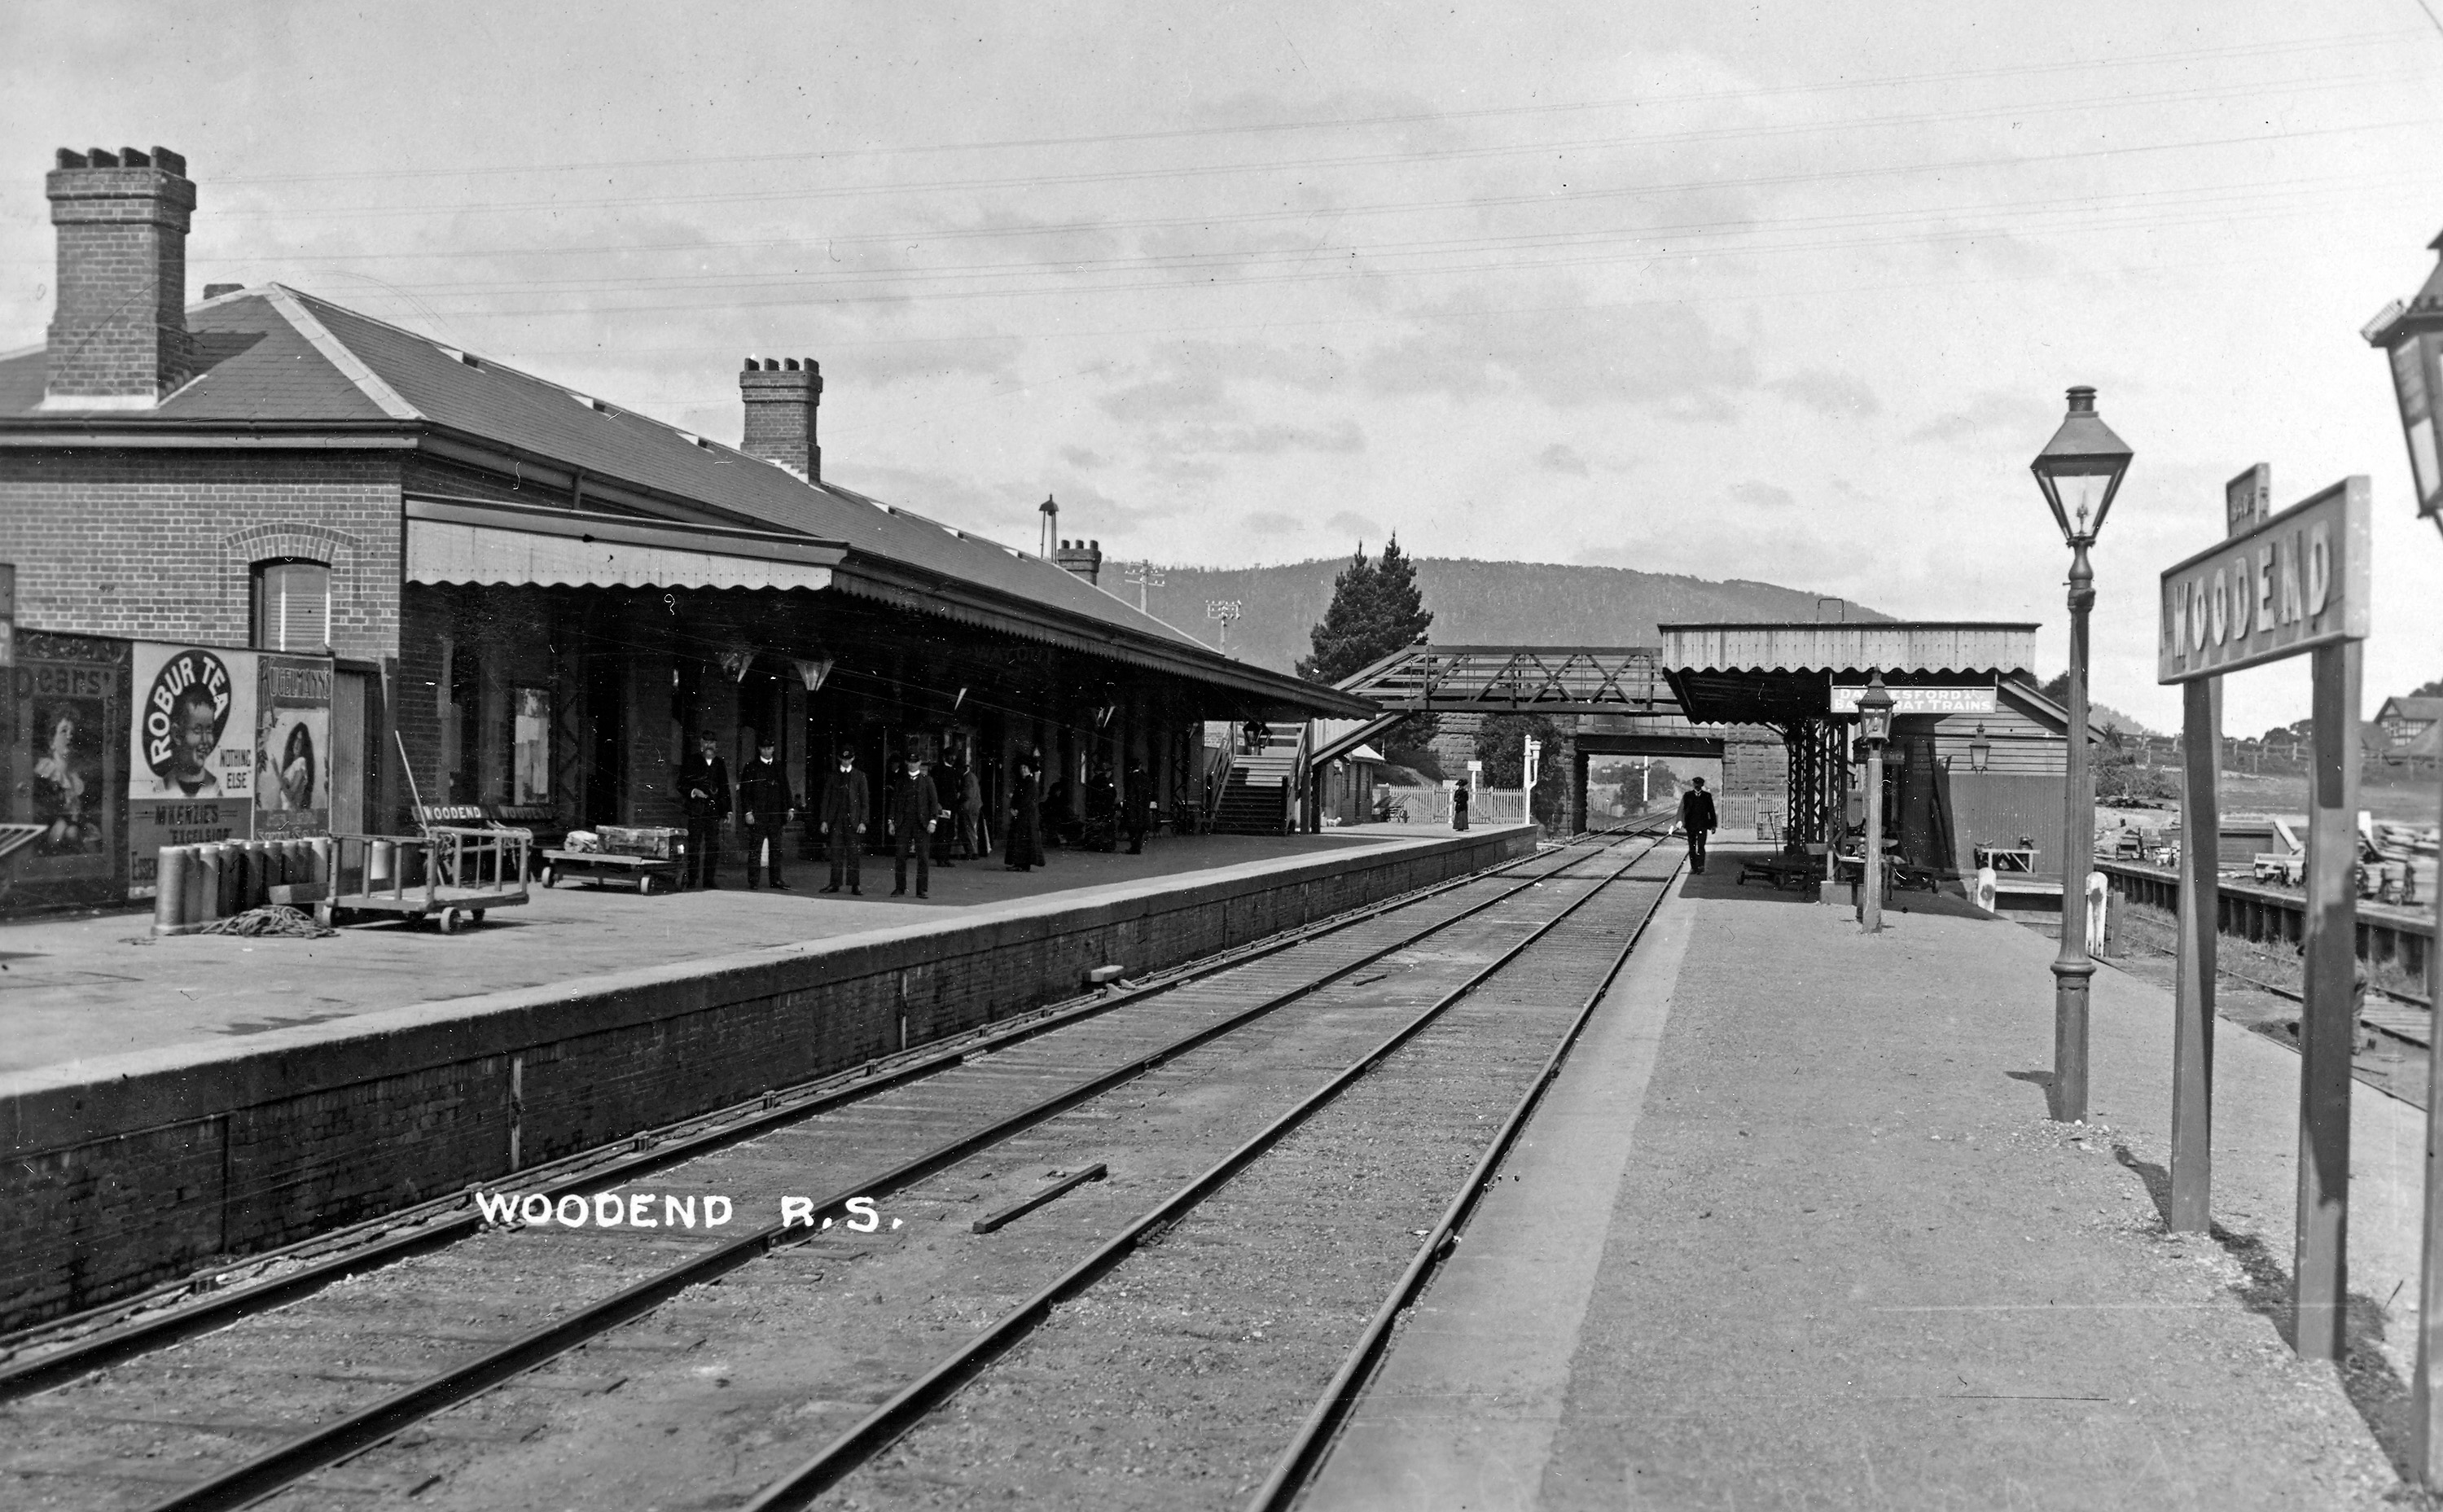
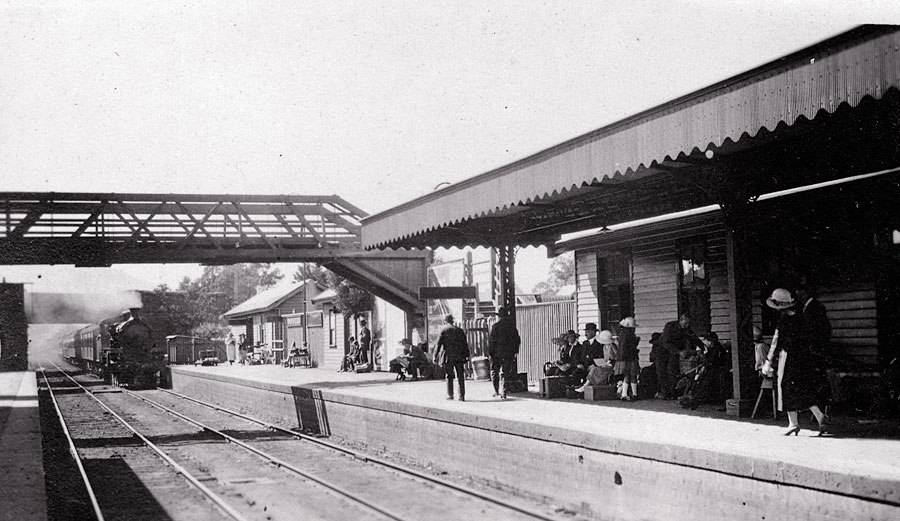
ABOVE: This photo, looking towards Melbourne, was taken prior to any interlocking signals being provided which happened in 1891. Like the previous photo, the presence of a facing turnout from the down line into what would become the up platform is notable and indicates that this photo was taken when Woodend was the terminus. Once through double line working was instituted, facing points on double line was, in accordance with British practice, strictly forbidden. (photo courtesy State Library Victoria)
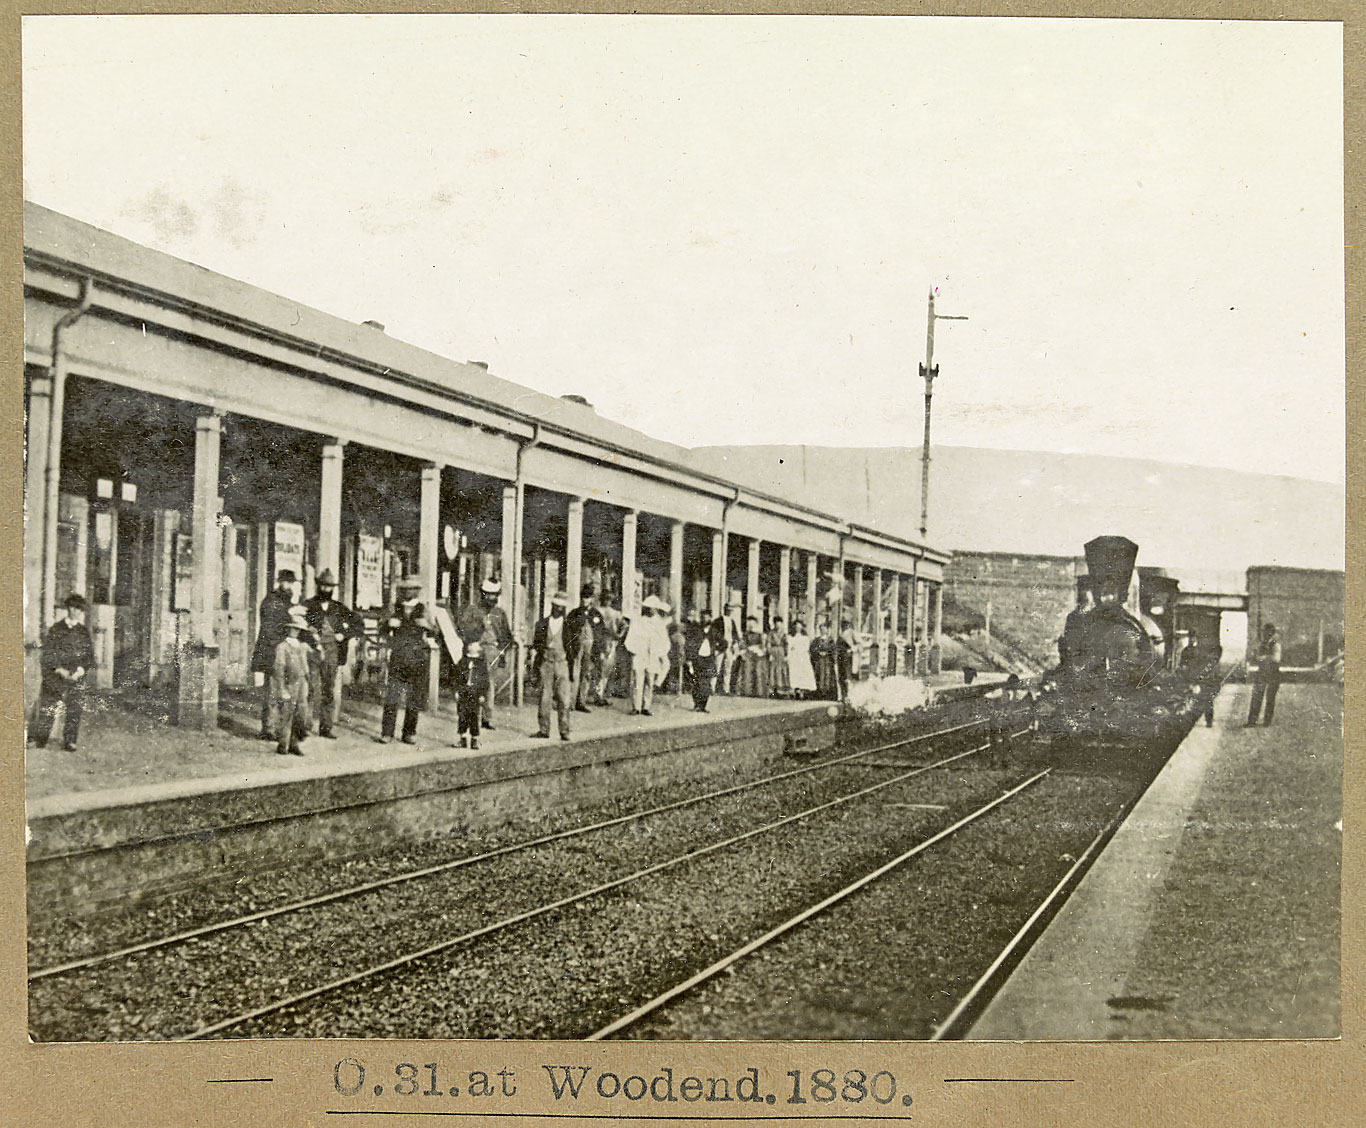
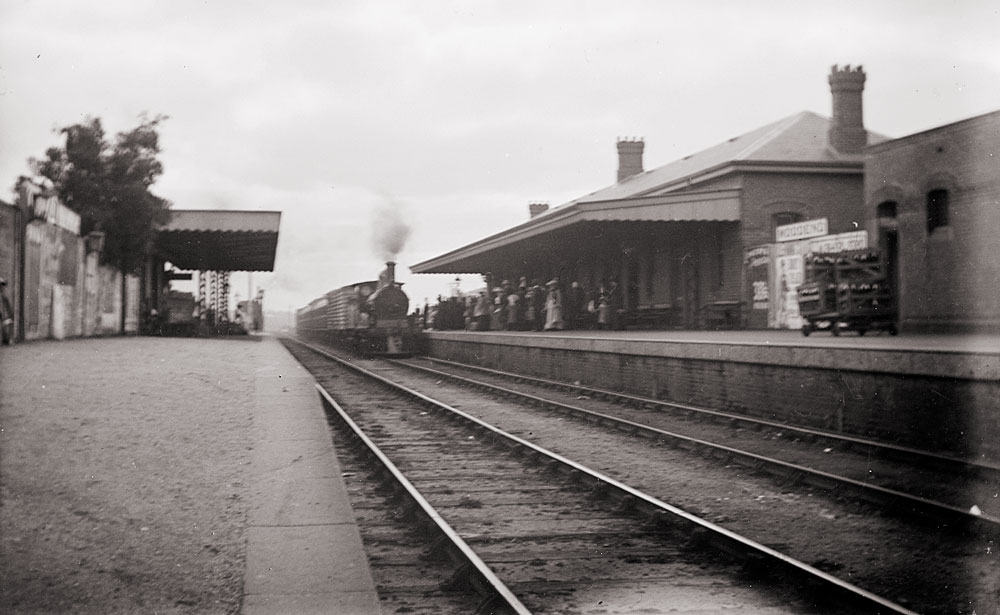
ABOVE: A down train arrives at Woodend. The position of the signal indicates that it has been put to the stop position for the down train. The group of people on the up platform and the position of the up signal appears to show that an up train is about to arrive with the up signal at "all right" which was indicated by the arm disappearing into the mast.
ABOVE: Two locos occupy the up platform. The distant loco may have just returned from banking an up train out of Woodend.
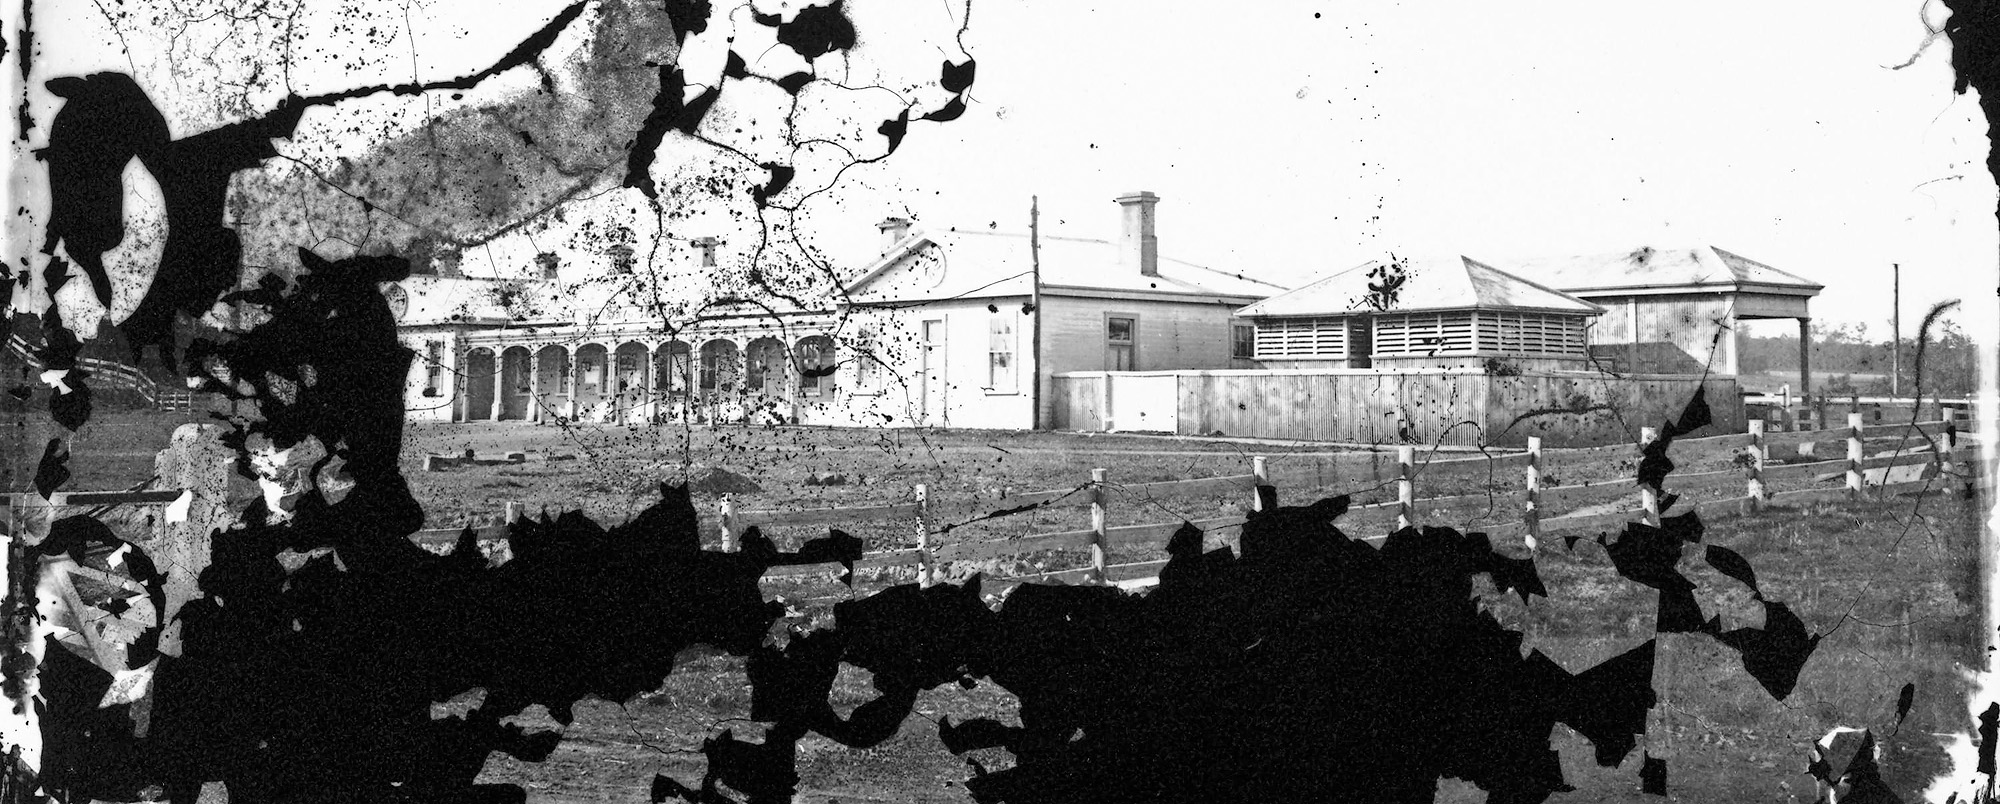
ABOVE: A rear view of the original station which burnt down in Dec 1897. (National Gallery of Victoria collection)
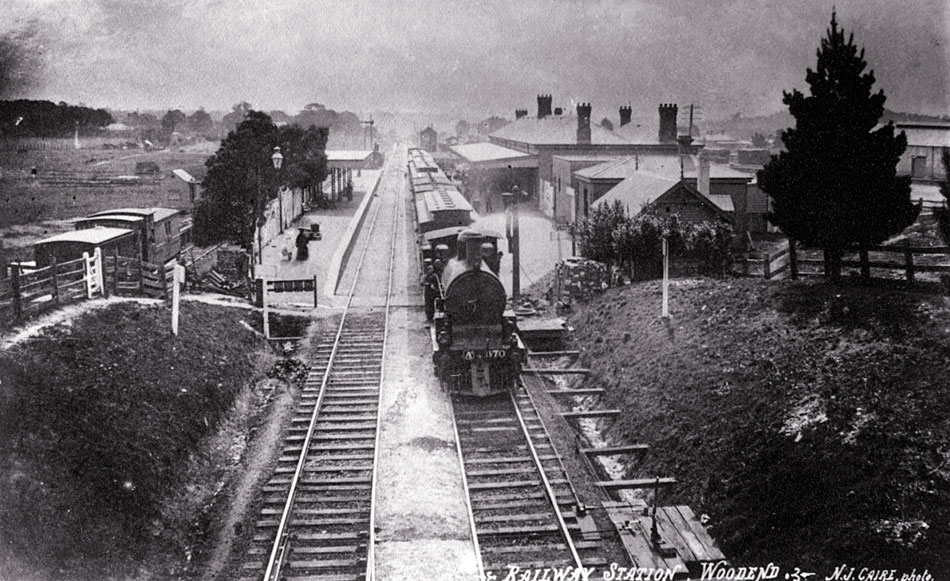 ABOVE: Aa 570 on an up Melbourne pass. pauses at Woodend. circa 1900.
Note the ramped ends of the platform, the absence of the footbridge and the public foot crossing. Later photos show the public foot crossing gone, replaced by the footbridge, (footbridge built 1928)
BELOW: A similiar view taken about the same time as the photo above.
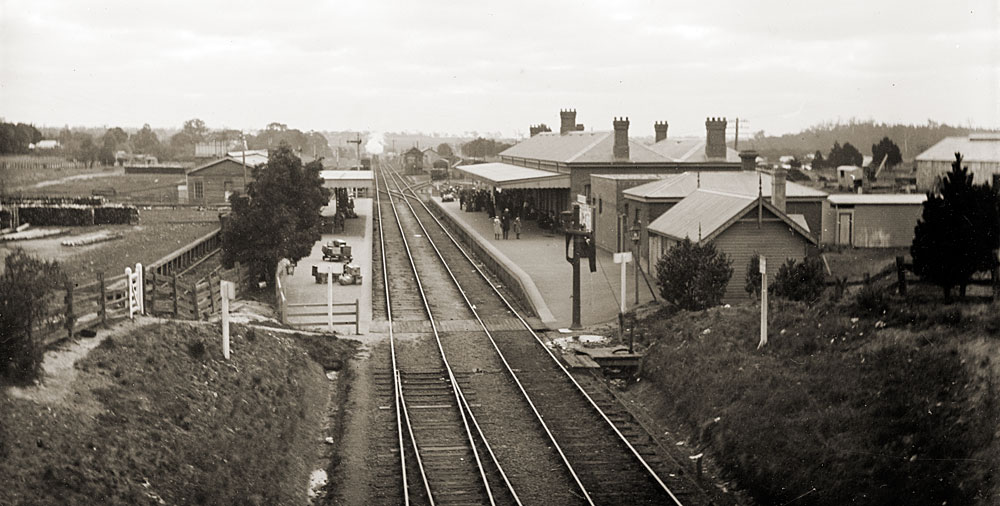
The comparison photo (BELOW) was taken in 2006
ABOVE: An up pass arrives at Woodend about 1910, prior to the footbridge being built in 1928.
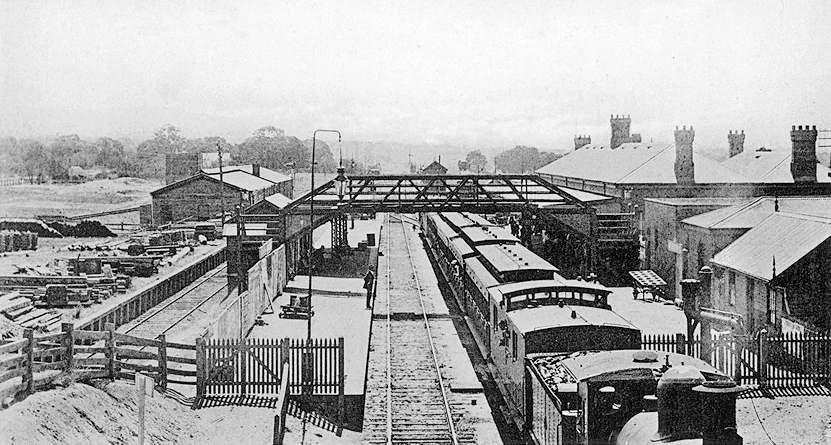
ABOVE: Looking north from the roadbridge, Woodend circa 1930. Does anyone know when the loco shed was demolished?
(Postcard courtesy Chris Wurr collection)
ABOVE: An undated view looking toward Melbourne. On the left hand side at track level is the Rest Hut and the Gangers store sheds (Image courtesy the University of Newcastle)
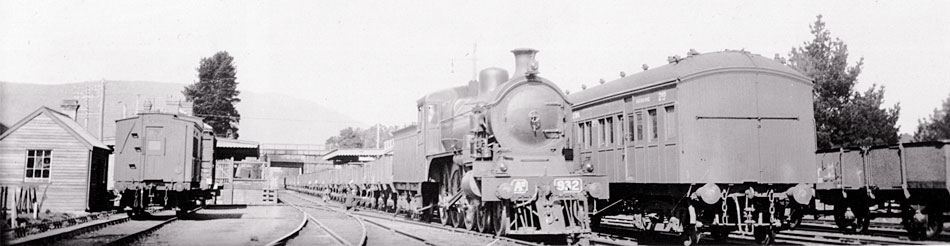
ABOVE: A down goods headed by A2 932 at Woodend. The BPL on the right is probably a car for the Daylesford service and the car on the left is an XYZ combination guards van, booking office, passenger car, most likely for the Redesdale service. Photo date circa 1930's
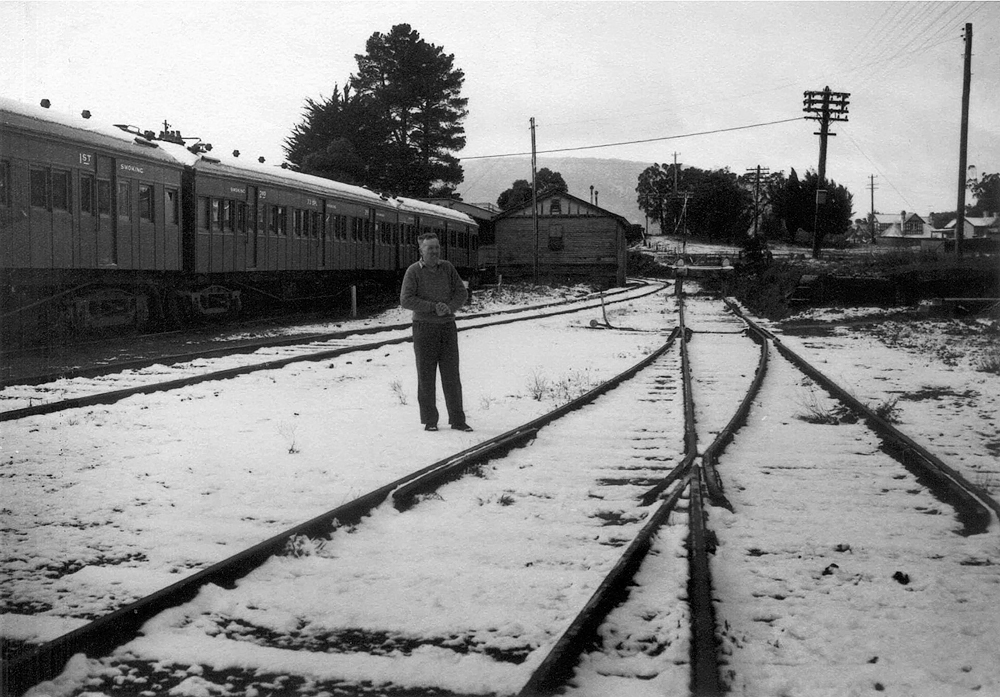
ABOVE: Looking towards Melbourne from the west side of the mainline. This Sunday winter scene, featuring Driver-in-charge Ocker Creelman, appeared on the front page of the Age sometime in the early 1960s.
(Information courtesy of Marlene French, [nee Creelman])
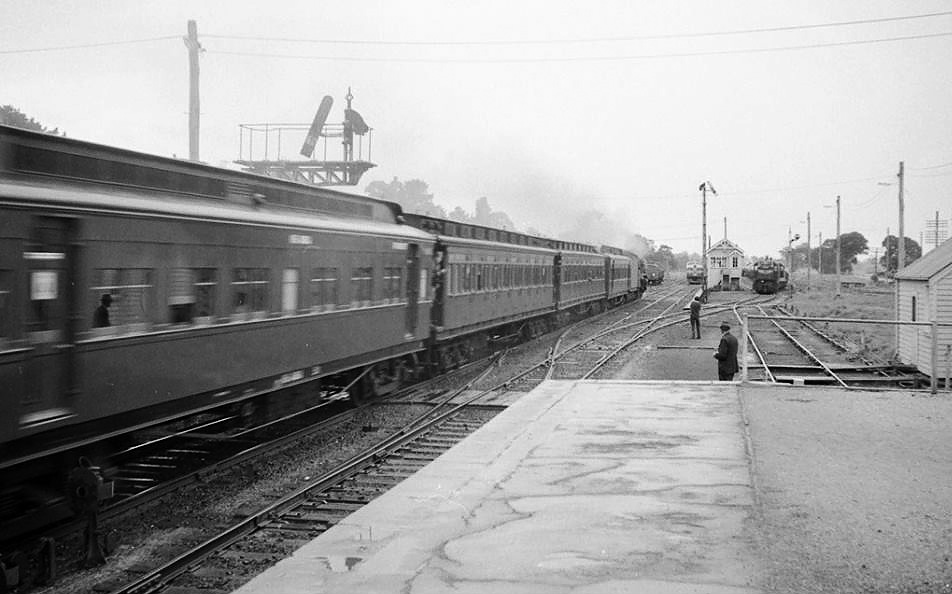
ABOVE: What looks like a down enthusiast special runs through Woodend whilst two up trains await departure.
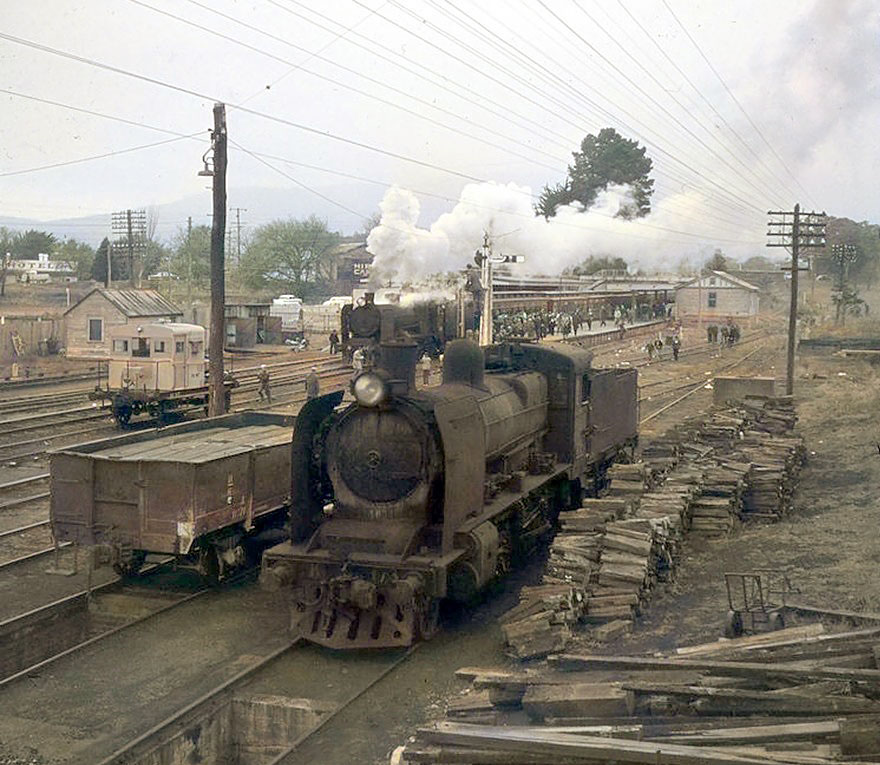
ABOVE: A fine morning in Woodend in 1961 finds A2 874 next to the coal stage, facing Melbourne. (photo courtesy late Alan Wilson)
BELOW: The same view in 2011
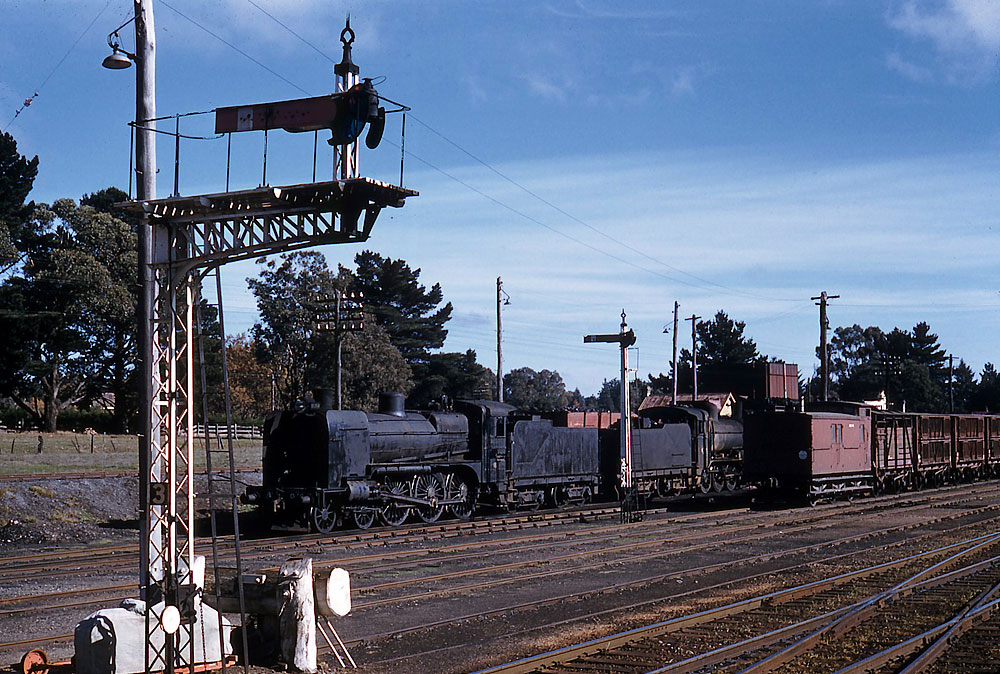
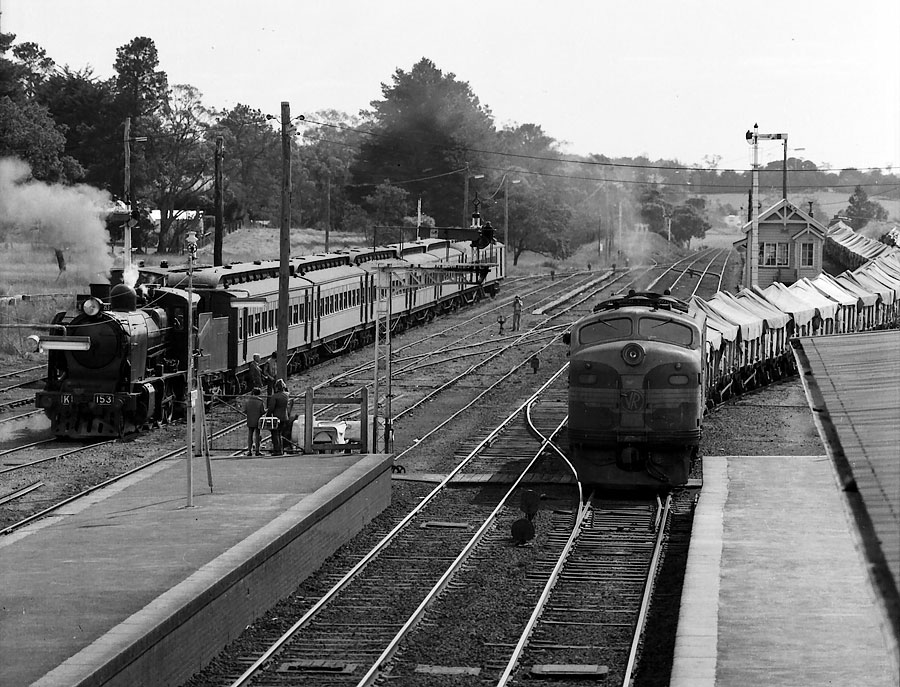
ABOVE: K 175 at Woodend loco as N 410 hauls a down enthusiast special to Maldon. May 22 1965. (photo courtesy John Phillips)
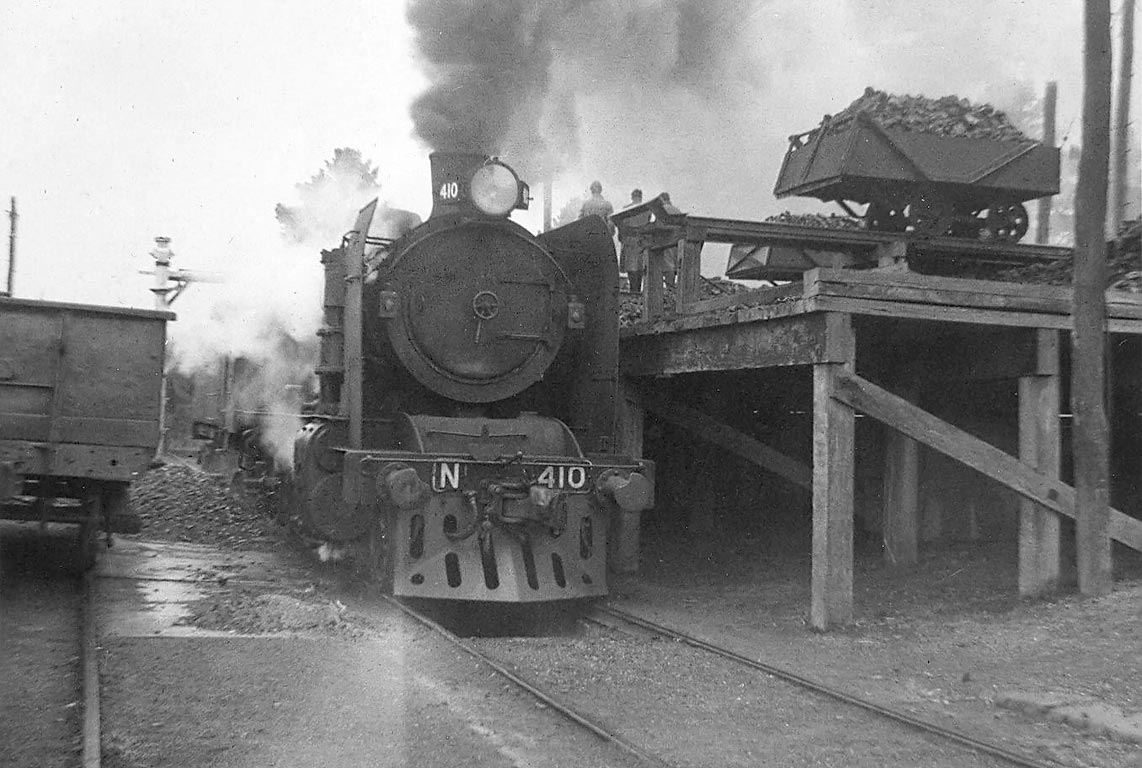
ABOVE: N 410 at the coal stage at Woodend, circa 1965. (photographer unknown)
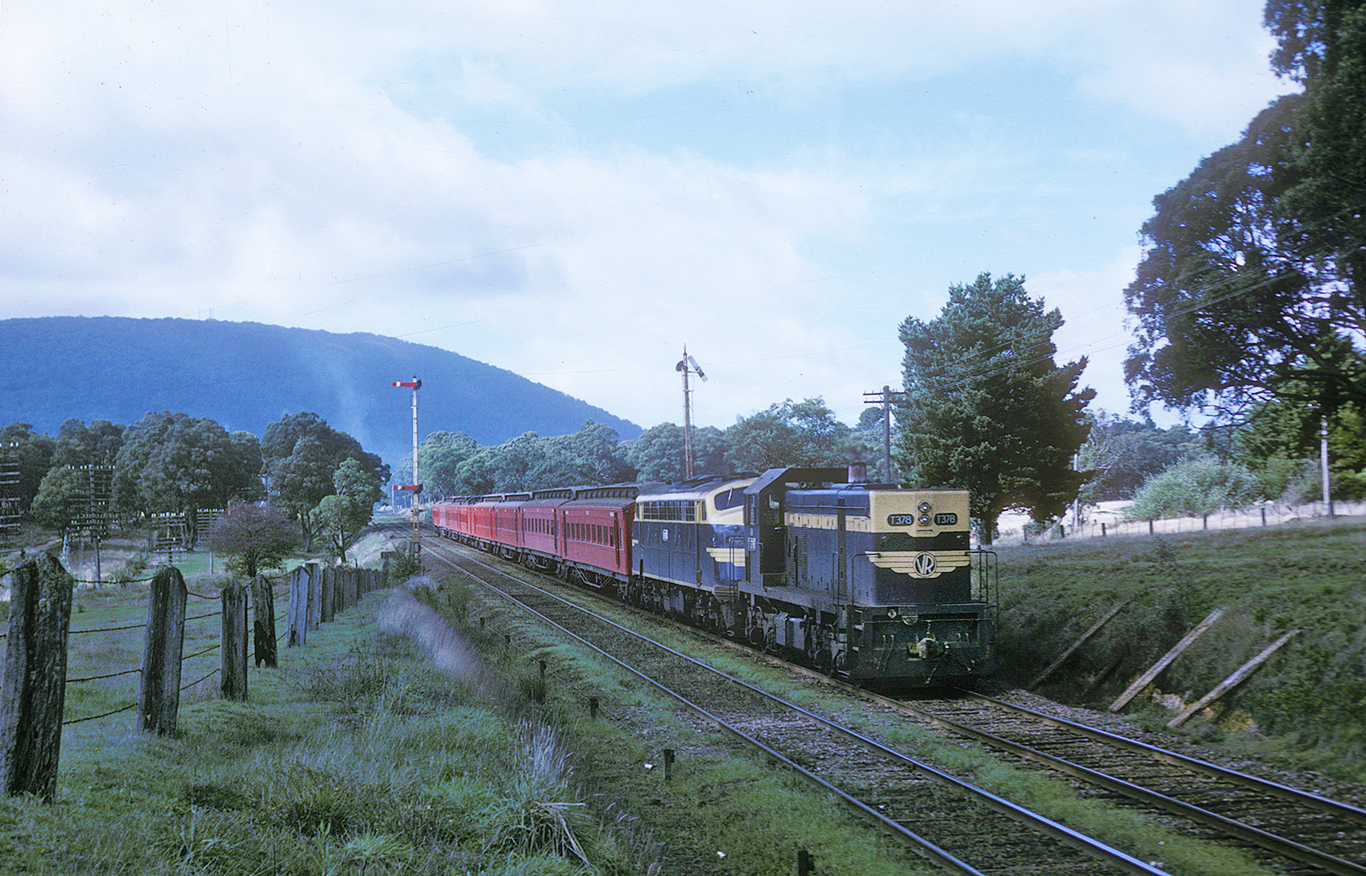
ABOVE: T 378 and a B class arrive Woodend in May 1970. This was a regular Sunday working. At Woodend the T class would be detached and the B would depart with the front cars for Bendigo, the T would then attach to the remaining cars and depart for Daylesford. The lack of any air conditioned is unusual and note the greenery along the up line, wheat spilled from loaded up trains taking seed. (photo courtesy Tony Smith)
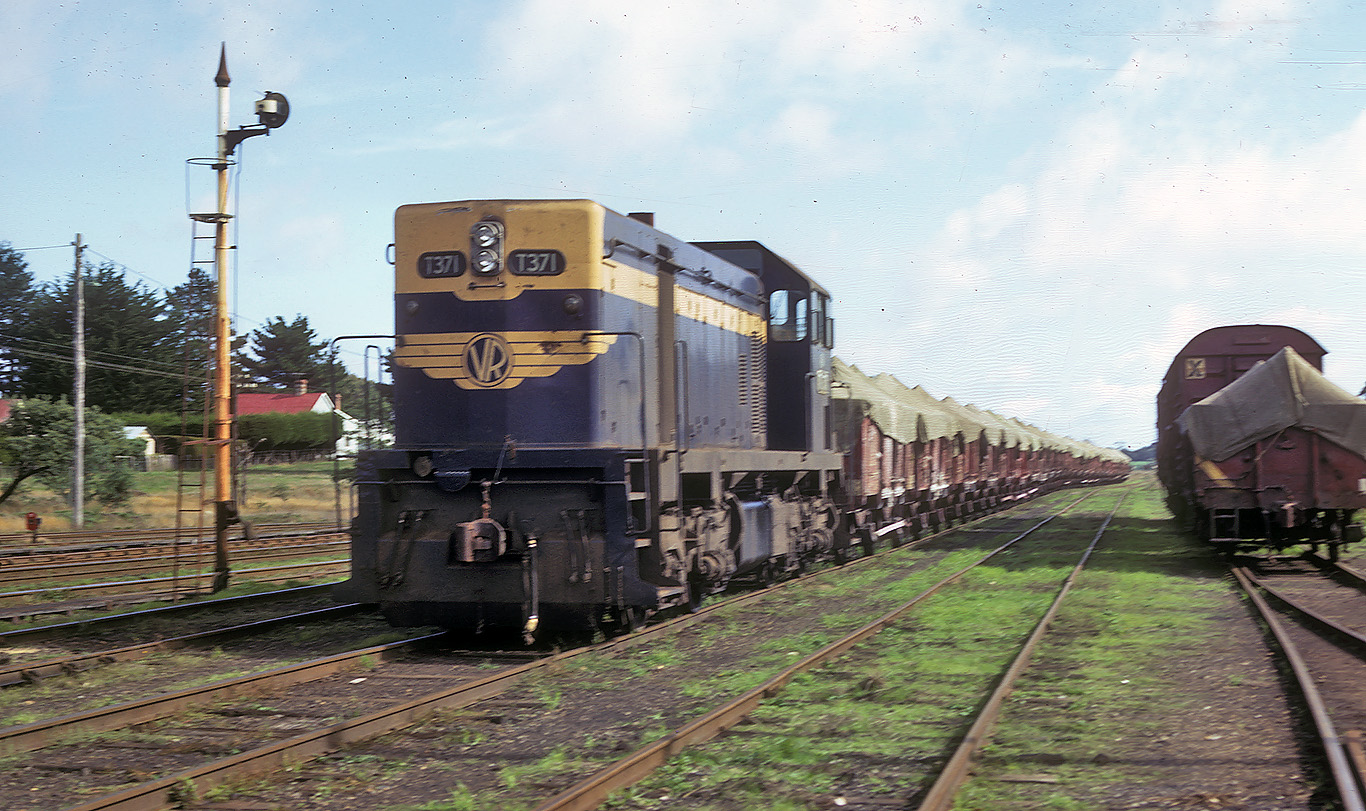
ABOVE: An up goods in the sidings on the up side of the mainline May 1970, (photo courtesy Tony Smith)
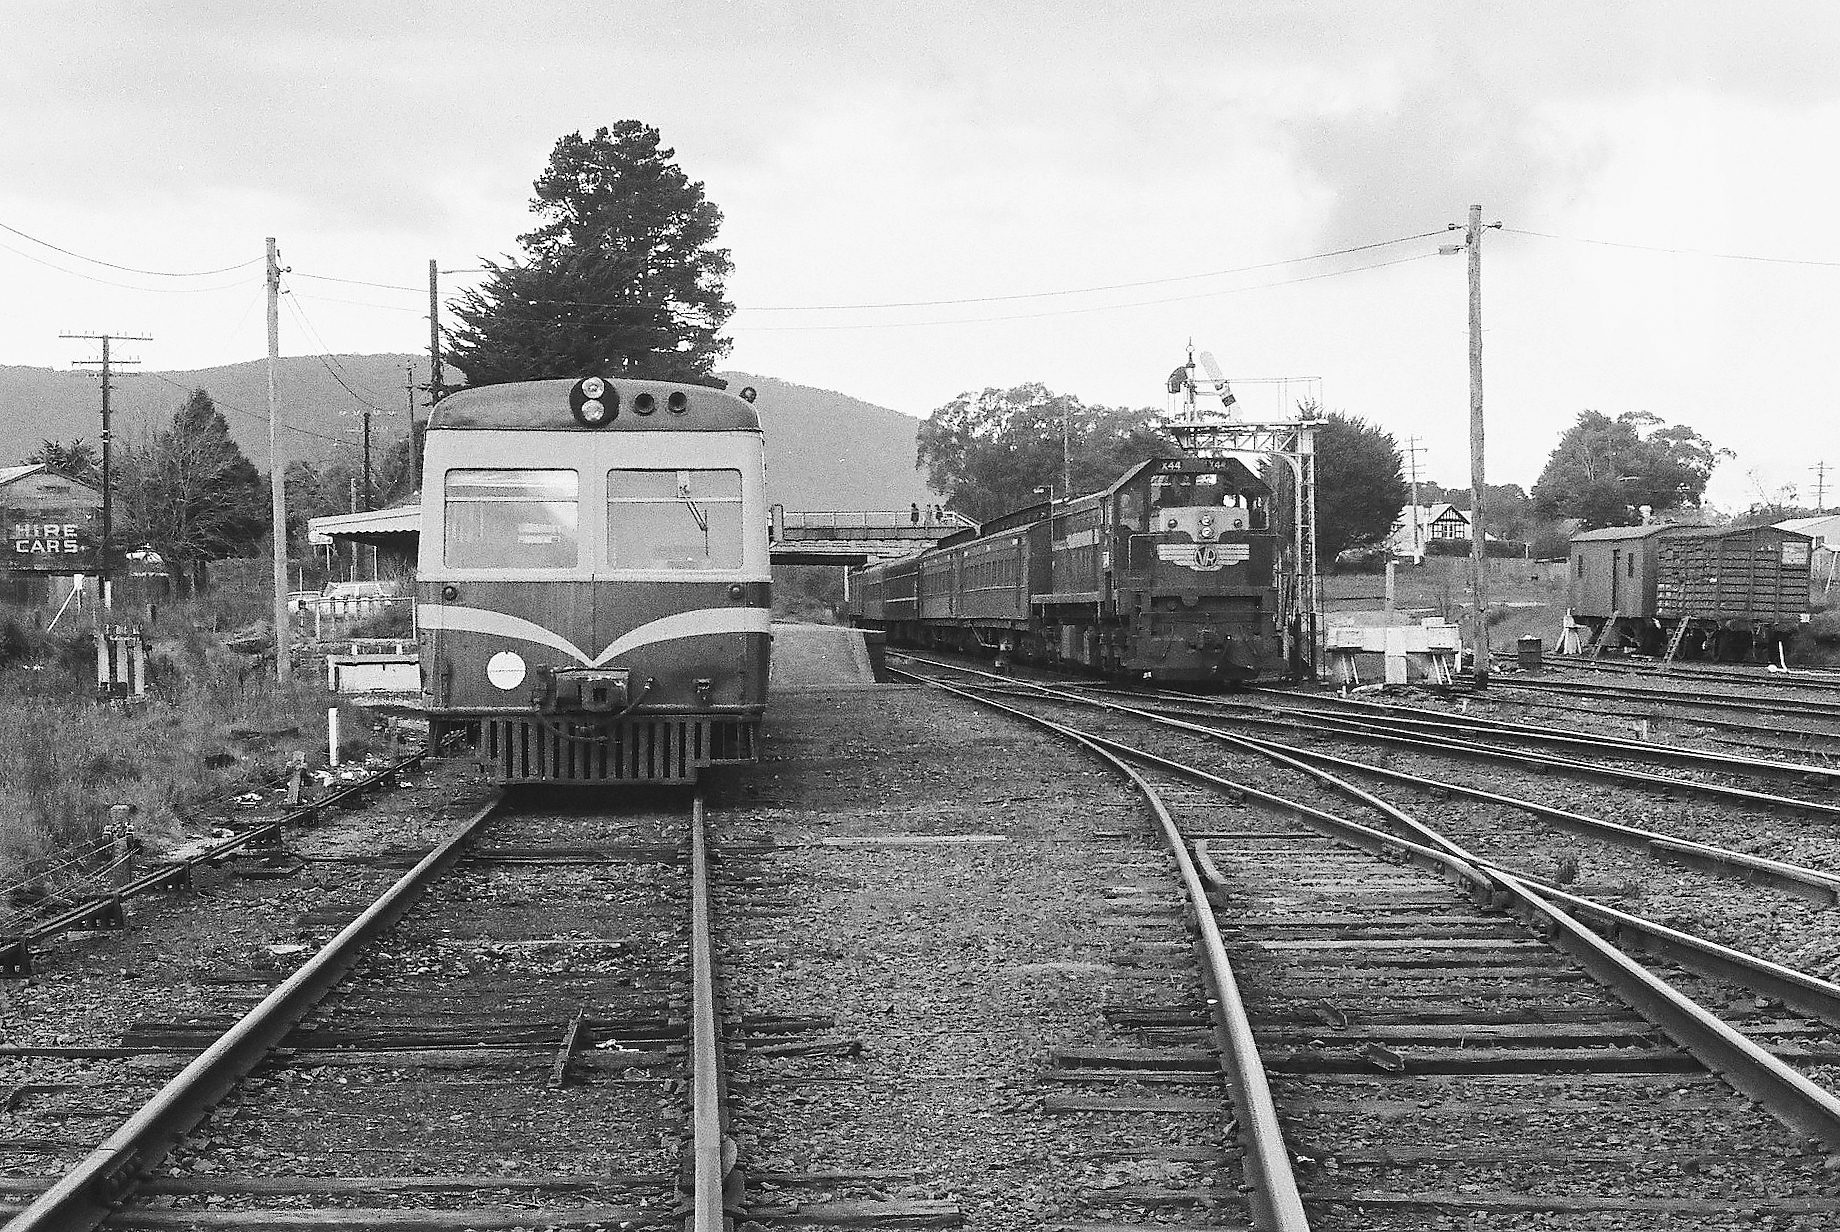
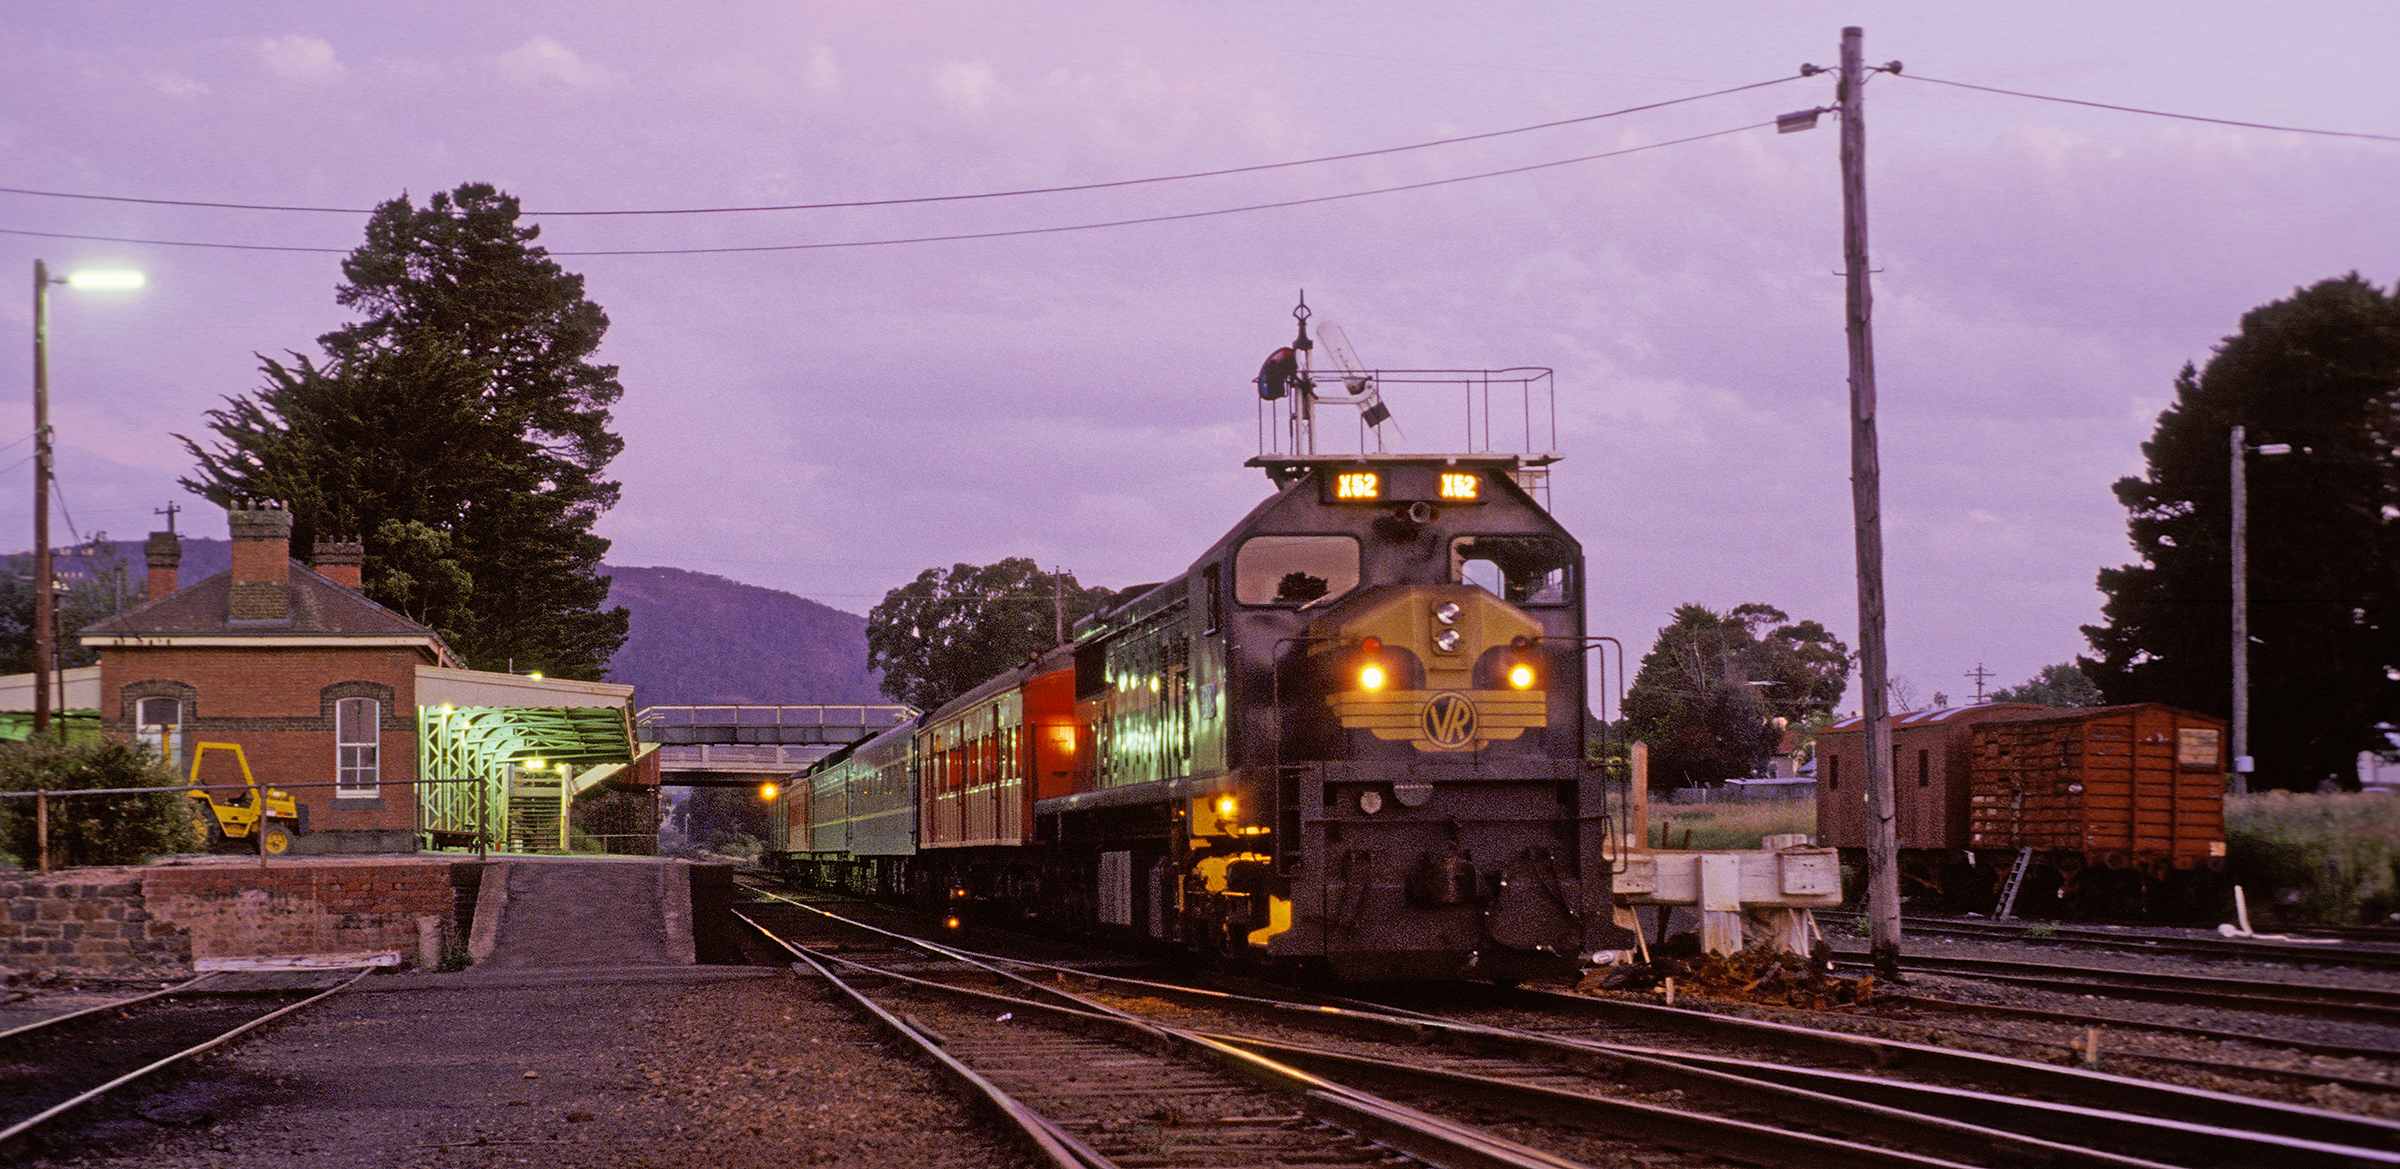
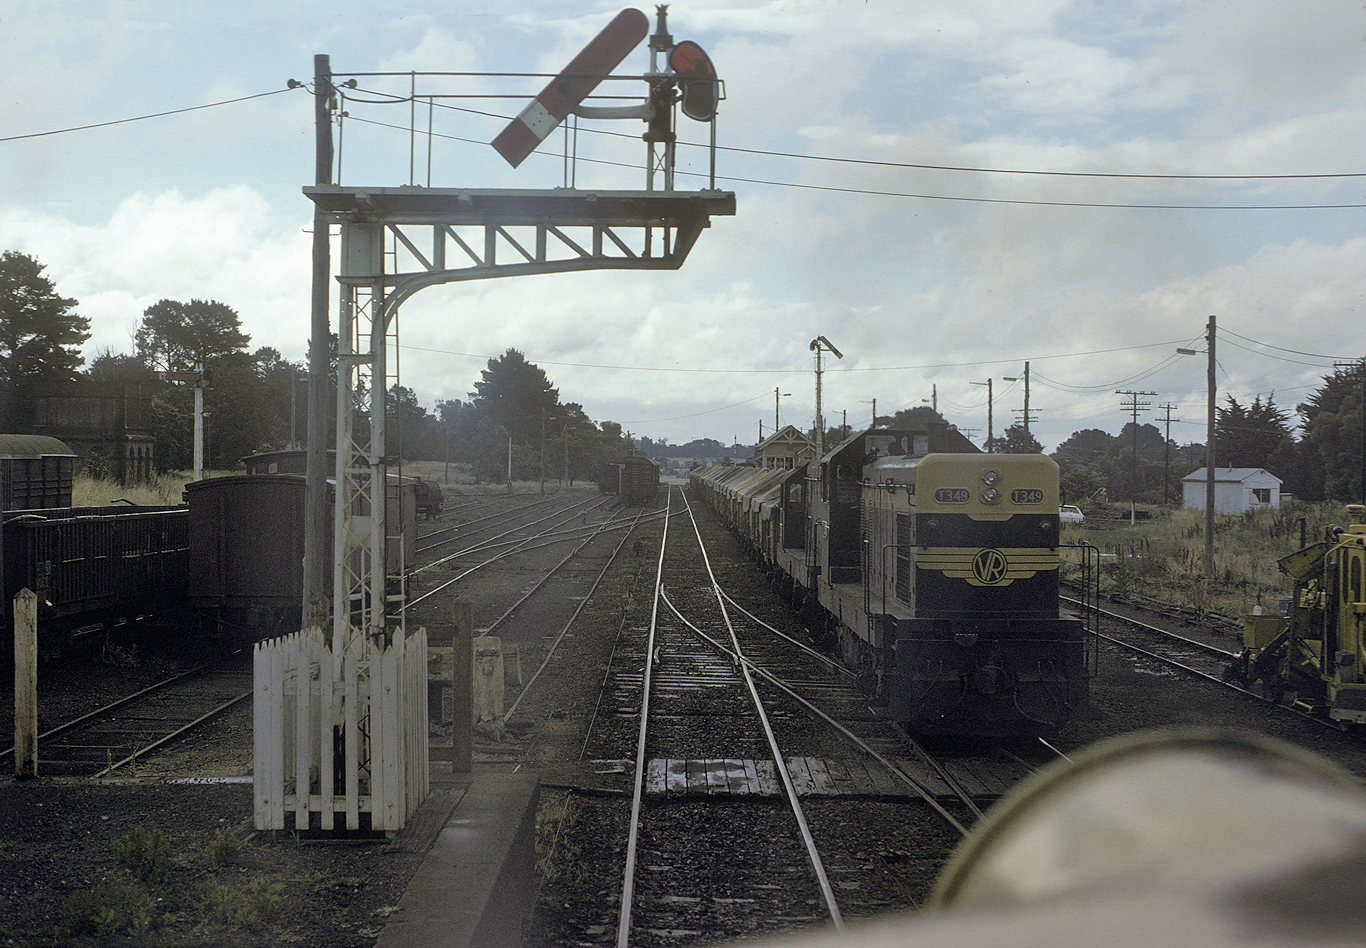
ABOVE: X 44 departs Woodend on the 1:40pm Melbourne to Bendigo pass, 280 Walker RM 84 will dock up to the platform and run the 4:07pm service to Melbourne. June 17 1978, photo courtesy David Langley.
ABOVE: PAPER TRAINS ON THE MAINLINE Paper trains were very early morning goods trains, ex Melbourne which conveyed that morning’s Age and Sun newspapers to country destinations. None of them did shunts en route, but the only fast one was the Bendigo which was a B class loco-hauled 60 mph job. By the early 1970s the numbers of paper trains had been whittled down to a small handful, viz: Bendigo, Kyneton, Ballarat, Warragul and Korumburra.
South Dynon Depot Train Crews ran them all out of Melbourne either to destination or change-over. In the case of the two on the Mainline, the Bendigo departed first at 1.30am as it had 100 miles to cover. This train ran express from Melbourne to Bendigo, with the only stop being at Castlemaine. It discharged newspapers from Malmsbury to Bendigo and this was achieved by slowing from 60 mph down to about 20 at all the stations. The Guard would throw a bundle or two of papers out the van door as the train passed the office or waiting shelter non-stop. Usually the local newsagent was waiting on the platform to pick them up ---- or at least to see whereabouts in the bushes, the bundles had lobbed! Chewton was the worst place to try to locate in the middle of a dark raining or foggy/frosty night. Despite not being a passenger train, the Bendigo job was nevertheless a high pressure job as will be explained further on. The Train Crew were under the pump to the same extent that running a passenger train would dictate. So our B class-hauled 60 mph train of very small loading would power downhill out of the Elphinstone tunnel and commence the descent of the 1 in 50 grade. The dynamic brake on a B was at its most efficient at 22 mph, so at 60 it was pretty-much useless. And being a small consist train, air braking was minimal too. This Bendigo paper train job was the only South Dynon job rostered right through to Bendigo, so track familiarity proportionally dropped off, the further from Melbourne, the crew ran. My regular Goods Roster Driver remembered that Chewton was just past the second overhead bridge from the tunnel, but he could never remember if that was also counting the bridge just a hundred yards or so out of the tunnel, in which case Chewton was after the third bridge! B class locos in those days, mostly still had their original globe headlights who’s beam comprised a feeble ring of light surrounding a big round black hole. The fact that the penny-pinching VR would not have the platform lights on anywhere in the middle of the night, made locating Chewton all that more difficult. The platform hiding a mere 400 yards beyond the overbridge didn’t help matters.
Castlemaine was the only stop and this was to unhook the louvre van which trailed behind the brakevan. The paper train would pull up in the Down platform and the Guard would pull the pin, jump into his van, give a green light and away the train would go again. The Castlemaine rail tractor would drop on to rear of the louvre and once the papers were emptied, would shunt it to the goods yard. This haste led to an incident one morning. In the rush to get all the foregoing done in the absolute bare minimum of time, the tractor hooked onto the louvre and in doing so, probably dropped the auto coupler locking pin behind the Guard’s van again. The Guard, itching to get going, gave a green light and the engine crew took off with great haste ----- with the louvre AND tractor dangling off the back! Fortunately Castlemaine B box was at the Down end and the Signalman was phoned to stop the train. He threw his signals back and the train stopped and they had a second go at uncoupling!
Next drop-off was Harcourt and one night when I was the rostered Driver, we were getting somewhere near there. There were patches of fog and I knew Harcourt was just around one of these curves. I was looking hard to spot Harcourt’s Down Distant as a clue. As pure luck would have it, I just happened to glance downwards out the side window and I spotted the Distant ------ lying horizontally in the drain right at the shoulder of the ballast. Harcourt had been dis-established as a Block Station only a week or so beforehand and the signals had already been pulled down! Upon arrival at Bendigo, the train would do a quick shunt and the crew would changeover onto a T class loco and head off light engine straight back to Kyneton.
Meanwhile, another Dynon crew had run the following 2am Kyneton paper train. This was always a 40 mph T class job which stopped everywhere from Sunbury to Kyneton to discharge papers. On arrival at Woodend, this train was shunted back from the Down line into the Up platform and stopped with the brakevan opposite the brick building towards the Up end. This building was the footwarmer boiling plant where the old metal footwarmers had been bubbling away all night in a big vat of water. The footwarmers were bundled into the brakevan and away the train would go to Kyneton. Carlsruhe didn’t get newspapers. At Kyneton the newspapers and footwarmers were emptied out of the van and the train shunted out. The T loco then dropped onto the cars for the 6.45am Up commuter train. A brake test was done by the crew and it was then docked up into the Up platform.
Upon arrival of the T class light engine from Bendigo, the Kyneton paper train crew relieved it. The Bendigo train crew then got onto the docked up 6.45 and ran that back to Spencer Street. The Kyneton paper train blokes would put the T off the ex Bendigo L/E onto the cars, did “brakes” docked up and ran the 7.12 Up pass to Spencer Street. If the L/E from Bendigo was delayed getting into Kyneton, then the pressure was really right on. On arrival at Spencer Street, the locos of both Ups were cut off and taken “over the pit” at South Dynon by their incoming crews after an exhausting nightshift. The other paper trains on the South Dynon roster were not high pressure to any degree comparable to the Mainline two. Aug 7 1974 (photo courtesy Chris Wurr)
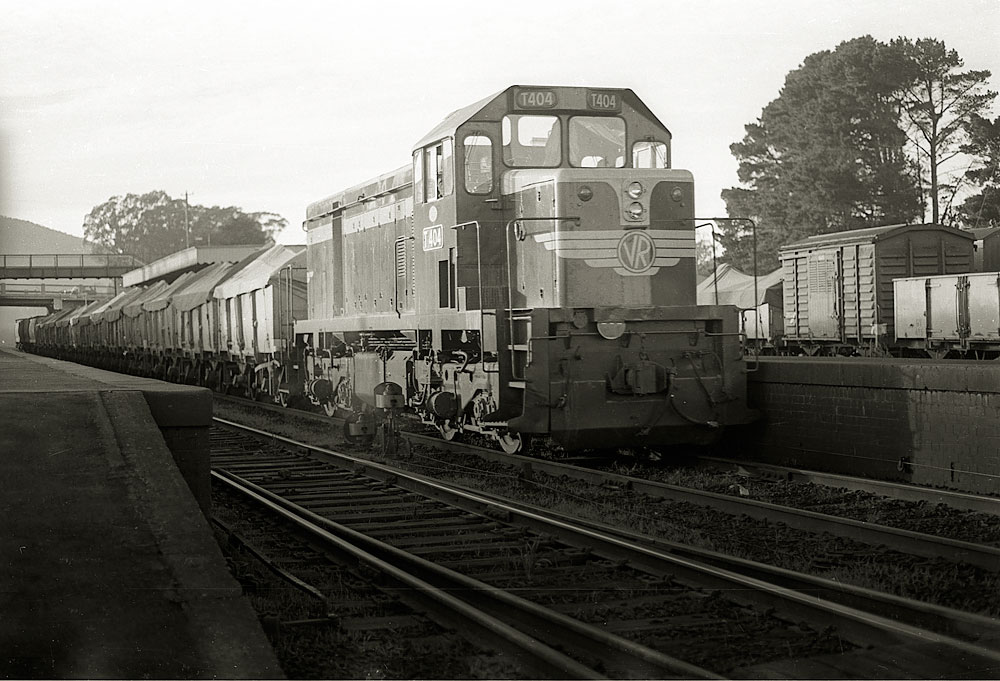
ABOVE & BELOW:T 404 arrives Woodend on an early morning Bendigo bound goods, March 28 1978.
ABOVE: From the footbridge looking north, 1974. (photo courtesy Peter J. Vincent).
ABOVE: The Vintage train to Woodend waits in the down side yard at Woodend as a wheat train departs the up side yard, mid 1970's (photo courtesy Chris Wurr)
ABOVE: The working day is over for the crew. Y121 and its train have been stabled, after returning with a goods from Daylesford. February 2, 1978.(Photo courtesy Geoff Winkler).

ABOVE: Saturday, June 24, 1978, was a very dank and miserable Winters day. This was the occasion of the running of the last train to Daylesford. In this photo, following the undertaking of engine requirements, K 153 prepares to rejoin it's train for the final trip out along the branch.(Photo courtesy Geoff Winkler).
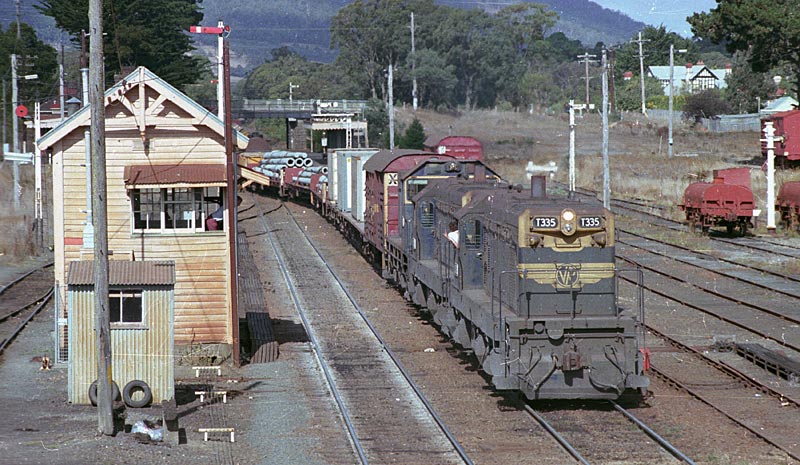
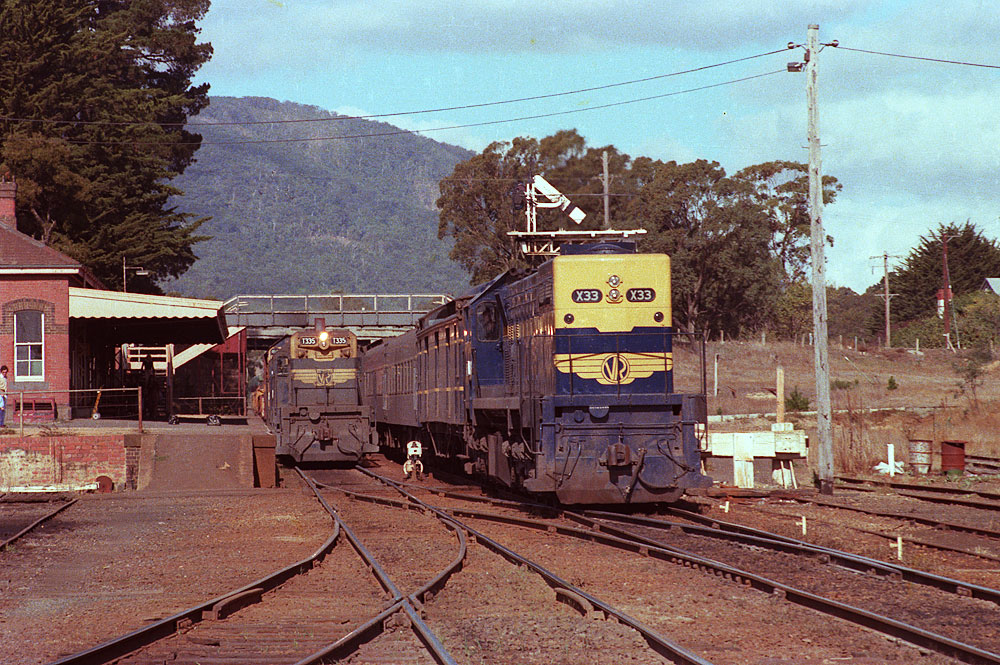
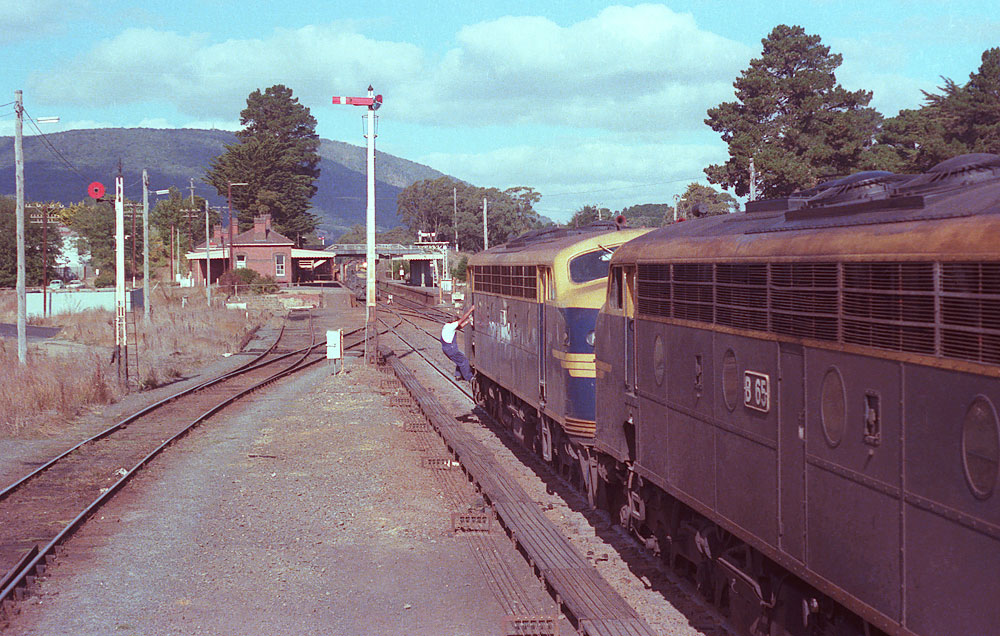
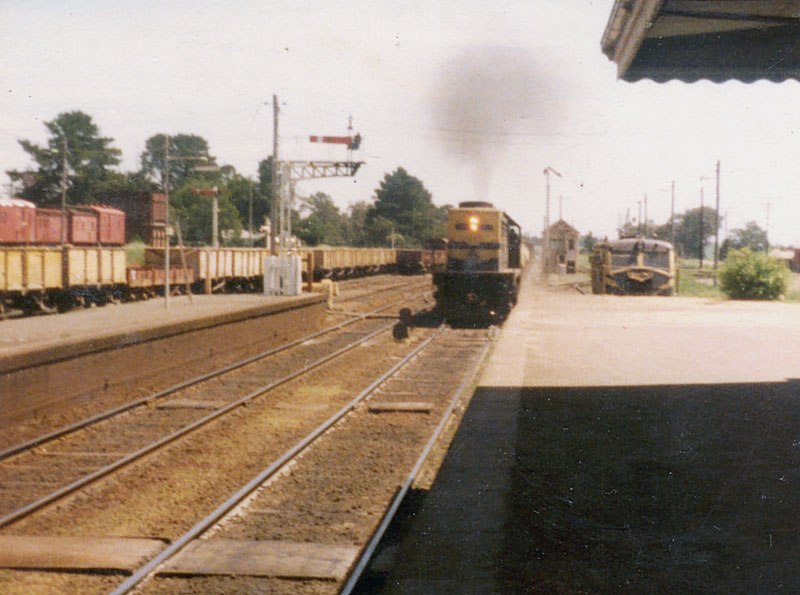
ABOVE: A down Bendigo goods with T 335-T 336-Y 160 sets back onto the up line at Woodend to allow a down pass to run through it. April 5 1980. BELOW: X 33 on the 1.40pm down Bendigo pass. departs Woodend.
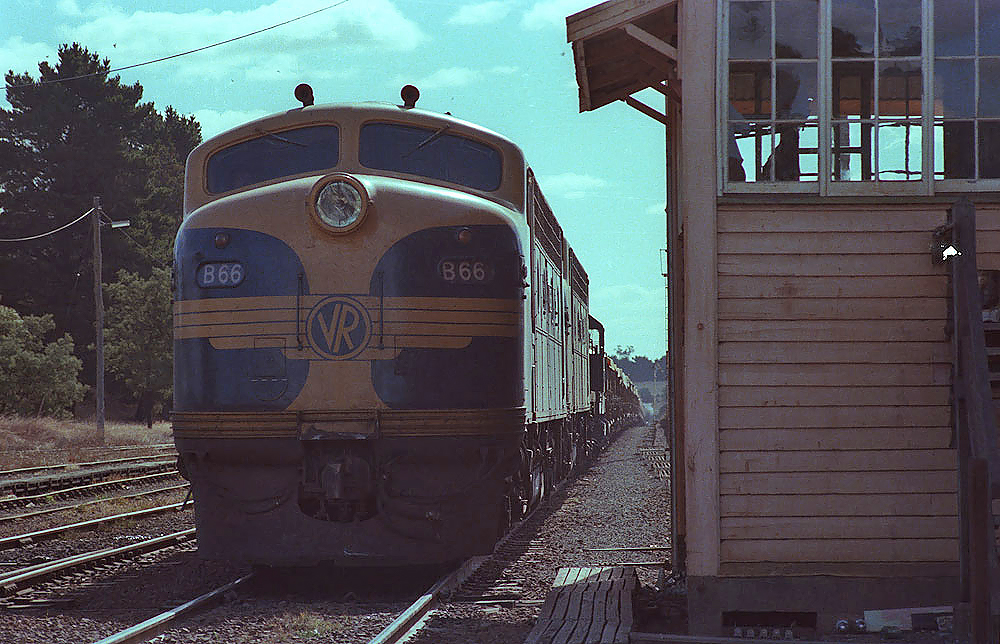
ABOVE & BELOW: Meanwhile B 66 - B 65 - T 408 - T 345 arrive Woodend on an up wheat train and are brought to a stand
as the down goods is still blocking the up line.
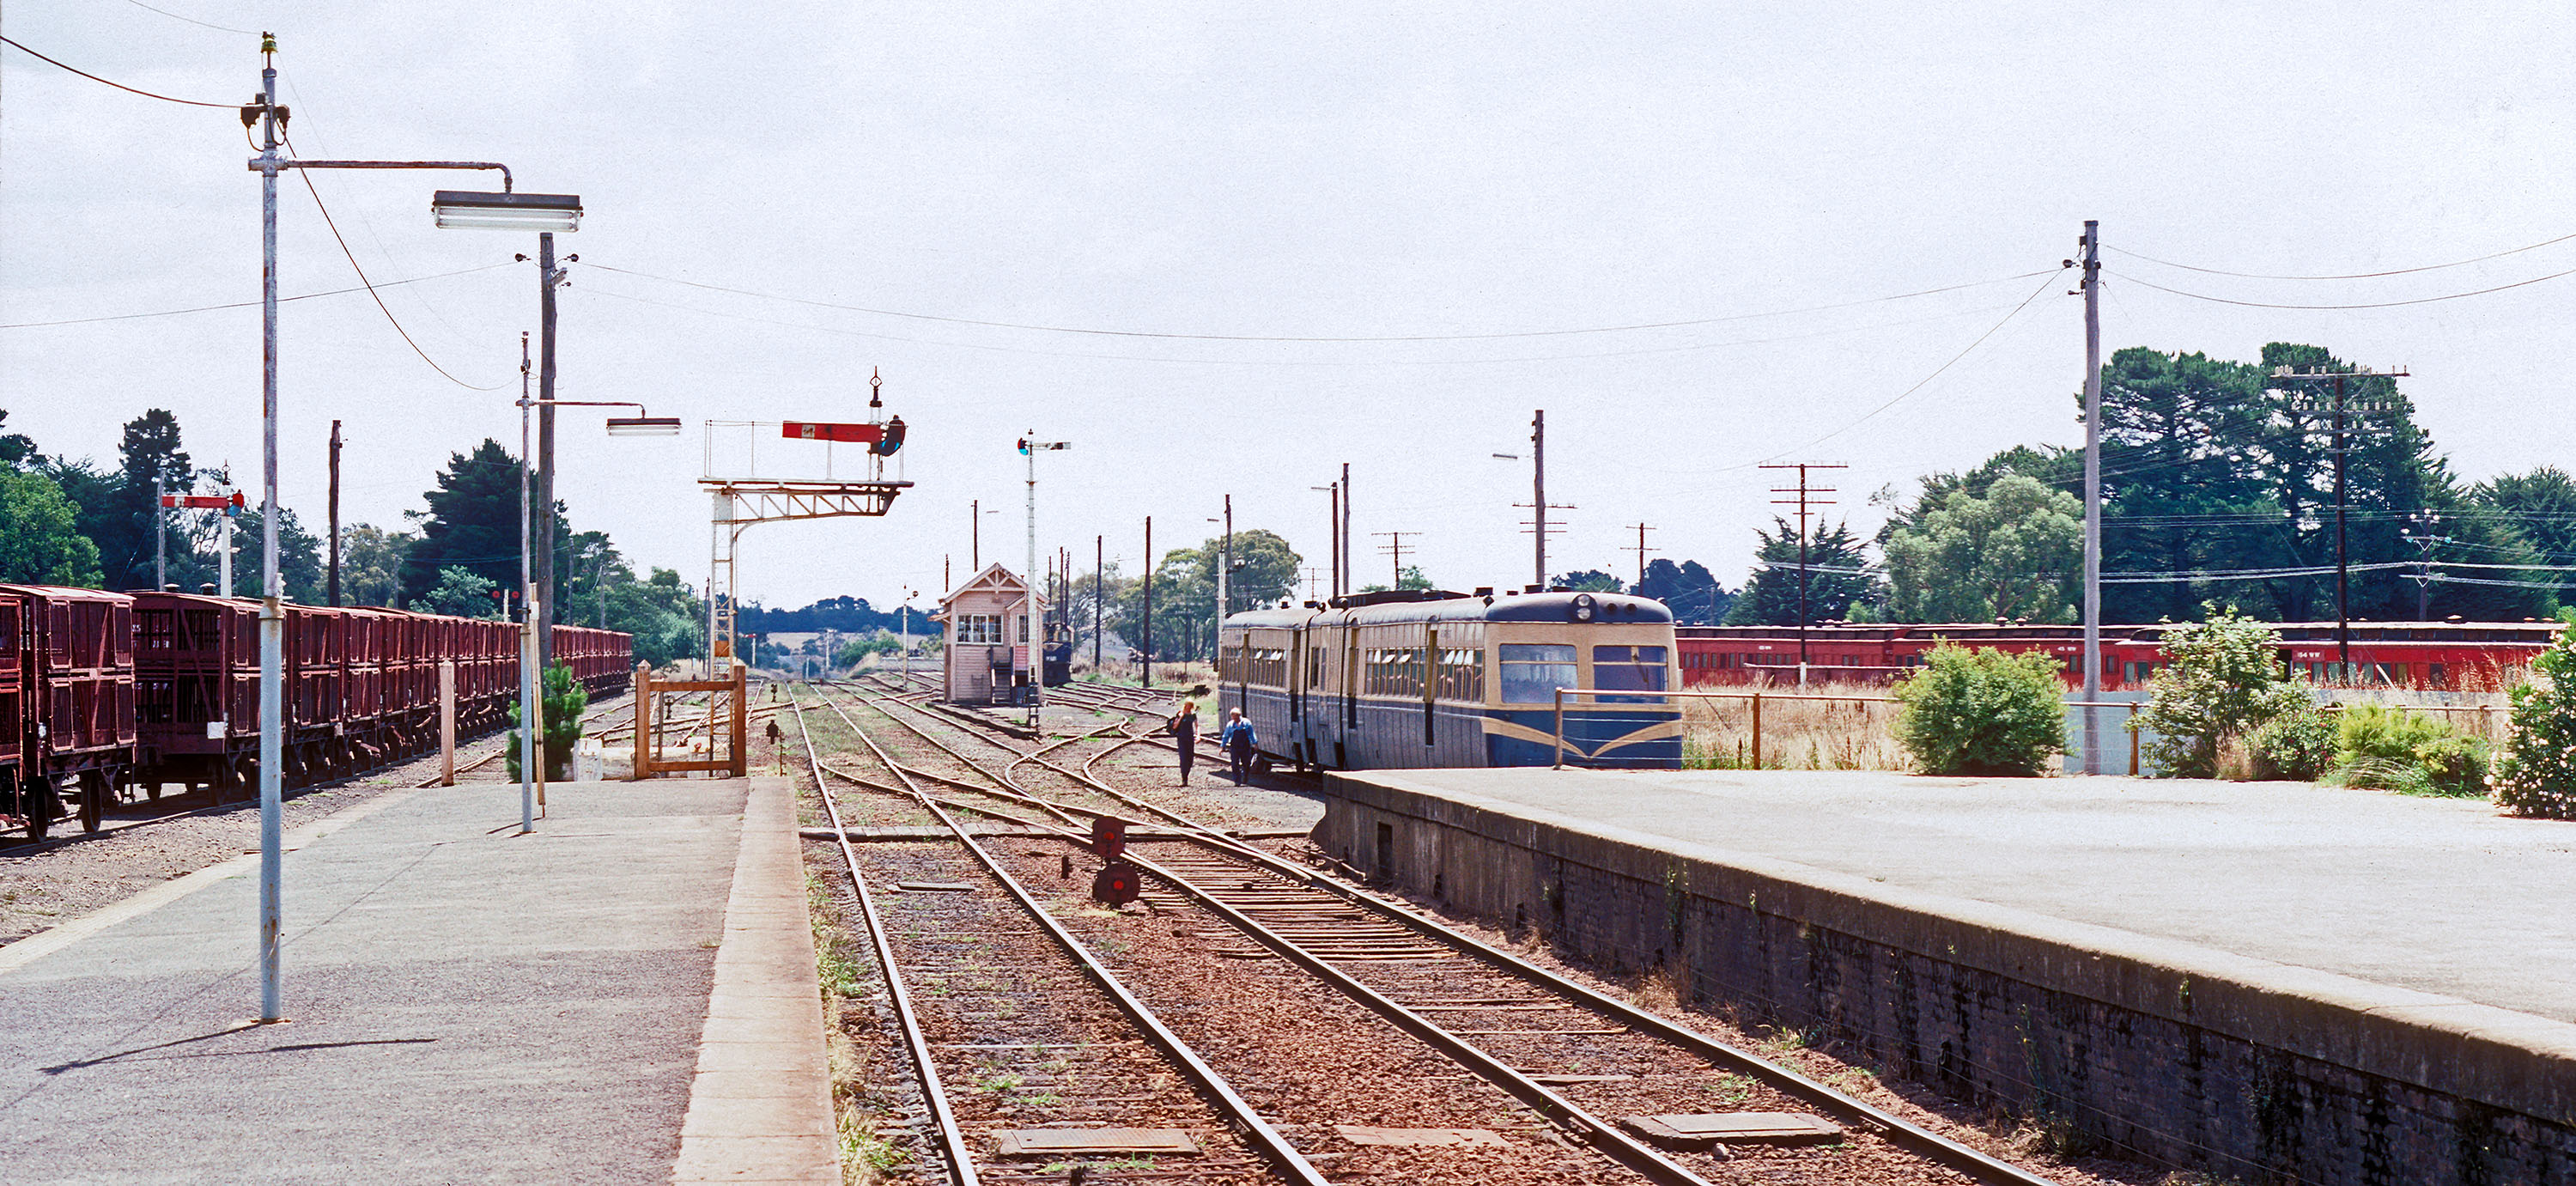
ABOVE: Looking north from the footbridge with two down passenger trains, not sure what was going on here, circa 1980. (photo courtesy Barry Cooper)
ABOVE: The view from B 62 running a down Kyneton service as it pauses at Woodend while an up wheat train powers through. Dec 18 1980. (photo courtesy Noel Bamford)
ABOVE: An up goods in full throttle as it powers towards the summit of the Great Dividing Range passes through Woodend. Late 1970's. (Photo courtesy Tony Tuchio).
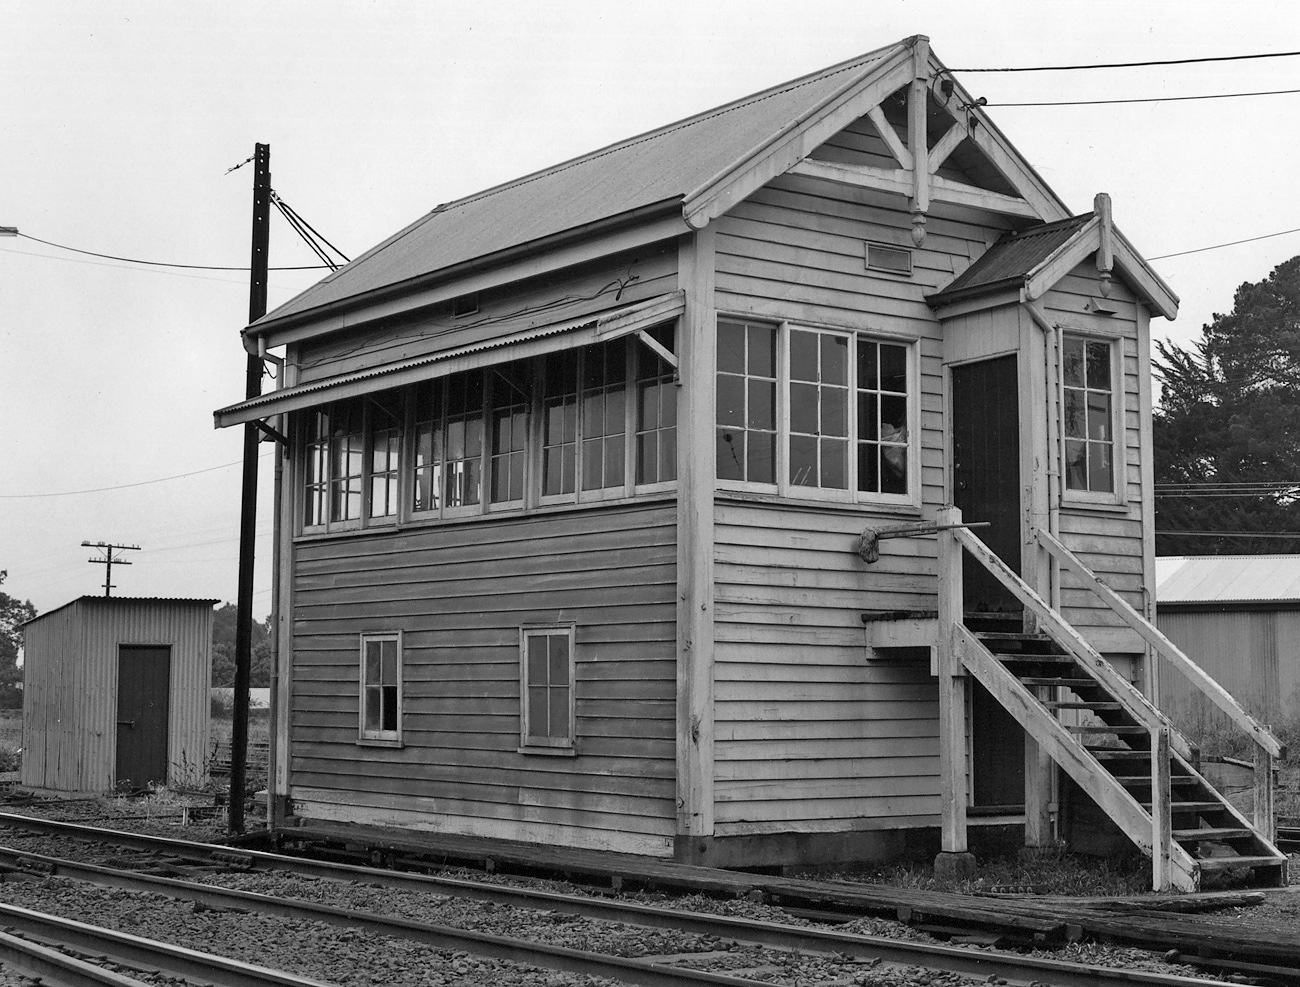
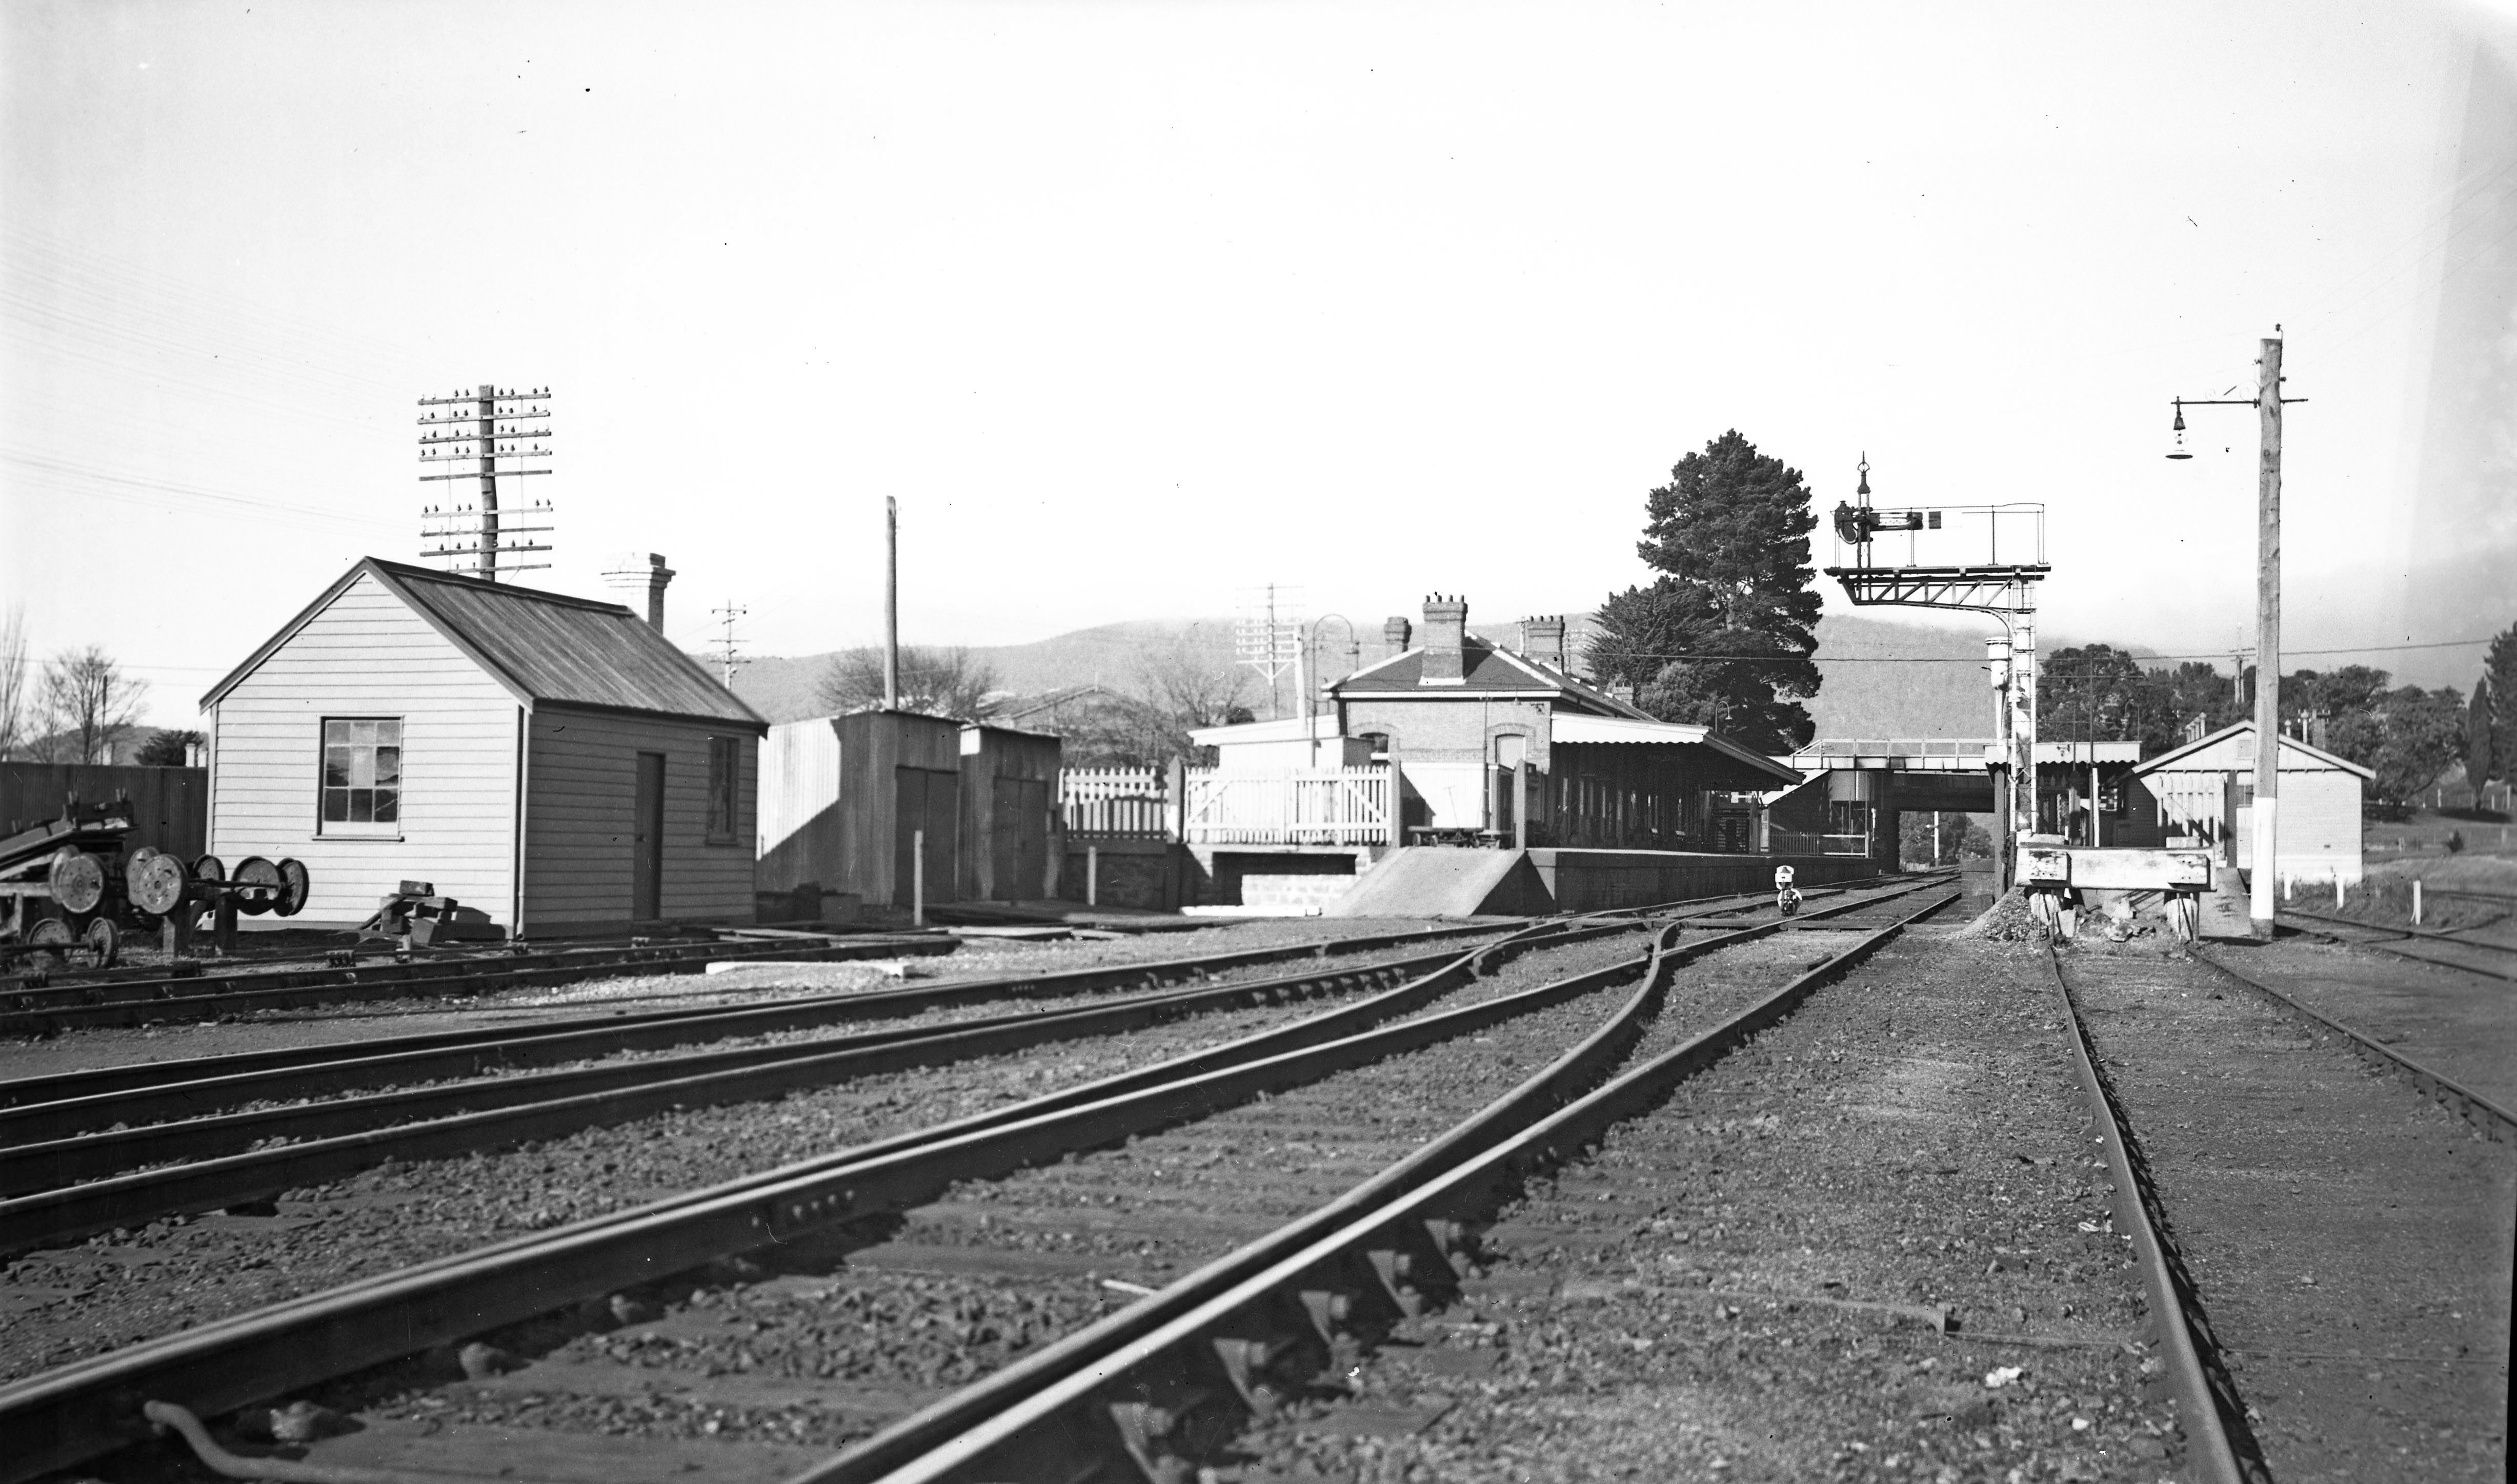
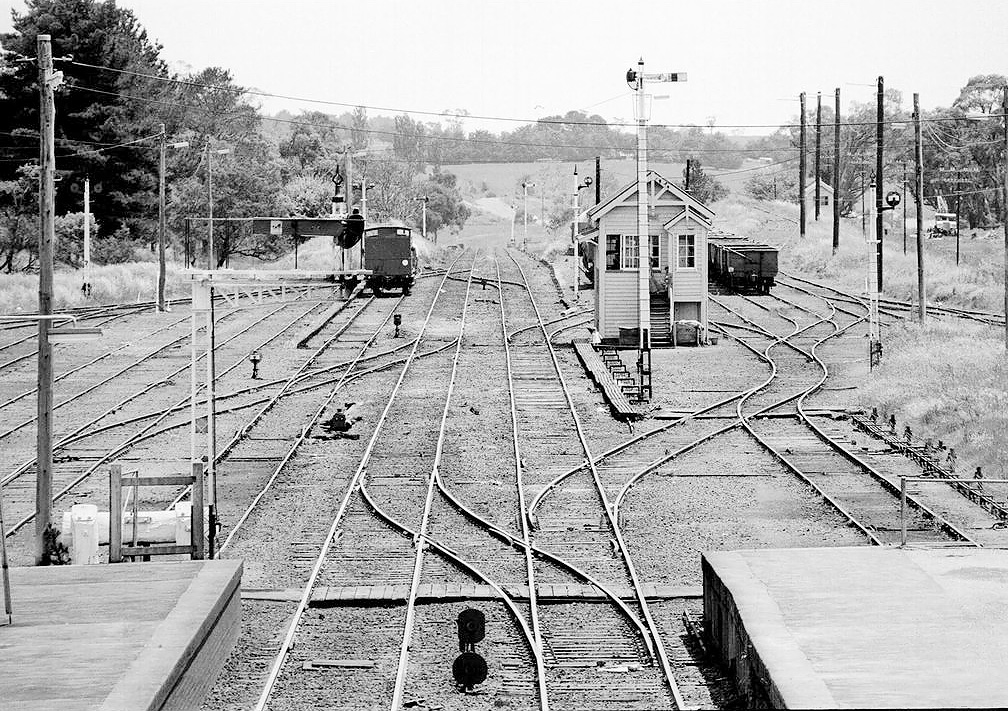
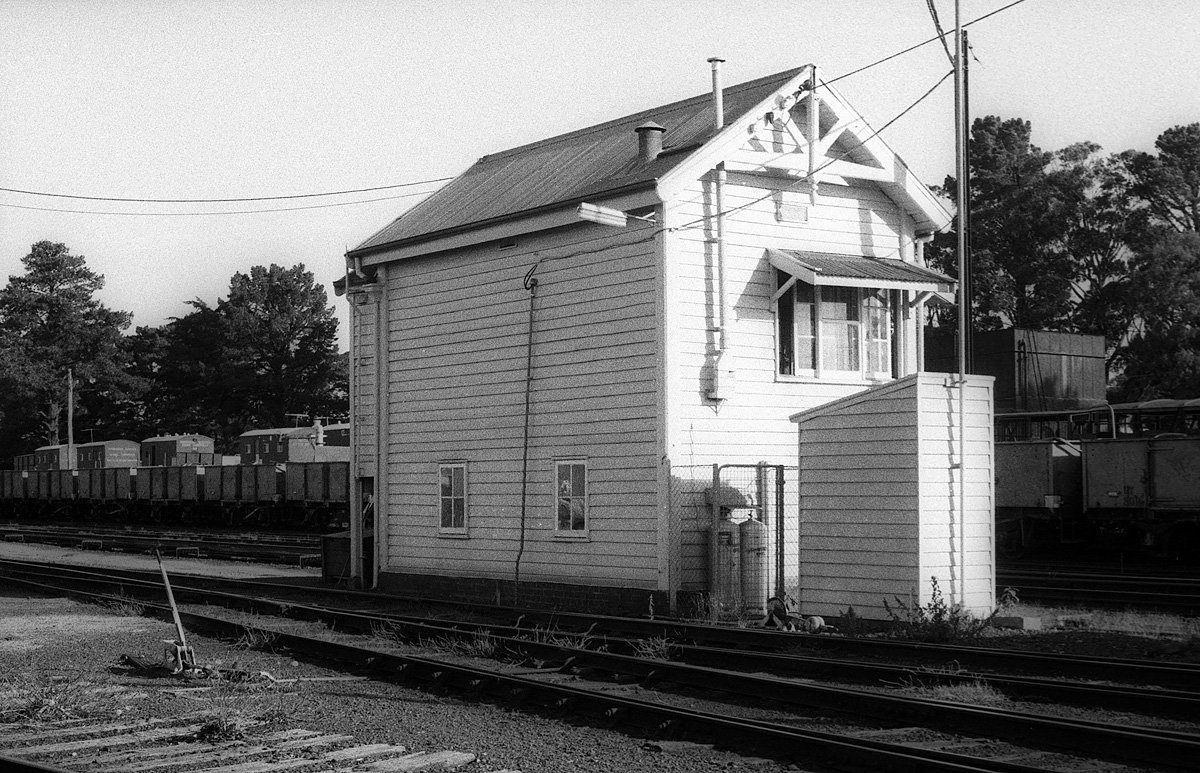
ABOVE: Woodend signalbox 1985
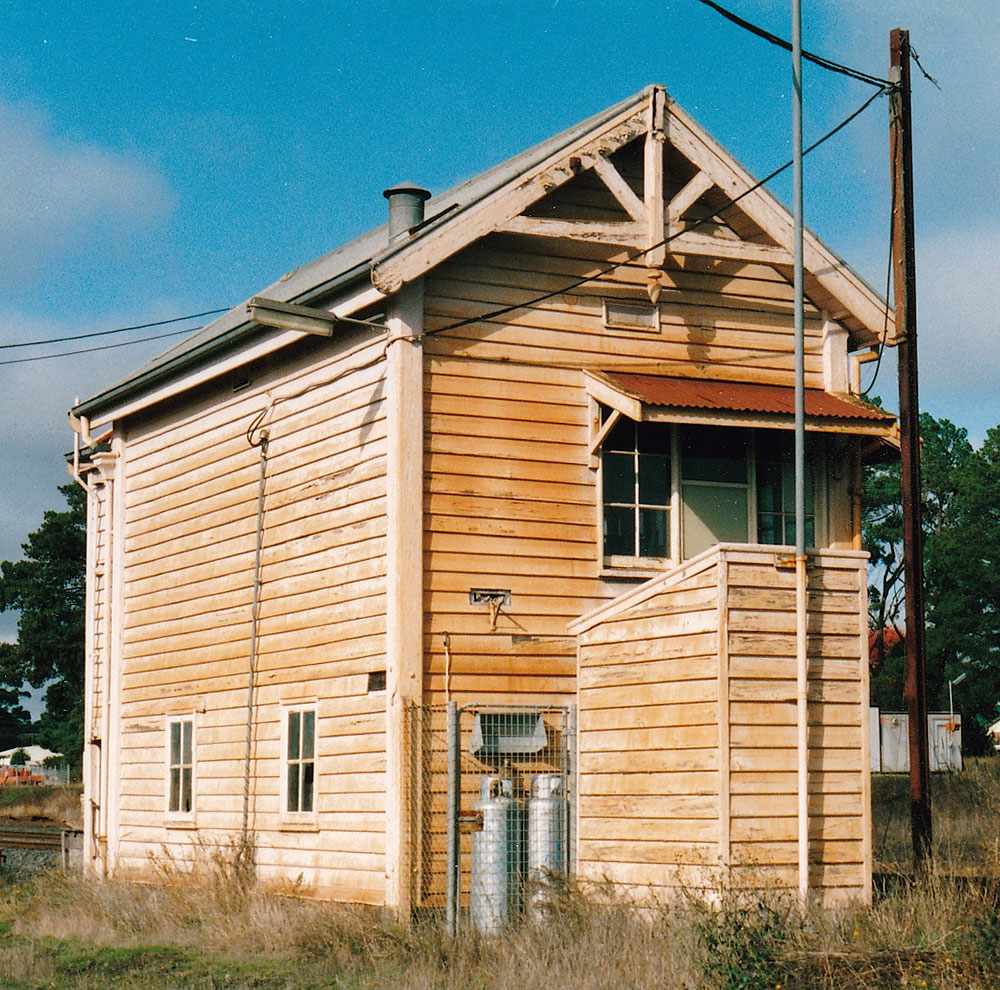
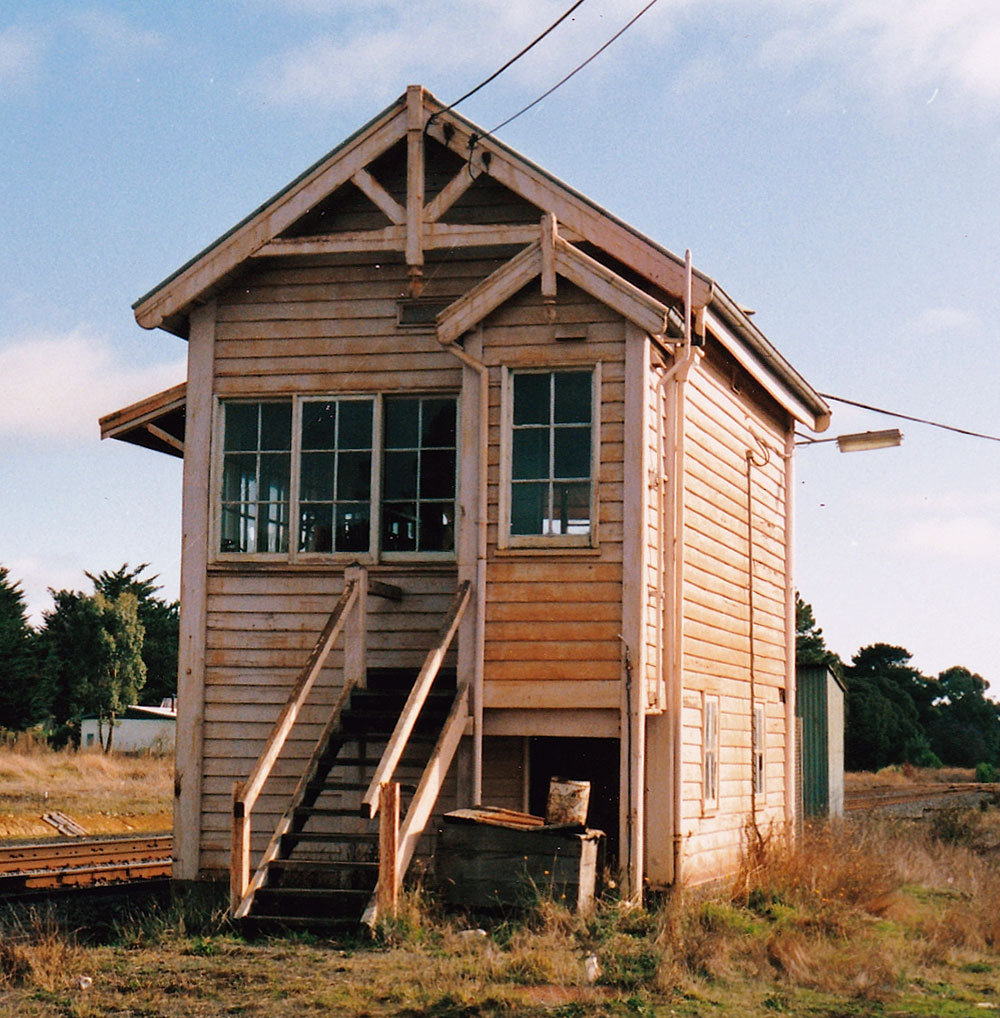
BELOW: The following four photos were taken in 1993 when the yard had been ripped up but the box was still in use as little more than a block post. The box, which was built in 1891,was demolished 2 years later in 1995. 105 years of service!
ABOVE: Back view of Woodend signalbox June 1993. (Photo Courtesy John Gilbert).
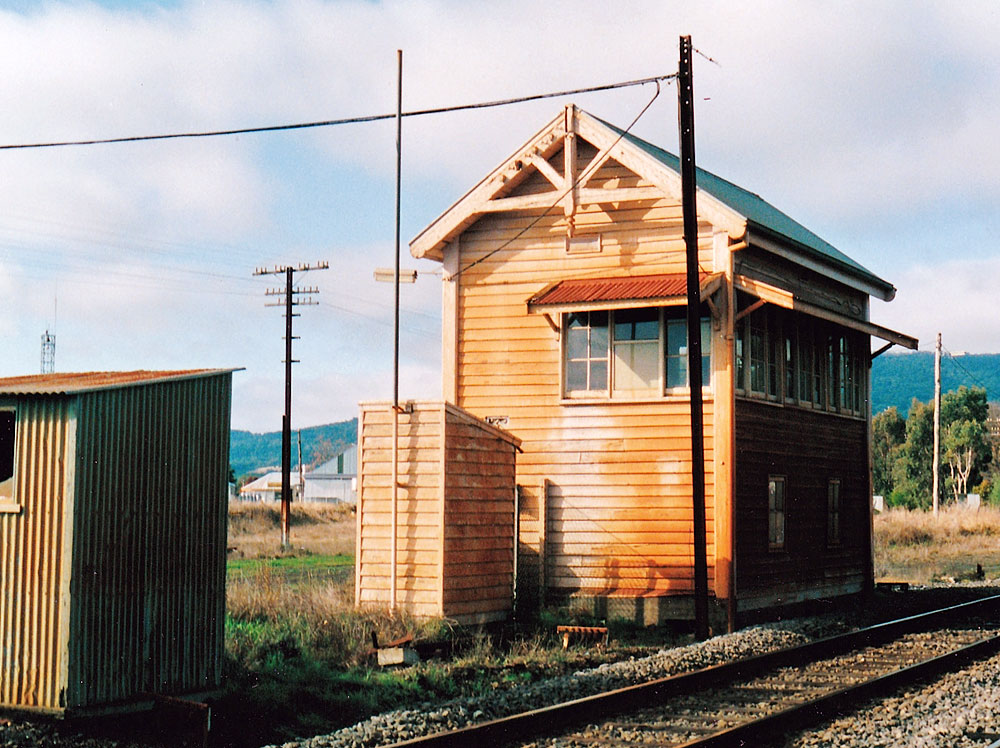
Looking towards Melbourne, June 1993.
Melbourne end view (looking towards Bendigo) June 1993 (Photo Courtesy John Gilbert)
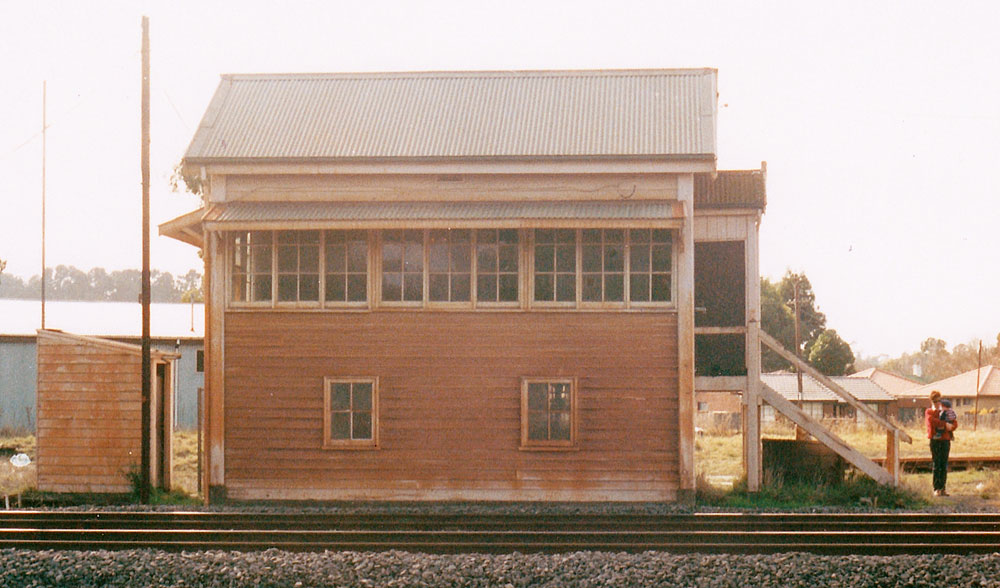
Front view June 1993. (Photo Courtesy John Gilbert)
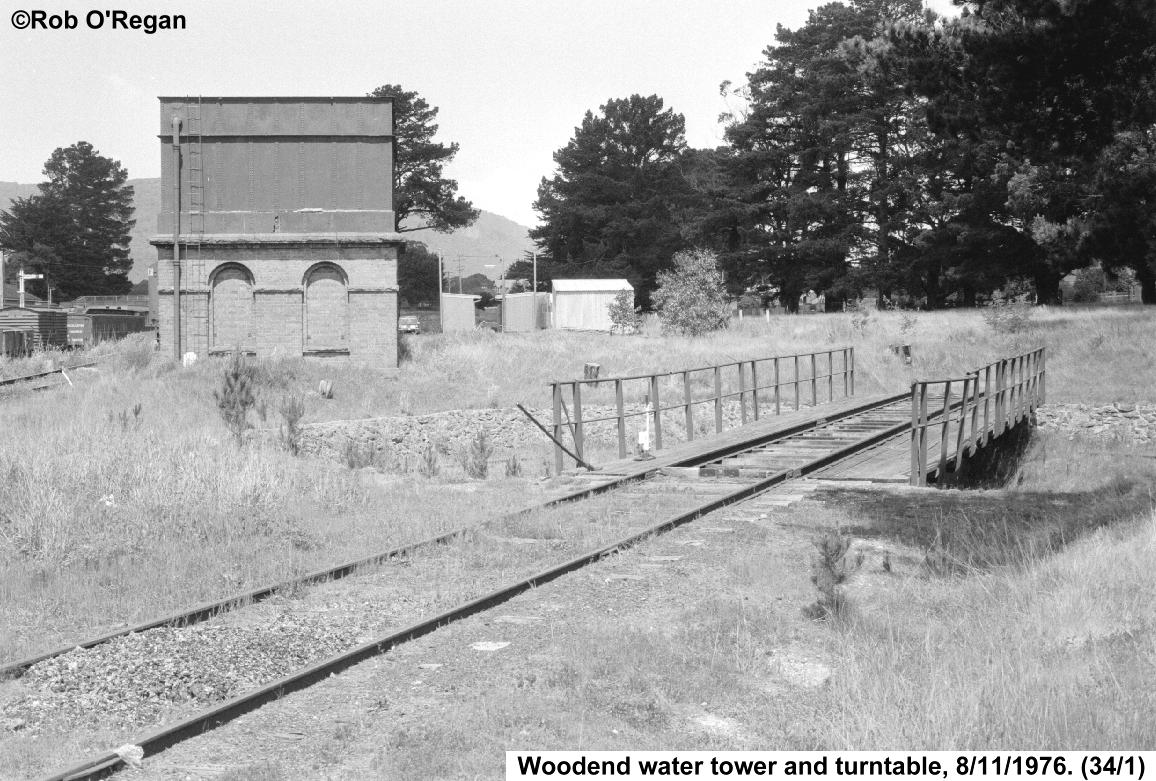
ABOVE: A view of the turntable and water tower looking towards Melbourne.
(Photo courtesy Rob O'Regan).

ABOVE: Looking towards Melbourne at the station buildings taken from just outside the signalbox
BELOW: Rear of the signalbox, both photos Feb. 1984. (Photo courtesy David Langley).
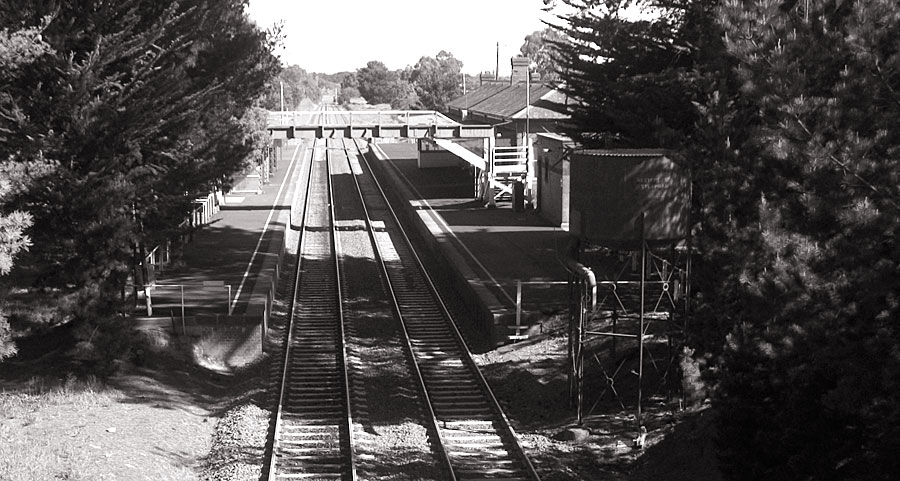
ABOVE: The view from the Calder highway bridge looking towards Mt Macedon and Melbourne showing the up Co-acting starting signal and the down home arrival. Feb. 1984 (Photo courtesy David Langley).
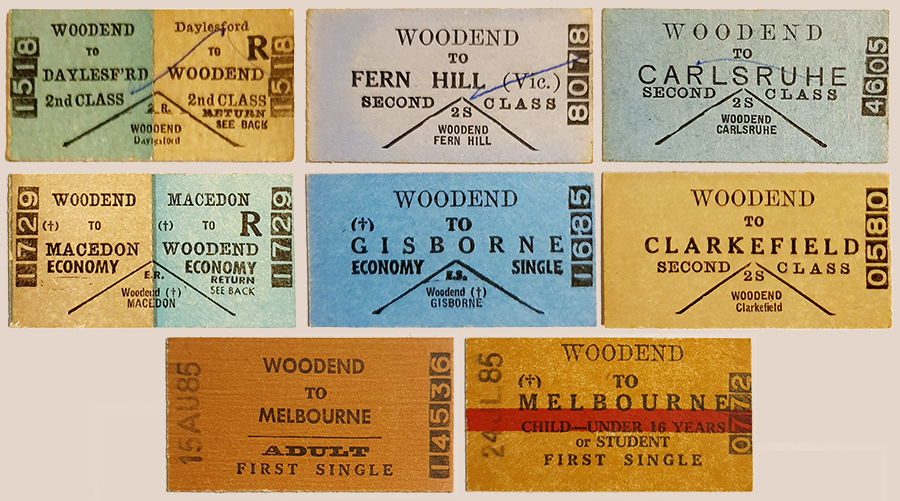
ABOVE: A selection of tickets issued at Woodend. (Courtesy of Geoff Winkler).

Feel free to email me with any corrections or comments
Page modified May 05, 2022