Broadmeadows Line
1921 Drainage diagram
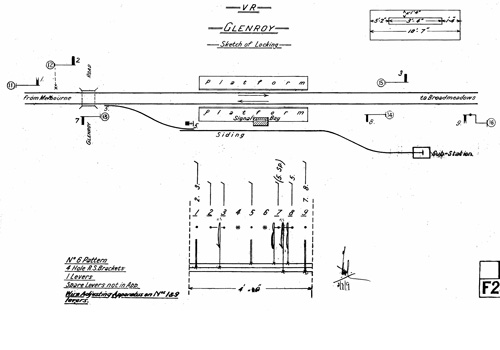
1947 W&W diagram
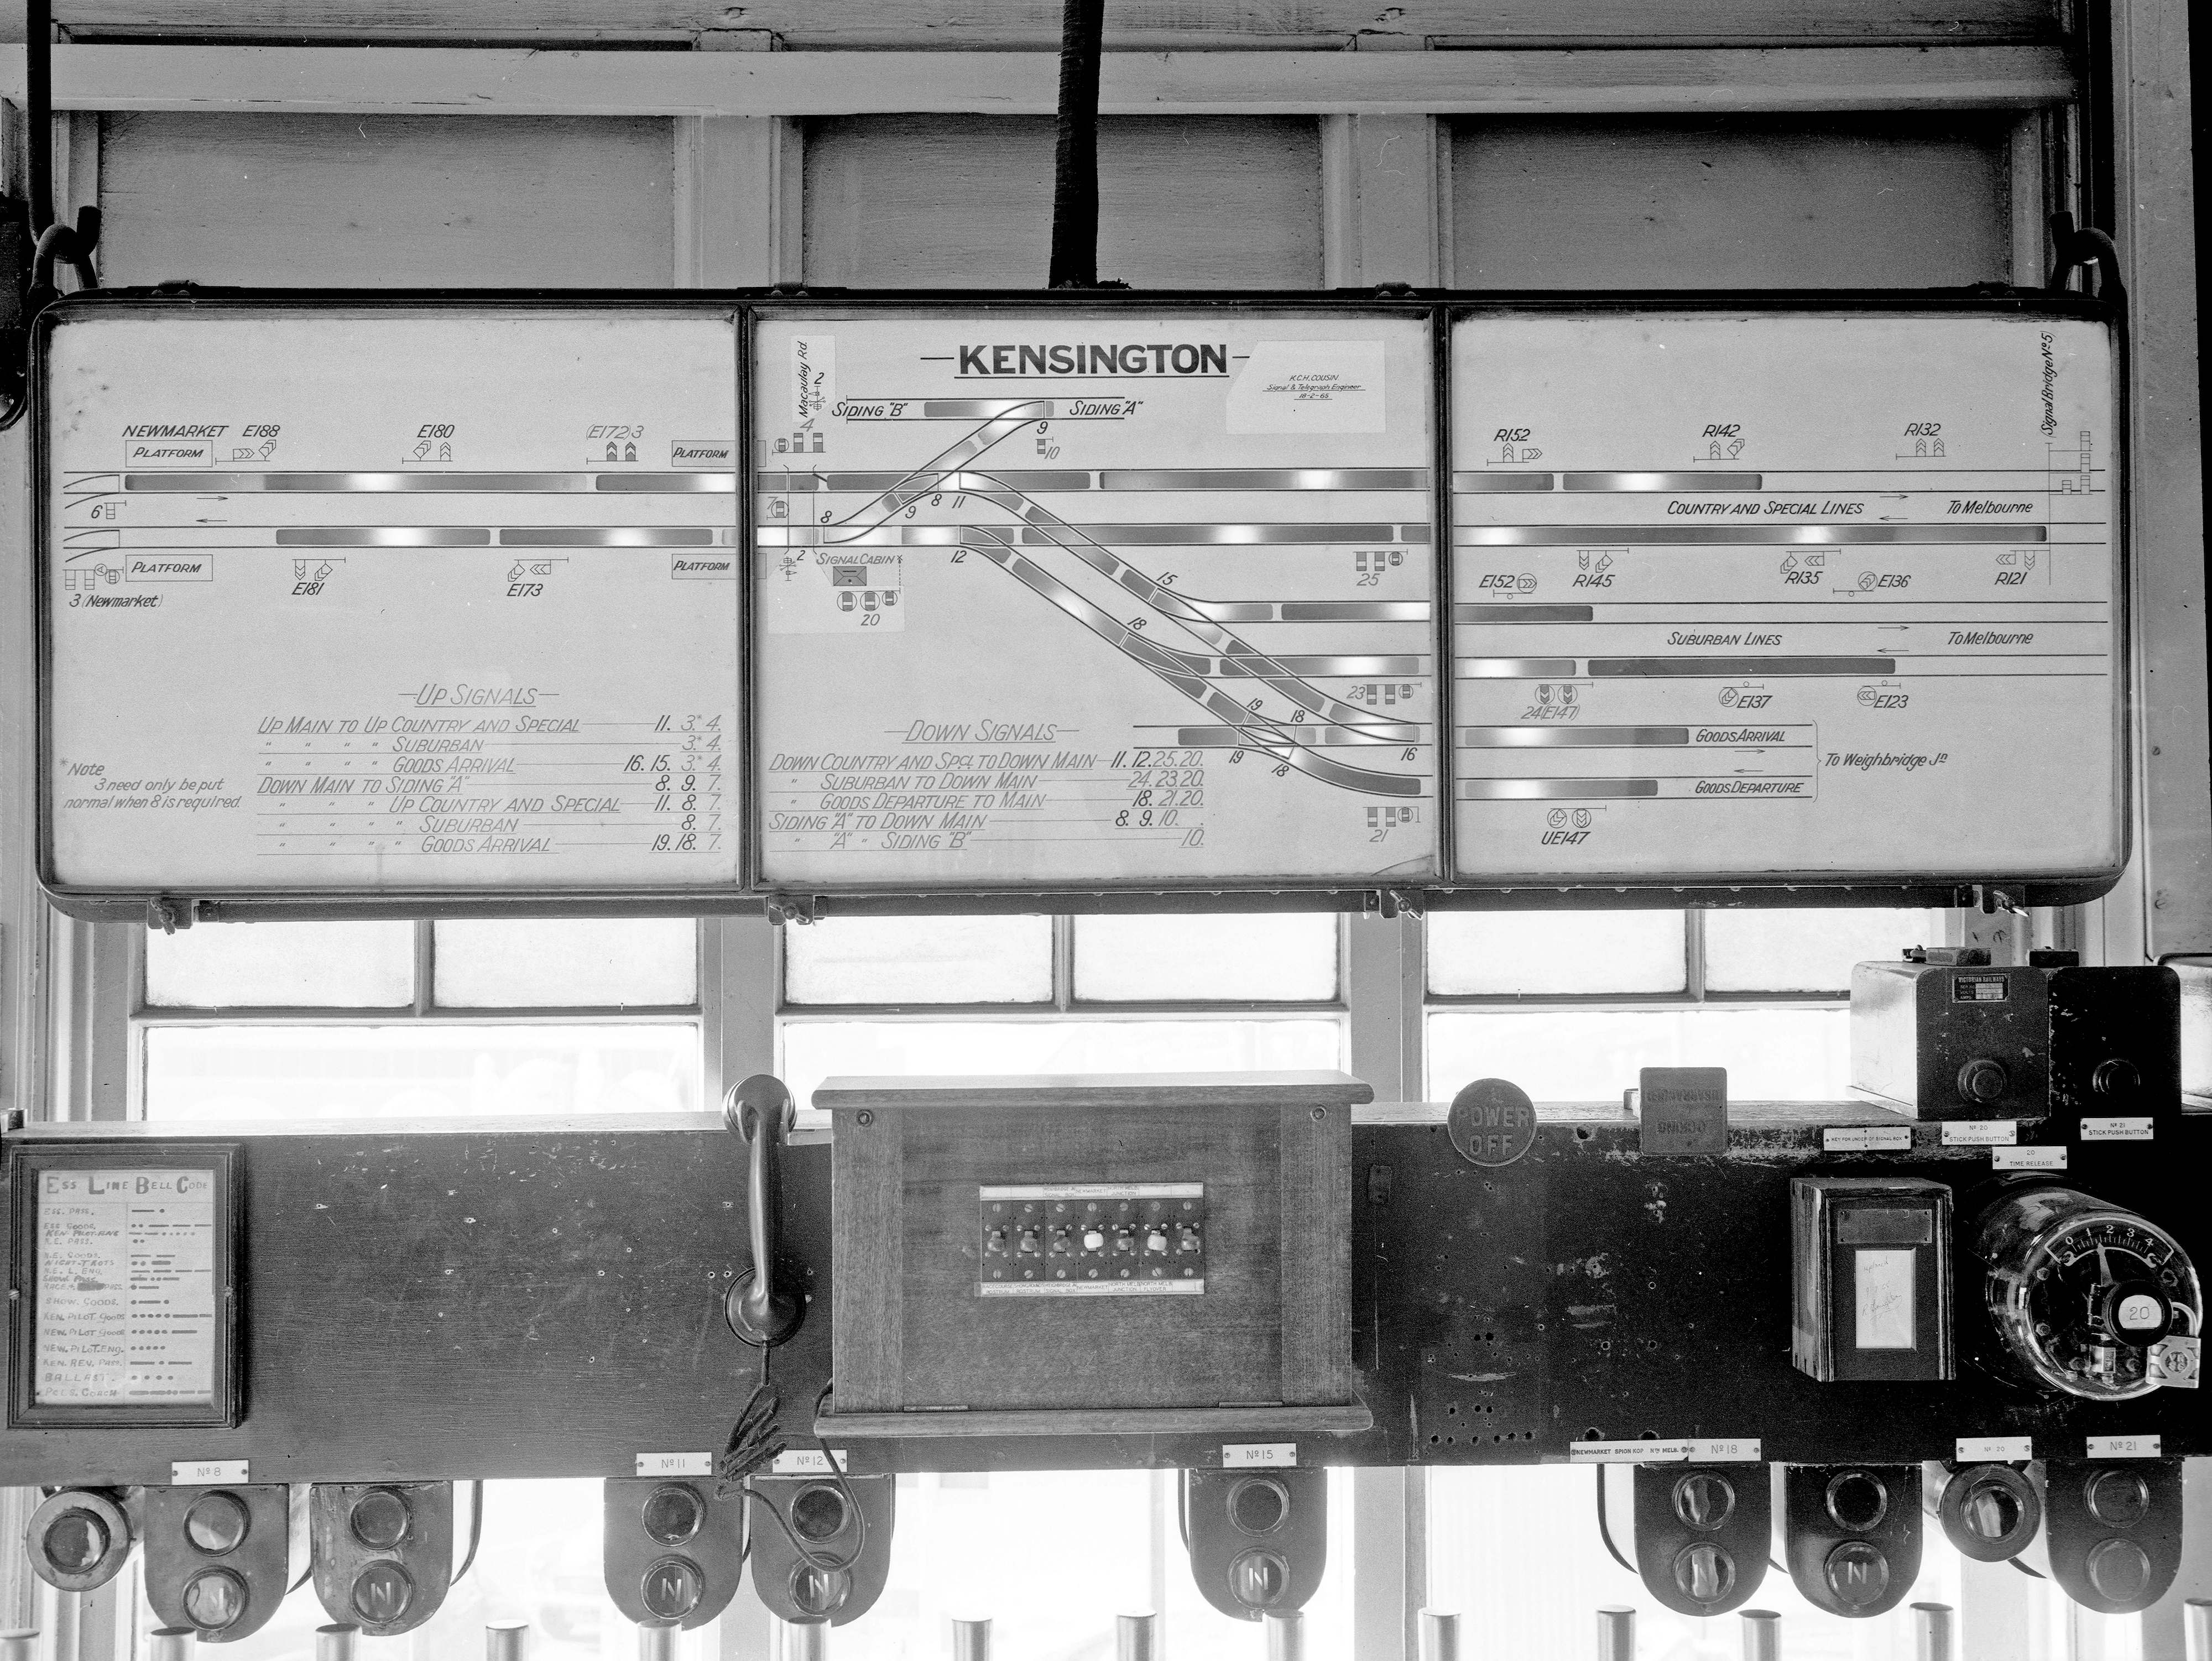
1963 box diagram
Kensington

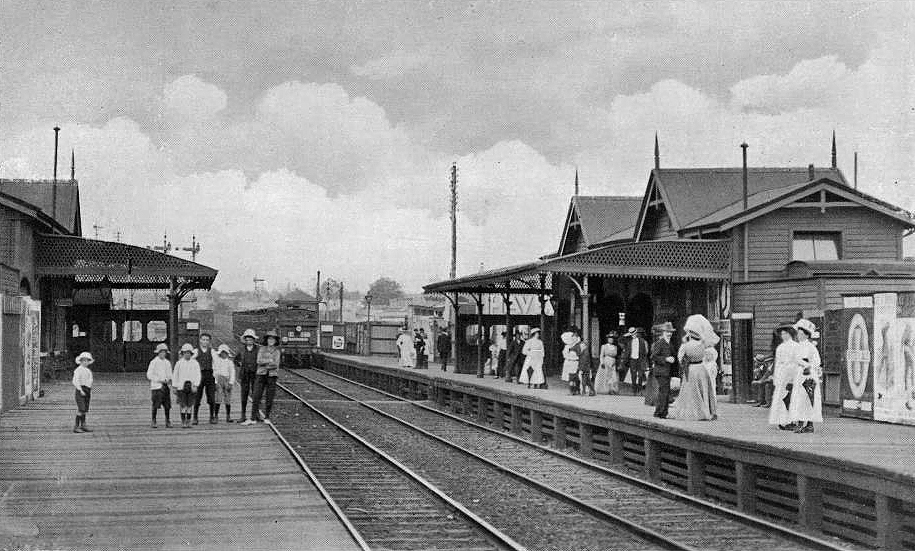
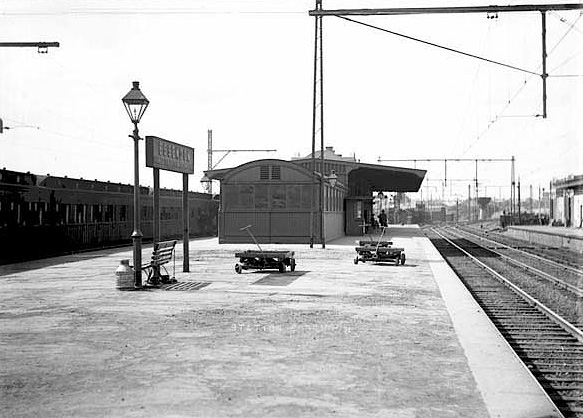
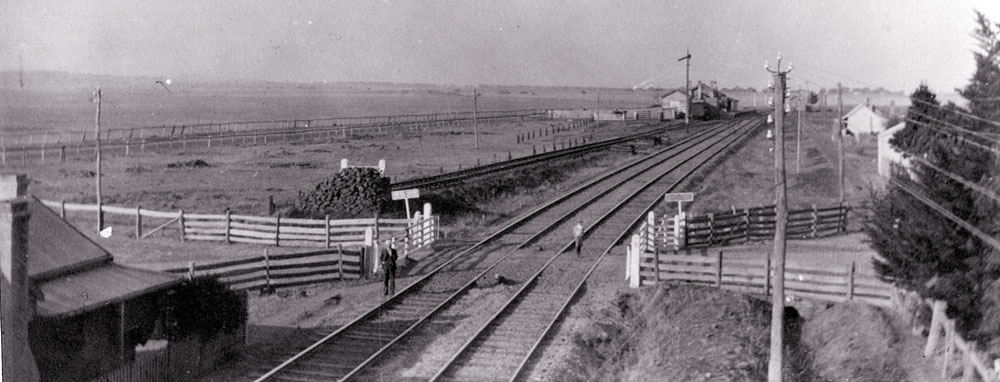
ABOVE: Looking towards Melbourne circa 1920 (official VR photo)

ABOVE: Brand new B 61 drifts through Kensington on its delivery run, Aug 18 1952, photo courtesy PROV

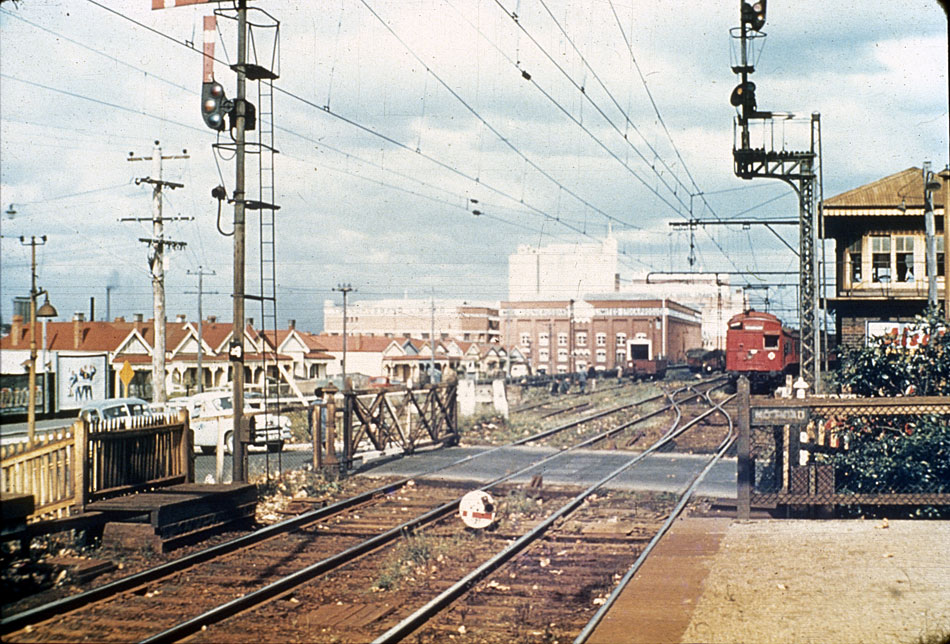
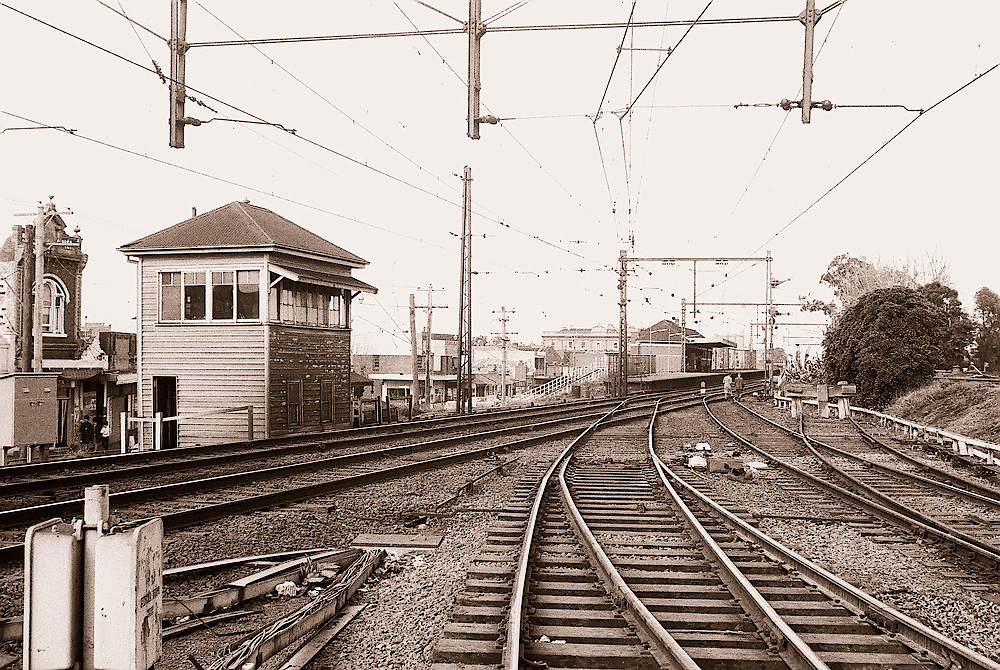
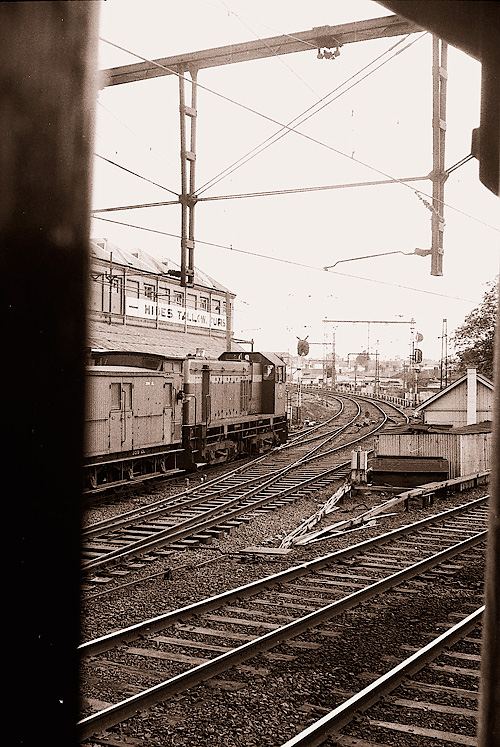
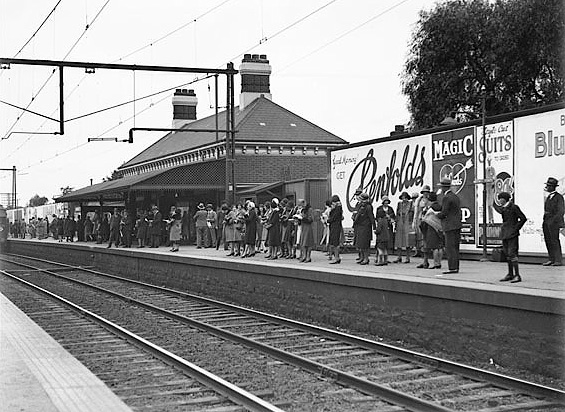
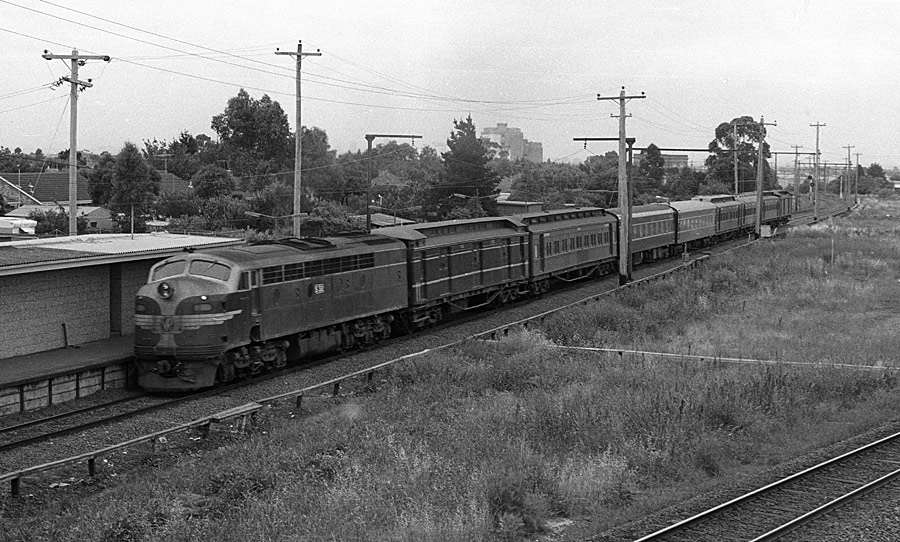
ABOVE: This view is looking towards Melbourne taken from the up platform, a flat top T can be seen in the distance on a down goods waiting to diverge on to the mainline. An up spark has just departed on the country lines and the signalman has wasted no time in making the road for another up train to diverge on to the down sububan line. Photo mid 1950s, photo courtesy PROV
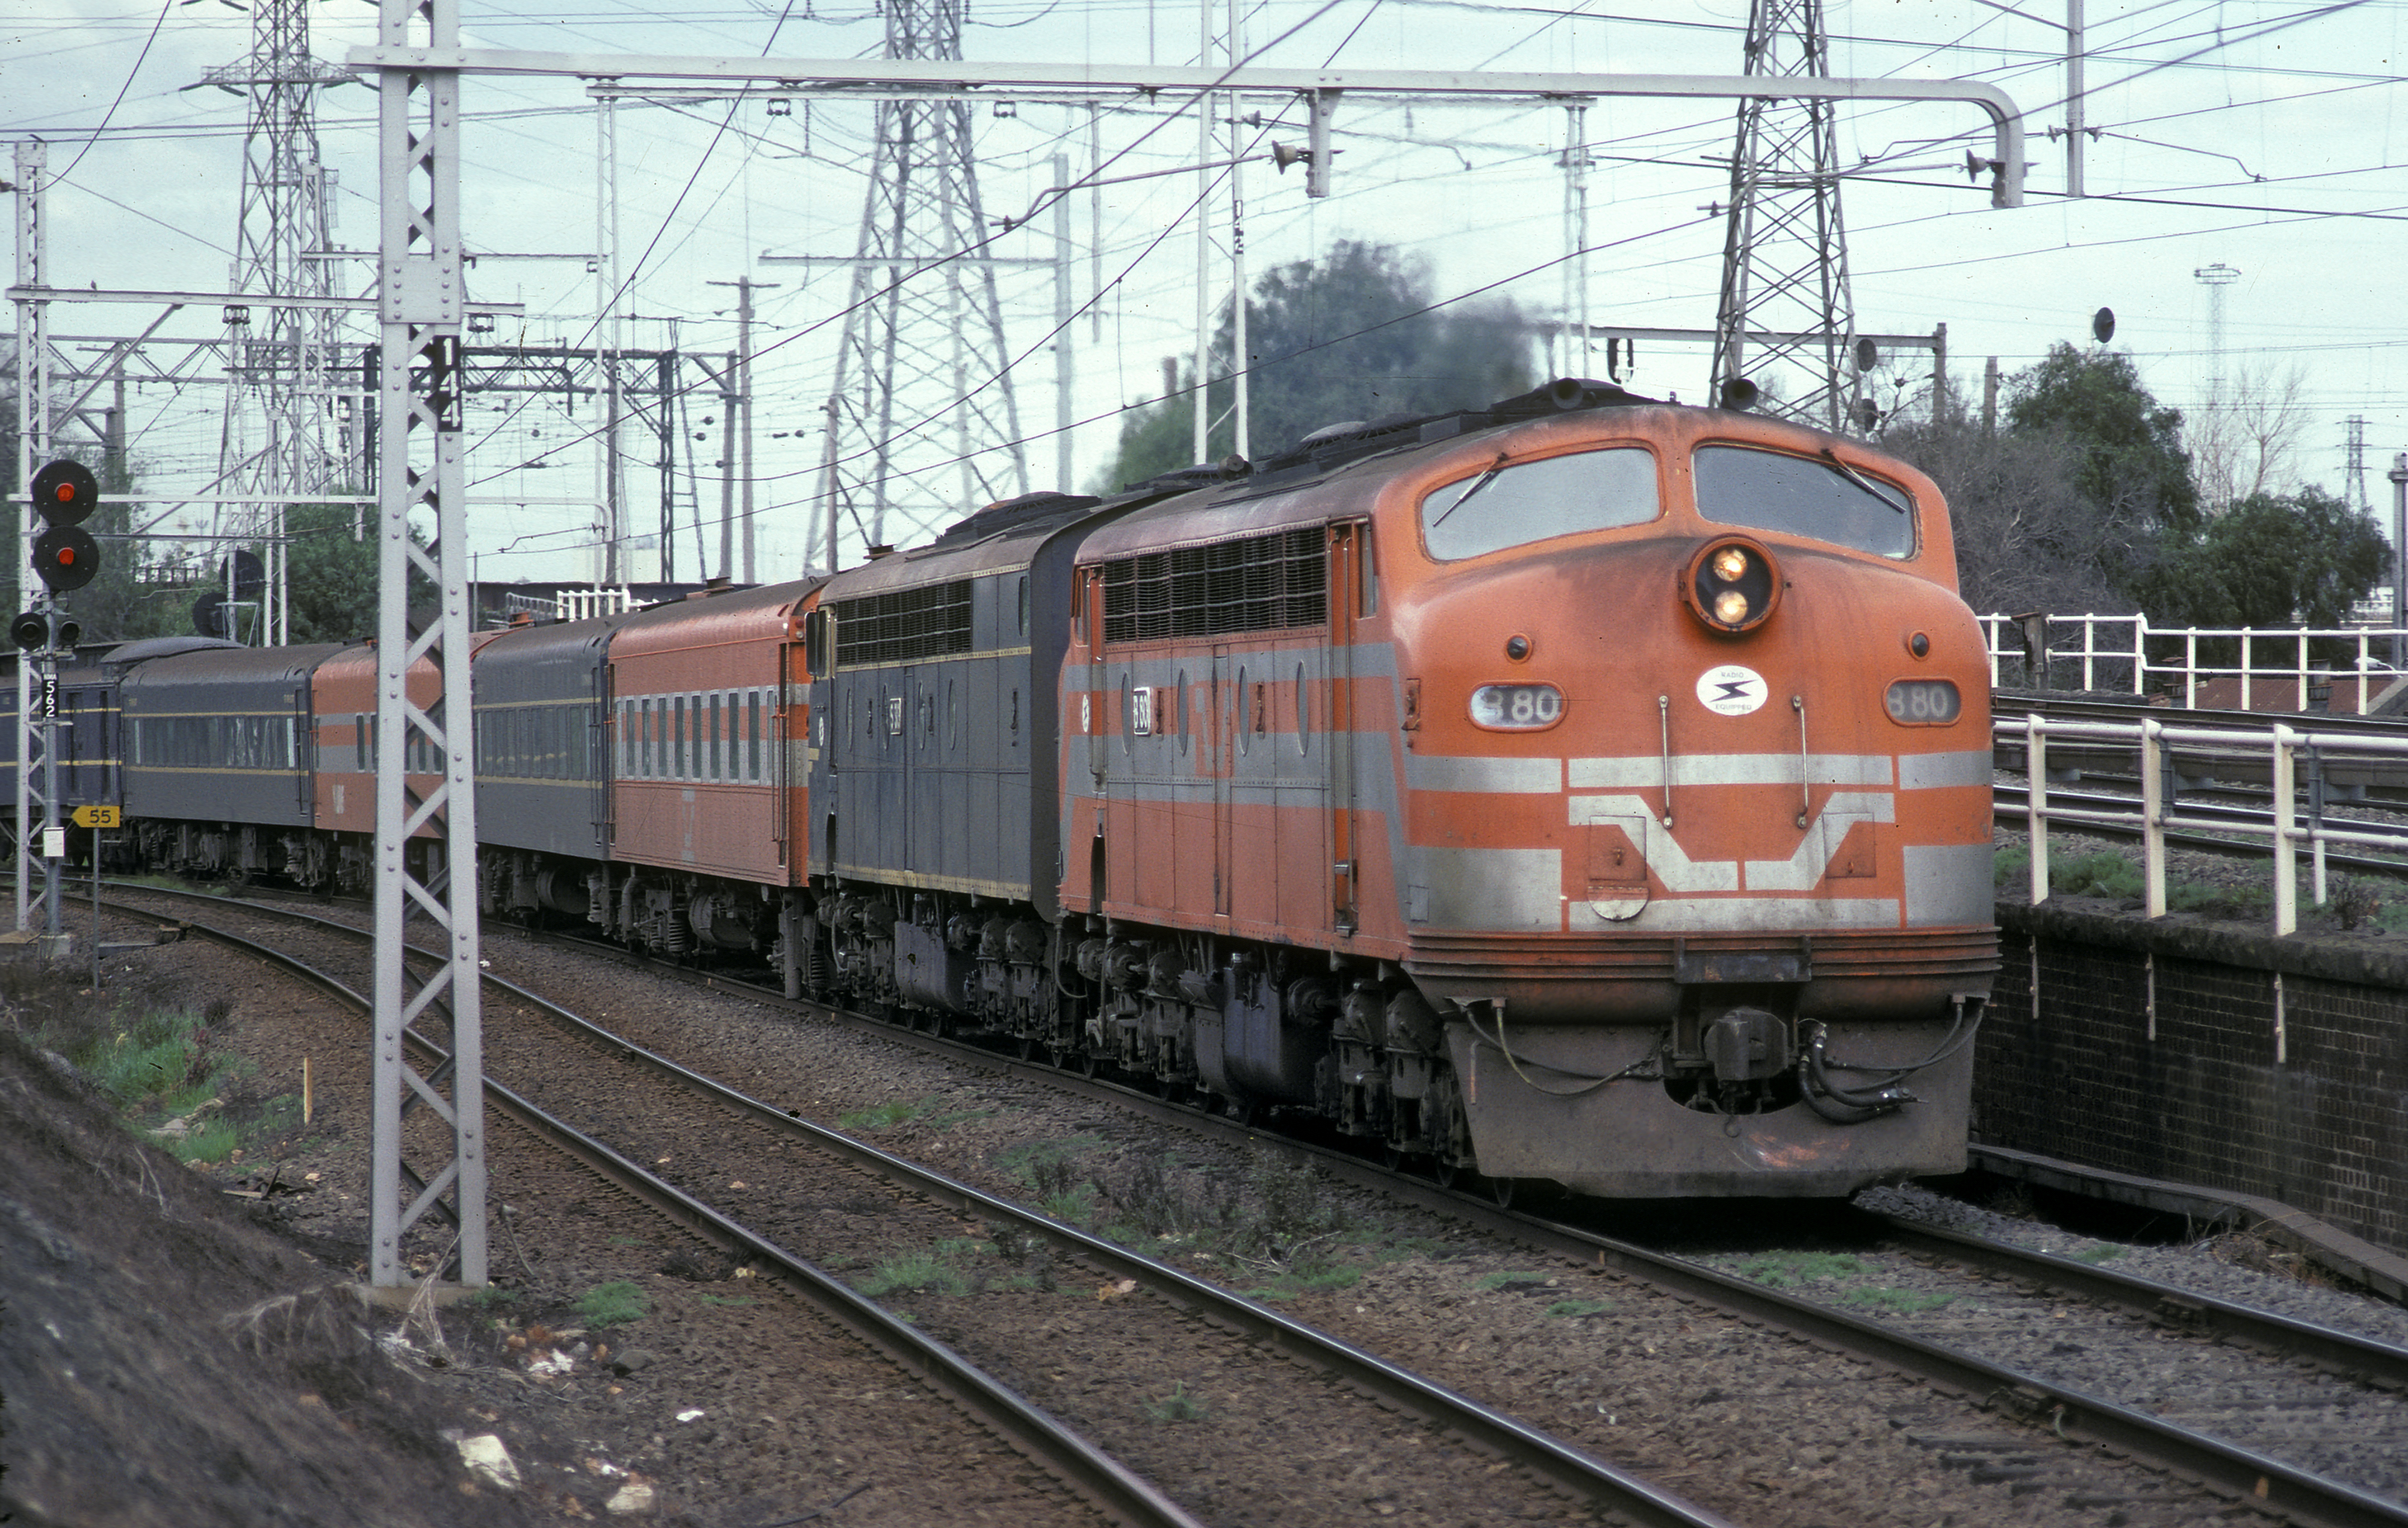
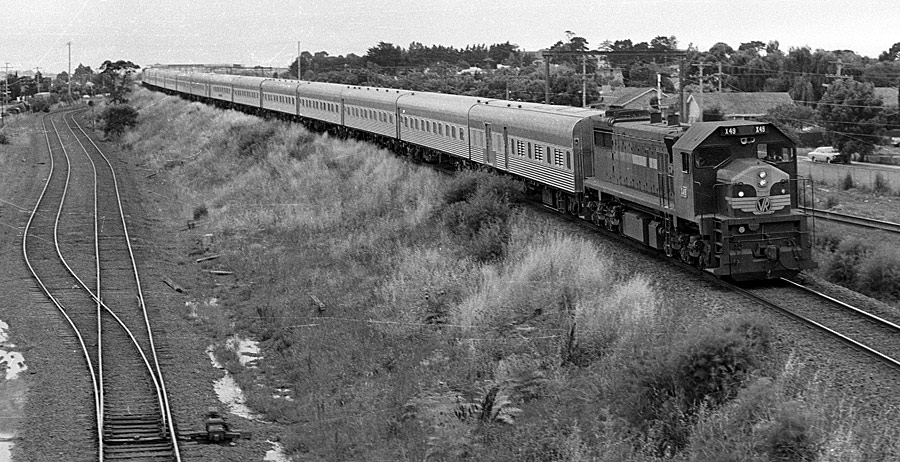
ABOVE: The 0835 Spencer St. to Albury pass comes up the suburban line between North Melbourne and Kensington Sept. 1984

ABOVE: A down Nth East pass passes the Younghusband buildings between North Melbourne and Kensington. Sept 1983.
(photo by Trevor Penn)
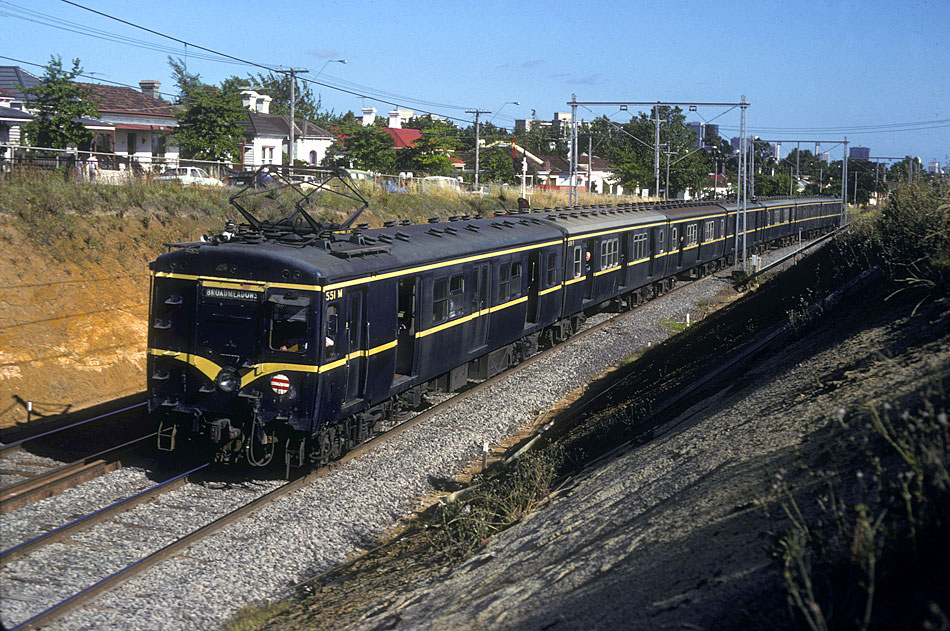
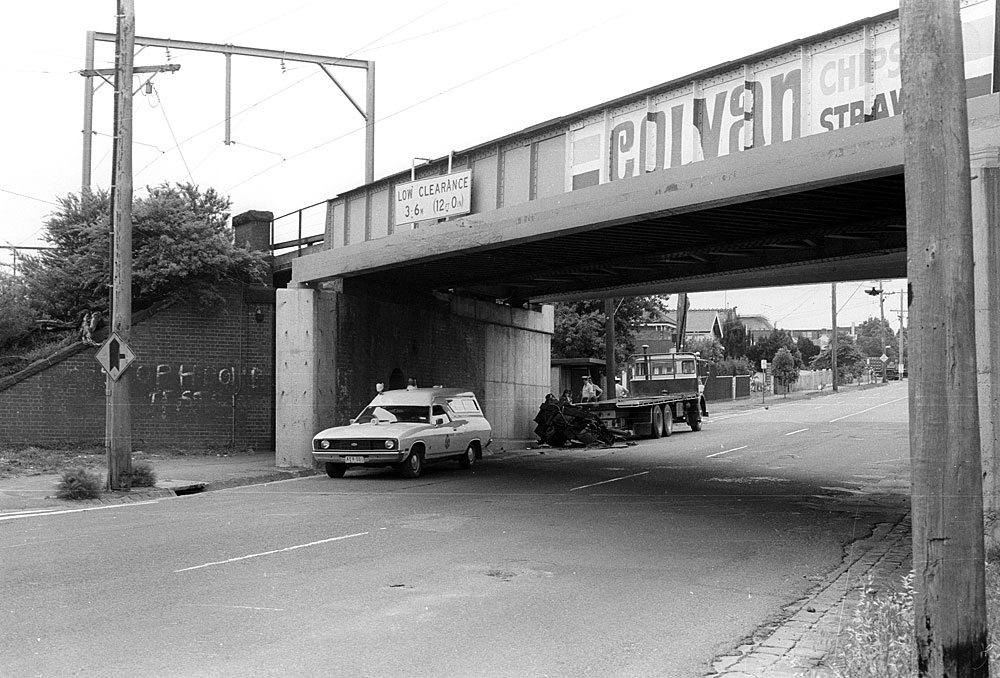
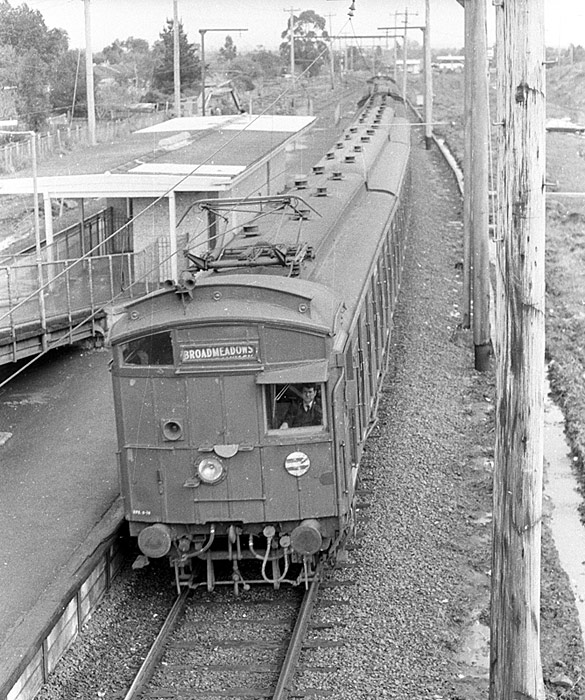
ABOVE: A down Broadmeadows "Tait" approaches Kensington. These interlocked gates were replaced by boom barriers in 1965 . official VR photo
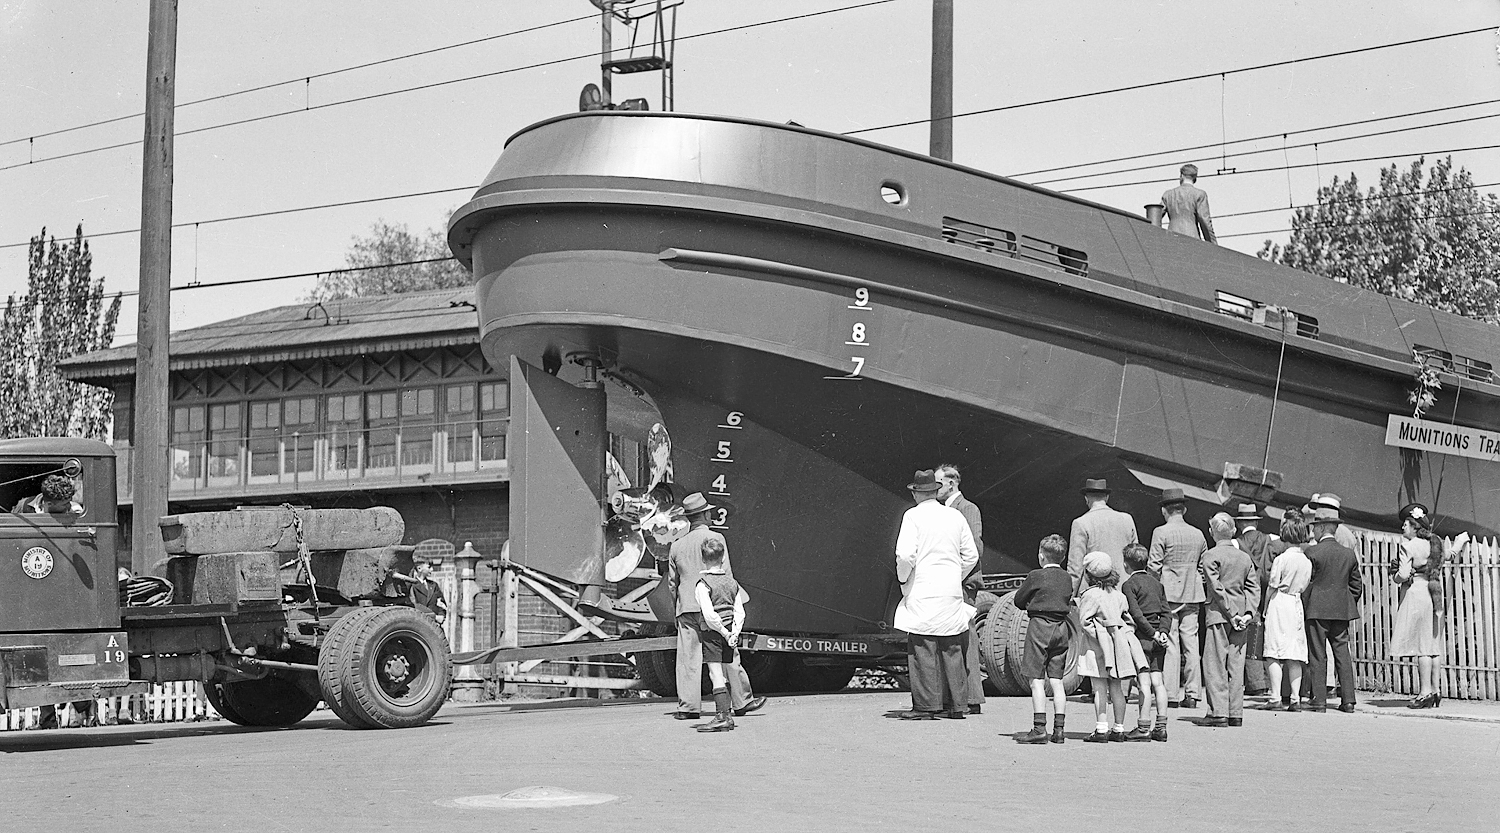
ABOVE: Not the sort of thing you see everyday from a signalbox window! During WWII Newport was involved in the war effort and amongst other things built these boats, no info as to where it was being taken.
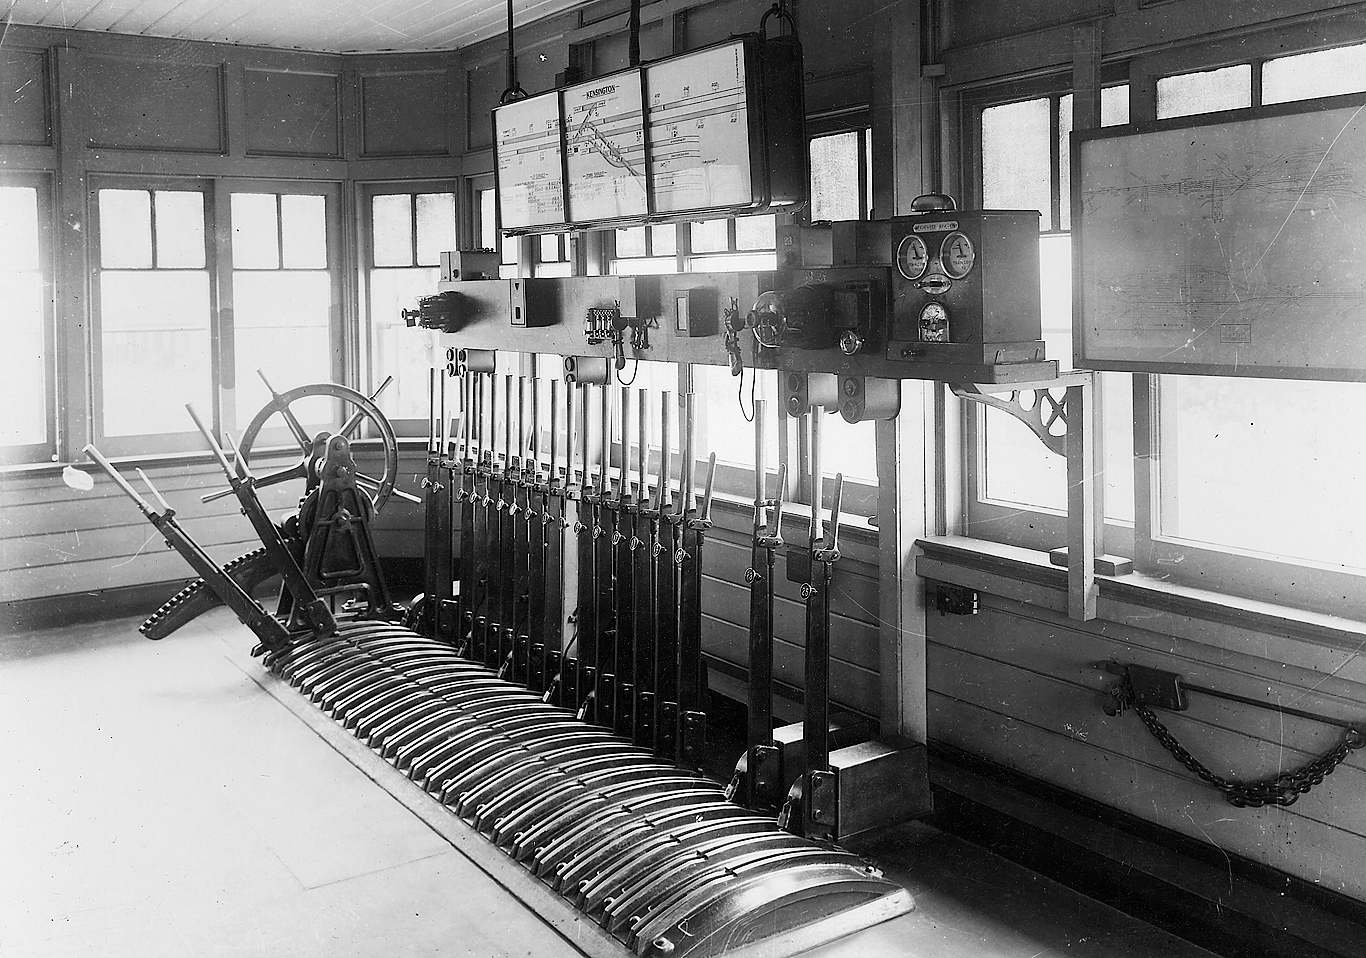
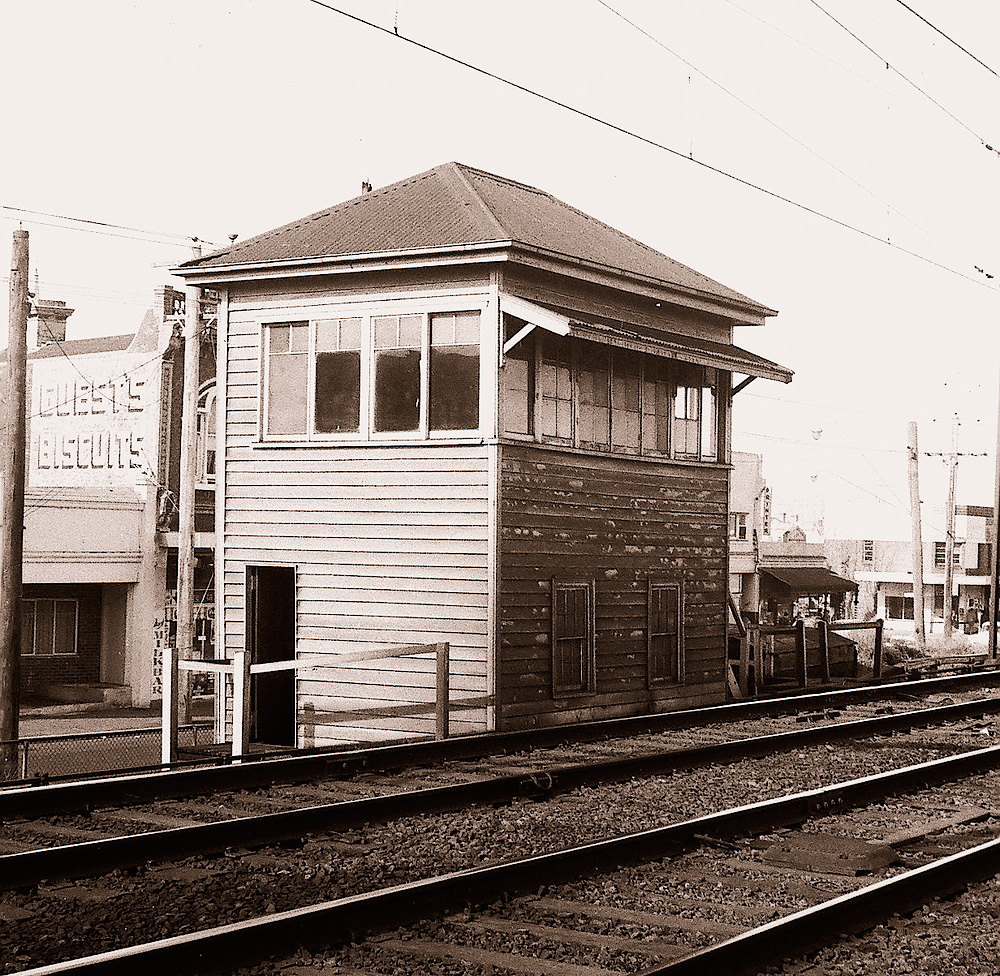
ABOVE & BELOW: Internal view of Kensington signalbox, prior to 1965 when the interlocked gates were abolished. (official VR photo)
Newmarket
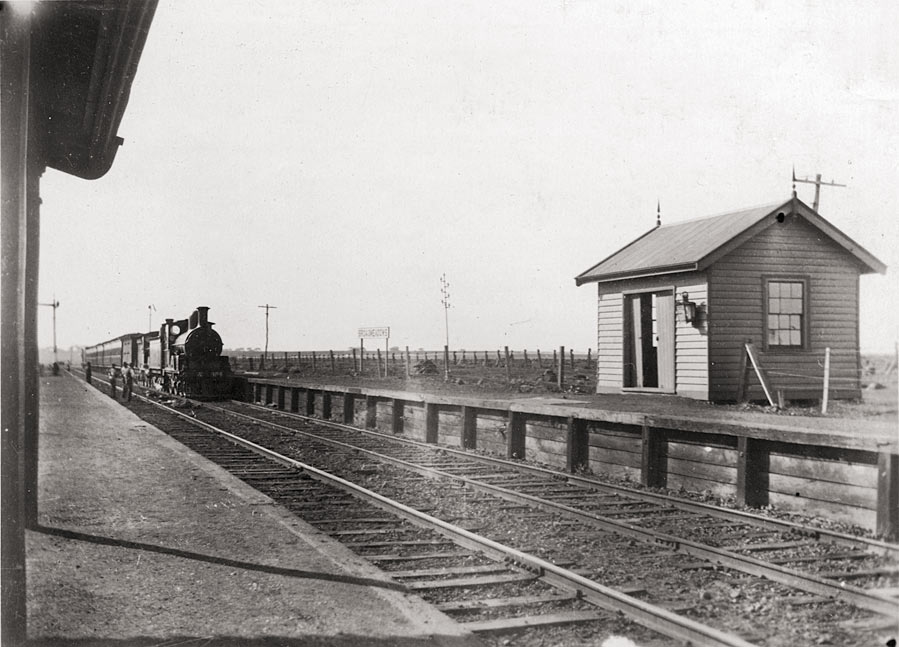
ABOVE: Newmarket looking towards Essendon as an up service arrives, circa 1910

ABOVE: On Aug 7 1918, in the small hours of a winter morning, the DD, running light engine, somehow managed to depart from the stock yard area on the wrong line, and clobbered the poor old X class, 375, on a Down Livestock Pilot with the result seen here. Note the Down Home signal still at Proceed, hours after the bingle. Some of the moo cows escaped down the embankment, and into the gas lit back streets, so things were really exciting for a while. The collision occured about 100 metres south of the down platform. A newspaper report can be read HERE. Although it was repaired, X 375 was off register on April 26 1919 after a 32 year career.
Newmarket is where the Racecourse/Showgrounds line
branches off the main North East line.
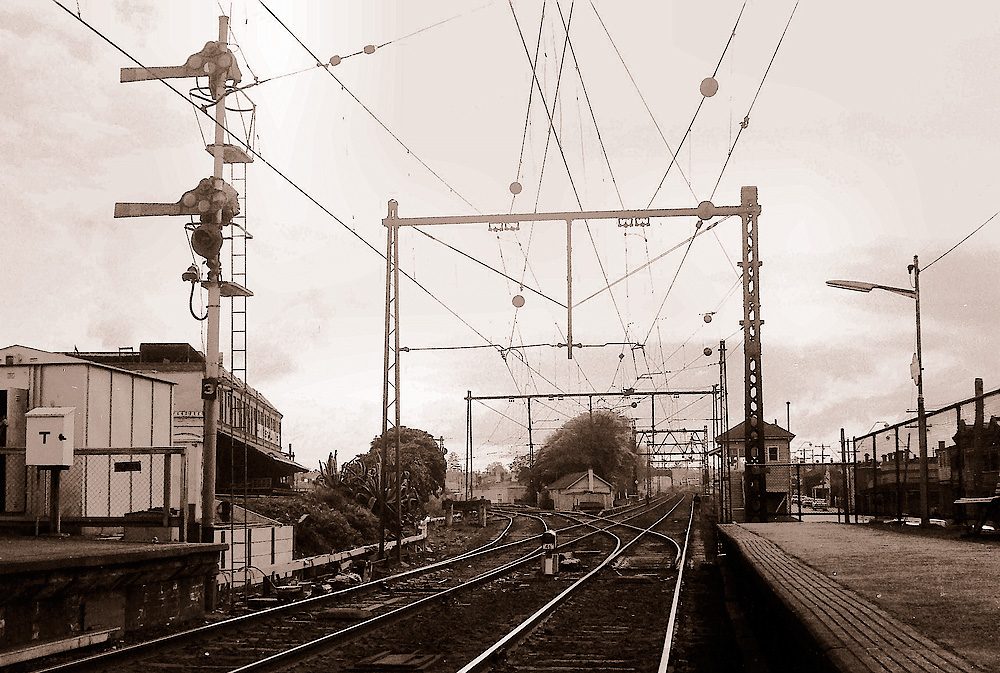
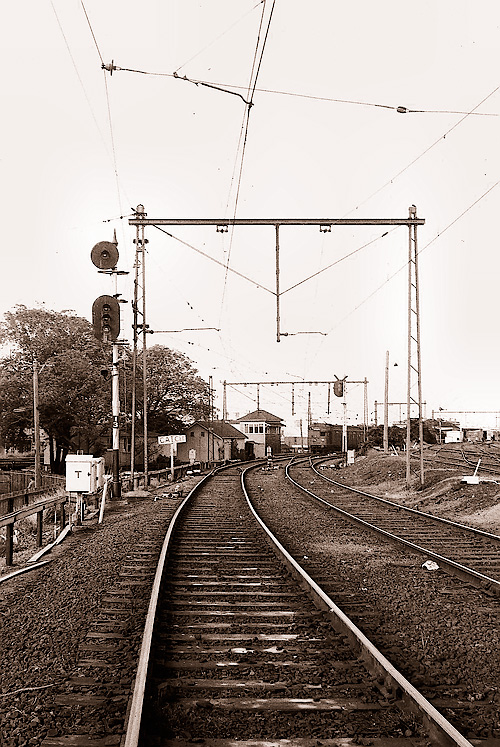
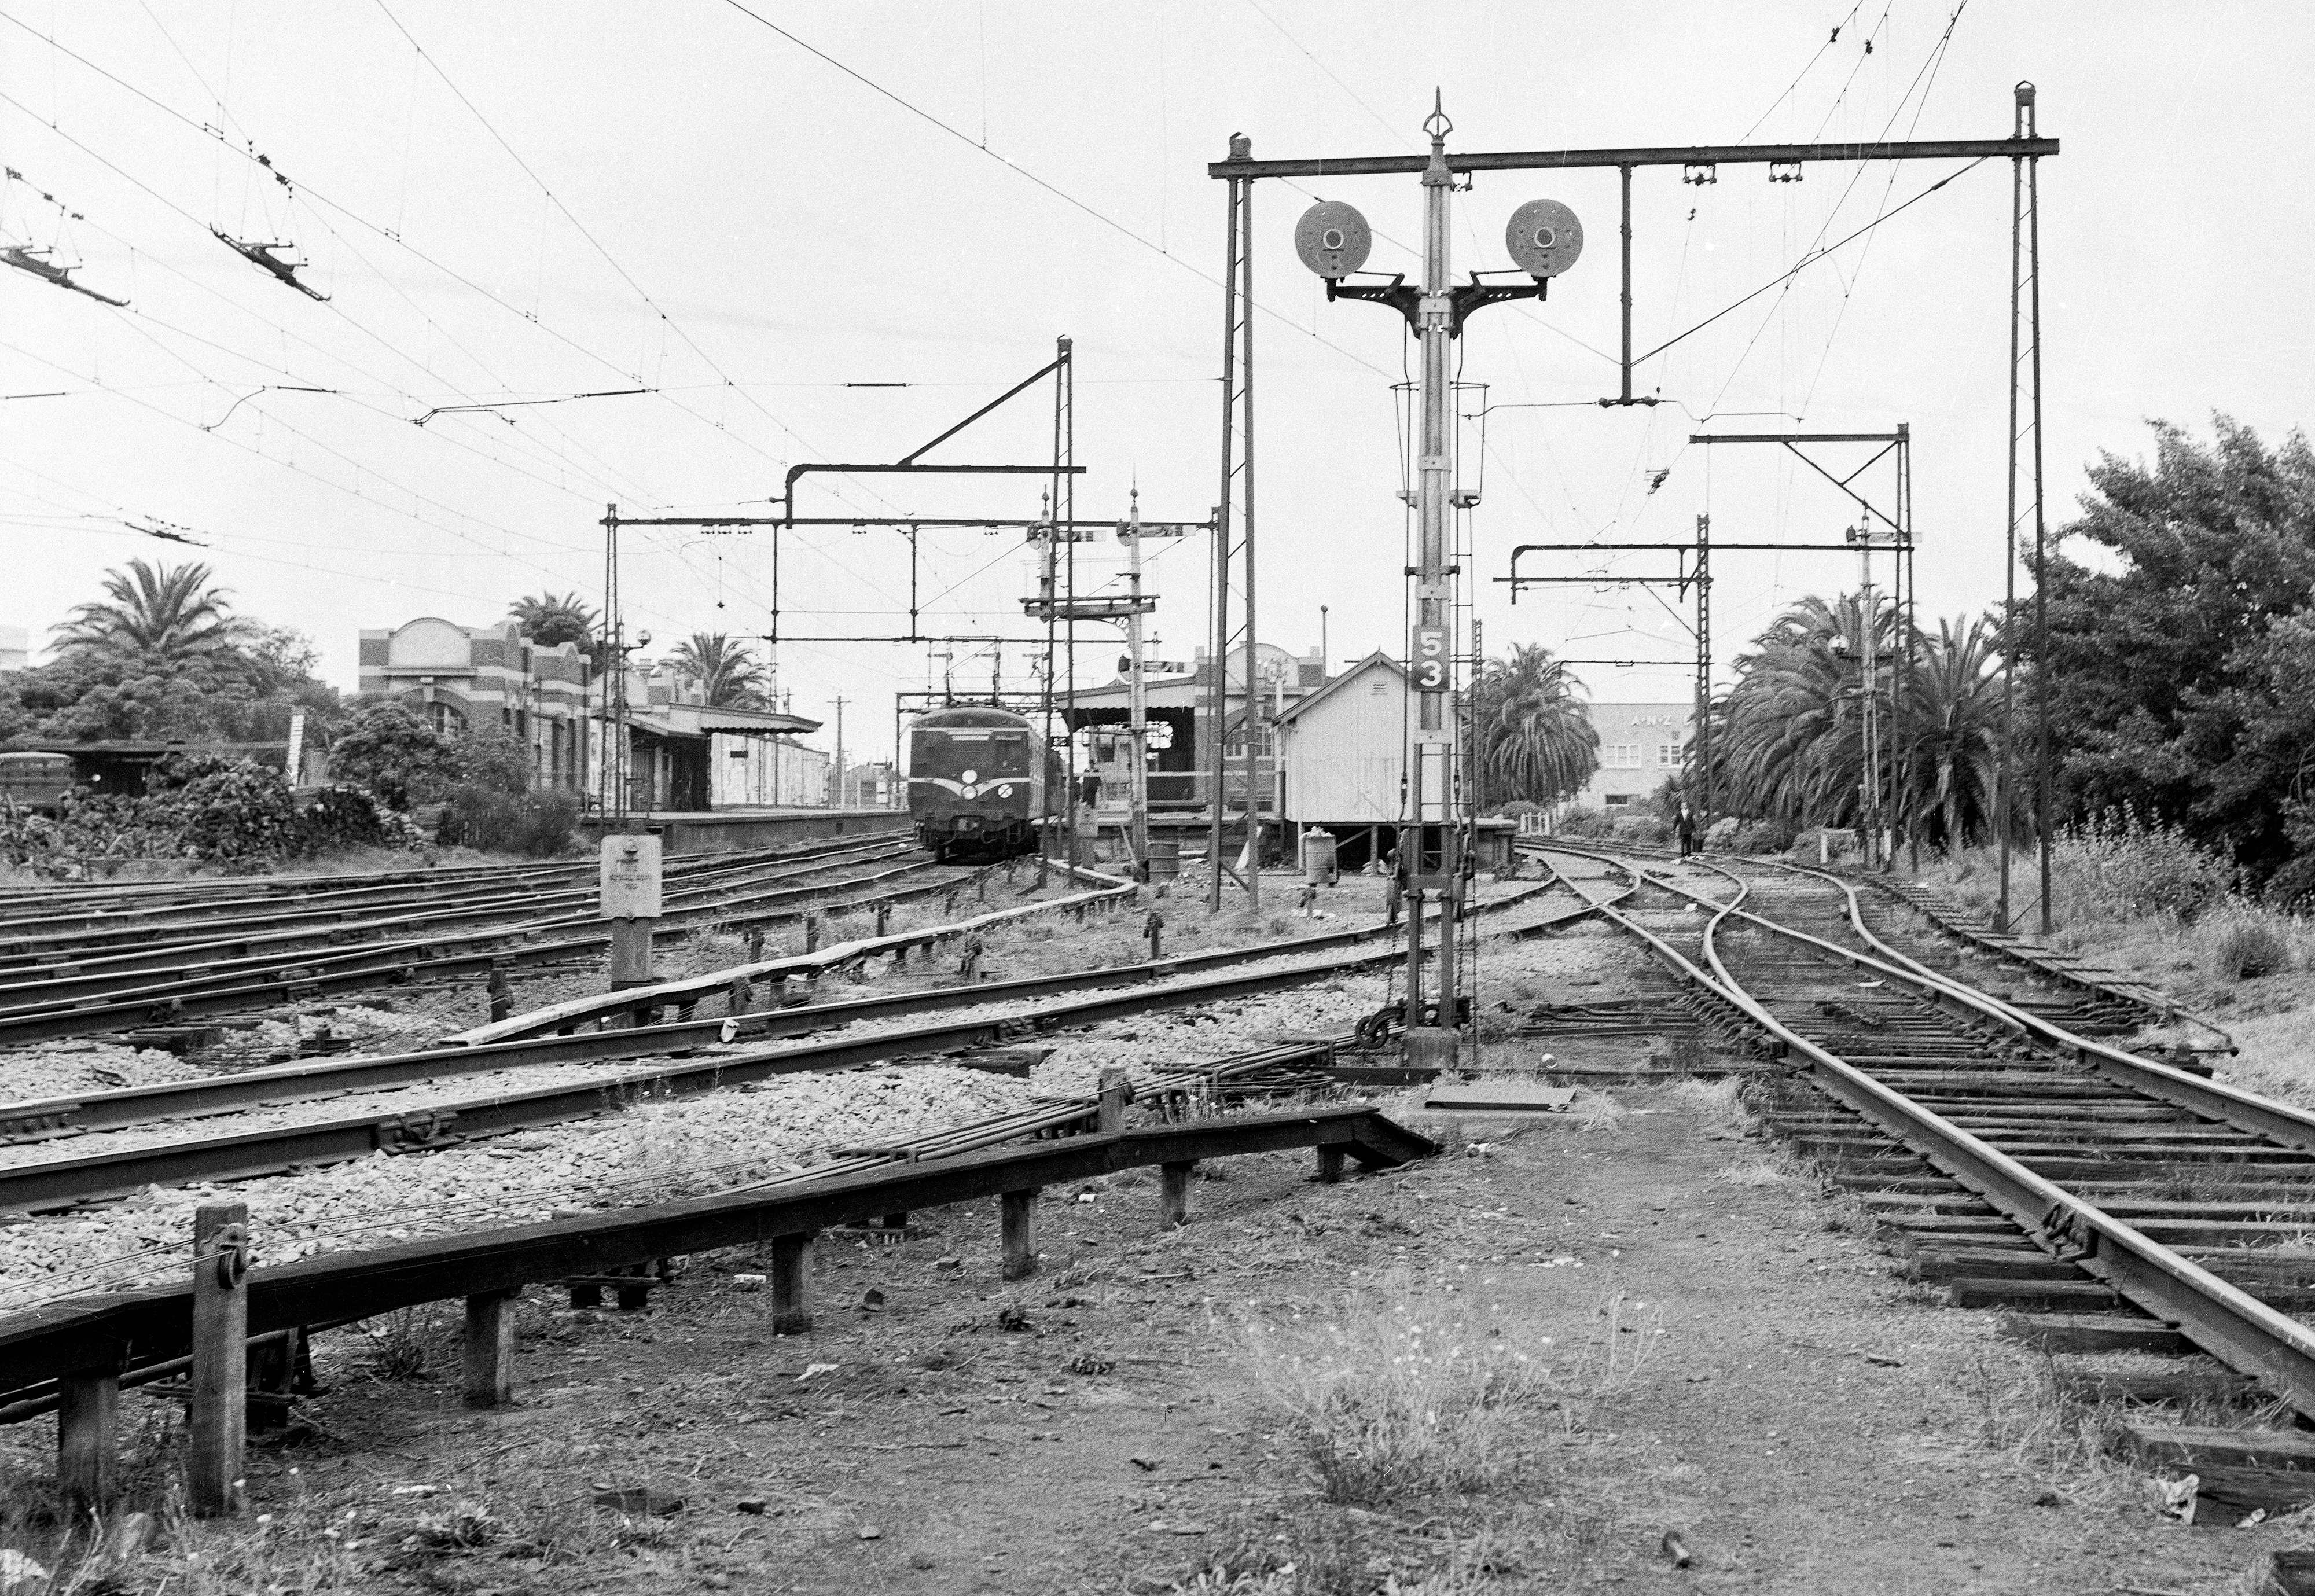
ABOVE: Taken standing on the up racecourse line looking towards Melbourne.
The signalbox shown was abolished July 1969 when control of the junction was done by Kensington
photo courtesy David Langley, April 1969.
ABOVE: Newmarket signalbox
photo courtesy David Langley, April 1969.
ABOVE: Looking north towards Broadmeadows.
The hut in the middle of the photo was the Signal & Communications depot.
photo courtesy David Langley, April 1969.
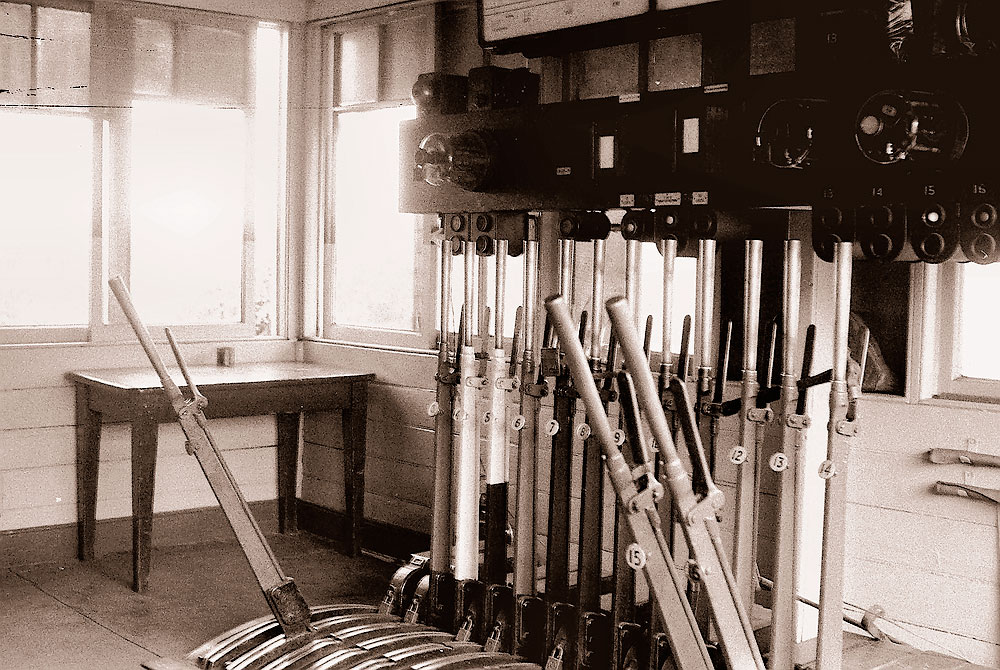
>p>ABOVE: The 15 lever frame at Newmarket signalbox
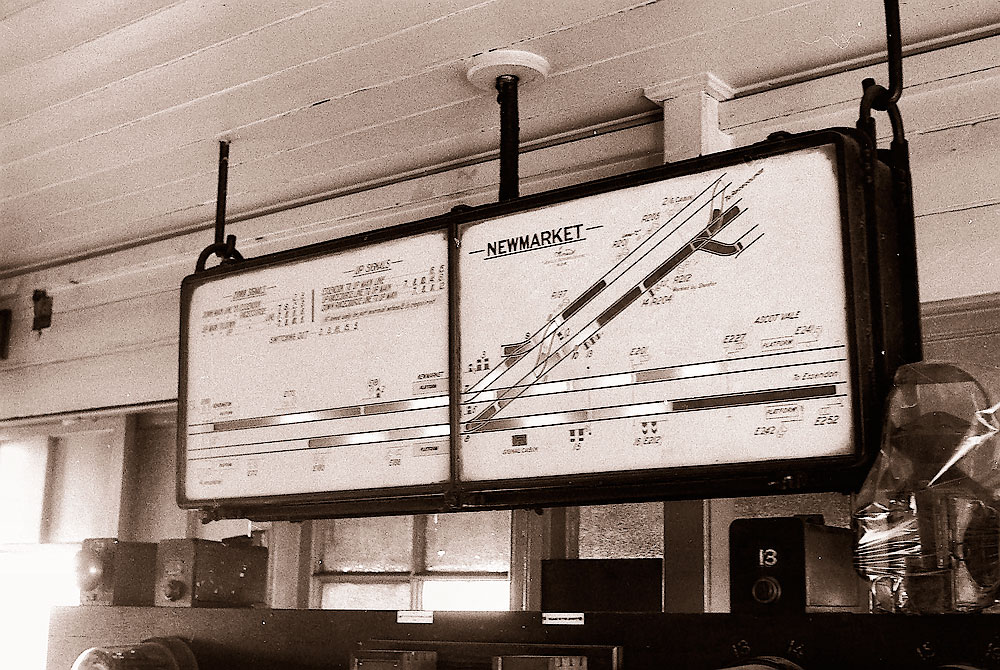
BELOW: The illuminated box diagram
photos courtesy David Langley, April 1969.
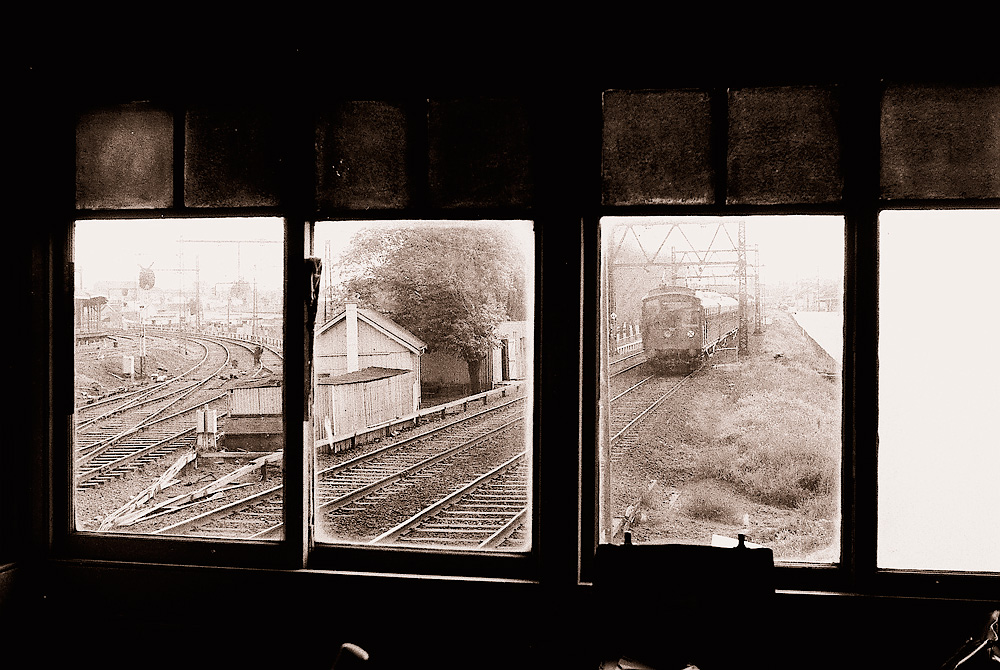
ABOVE: An up Tait from Broadmeadows as seen through the signalbox windows.
ABOVE: A Newmarket pilot diverges off the mainline onto the Showgrounds line.
photo courtesy David Langley, April 1969.
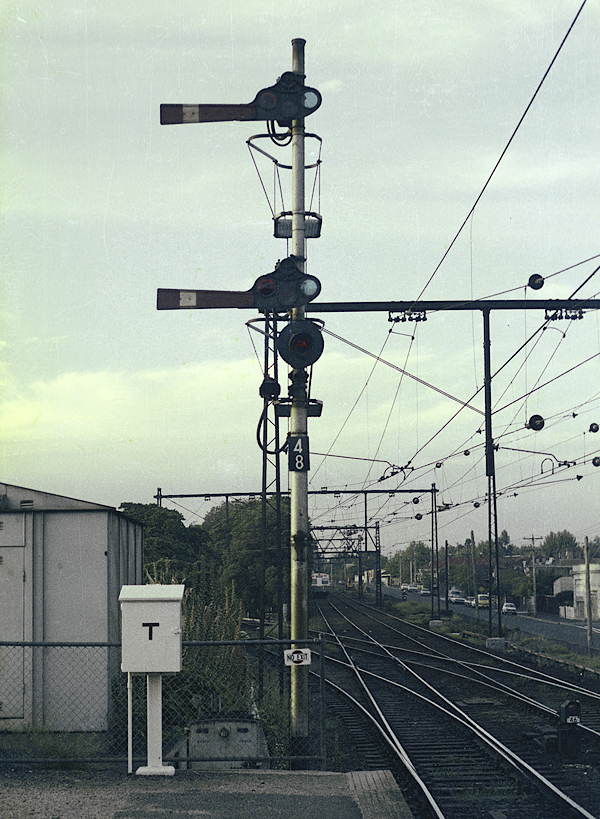
ABOVE: Looking towards Melbourne from the up Racecourse line.
photo courtesy David Langley, April 1969.
ABOVE: A down Broadmeadows has just departed Newmarket, 1980.
The signalbox is gone and the junction is now controlled by Kensington.
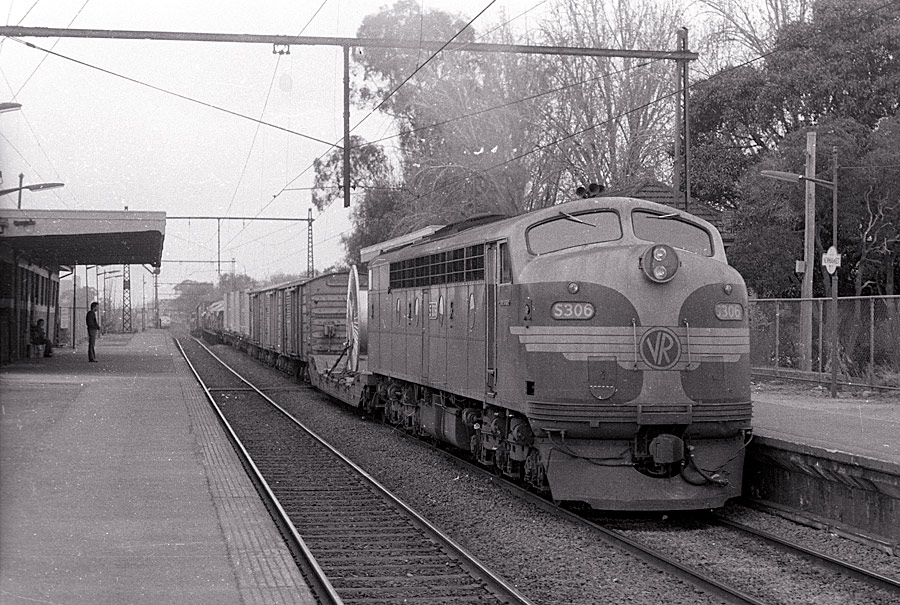
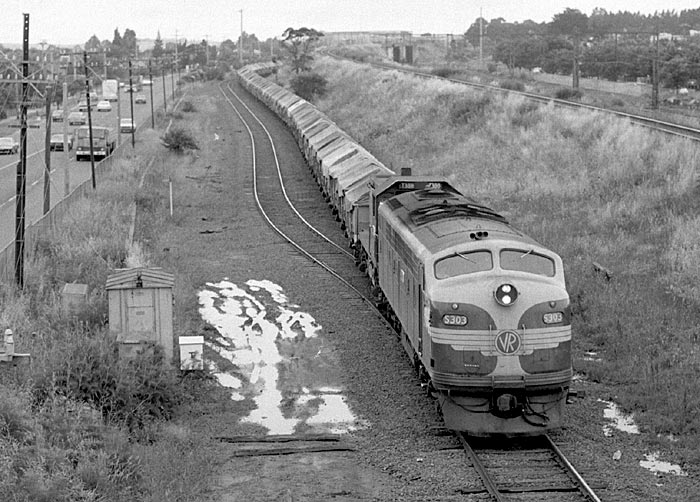
ABOVE: S 306 heads a Saturday afternoon down Seymour goods at Newmarket, 1978.
ABOVE: A down Broadmedows bound Harris between Newmarket and Ascot Vale.
Dec. 27 1983
Photo courtesy Warren Banfield
Ascot Vale

ABOVE: Looking north, an up service arrives pre electrification. photo courtesy PROV.
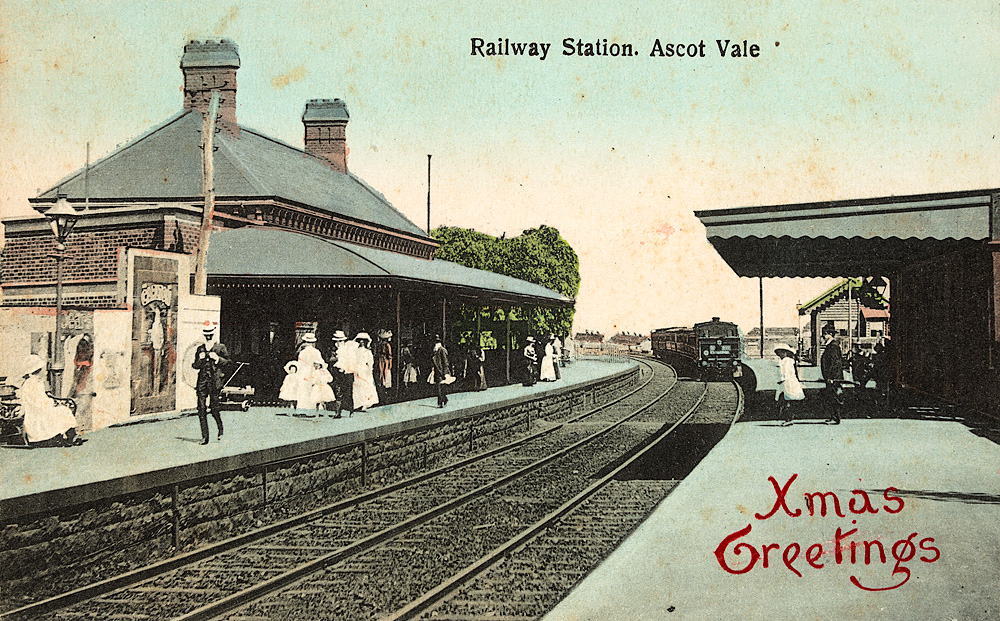
ABOVE: A pre electrification view looking South.
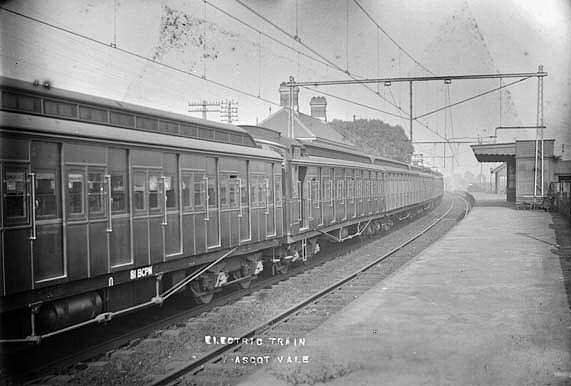
BELOW: From a similiar viewpoint to the photo above a up Tait at the platform
not long after electrification.

Moonee Ponds
ABOVE: Moonee Ponds up platform.
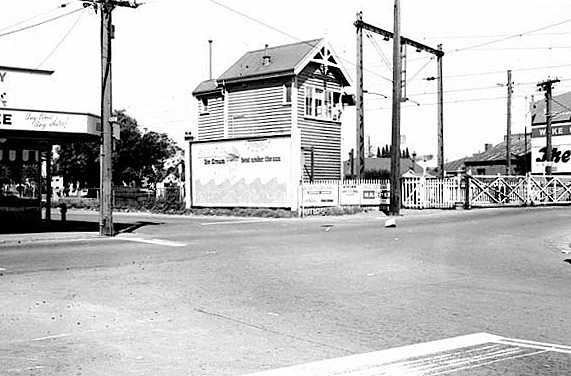
ABOVE & BELOW: Moonee Ponds signalbox contolled the interlocked gates at Puckle street. It was abolished in May 1969 when boom barriers were brought into service.
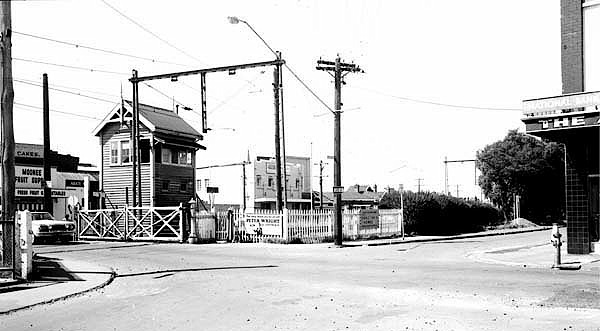
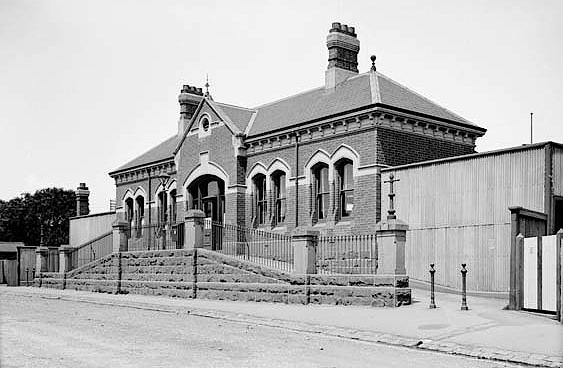
BELOW: The up side buildings from the road side.
Essendon
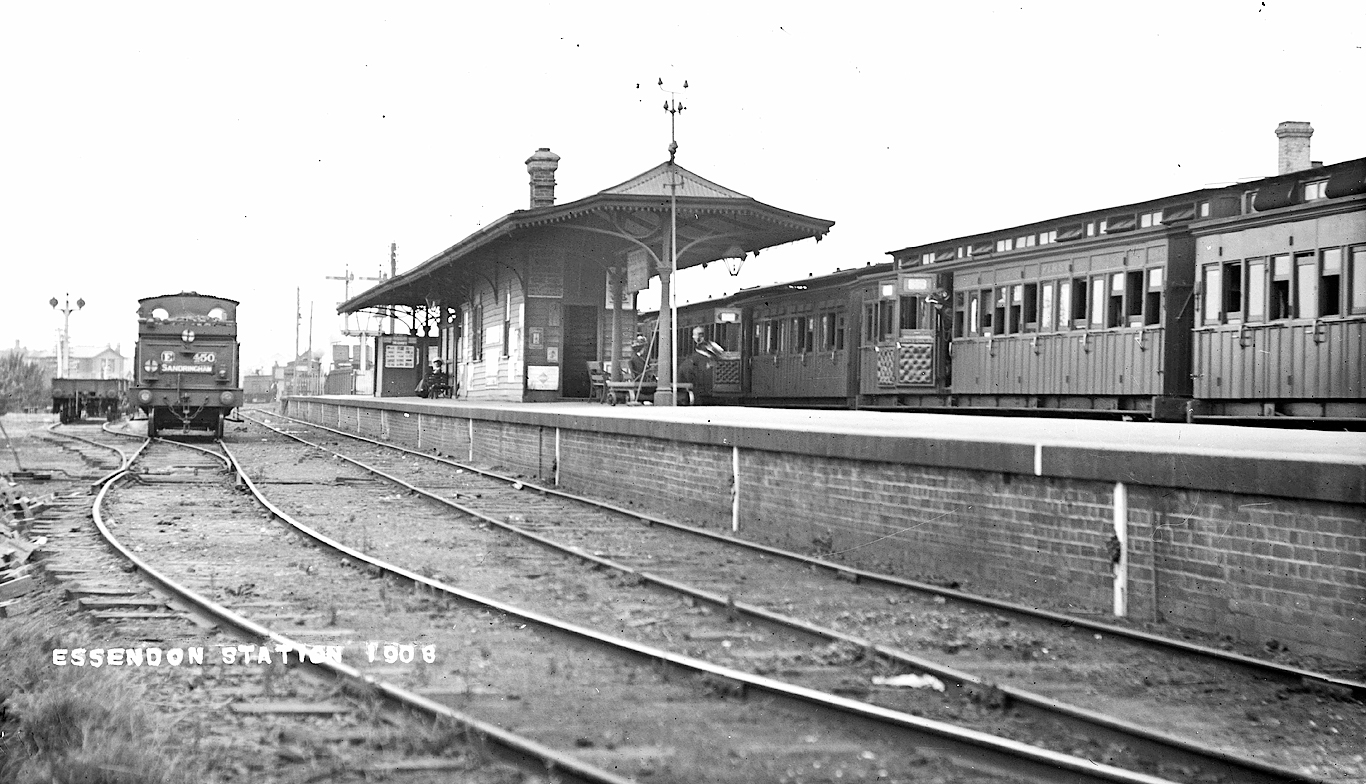
ABOVE: Pre-electrification view looking North. 1908.
ABOVE: Looking North towards Broadmeadows from the signalbox citca 1920s
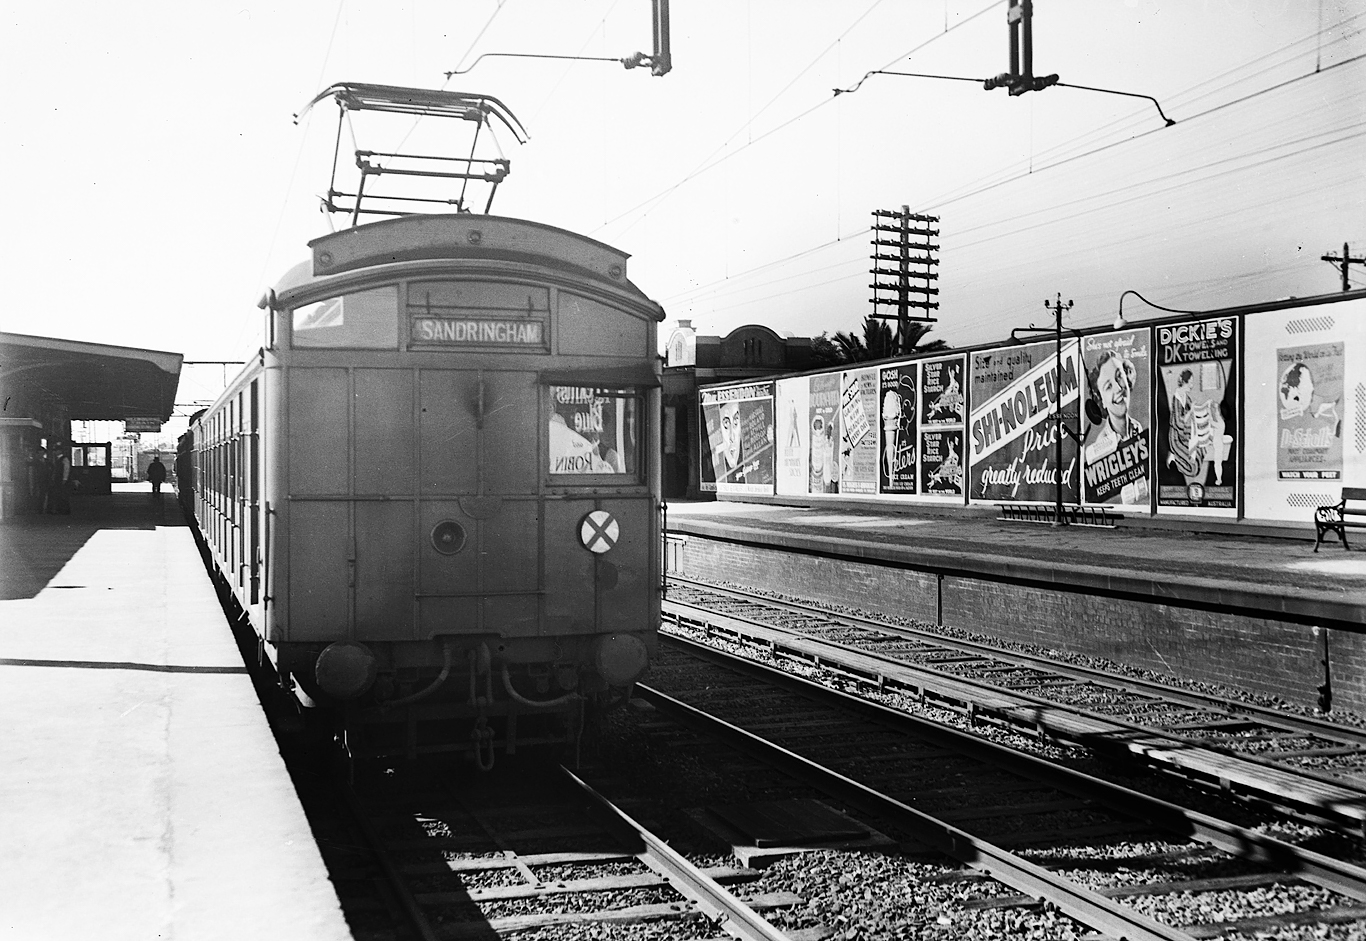
ABOVE: An up Tait arrives at the centre platform
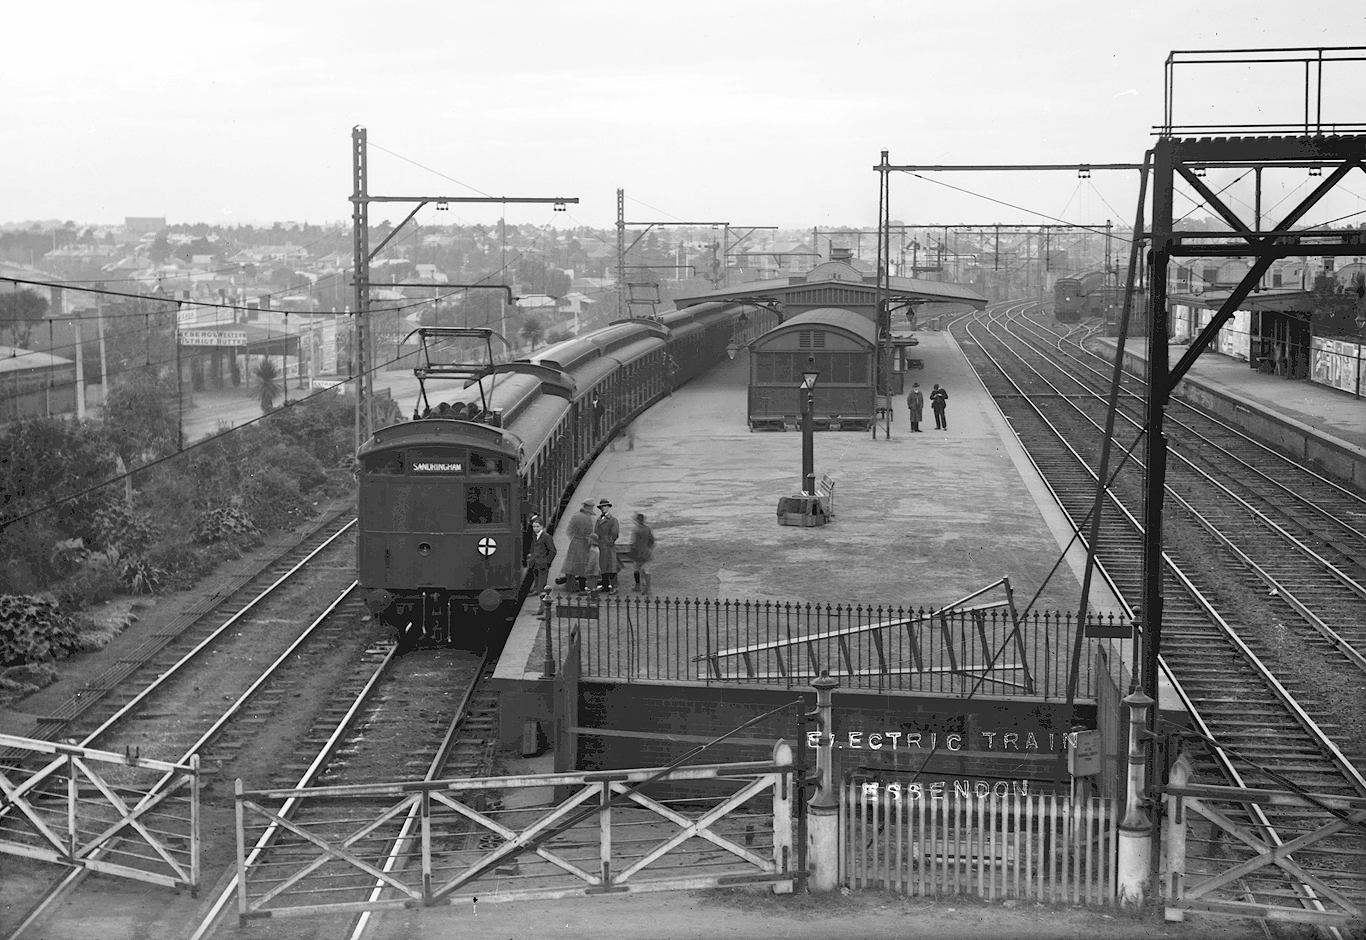
ABOVE: Looking North, not long after electrification.
ABOVE: Looking South towards Melbourne, the signalbox would be just behind the camera.

ABOVE: Looking South
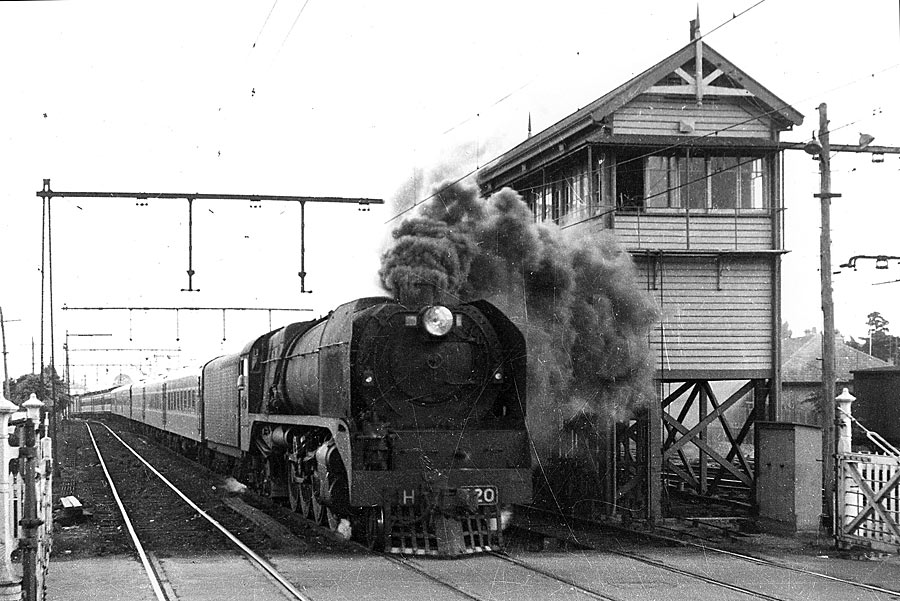
ABOVE: H 220 on a down Albury pass. passes the signal box at Essendon, 1940's
official VR photo.
ABOVE: Looking towards Melbourne an up Harris train pauses in thecentre platform. Circa 1960.
ABOVE: A pair of S class on a down Albury pass. at Essendon, Feb 1979
Strathmore
ABOVE: The up SOP glides around the curve into Strathmore (then called North Essendon) circa 1950.
Pascoe Vale
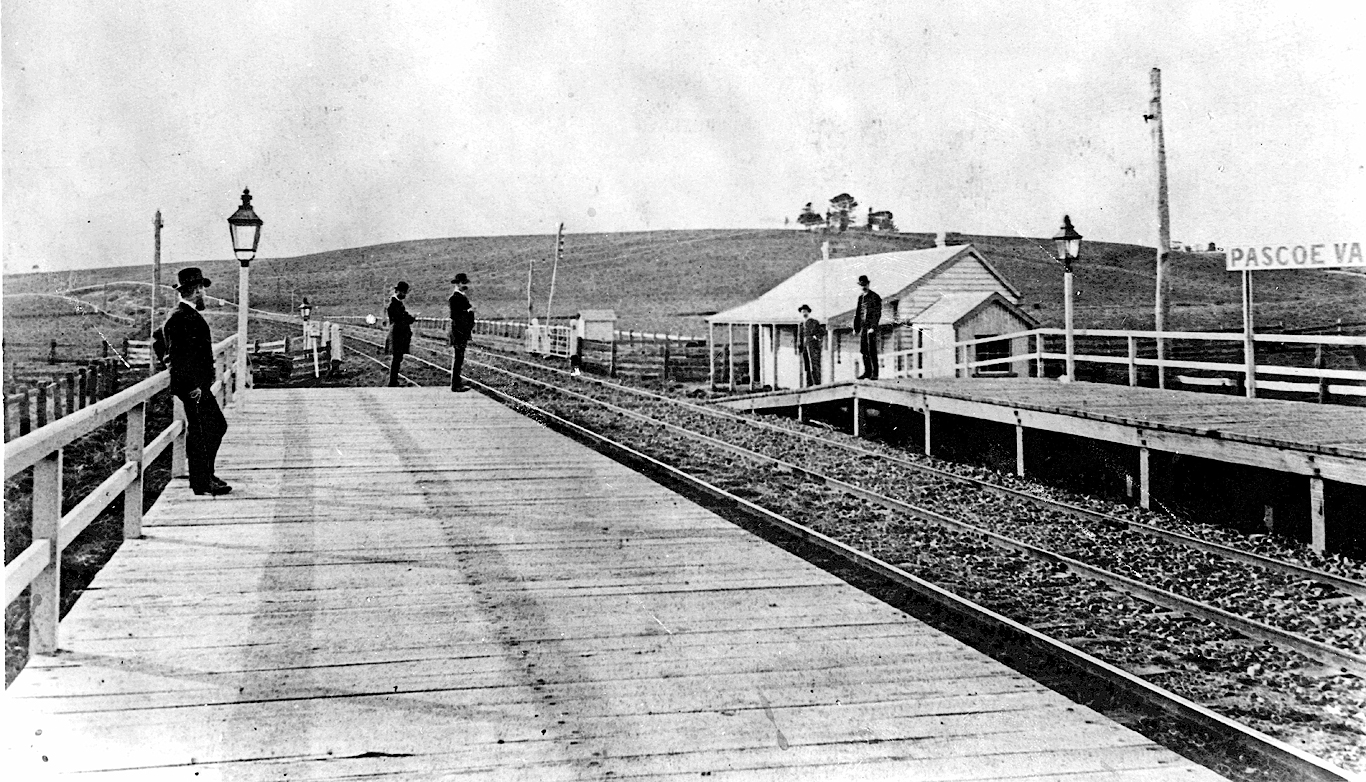
ABOVE: Although there is nothing to accurately date this photo, it is assumed that it was taken soon after the station was opened (10Nov1885) with duplication coming on 16Nov1885. Looking north from the down platform. Judging by the shadows it was taken fairly late in the afternoon.
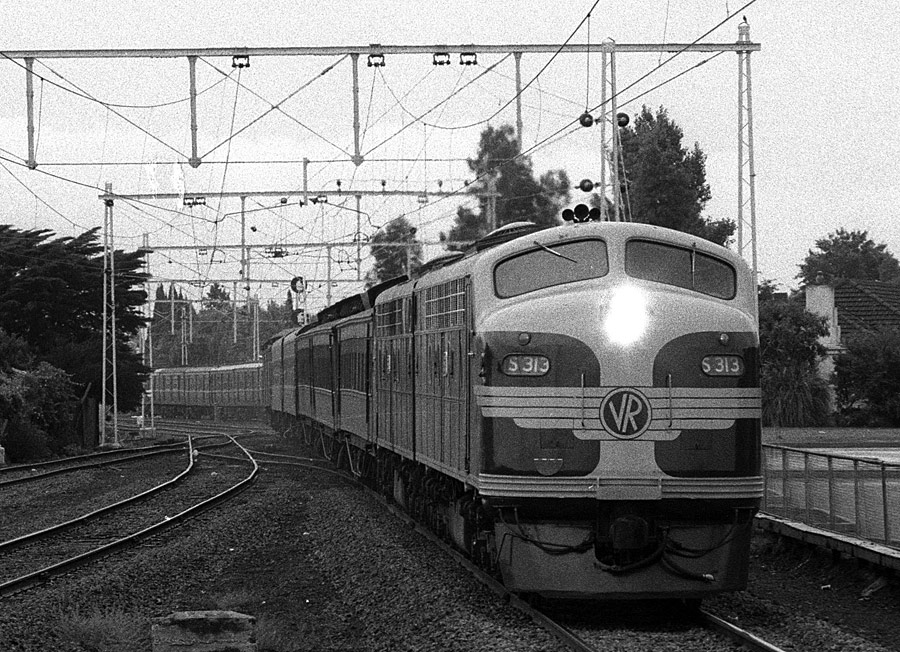
ABOVE: One of the first train pictures I ever took. S 315 and two flat top T's on a combined Albury - Cobram train in full throttle approach Pascoe Vale which is at the foot of Glenroy Bank. This location is about 5 blocks from where I grew up. 1977.
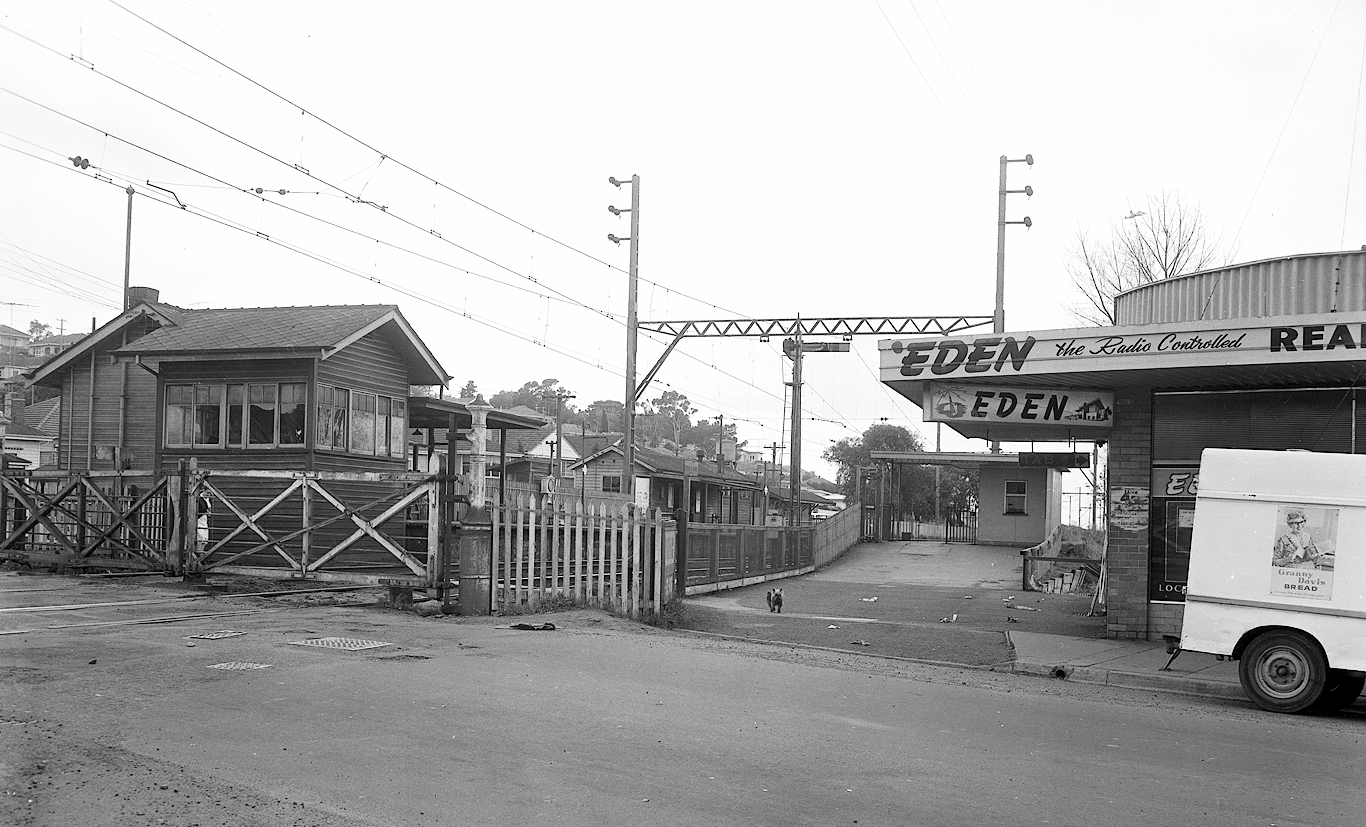
ABOVE: Looking towards Melbourne at the signalbox on the up platform. The interlocked gates controlled traffic across Gaffney street. The gates went when as part of 3 position signals being introduced from Essendon to Broadmeadows Nov 15 1965.
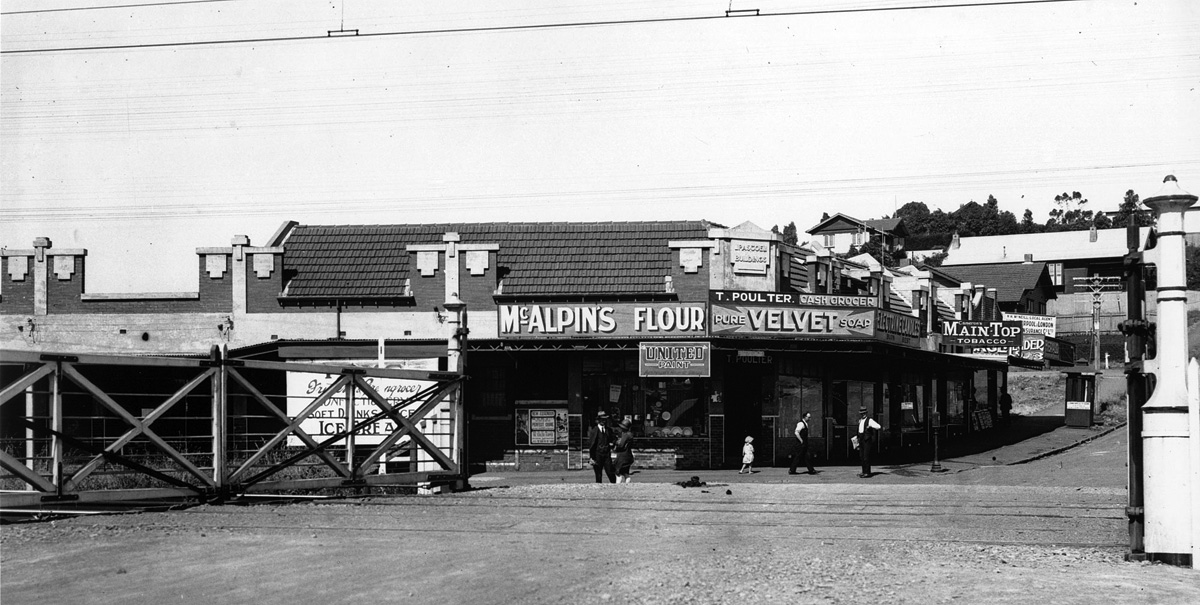
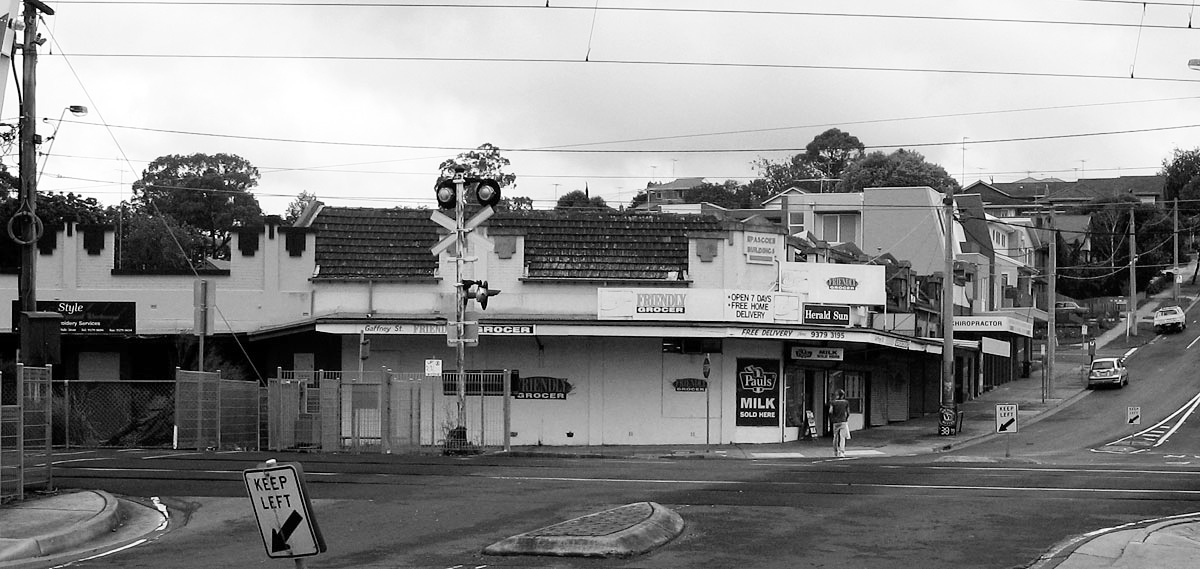
Gaffney Street, Pascoe Vale, looking in an easterly direction. The ABOVE photo was probably taken in the 1930's although without any vehicular traffic it's a bit hard to tell. The BELOW photo was taken in 2008. The interlocked gates were replaced by booms on Nov. 15 1965. Since this photo was taken the building on the corner has been demolished.

ABOVE: L 1150, with dynamometer car attached, on a test train on Glenroy bank just north of Pascoe Vale. March 13 1954
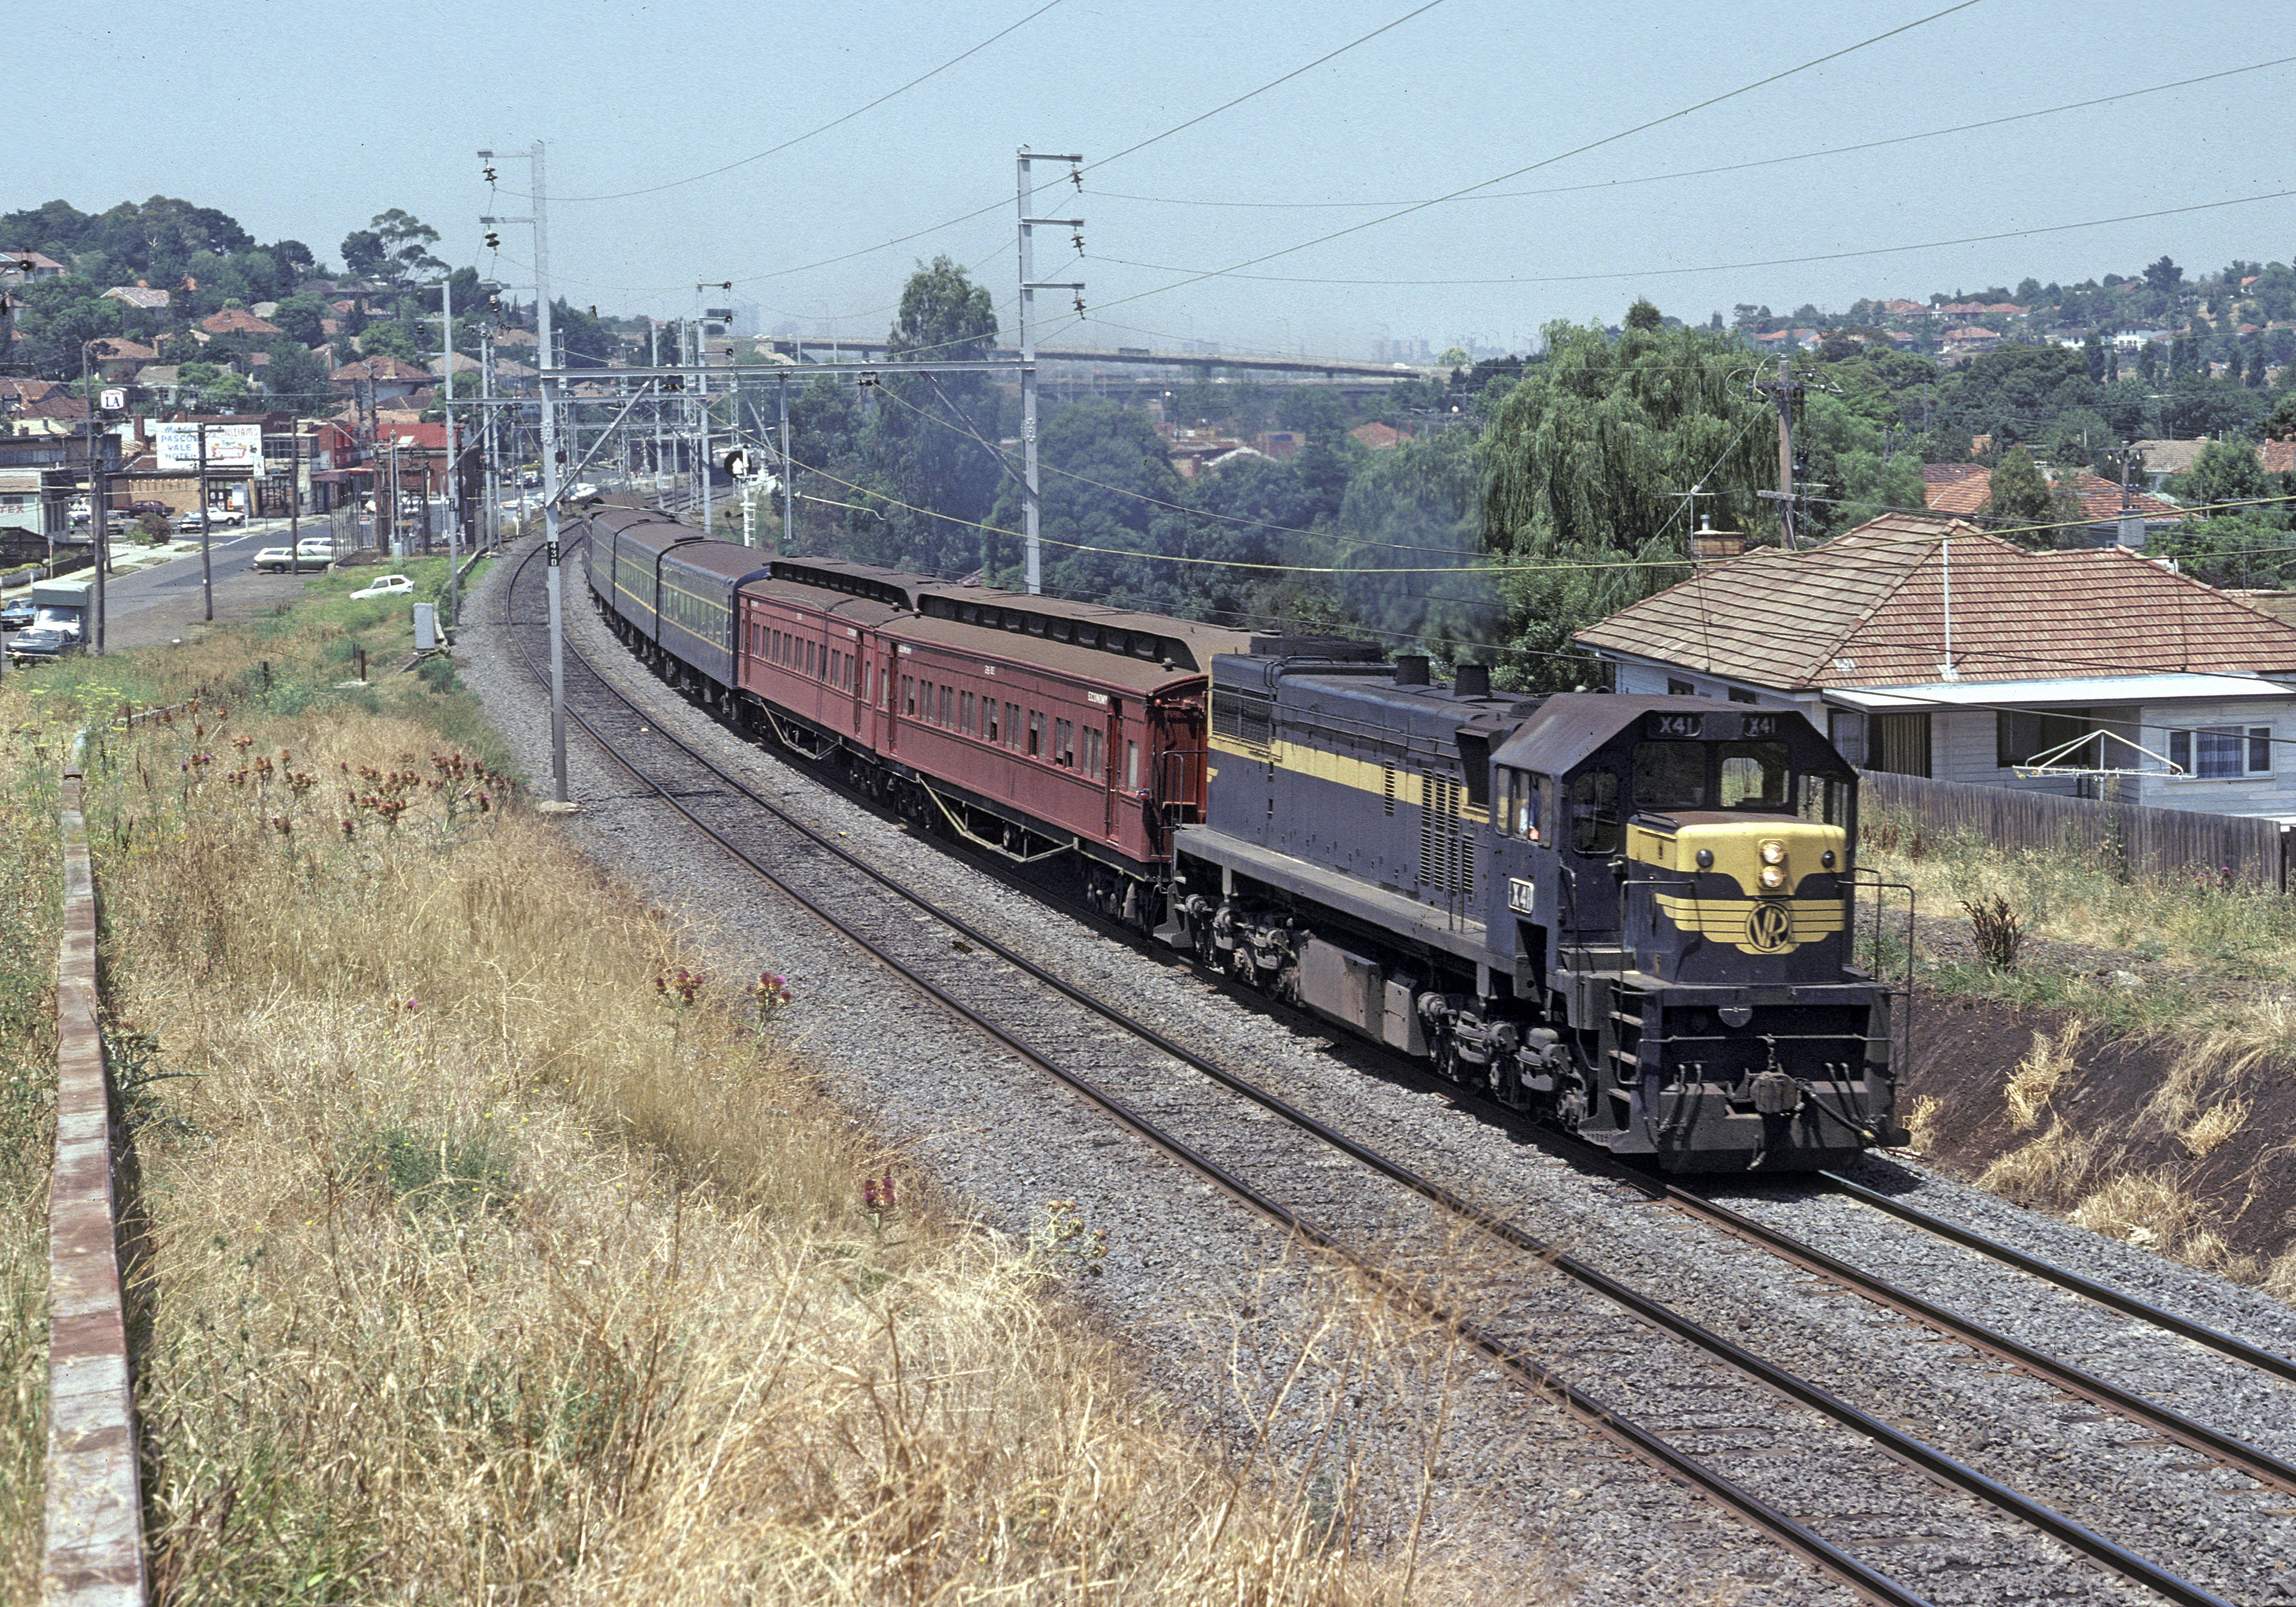
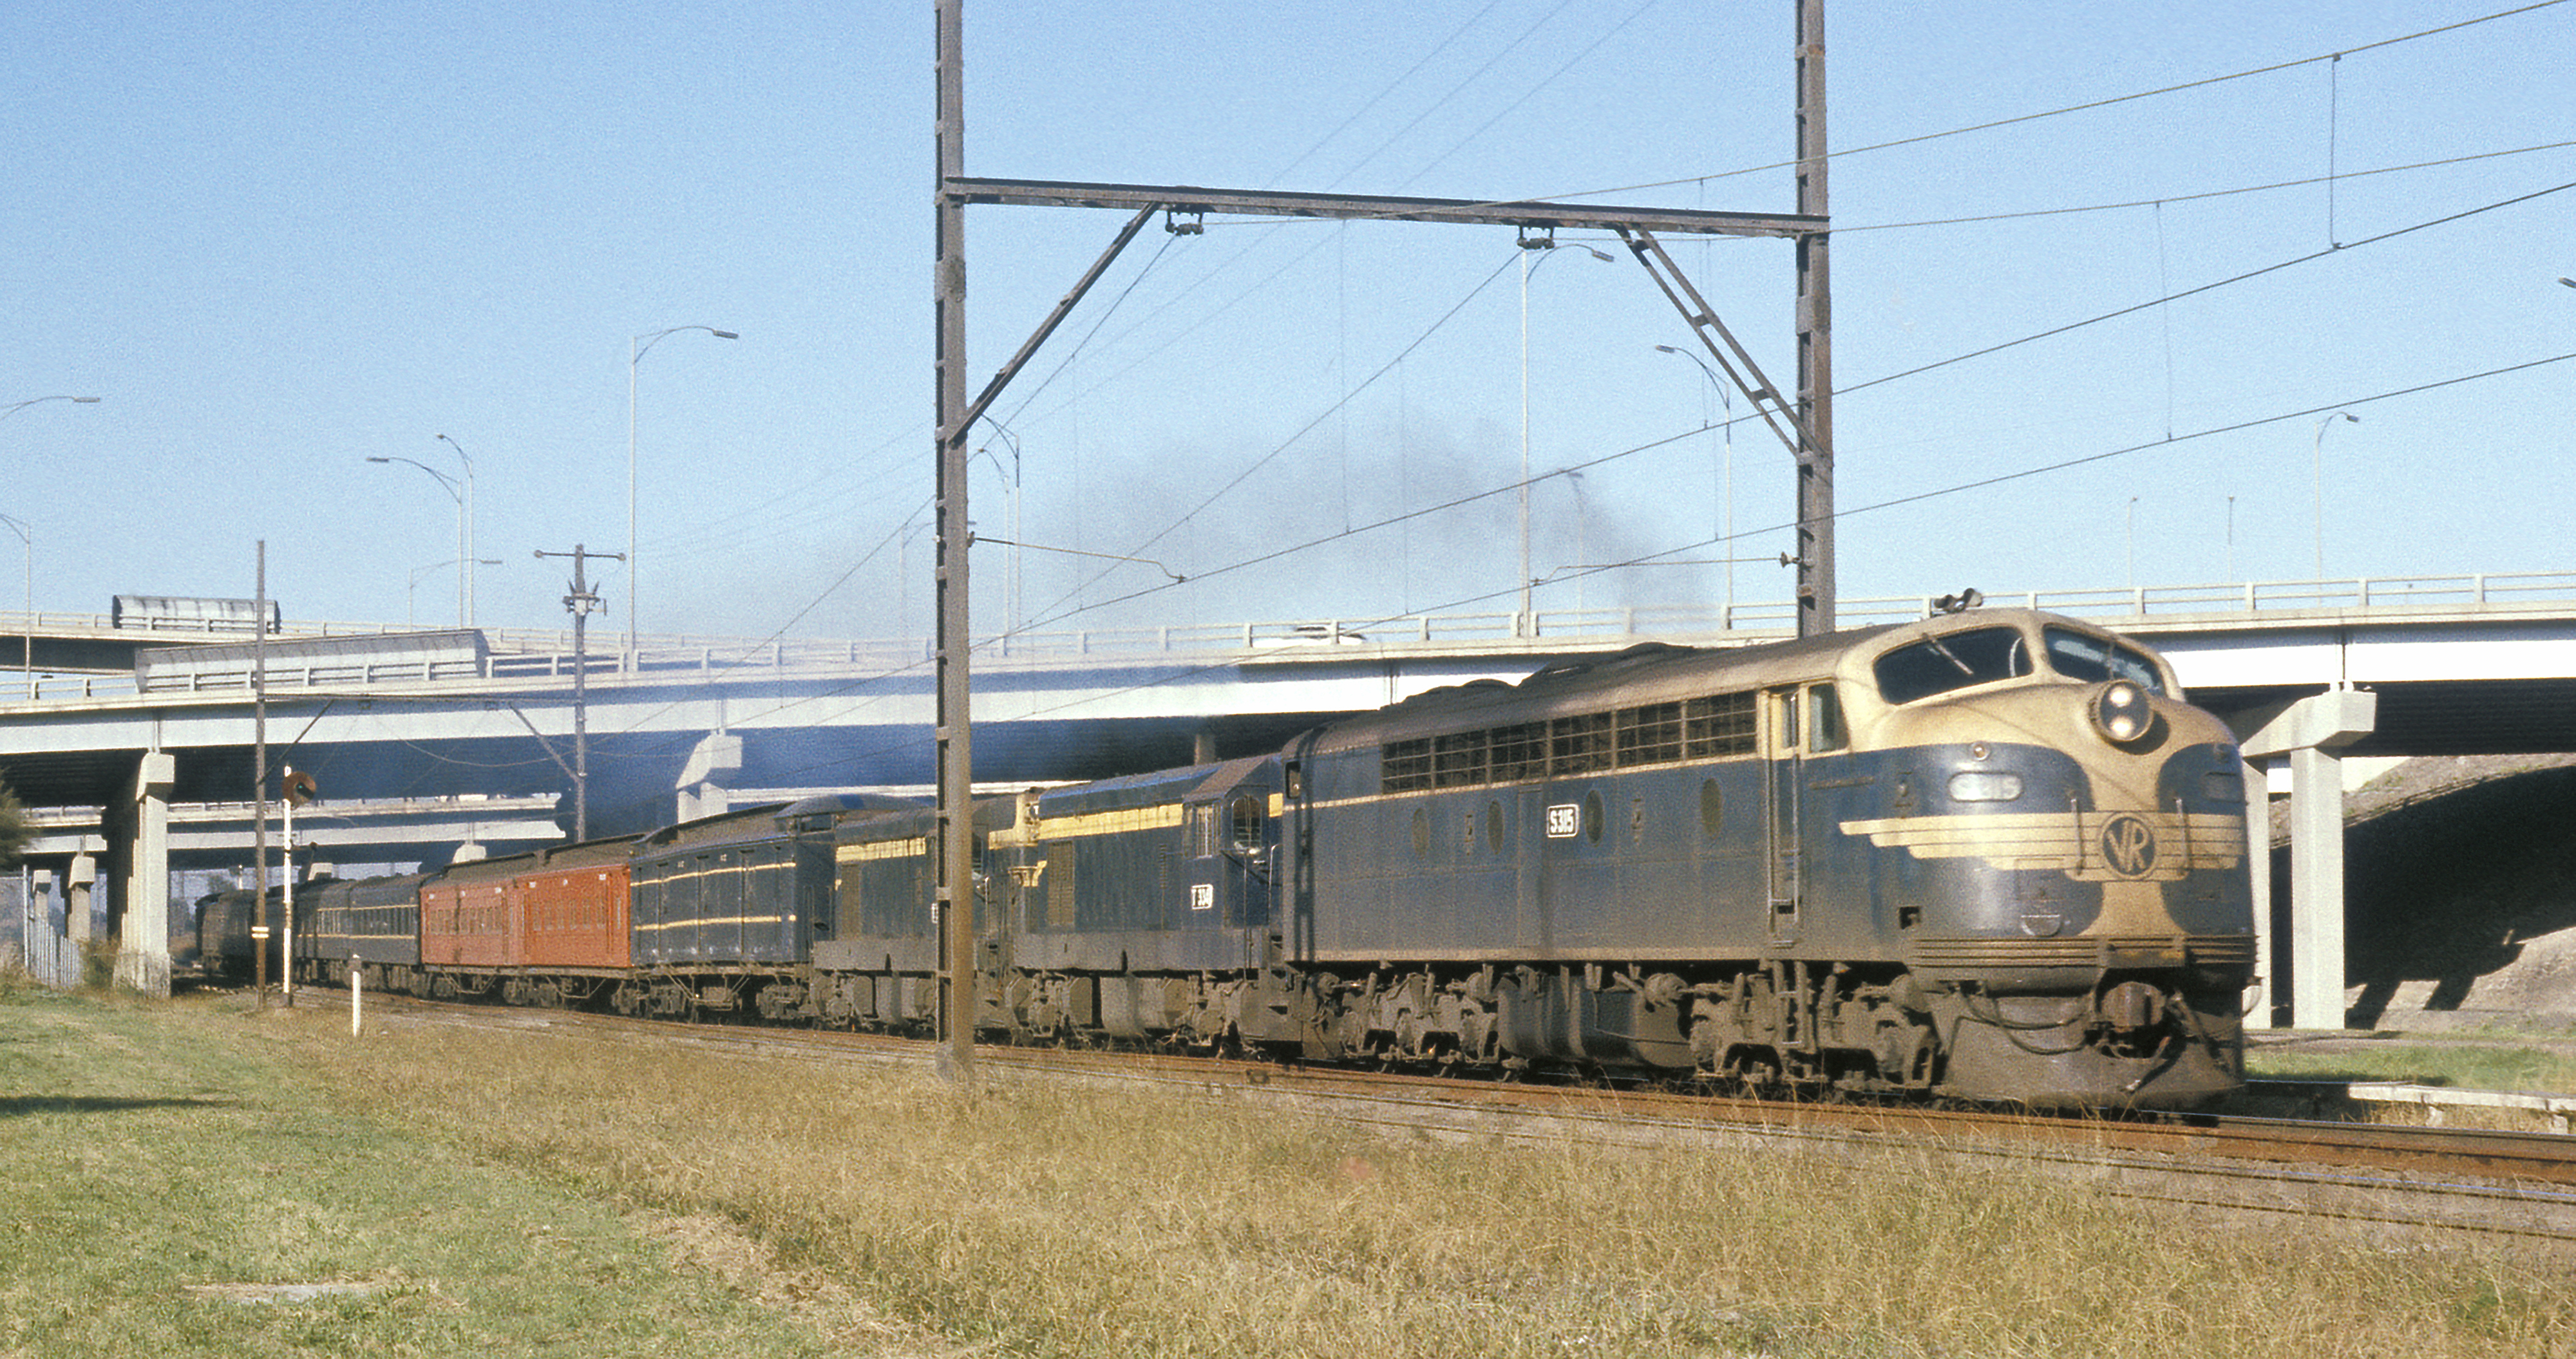
ABOVE: A down Albury pass. roars through Pascoe Vale as it begins its ascent of "Glenroy Bank" Feb. 1982
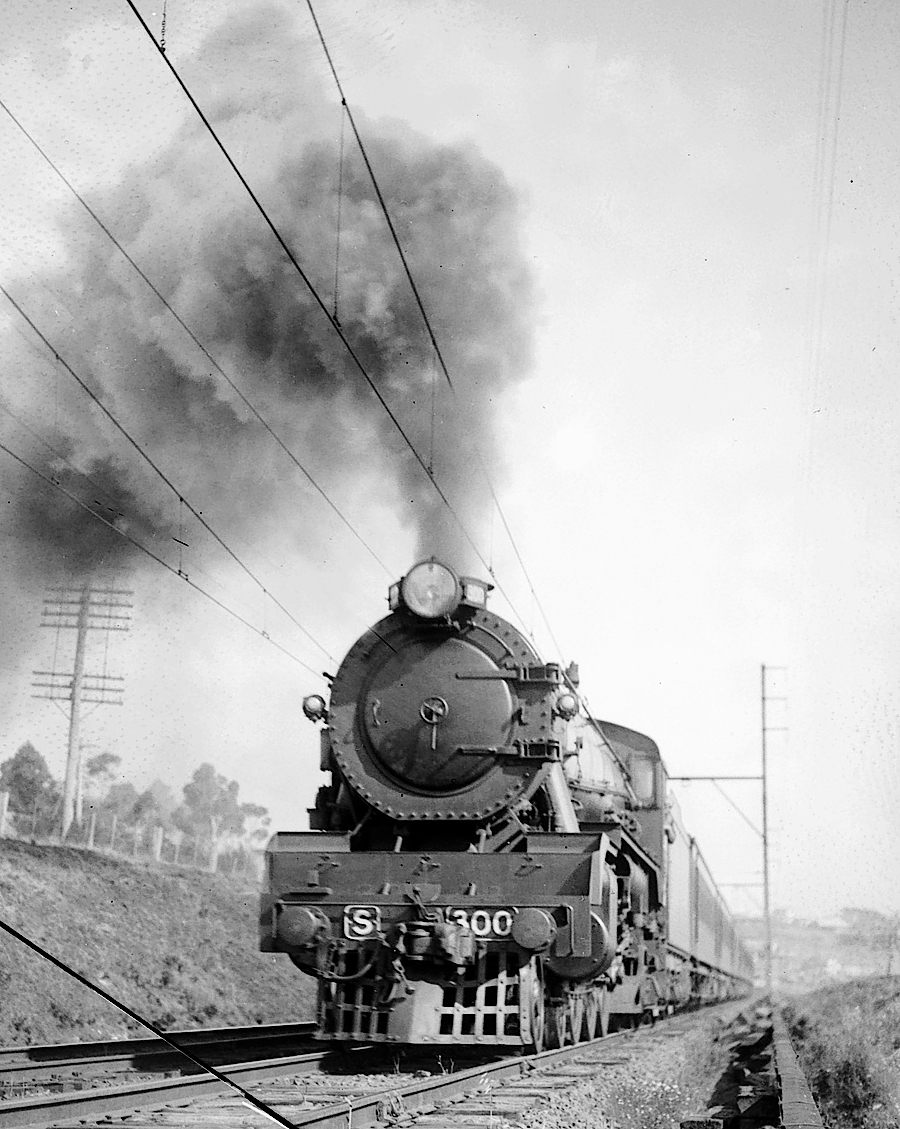
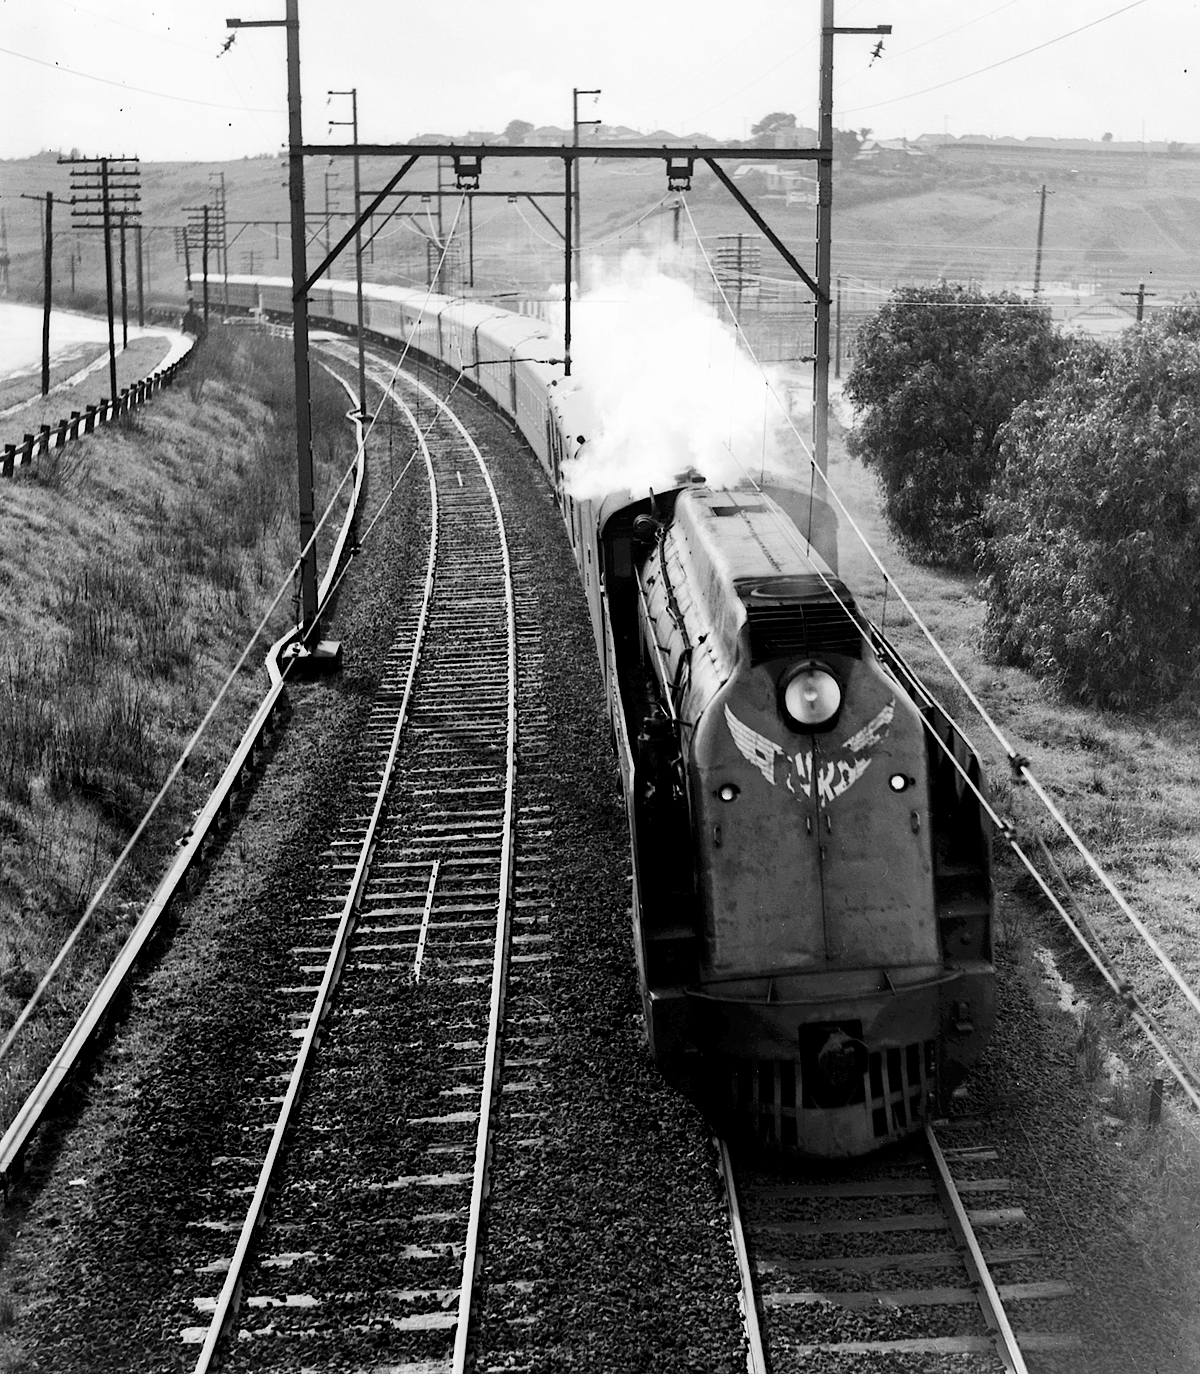
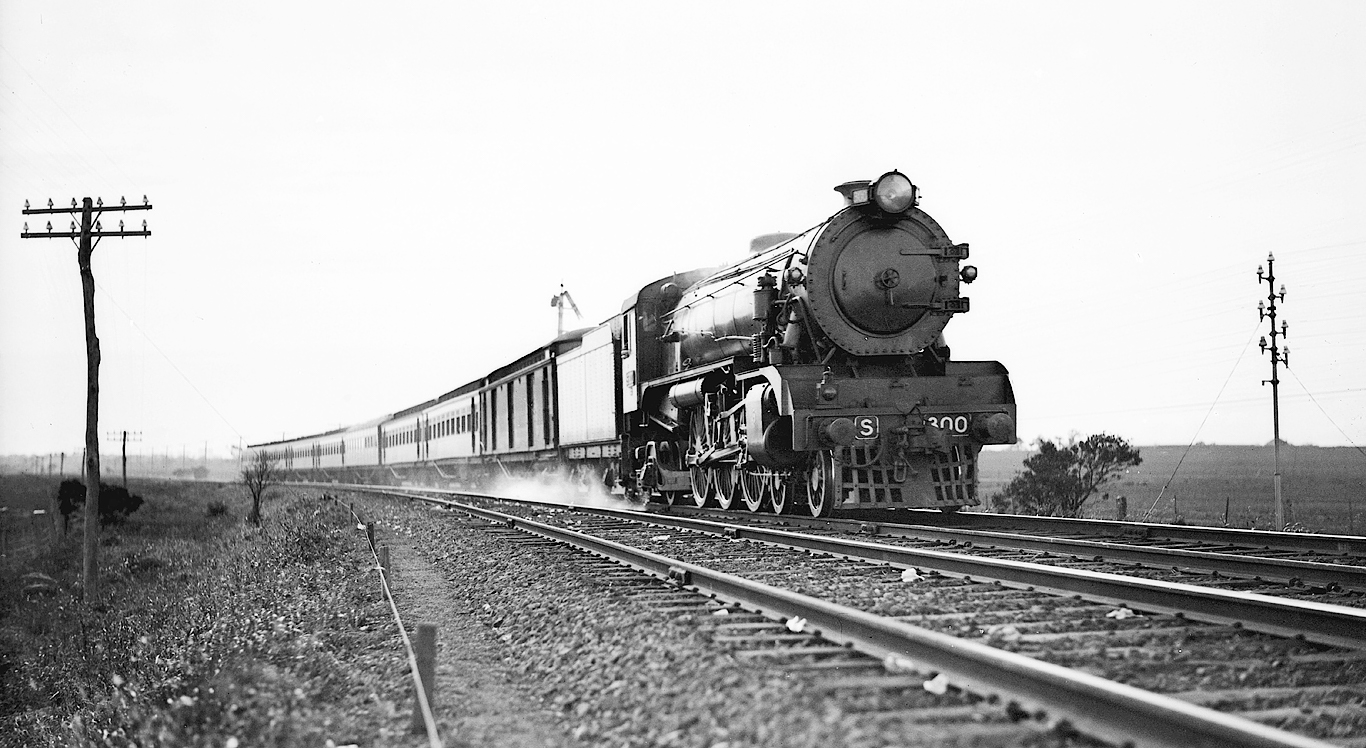
ABOVE: S 300 ascends Glenroy bank on the down Sydney Limited circa 1930s
Glenroy
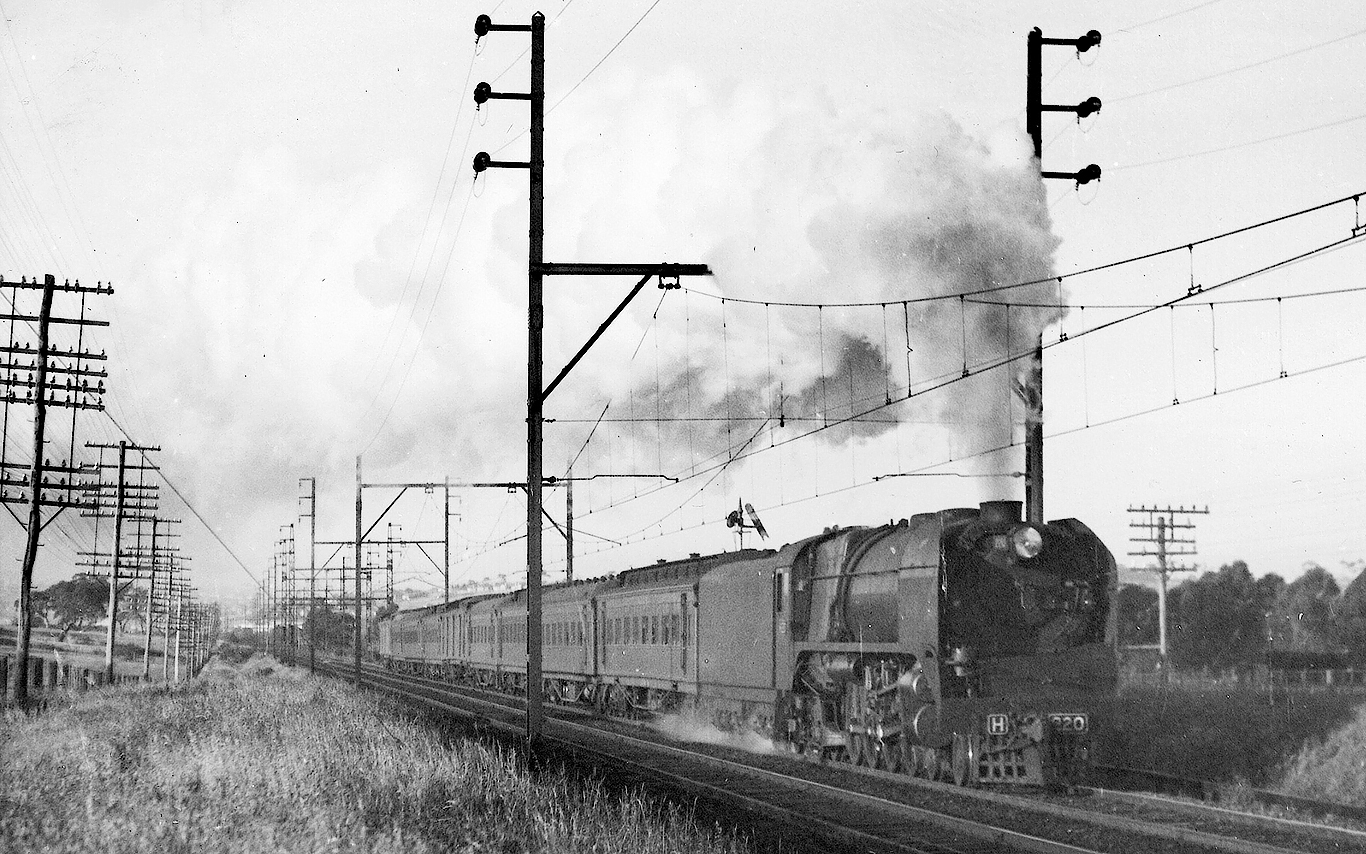
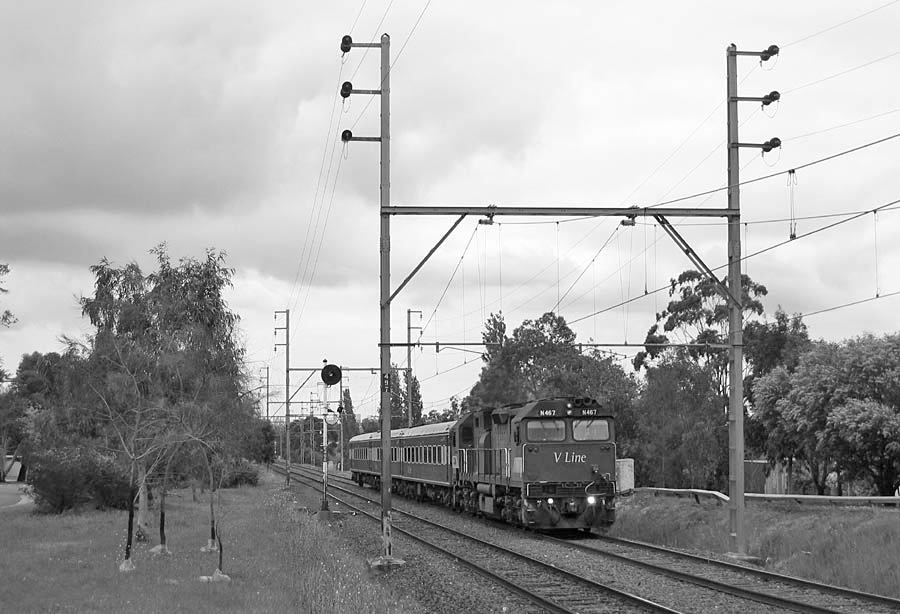
Glenroy bank, 63 years apart. The photo ABOVE shows "Heavy Harry" (H 220) at the head of the 8.00am combined Nth East/Goulburn Valley train. Glenroy's down distant signal can be seen above the tender. May 1941. ABOVE photo by Mr. Aiken. The photo BELOW was taken at the same spot shows N 467 on the 0910 Spencer St to Shepparton pass Oct. 9 2004. In older photos "Glenroy bank" is often refered to as "Olivers bank"
ABOVE: A pair of X's make short work of the 1 in 50 grade between Oak Park and Glenroy on the morning down Albury pass. Dec 1986
ABOVE: B 67 powers up Glenroy bank (between Oak Park and Glenroy) on the 7.55 am Spencer Street to Albury pass. Jan. 29 1982. At various times over the years this train ran as either a straight Albury train or as a combined Albury/Cobram with the train splitting at Seymour.
Seven years after this photo was taken B 67 was scrapped and its No2 end nose would be used as an ornament at the Station Hotel in Prahran
Jacana
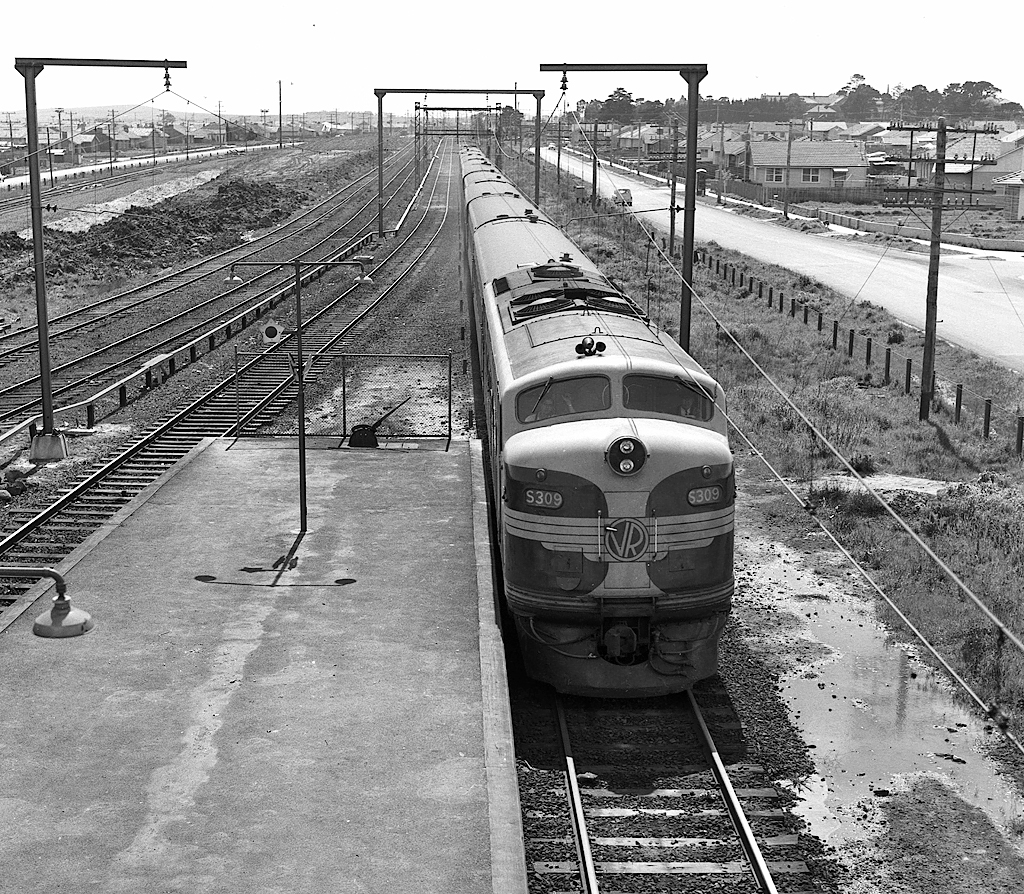
ABOVE: Work on the standard gauge flyover continues as S 309 drifts through Jacana on the up SOP. circa 1960, note the signal lever on the platform
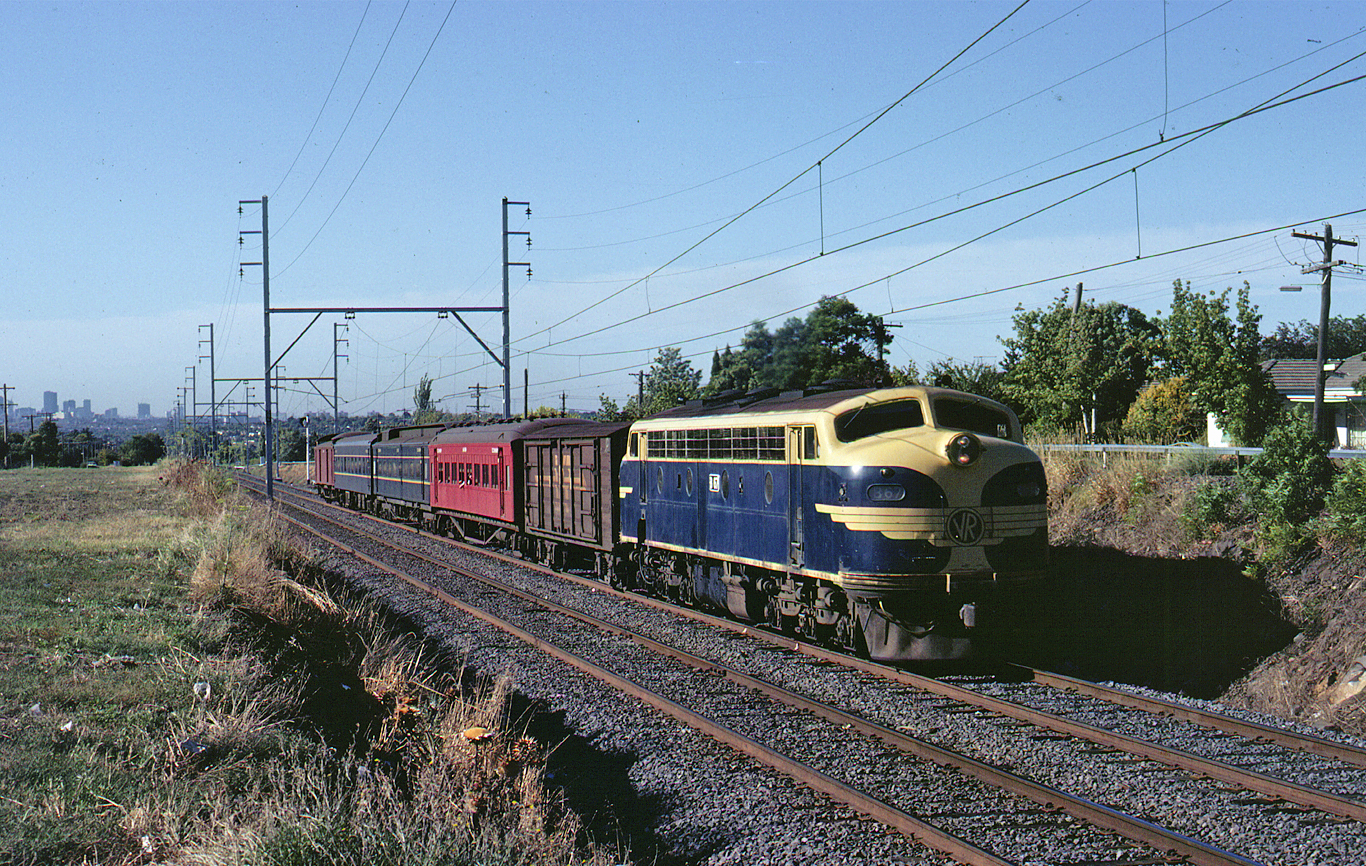
ABOVE: The combined Albury/Cobram headed by S 312 powers through Jacana. At Seymour the S and the front 4 cars will form the Albury train while a loco will attach to the rear 4 cars to form the Cobram train, 1978.
ABOVE: A down Broadmedows "Tait" suburban arrives at Jacana, 1978.
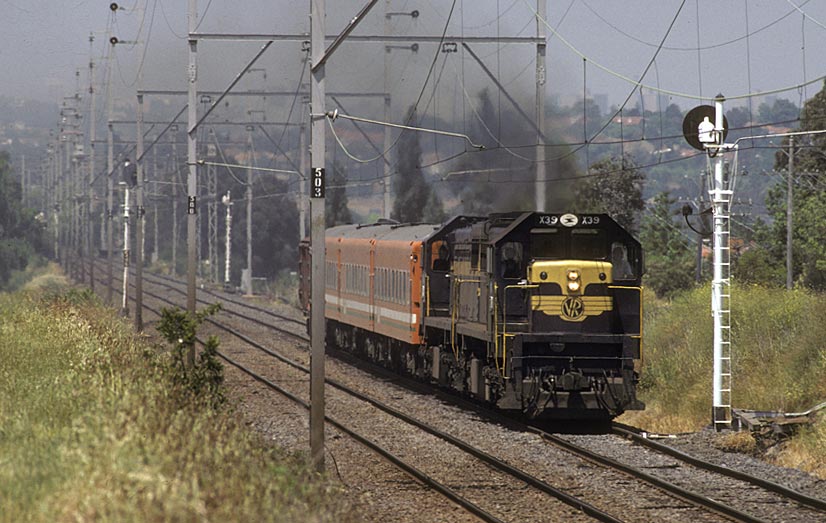
ABOVE: X 49 on the up "Southern Aurora" at Jacana, 1978.
ABOVE: S 303 and T 388 depart Jacana loop and head onto the single line C.T.C. section on a train consisting entirely of loaded GY's. The standard gauge flyover that takes the S.G. from the west side to the east side of the broad gauge line can be seen to the right of the train. Dec. 7 1978
Broadmeadows
ABOVE: An early view of Broadmedows looking north, circa 1905. The level crossing (#11 gate) in the foreground is the present day Camp Road (named after the nearby military camp) The motivation to take this photo was probably the impending replacement of these hand gates by cattle pits which occured on 16-4-1906
ABOVE: Aa 554 and a re-boilered old A class on Up Sydney express at Broadmeadows 1906. This loco was barely a year old when the photo was taken. The first vehicle behind the locos is an insulated TT van, possibly bringing fruit from Queensland, the passenger stock is "V" stock photo by Charles Gavan Duffy
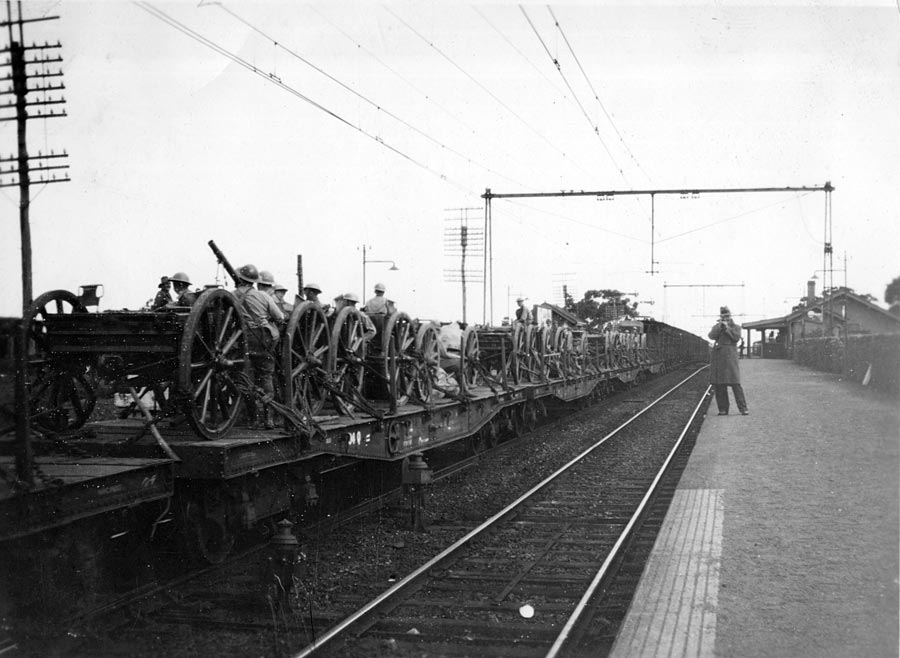
ABOVE:
A military train at Broadmedows on August 25 1938.
Consist was 2 Z vans, 7 Q trucks, 28 M wagons & 3 A cars.
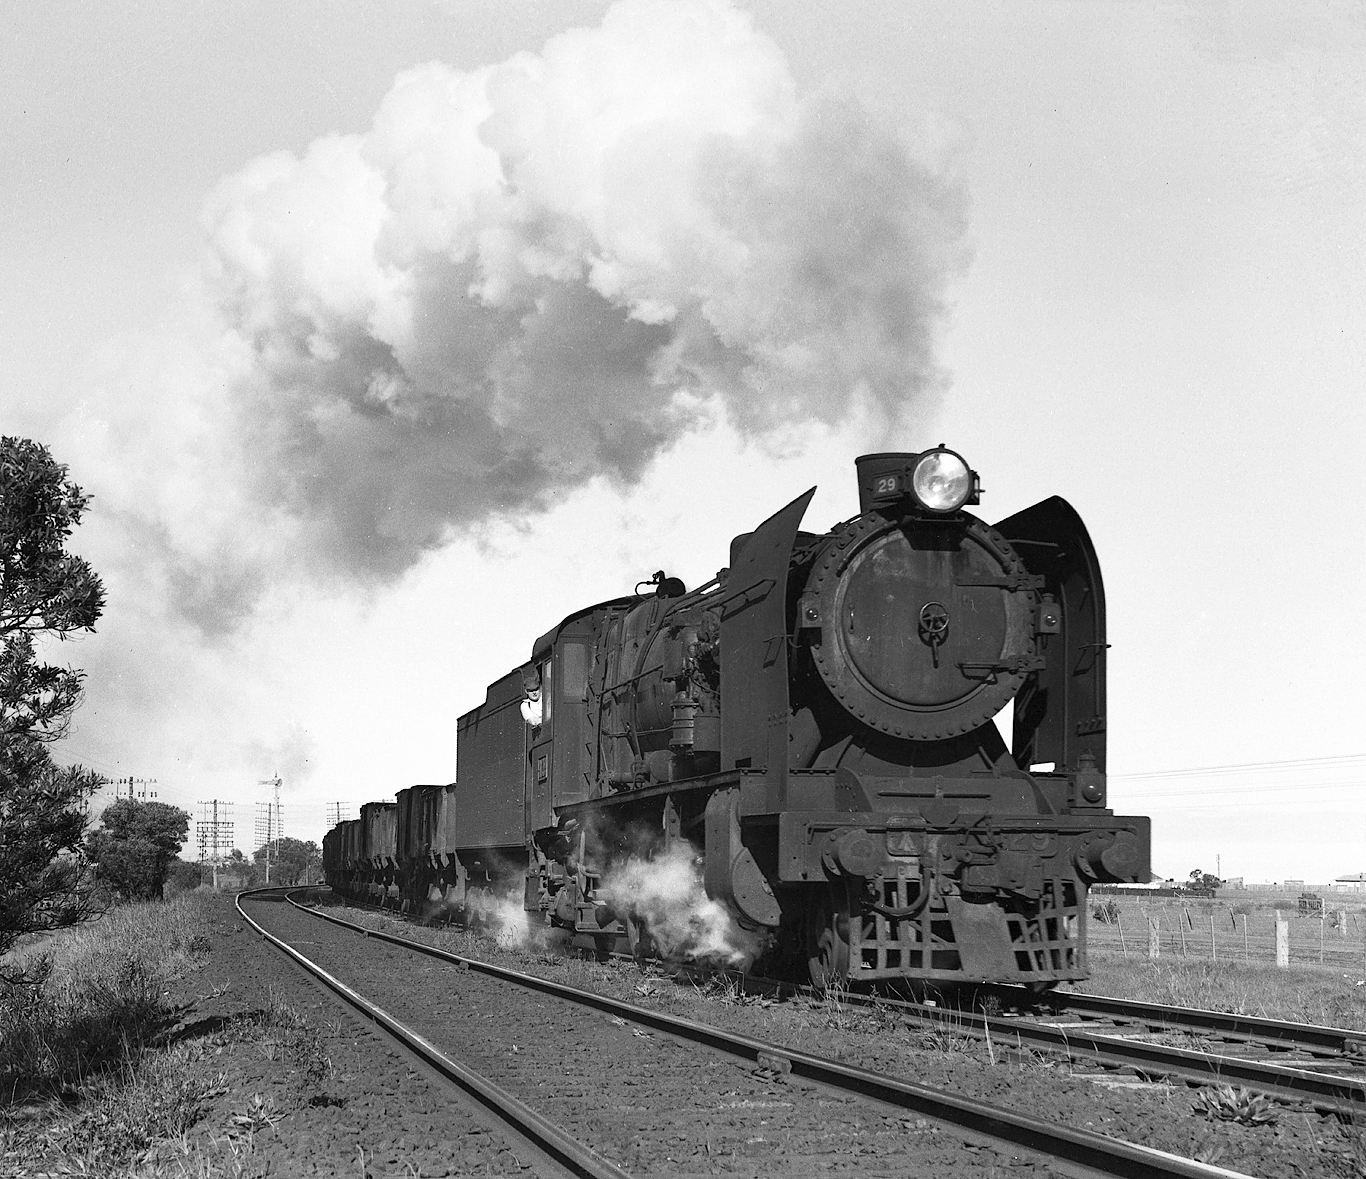
ABOVE: X 29 departs Broadmeadows late in its life on a down goods. circa mid 1950s
ABOVE: The up Sydney Limited passes the up distant signal for Broadmeadows. circa 1930.
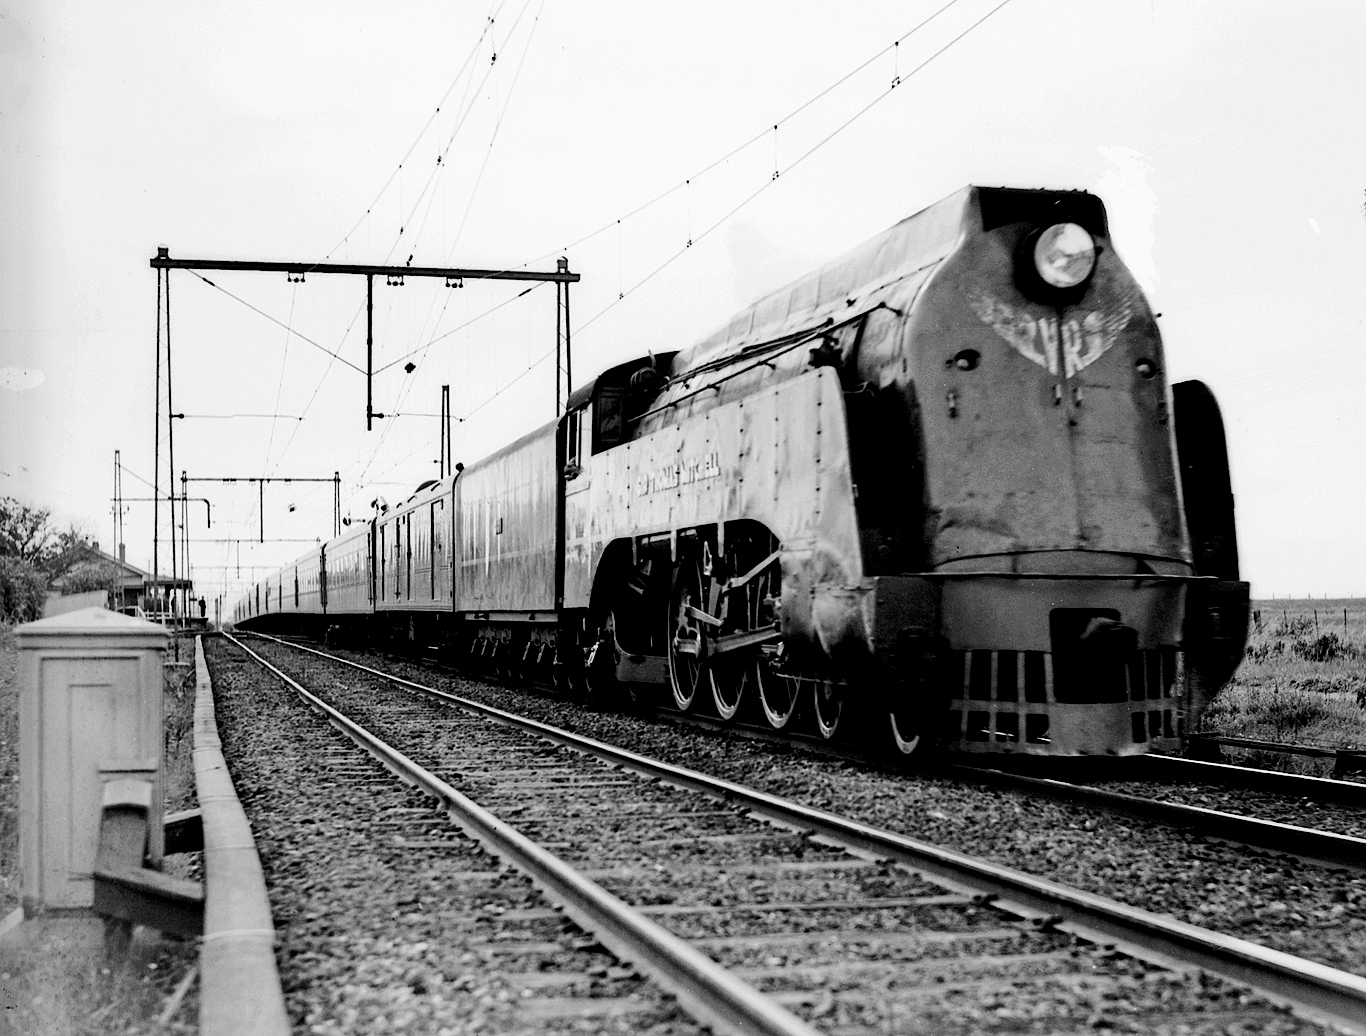
ABOVE: "Sir Thomas Mitchell" S 301, hauls the up "Spirit of Progress" though the up platform at Broadmeadows circa 1950.
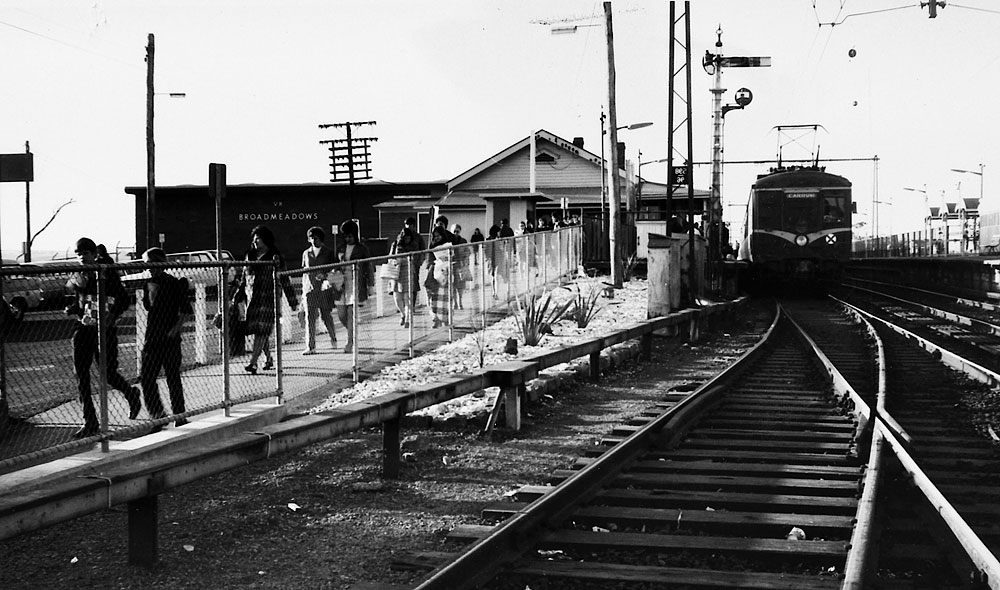
ABOVE: A Harris awaits departure from Broadmeadows, June 1972 official VR photo PR 6345
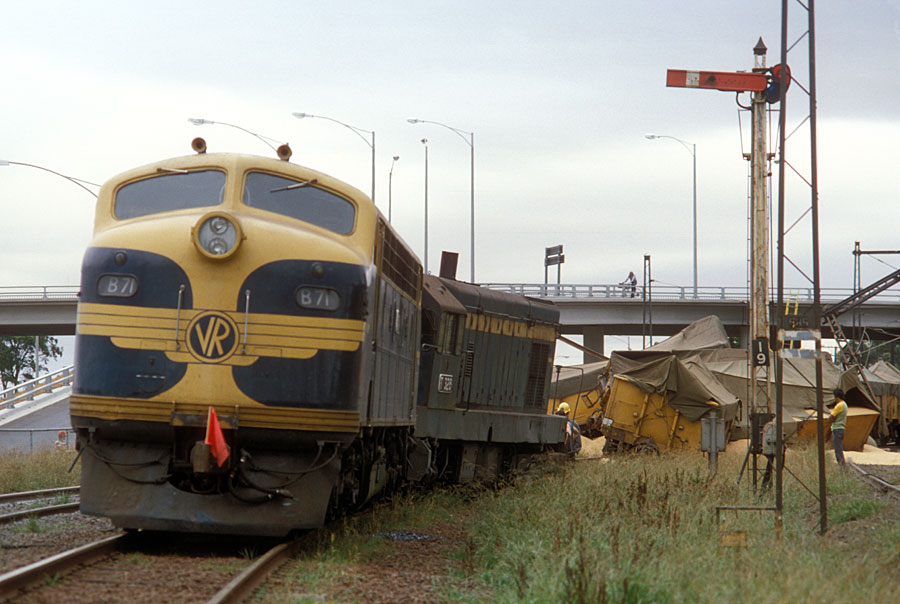
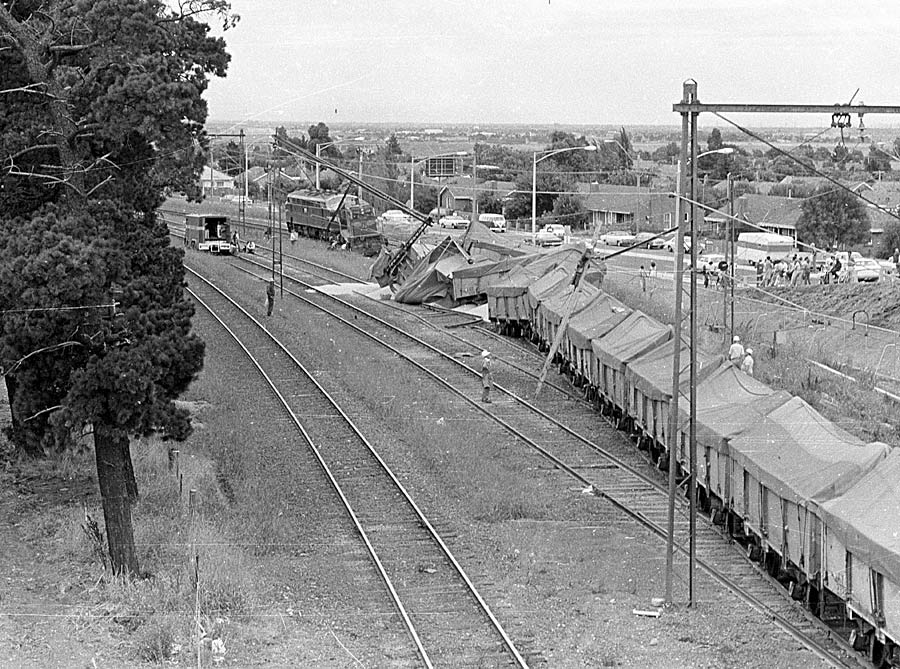
ABOVE & BELOW: While crossing from the up North East mainline to the Albion loop line the up wheat train derailed,
blocking the main North East line for most of the weekend. Feb 3 1979
Above courtesy Peter J. Vincent
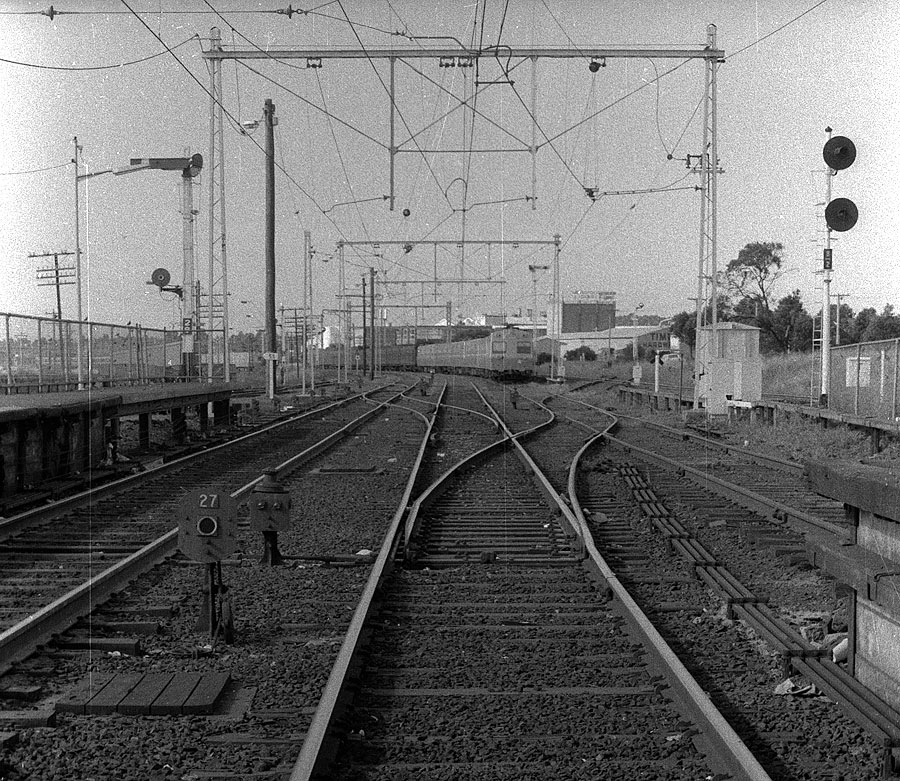
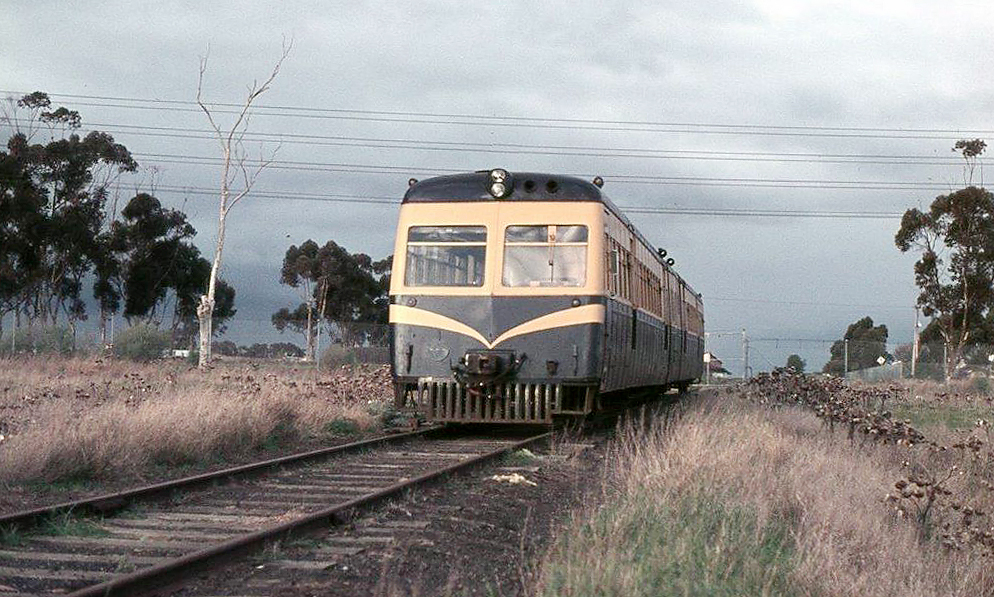
ABOVE: Looking north, towards Seymour with 2 positions signals and the siding to Broadstore still intact. 1980. BELOW: On July 16 1972 the AREA ran a tour with RM 87 that ran as far as the gates to Broadstore, photo courtesy Doug Miles.
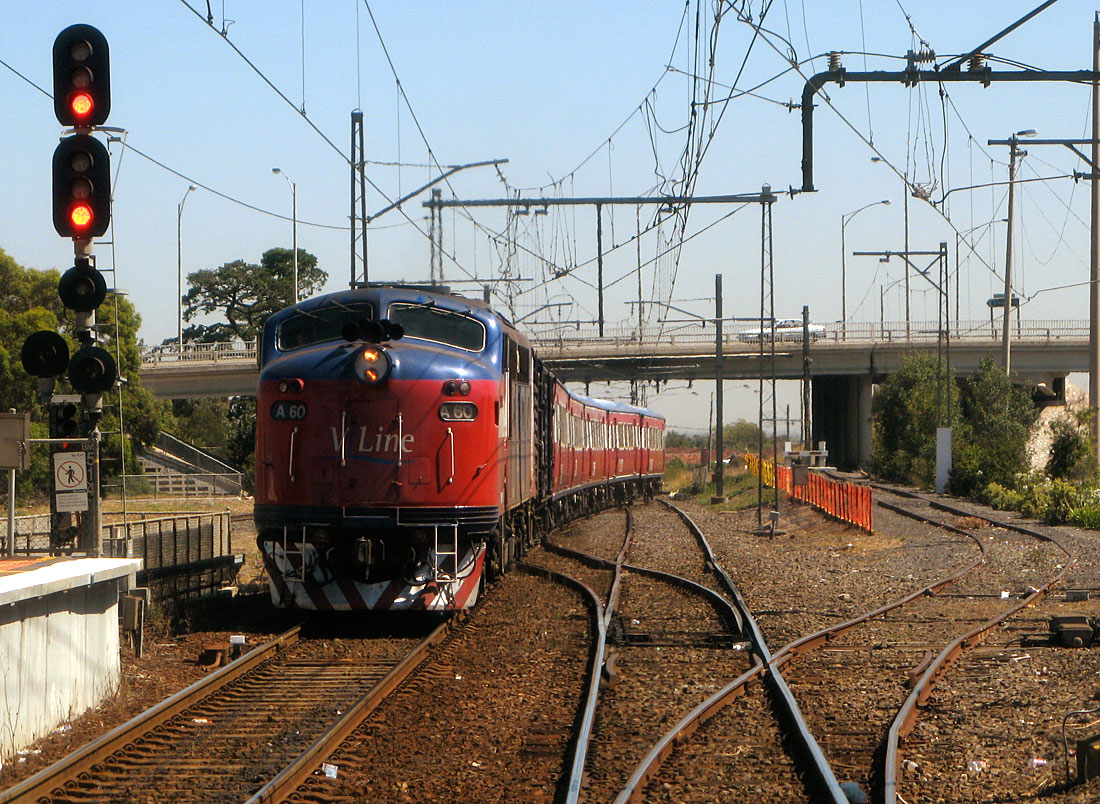
ABOVE: A down Spencer Street to Seymour commuter crosses from the down line to the up platform at Broadmeadows whilst my suburban sits on the down platform.
Feb. 1 2007