Bendigo
Originally called Sandhurst until Sep 1 1891, Bendigo was the terminus of the line from Melbourne from its opening, Oct 21 1862 until the line to Echuca was opened, Sep 19 1864. At its peak it had 4 signalboxes: A, B, C and D. It also featured a large shunting yard and goods shed, undercover turntable, loco depot, coal stage and carriage sheds. The down side station buildings suffered a devastating fire on Dec 23 1965 which resulted in their demolition and were replaced by the rather uninspiring buildings that can be seen today. There are many signal diagrams of Bendigo on the diagrams page.
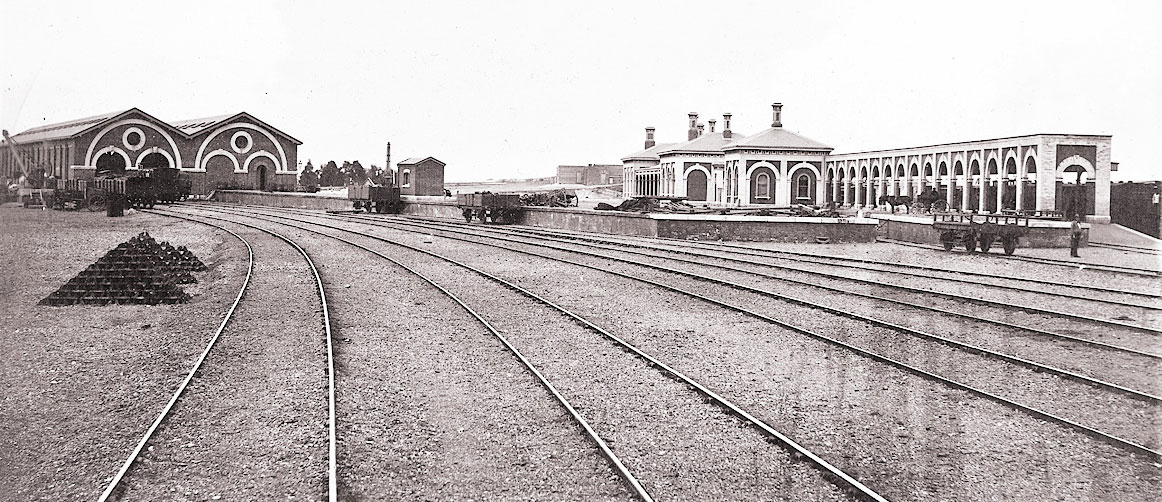
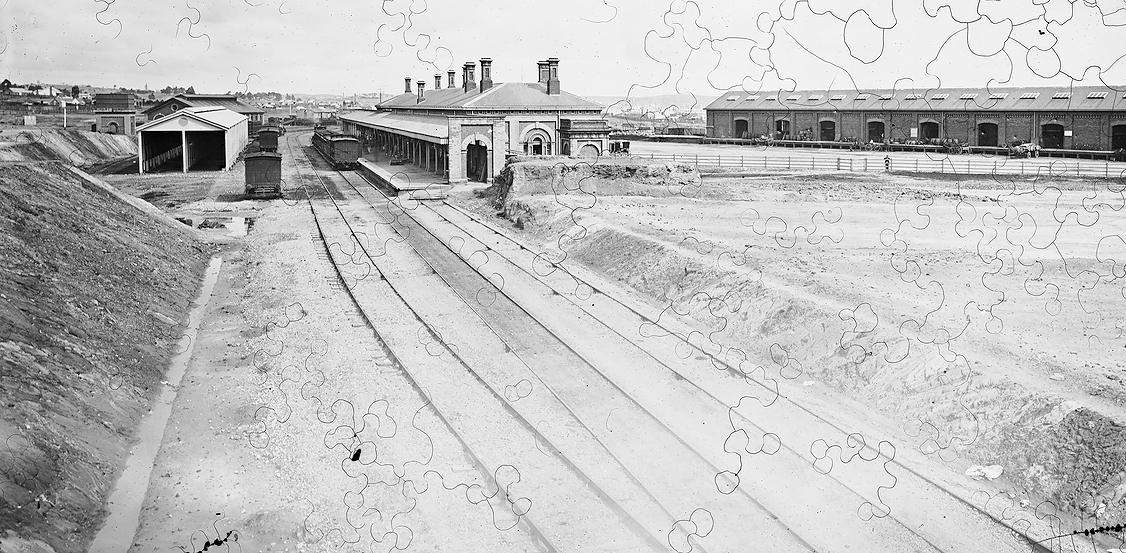
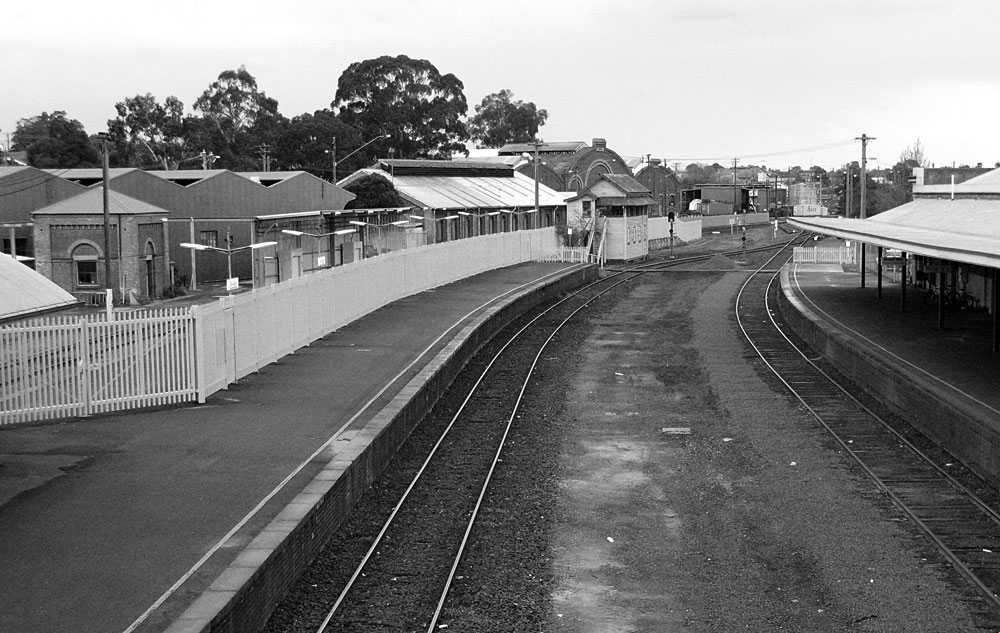
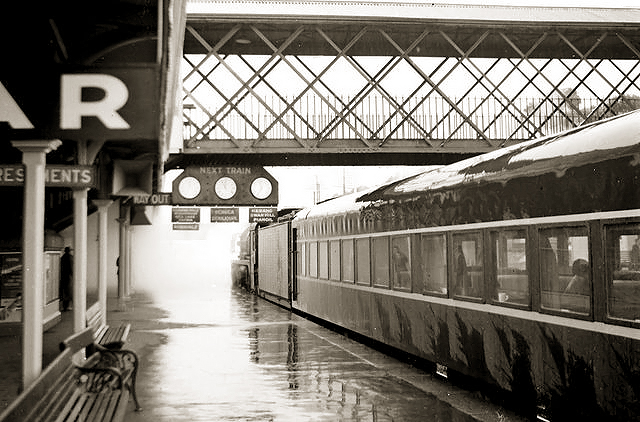
ABOVE & BELOW: Looking towards Melbourne before the up side buildings were built, circa 1885. Note the staggered platform. The massive goods shed which is now "Discovery Science & Technology Centre" can be seen on the right.

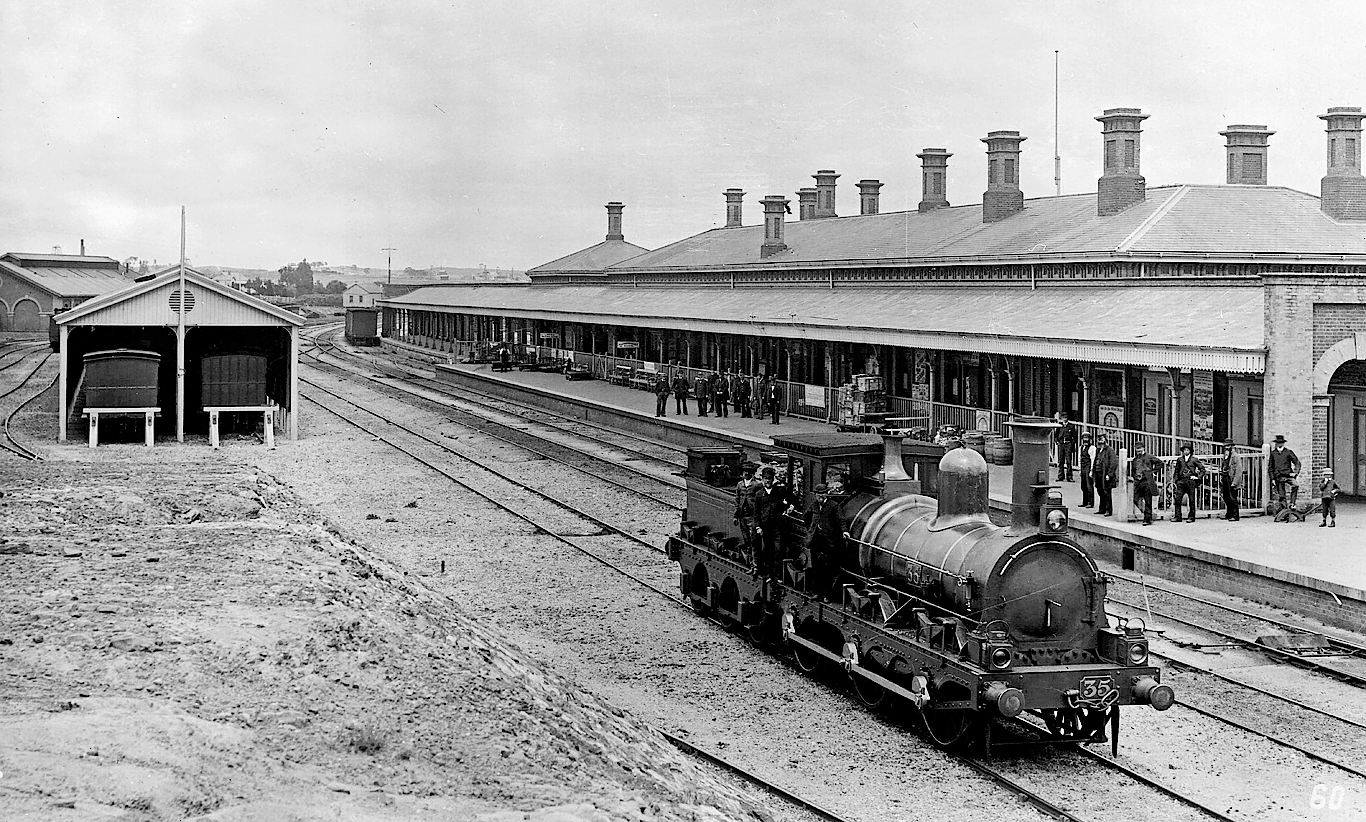
ABOVE: Undated view looking at the down side station building, on the left, the goods shed in the middle and the loco dept on the right.

ABOVE: Aerial view of Bendigo looking North circa 1925 (photo courtesy Charles Daniel Pratt, State Library of Victoria collection)
ABOVE: The down side station buildings prior to being burnt down on Dec 23 1965, photo circa 1930.
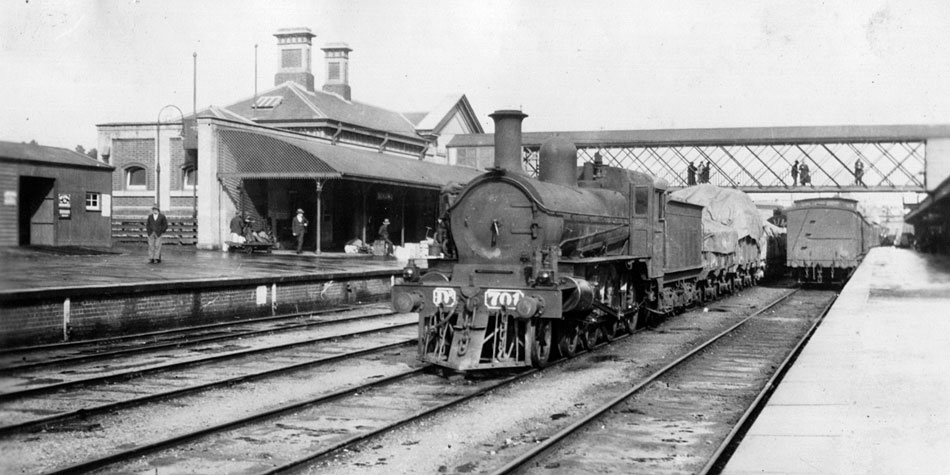
ABOVE: Busy times at Bendigo, looks like an imminent arrival on the up platform as Dd 701 awaits departure on a down goods and a pass. is seen on the down platform. 1928.
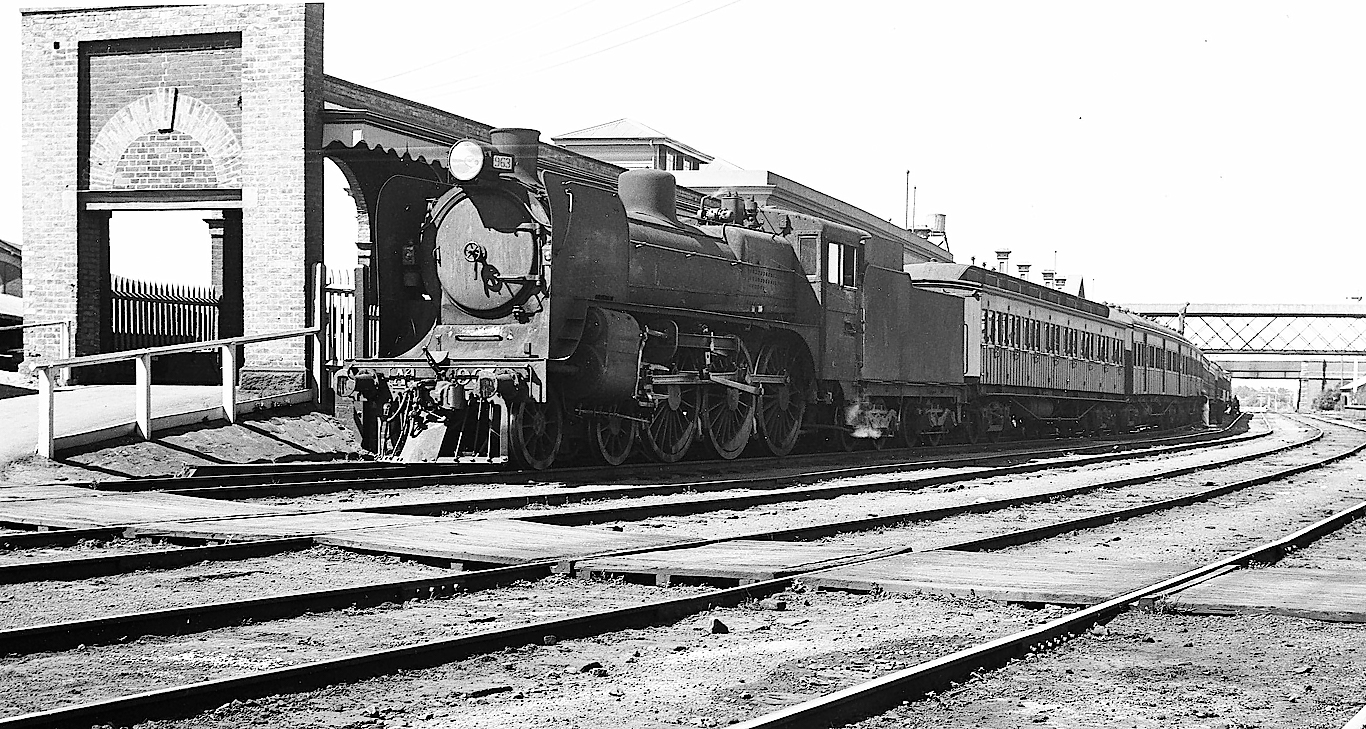
ABOVE: A2 963 on an up pass. 1948, (photo courtesy Phil Dunn)
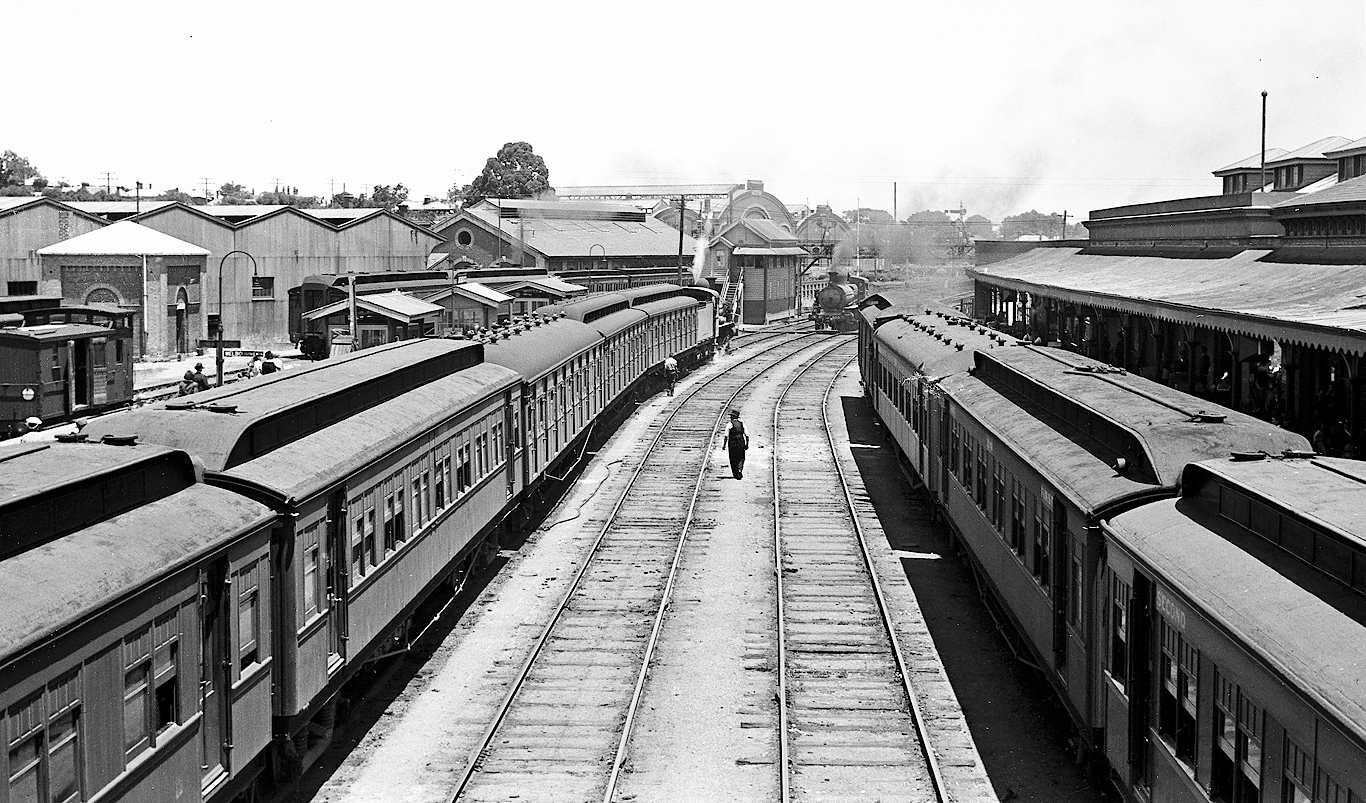
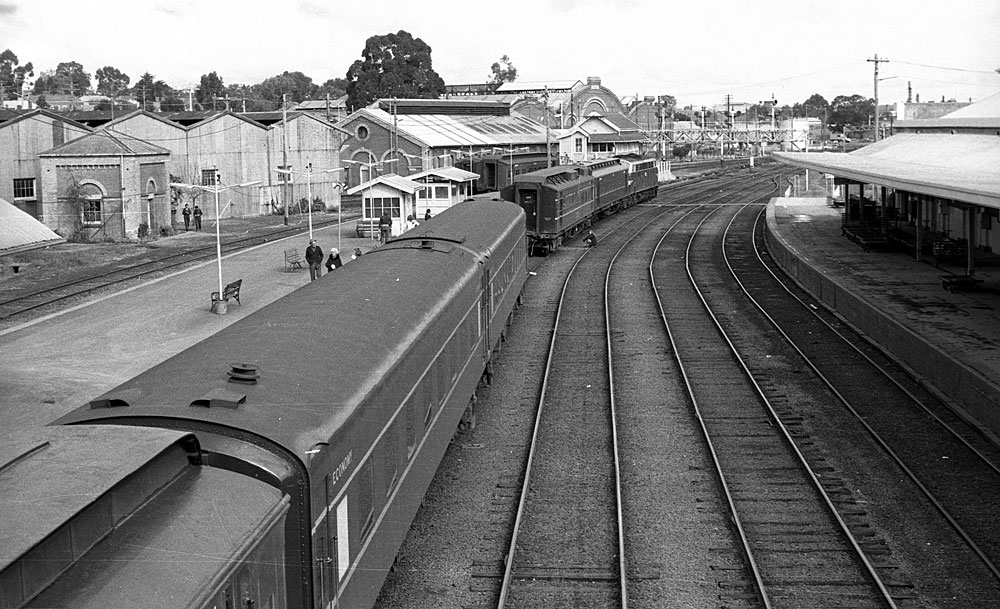
ABOVE: Looking south from the footbridge circa 1948, (photo courtesy Phil Dunn) BELOW: The same view in 1978 as a B class attaches Taggerty buffet car to the 12 noon up pass to Melbourne.
BELOW shows the same view 29 years later, in 2007. (photo below courtesy Chris Wurr)
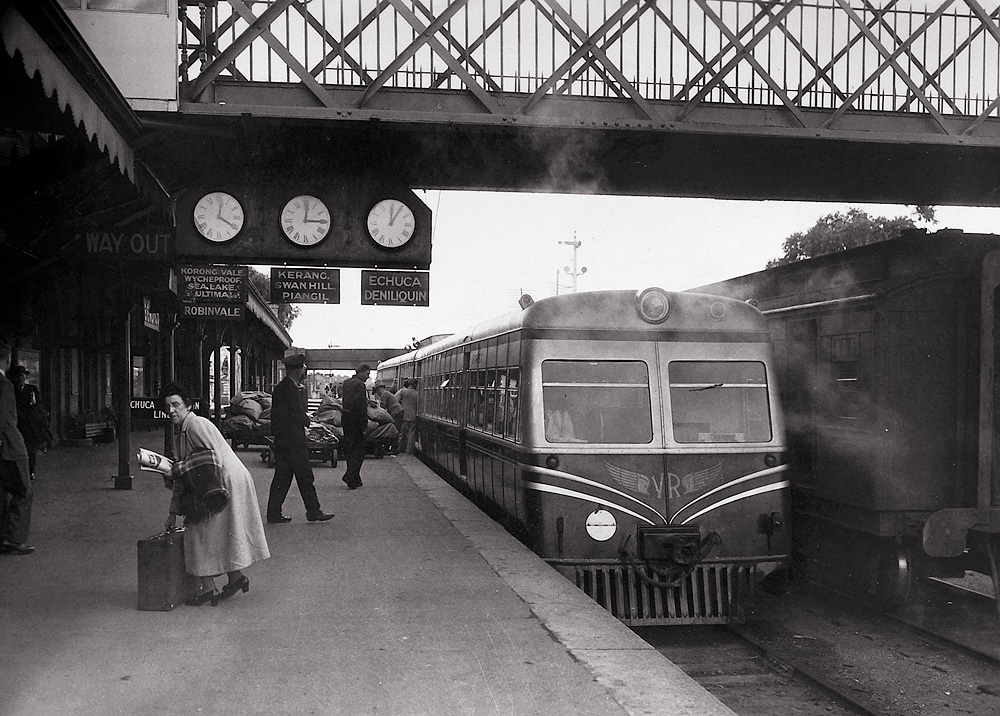
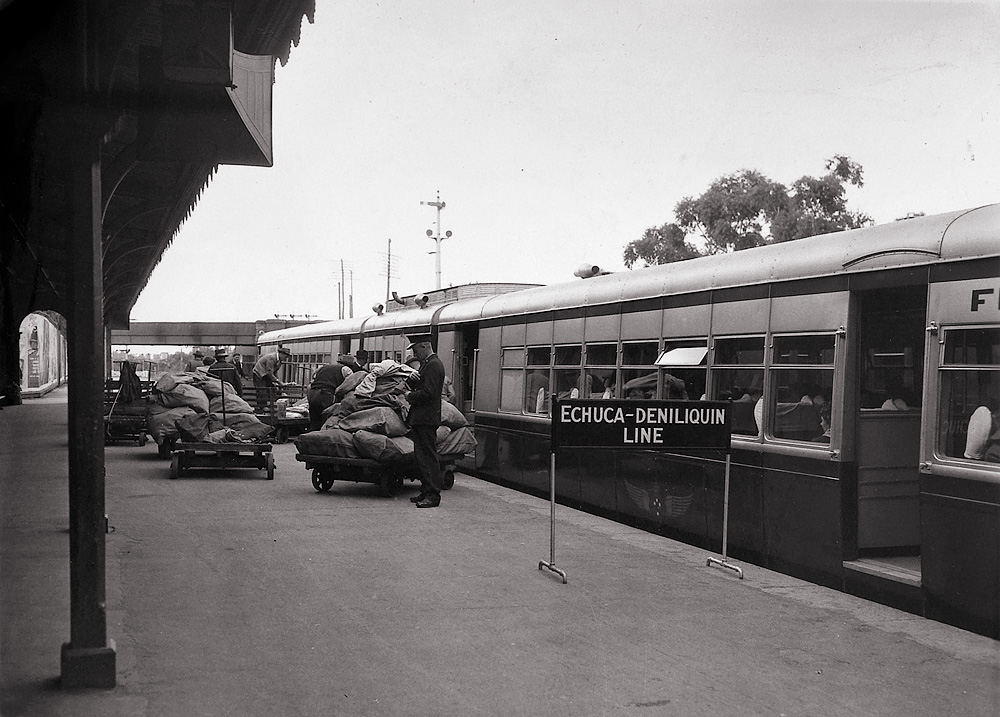
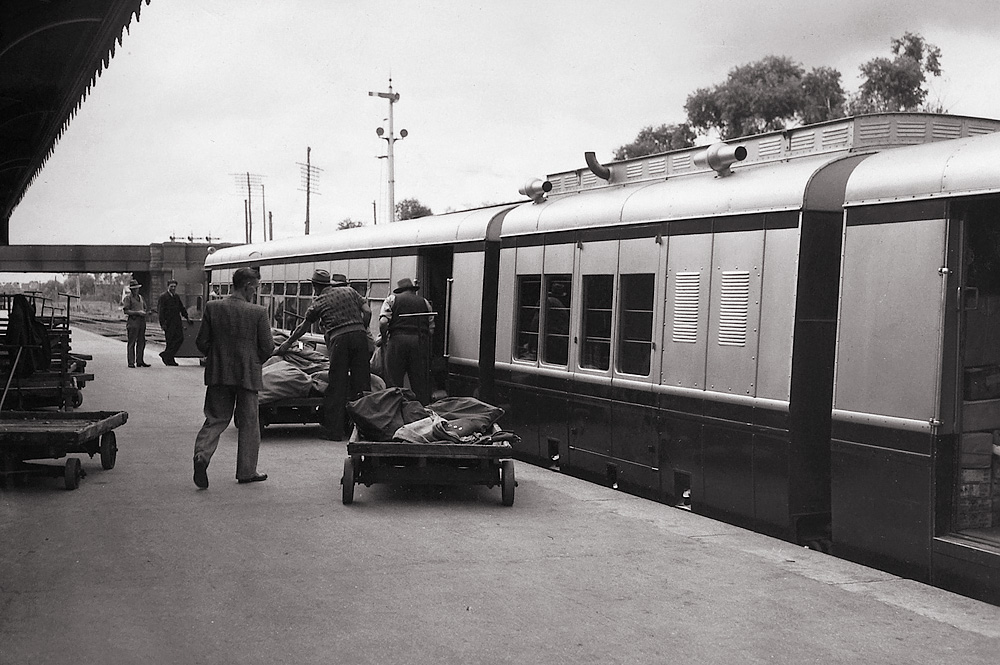
BELOW: The following three photos show a 280 hp Walker (number unknown) preparing to depart Bendigo for Echuca and Deniliquin in April 1951 just after the Walkers were introduced. I don't know how long the Walkers lasted in this service as DERMs seemed to reign supreme north of Bendigo. (official VR photos)
ABOVE: R 711 has just arrived at Bendigo on the down Swan Hill pass, May 23 1962. (photo courtesy John Ward)
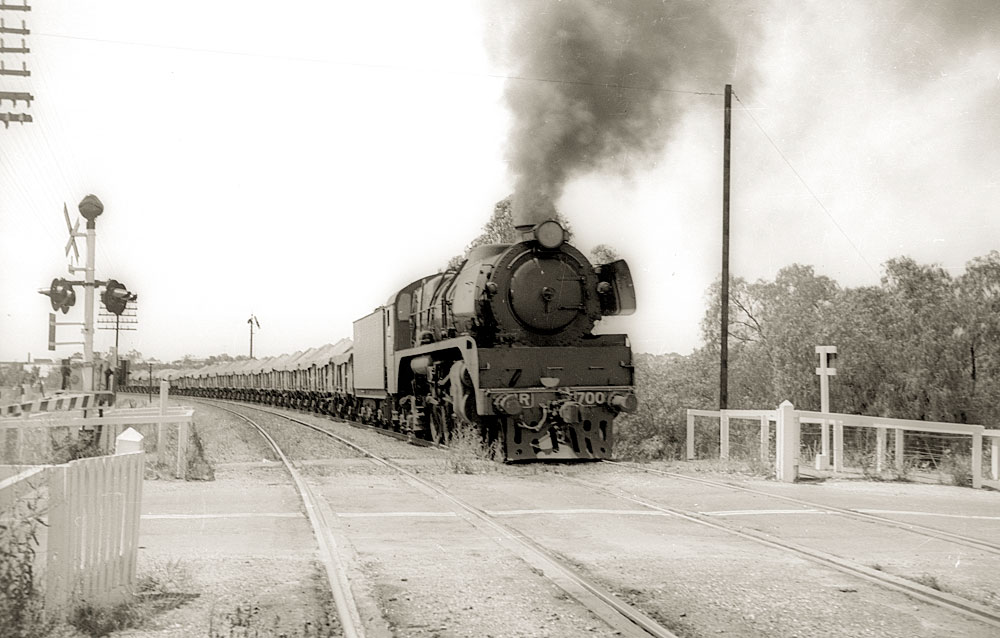
ABOVE: R 700 leads an up Elmore wheat train into Bendigo. The train is about to cross the Mundy St level crossing between Bendigo C and D boxes which was a double line block section, this section was rationalised to single track in 1989. These were very early boom gates being installed in 1959. Jan 25 1964 (Photo courtesy John Ward)
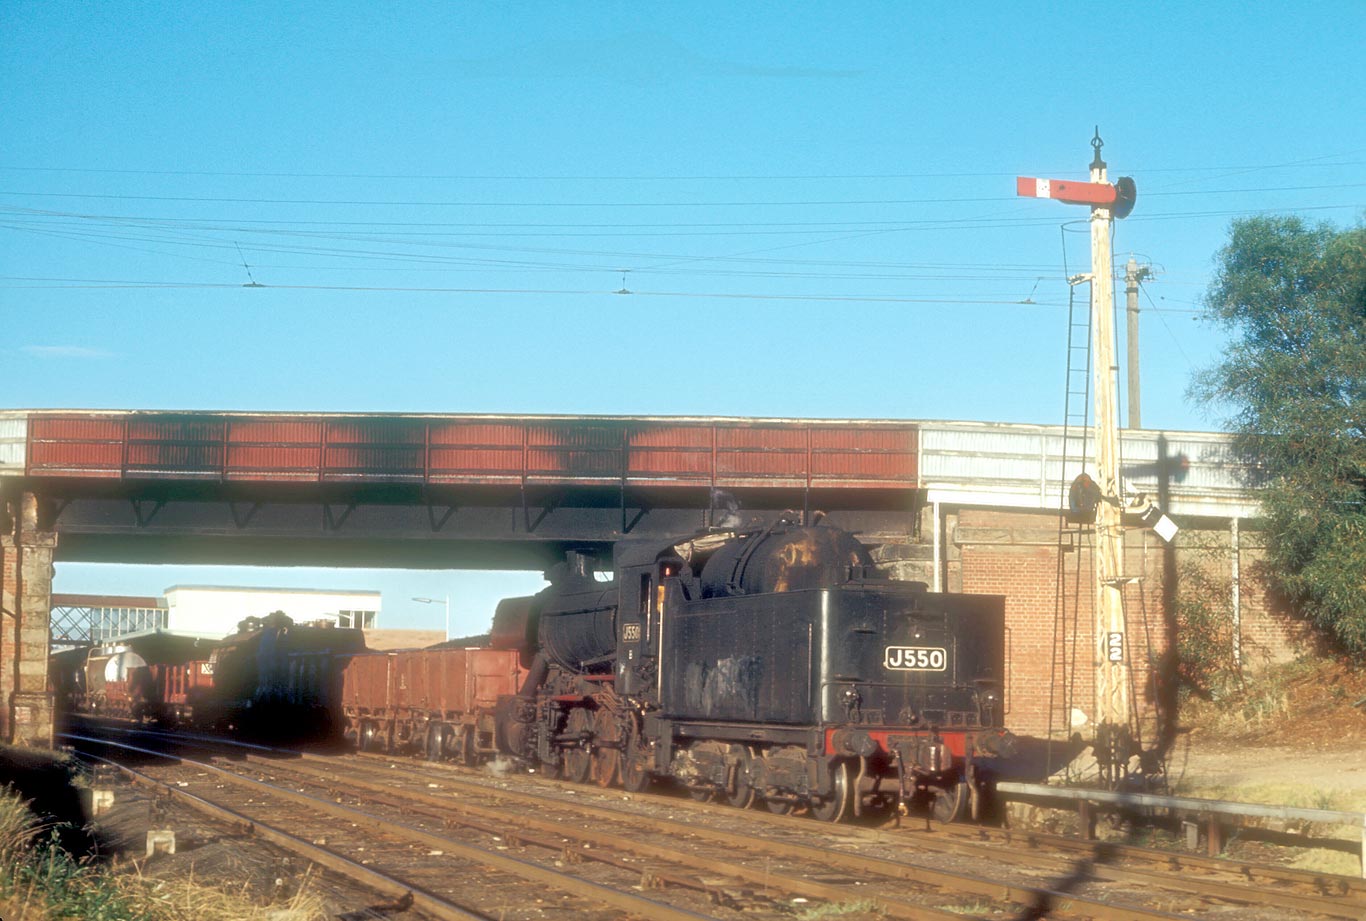
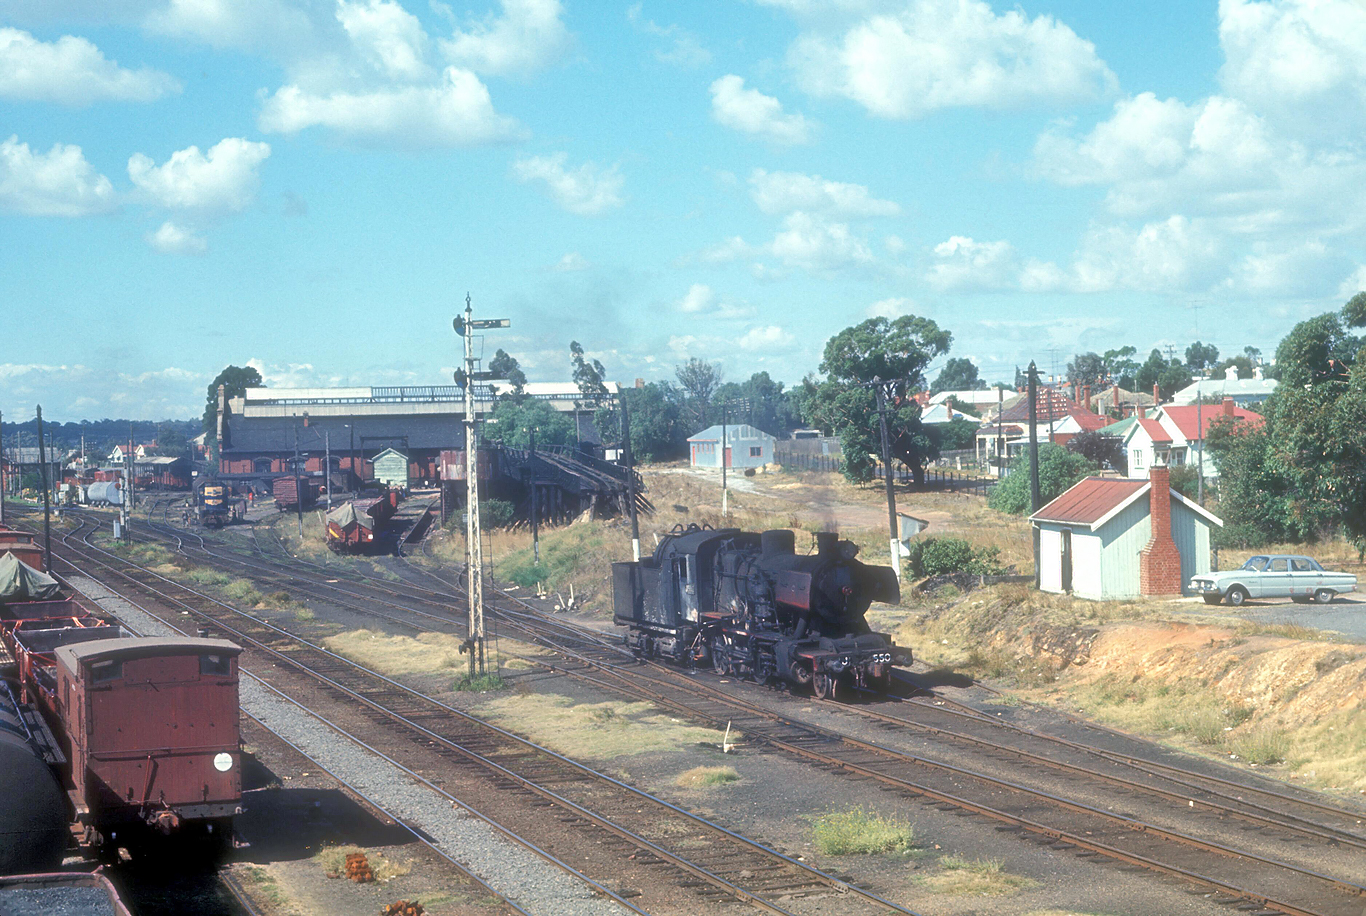
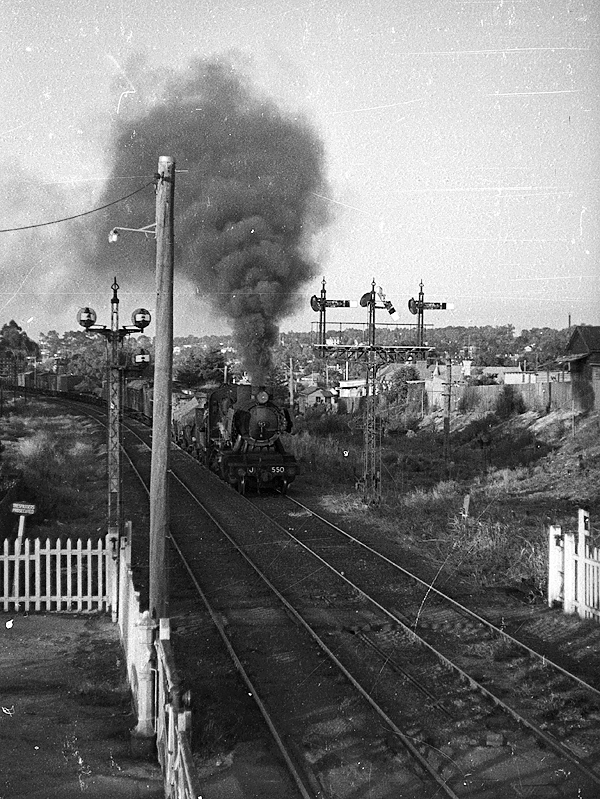
ABOVE: J 550 is on Bendigo yard pilot duties as it passes under the Mitchell street overpass. At this time, Mitchell street still had its tram service, hence the wires above the road, March 23 1970.(photo courtesy John Ward)

ABOVE: A pair of Y's trundle over the Williamson street crossing and past Bendigo C box as they enter Bendigo yard from the north. Late 1960's, (photo courtesy Bill Cray.) BELOW: The same view in 2012. (photo courtesy Chris Wurr)
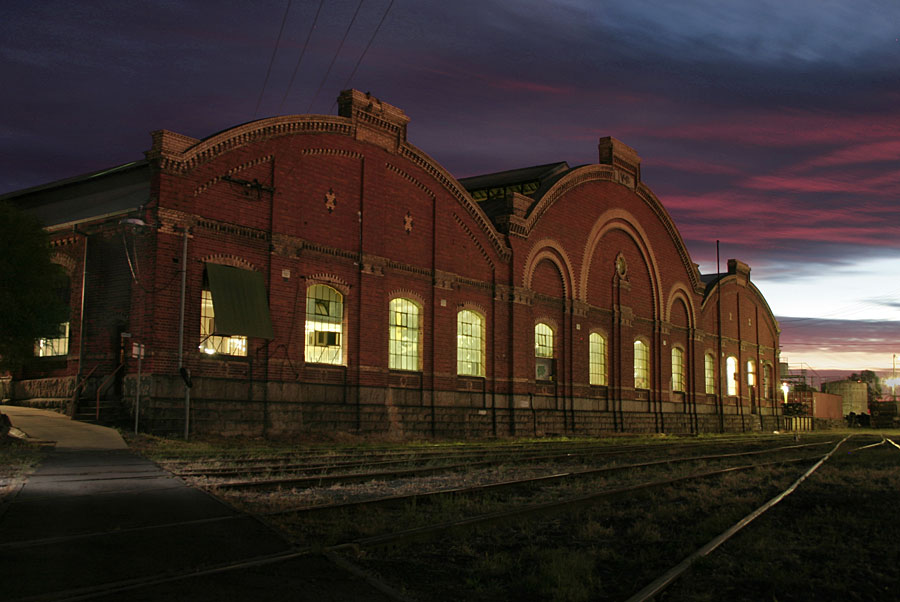
ABOVE: Bendigo loco has appeared as a background in countless photos over the years but here it is captured beautifully as the main subject. The night/time exposure gene runs strong in the Wurr family! Photo courtesy Michelle K. Wurr
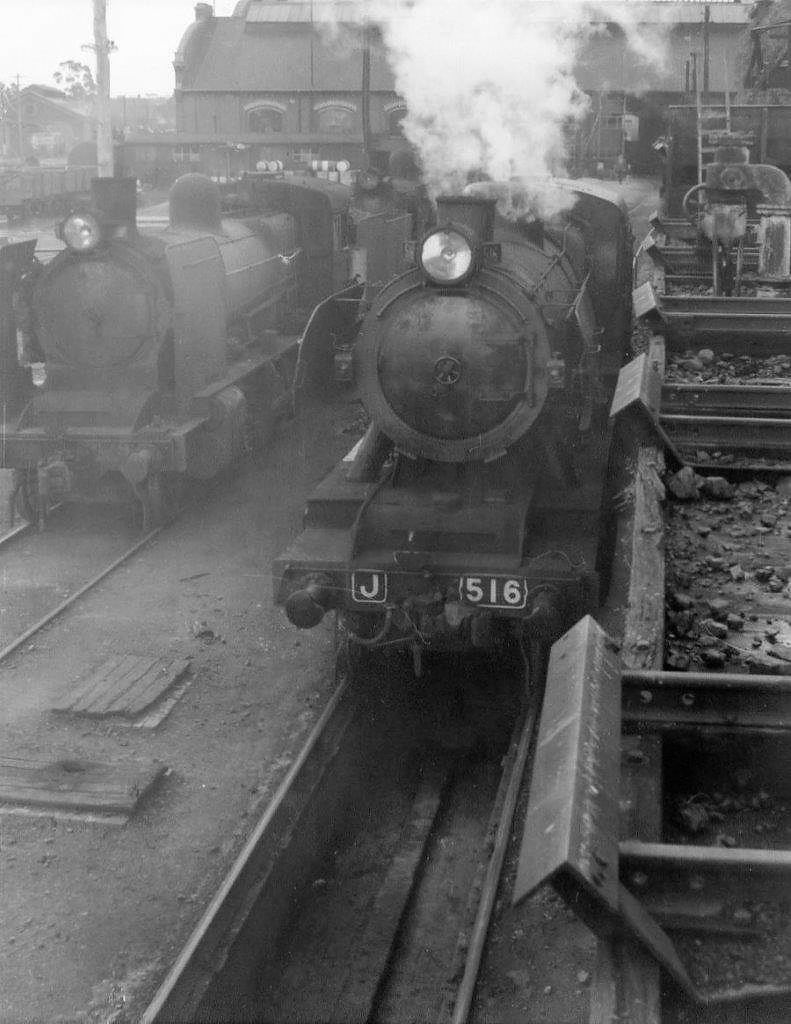
ABOVE: J 516, K 164 and K 179 at the coal stage, Aug 13 1967.(photo courtesy Doug Miles)
ABOVE: Lokking north towards the loco depot, March 23 1970. (photo courtesy John Ward)

ABOVE: D 3 677 departs Bendigo on a down Swan Hill train, the signalbox on the right is Bendigo C box. Oct 21 1959. Photo courtesy Des Jowett.

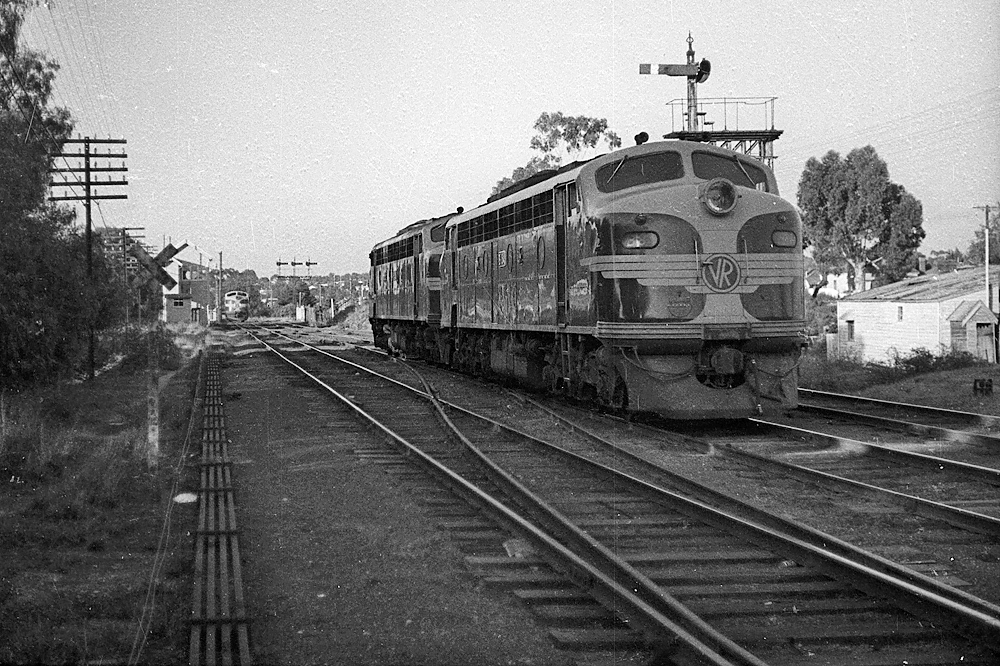
ABOVE: The view looking south in 1974, a DERM has arrived from the north and the down Great Northern Limited is seen on the main platform. (photo courtesy Geoff Winkler)
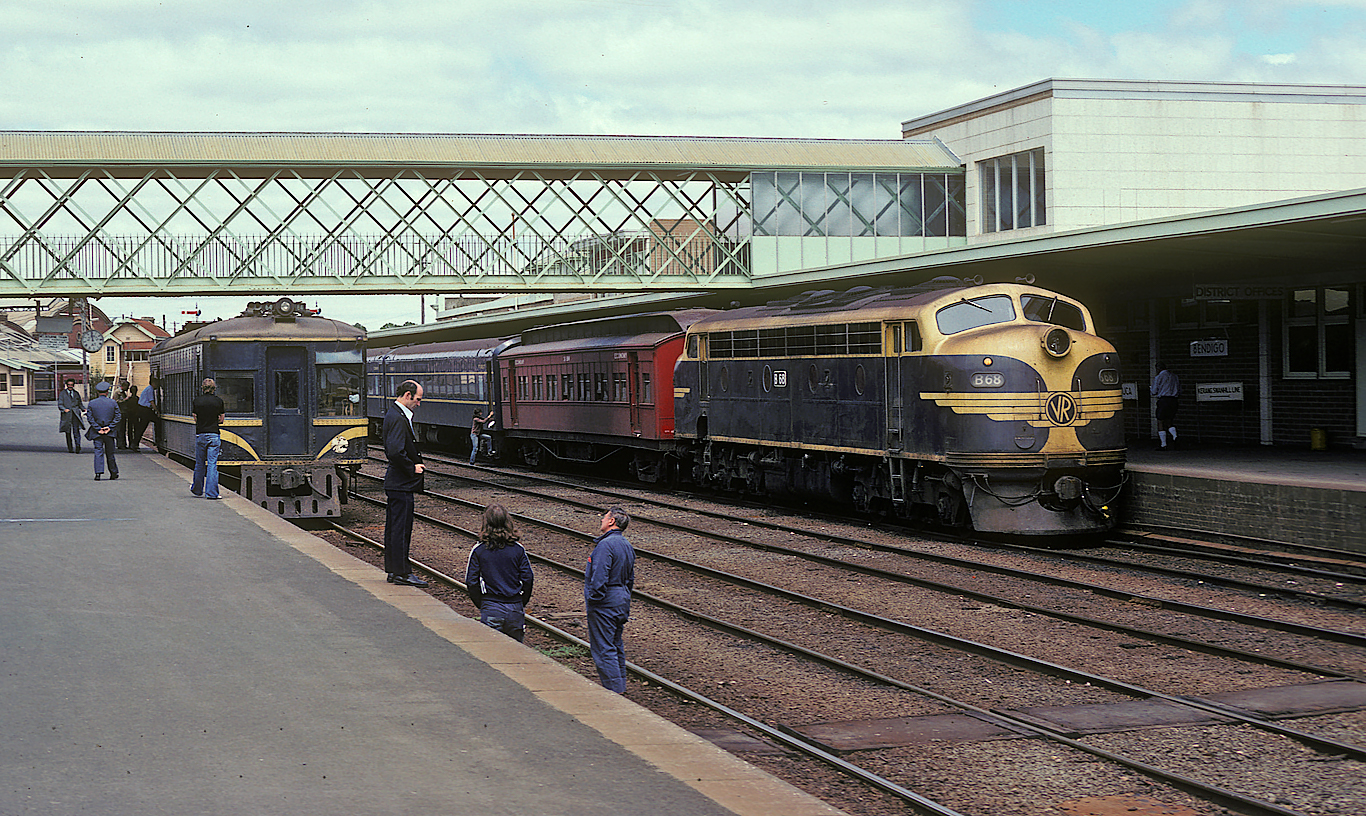
ABOVE: B 68 has arrived on the Great Northern Limited, the DERM will no doubt be bound for a northern destination. Dec. 1977 (photo courtesy Warren Banfield)
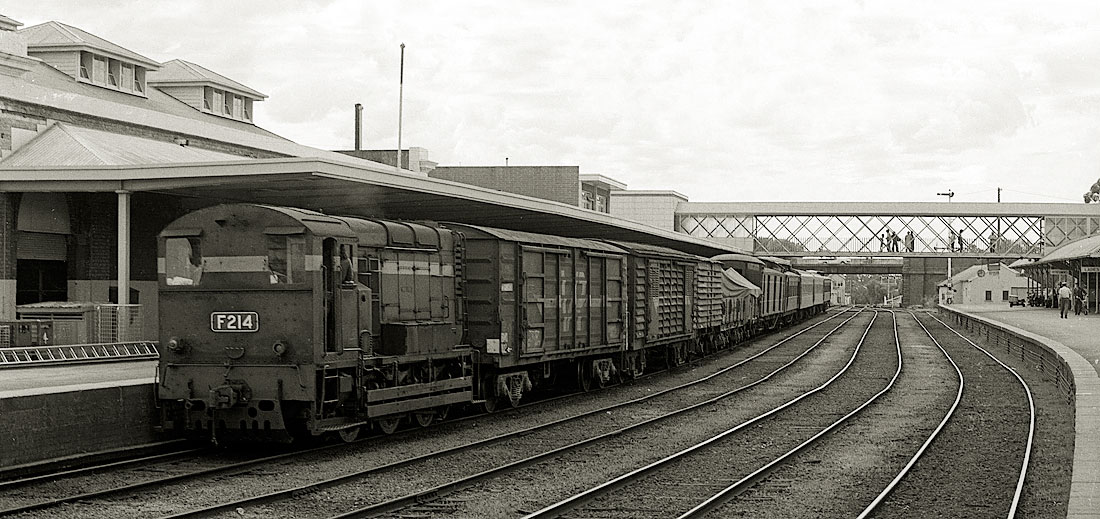
ABOVE: F 214 interupts its Bendigo yard shunting to take a rake of passenger cars over to the car sheds. March 1978. Since this photo was taken the two centre tracks have been removed.
This is the content for Layout P Tag
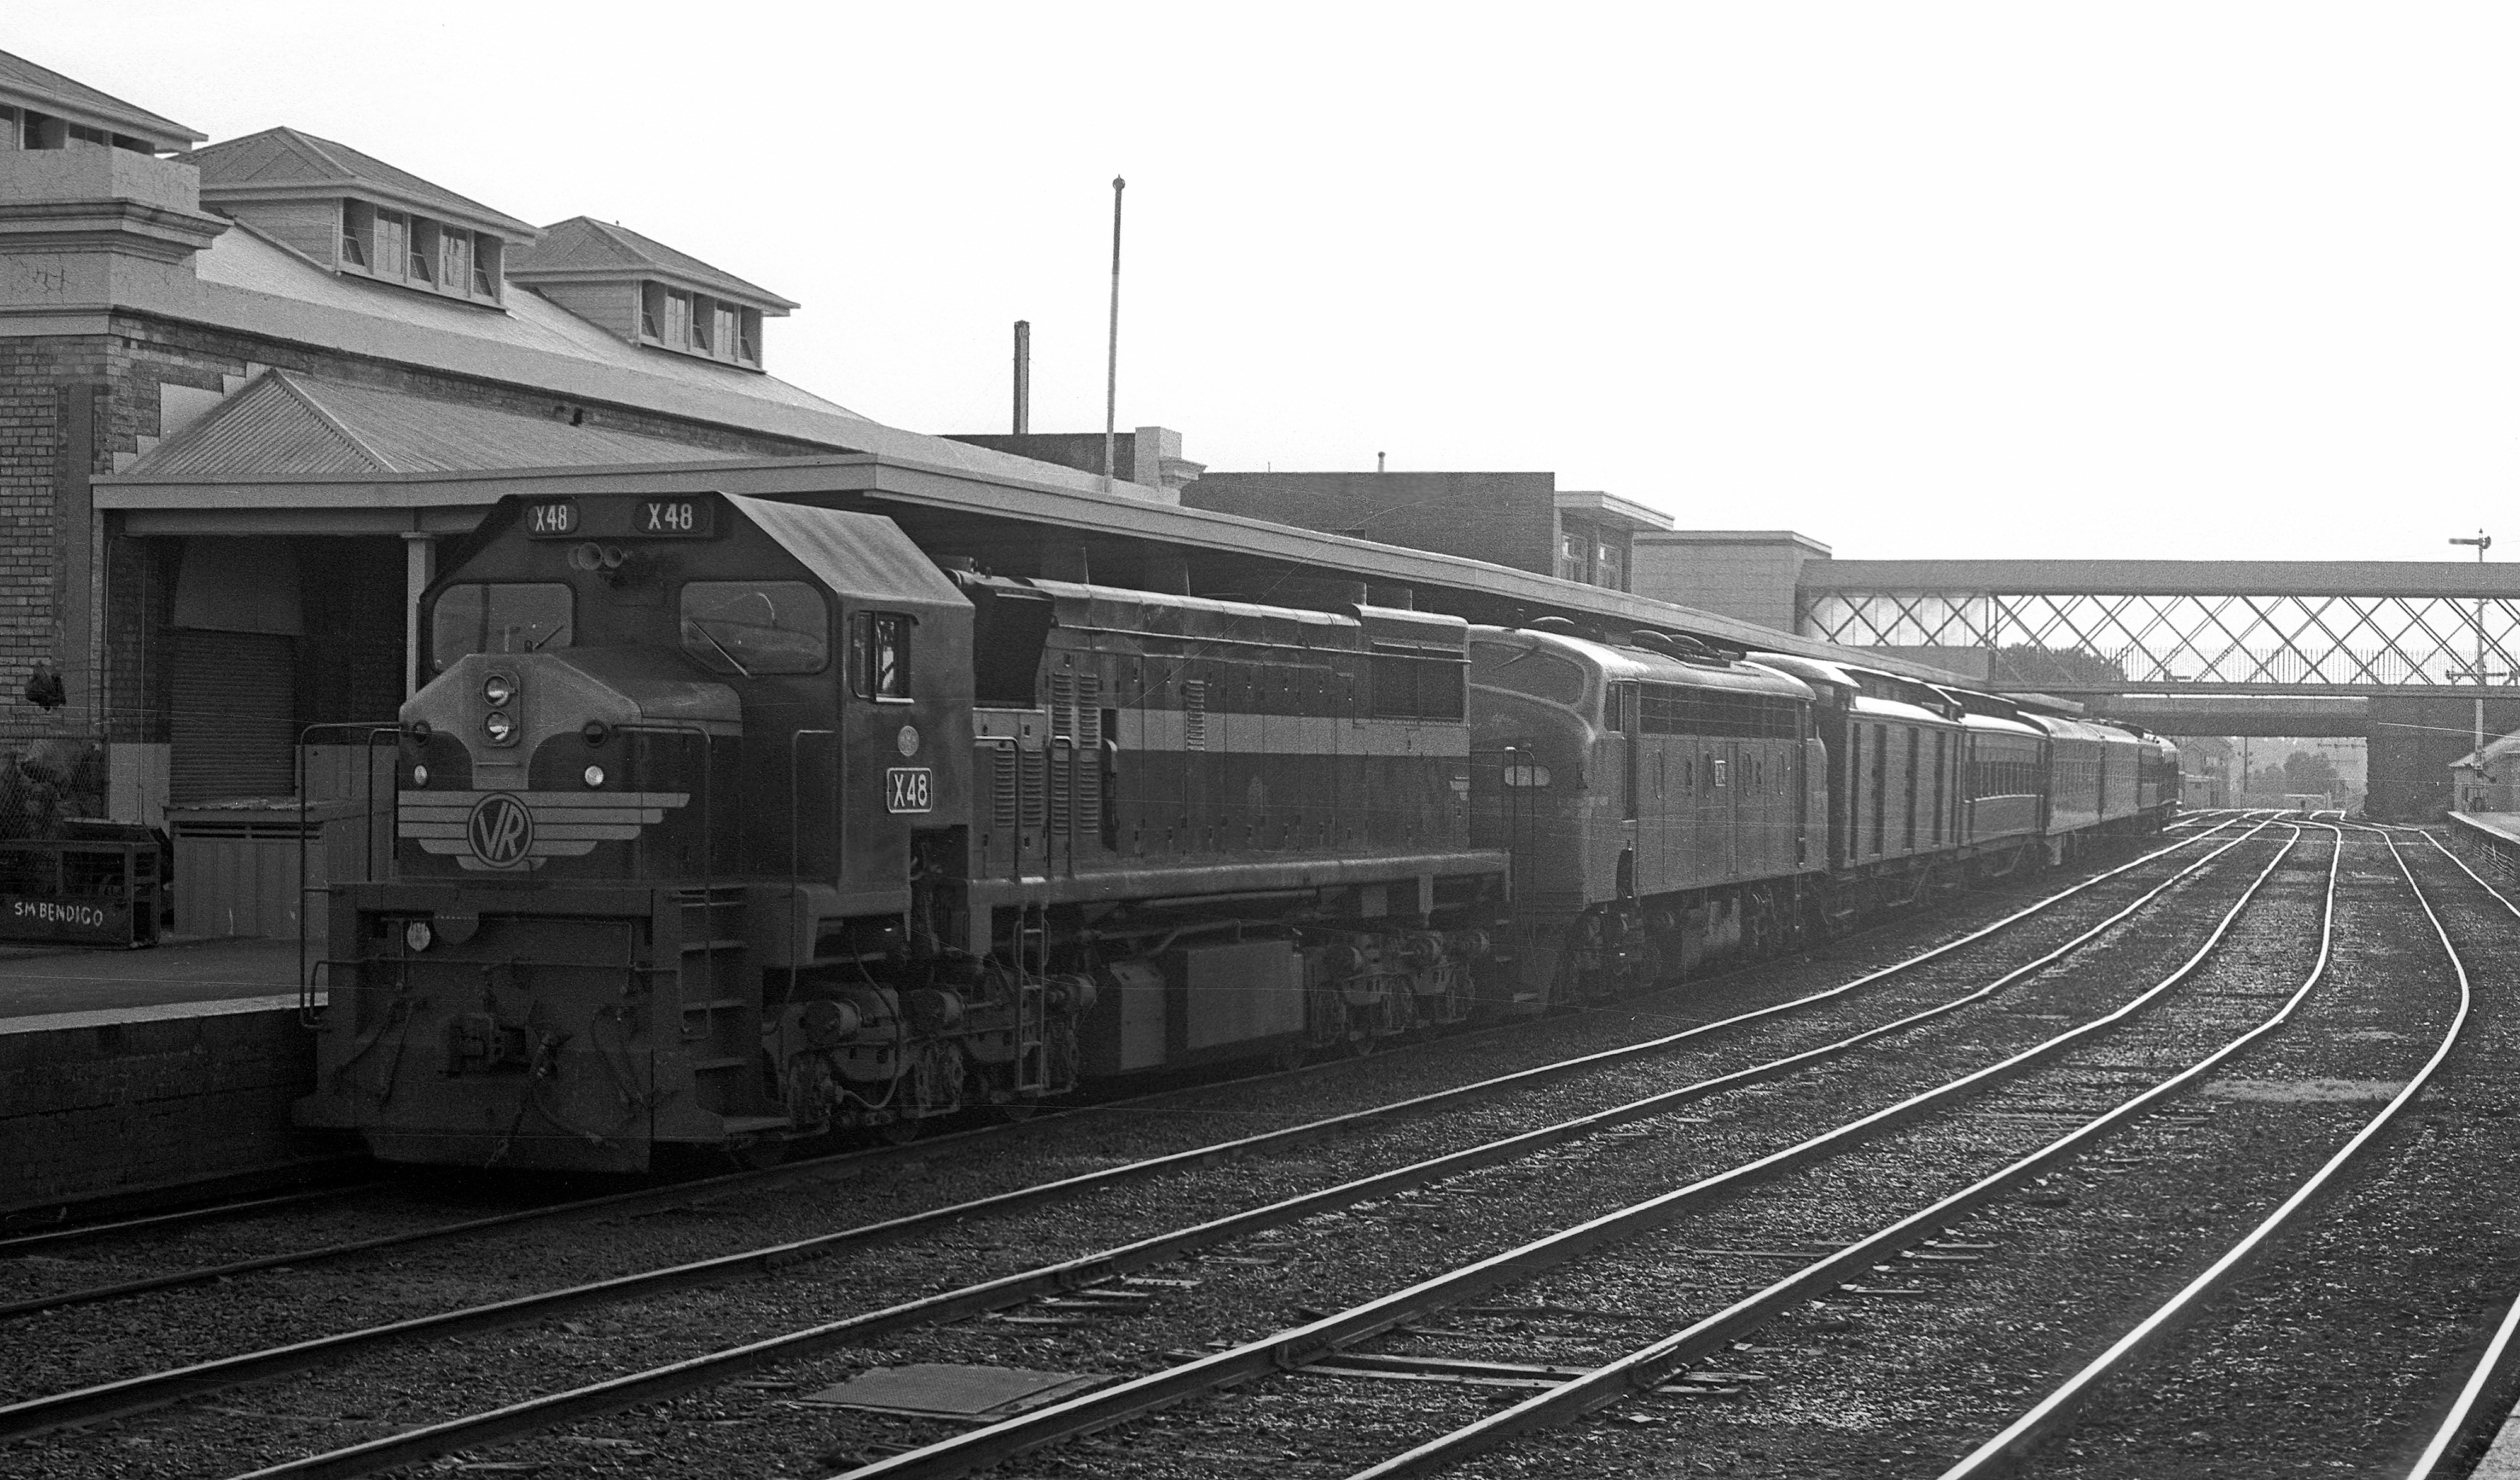
ABOVE: X 48 and a B 4:45pm Bendigo to Melbourne service. June 1978
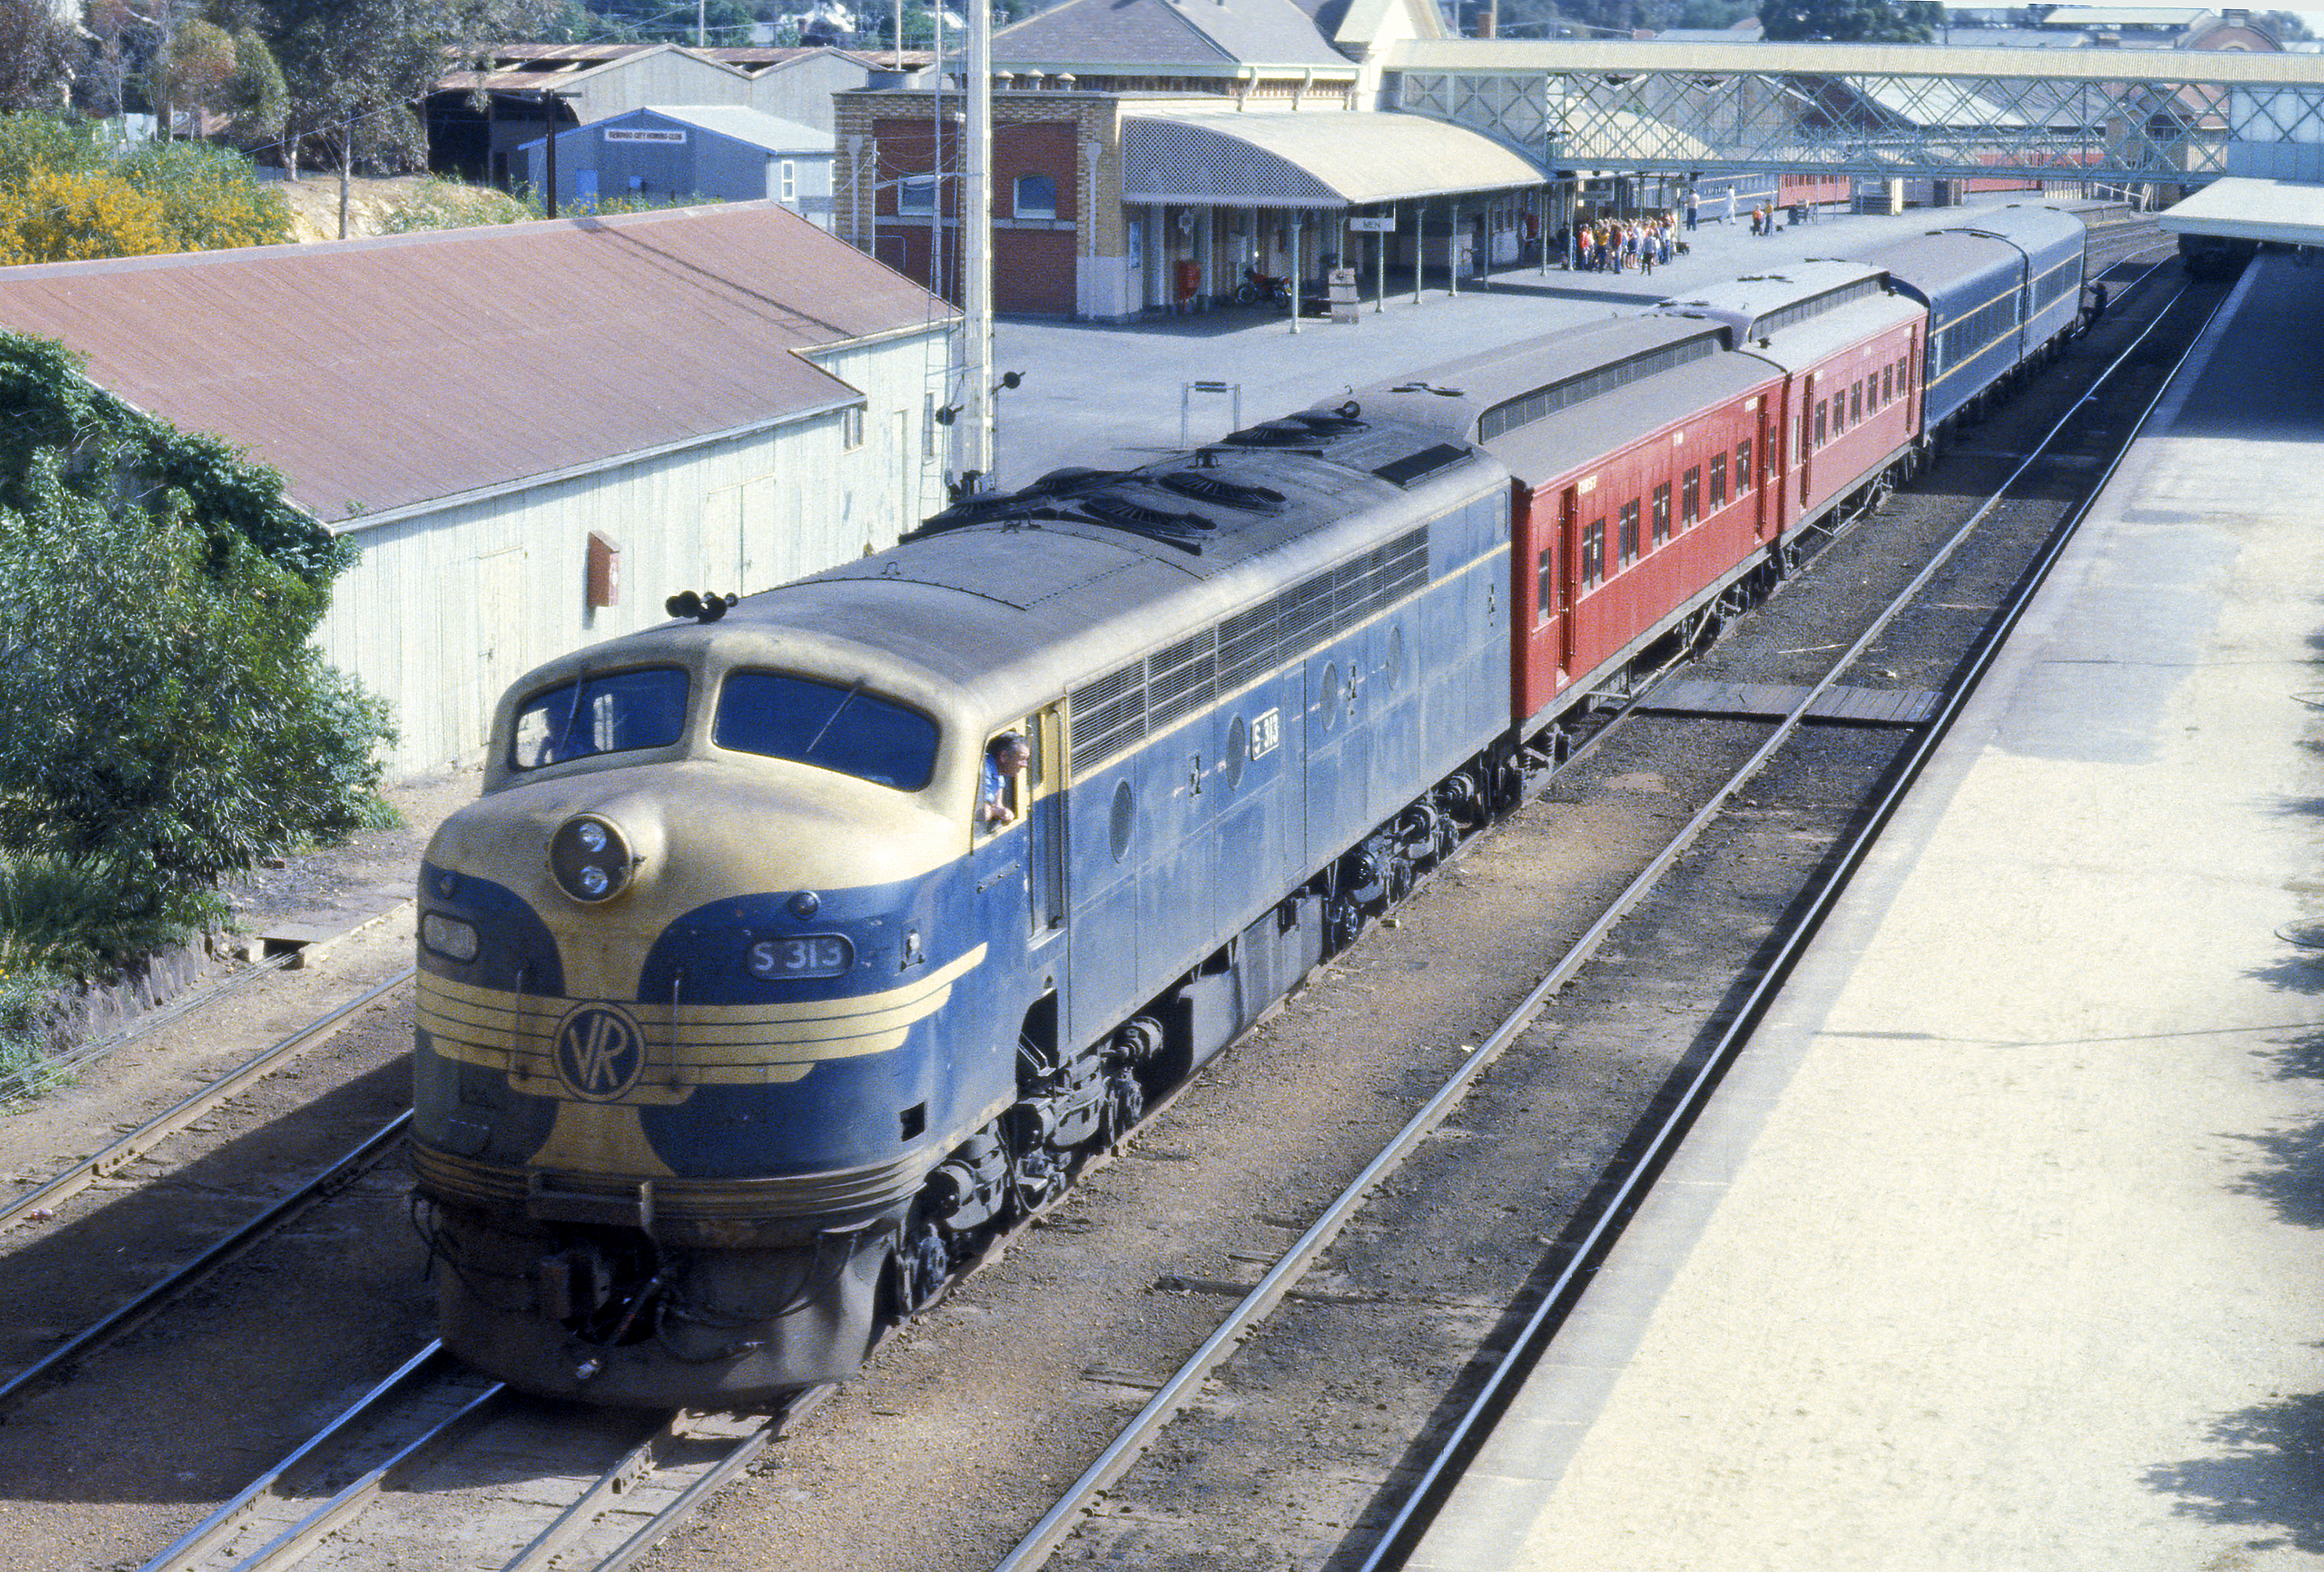
ABOVE: S 313 shunts passenger cars around Bendigo in 1978. The two centre tracks shown here were removed in 1989
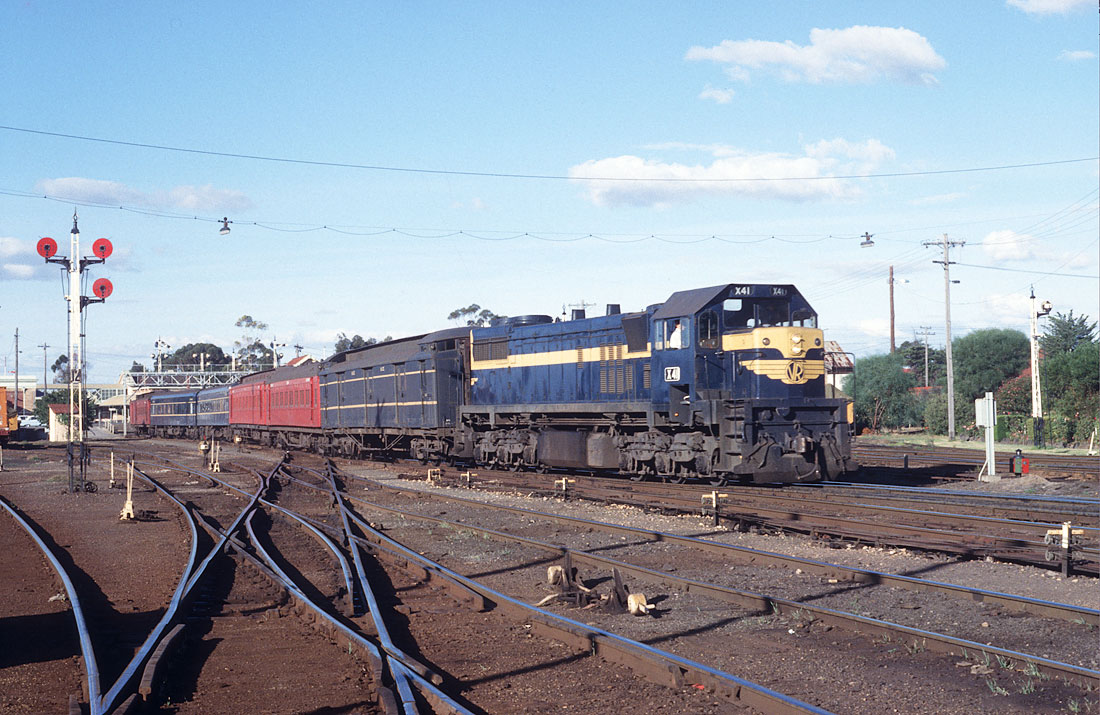
ABOVE: I made many trips to Bendigo as it was my family's original home town. On a quiet Saturday afternoon in 1977, X 41 gets the Swan Hill to Melbourne pass on its way. There is a story to this photo, I had caught the Great Northern Limited up from Melbourne and spent the day photographing trains around Bendigo including walking all the way out to Ranglea and the Bendigo workshops. I made sure to be back at the station to photograph the up Swan Hill. After taking this photo I realised that it was the last train back to Melbourne for the day! I had to stay at a relatives place for the night.

ABOVE: An up DERM with BCPL, arrives Bendigo's up platform 1978. Up until the late 70's quite a few passenger services operated by DERM's originated and/or terminated at Bendigo including services to:
Echuca/Deniliquin (last run Jan. 11 1979)
Cohuna (last run Aug. 24 1977)
Sea Lake (last run May 7 1977)
Korong Vale/Ultima/Robinvale (last run June 3 1978)
Balranald (last run Nov. 6 1975)
(Photo courtesy Kent Smiley)
ABOVE: Looking north with Bendigo C on the left. March 1970. BELOW: J 550 arrives Bendigo and is about to pass over the Williamson street crossing. (both photos courtesy David Langley
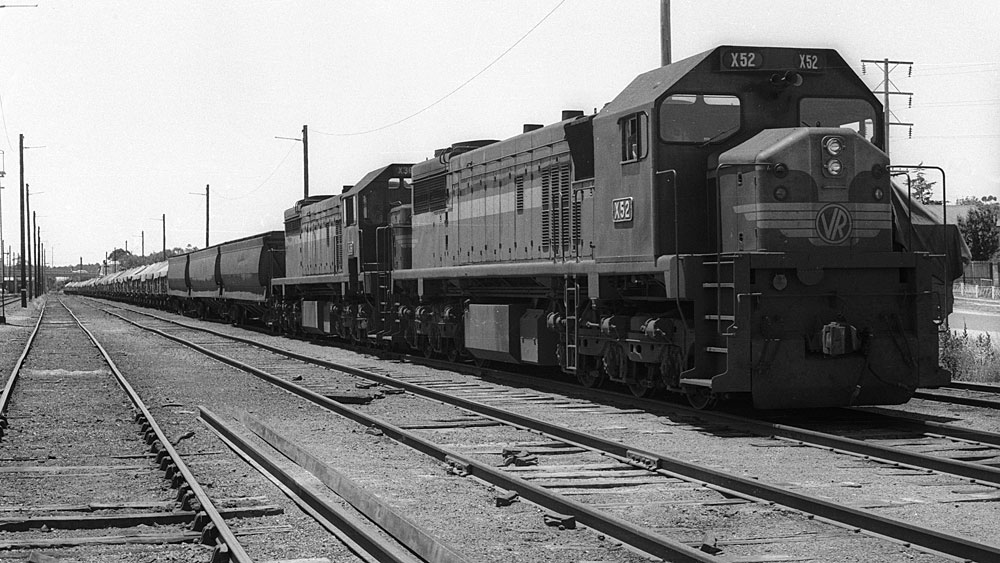
ABOVE: X 52 - X 36 at the head of a Bendigo to Nth Geelong wheat train at the height of the 1978-79 wheat season. The train consisted of 3 GJF's - 50 GY's of wheat for a total weight of 1,787 tons and left Bendigo at 1.20 pm. After X 36 overheated at Castlemaine and 4 stops down Macedon to pump air, the train finally arrived at Sunshine at 9.00pm. Dec. 22 1979.
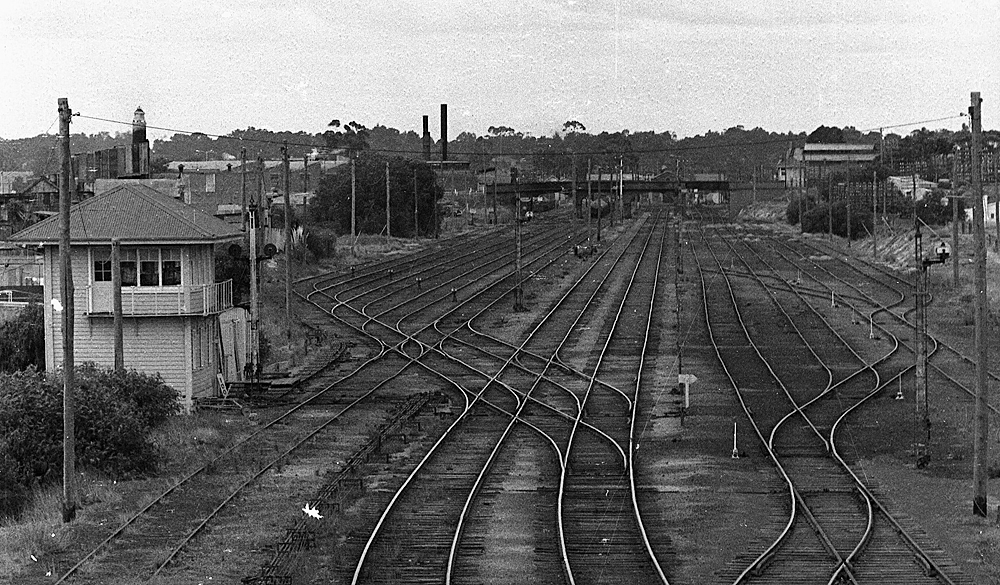
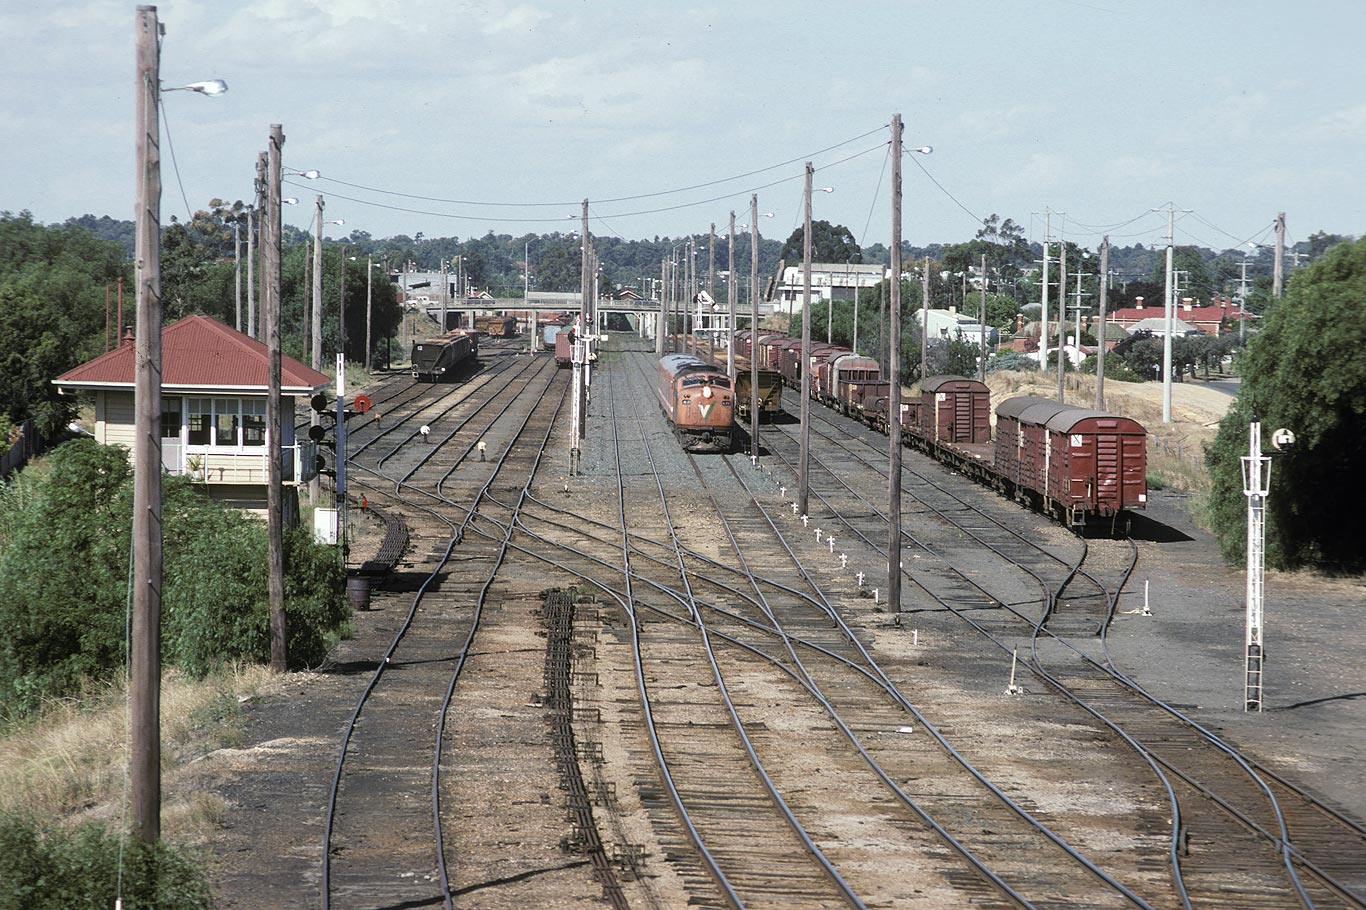
ABOVE: The view from the Thistle St bridge looking north towards Bendigo. Bendigo A box is seen on the left. The yard was extensively enlarged between 1915 - 1921 and most of the yard you see here dates from then. (photo courtesy David Langley). BELOW: Similar view taken on Feb 4 1989 (photo courtesy Noel Bamford)

ABOVE: The view from outside Bendigo A box looking towards Golden Square and Melbourne. The road overbridge is Thistle street.

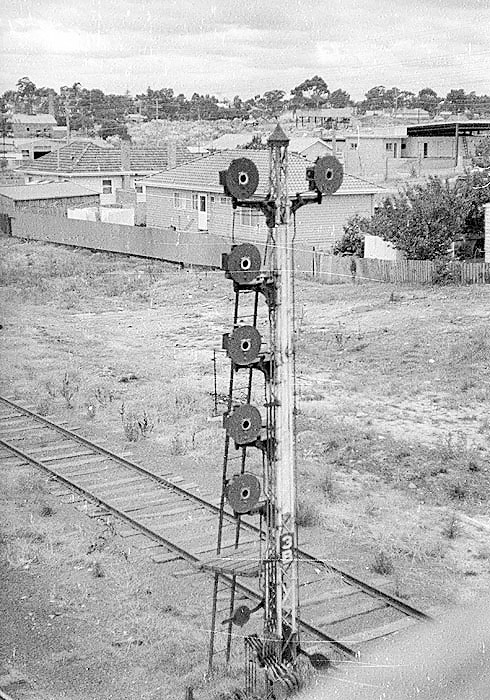
ABOVE: Looking north at the same bridge as the photo above. This was the entrance to Bendigo yard, Bendigo A box can be seen under the Thistle street bridge. The disc on post 2B was an interesting one, it was for setback moves from the up line and it could not be placed to proceed unless one of the discs on post 3B (seen poking out behind the bridge), was at proceed, which made it a kind of repeating disc, although that is in no way any sort of official term. Why they didn't just move post 3B to this side of the bridge we will never know, Nov 1982. (photo courtesy Noel Bamford) BELOW: post 3B which hid behind the Thistle street bridge, circa 1970. (photo courtesy David Langley)
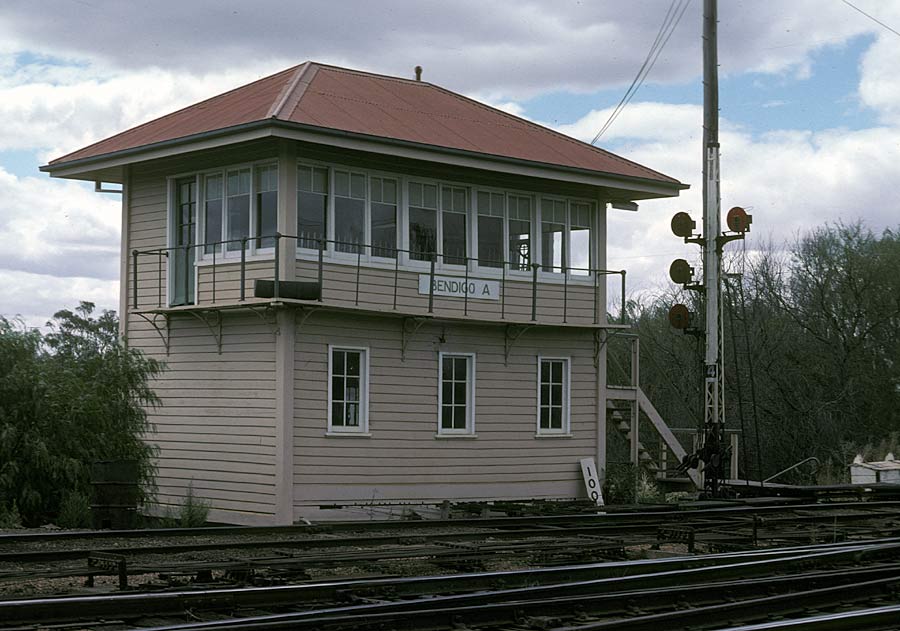
ABOVE: As part of a yard enlargement project, this Bendigo A box was constructed in 1921, exactly 100 miles from Melbourne it controlled all movements into and out of Bendigo at the Melbourne end, it was abolished in May 1990. BELOW: the box viewed from the north side. photo courtesy David Langley

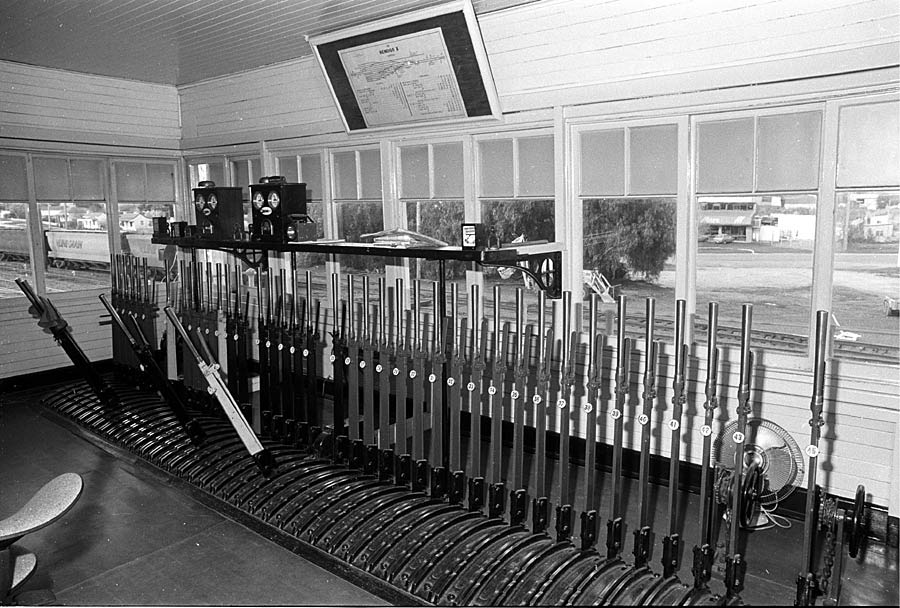
ABOVE: Inside Bendigo A box. 45 lever frame and two double line block instruments. The left hand instrument was to Bendigo B box, the right hand instrument was to communicate with the next "switched in" box towards Melbourne. Bendigo A box itself could switch out. 1988.
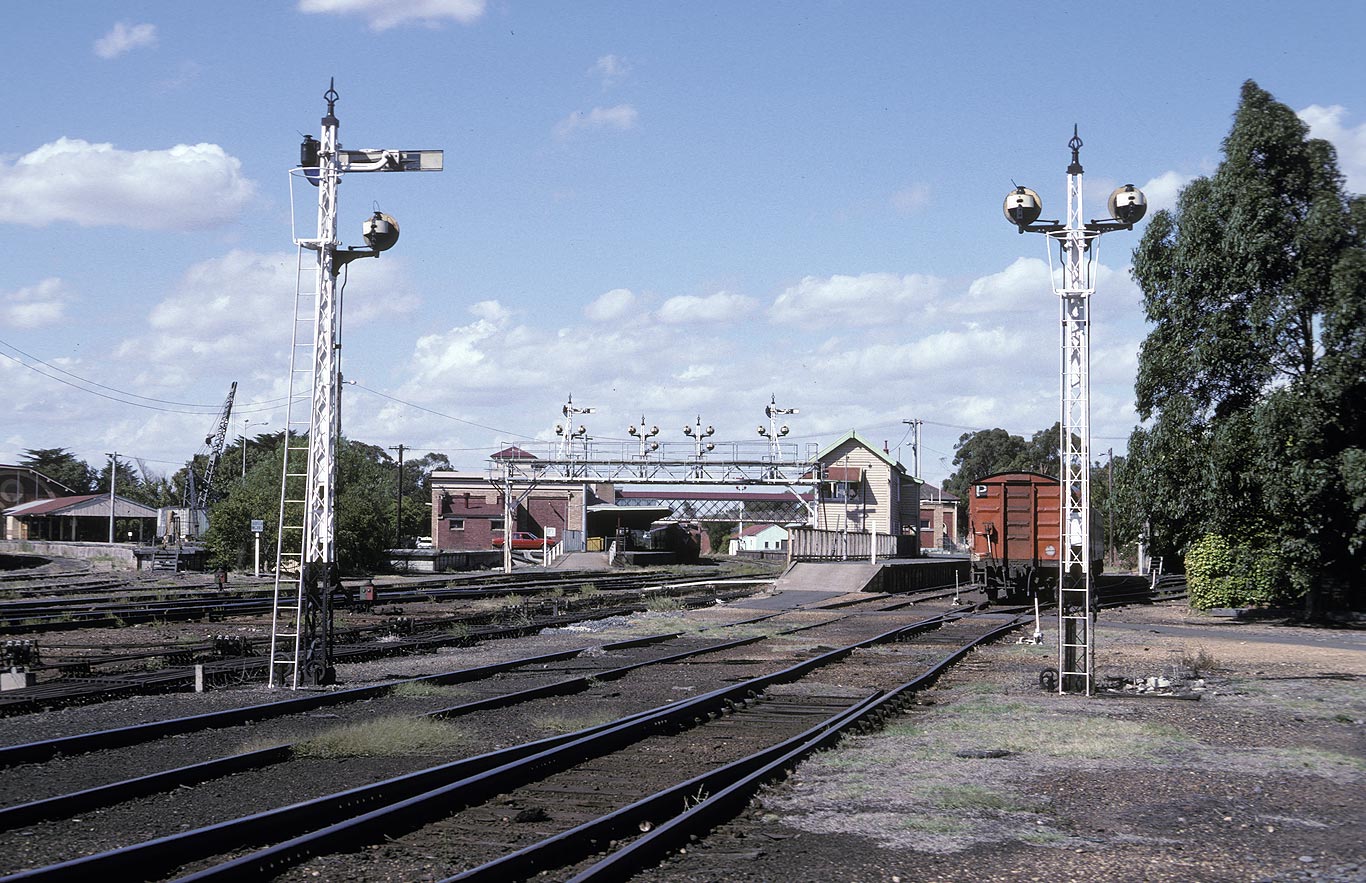
ABOVE: Looking North from the loco area, B box is on the right, Feb 4 1989. (photo courtesy Noel Bamford)
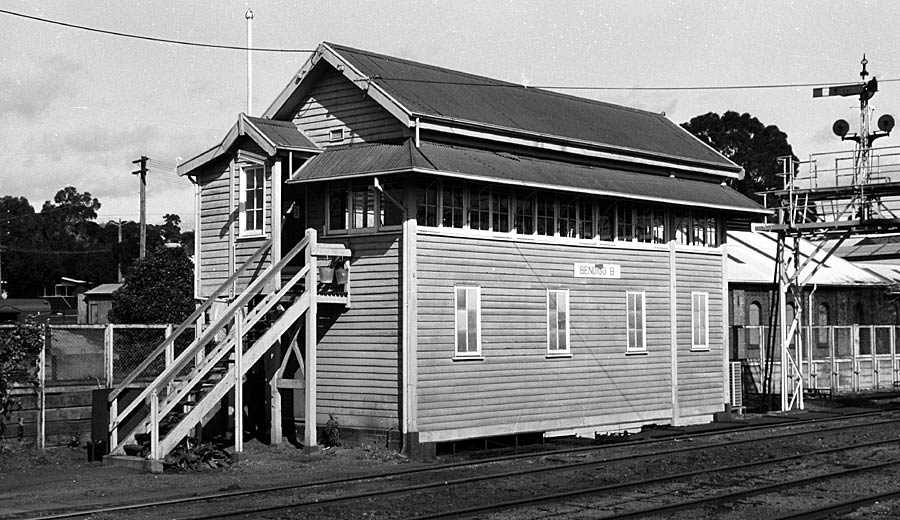
ABOVE: Bendigo B box controlled all movements in and out of the platforms at Bendigo. It was in use until May 1990 when it was replaced by three position signals controlled by a panel in Bendigo station. The box and frame are still standing as of 2021. Photo date 1988.
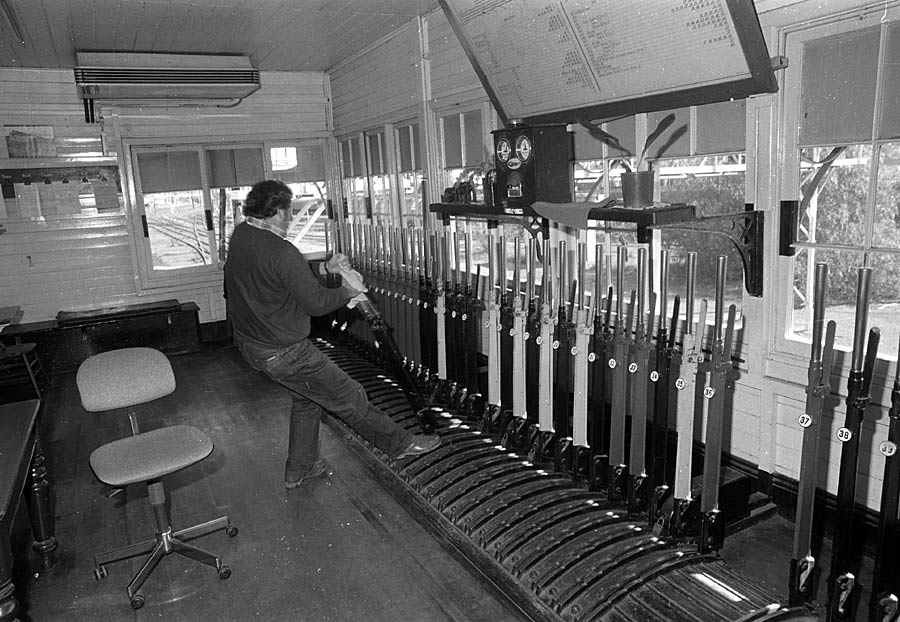
ABOVE: Inside Bendigo B box as the signalman pulls a point lever. 1988.
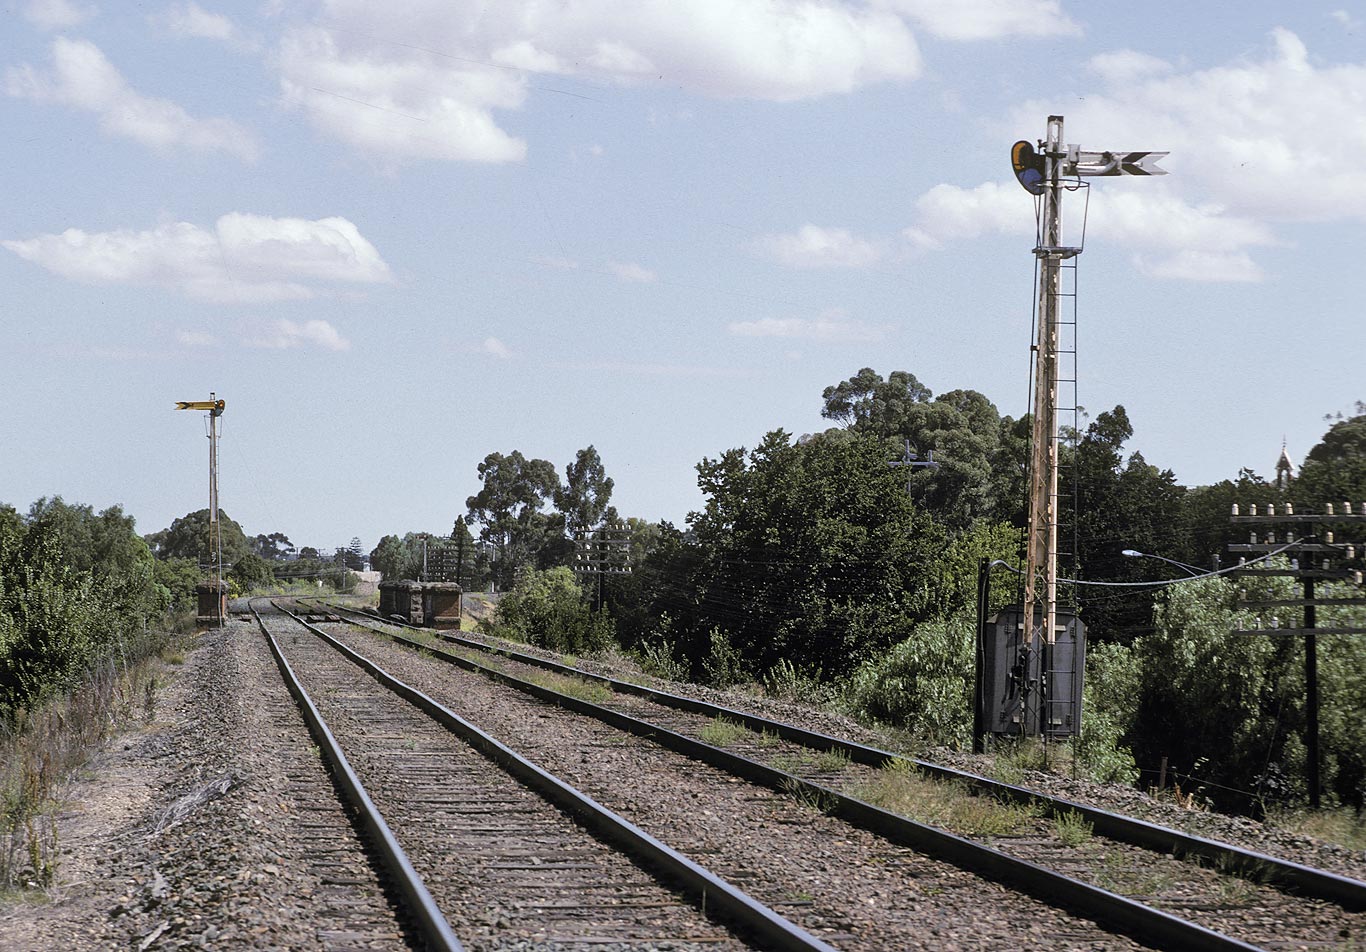
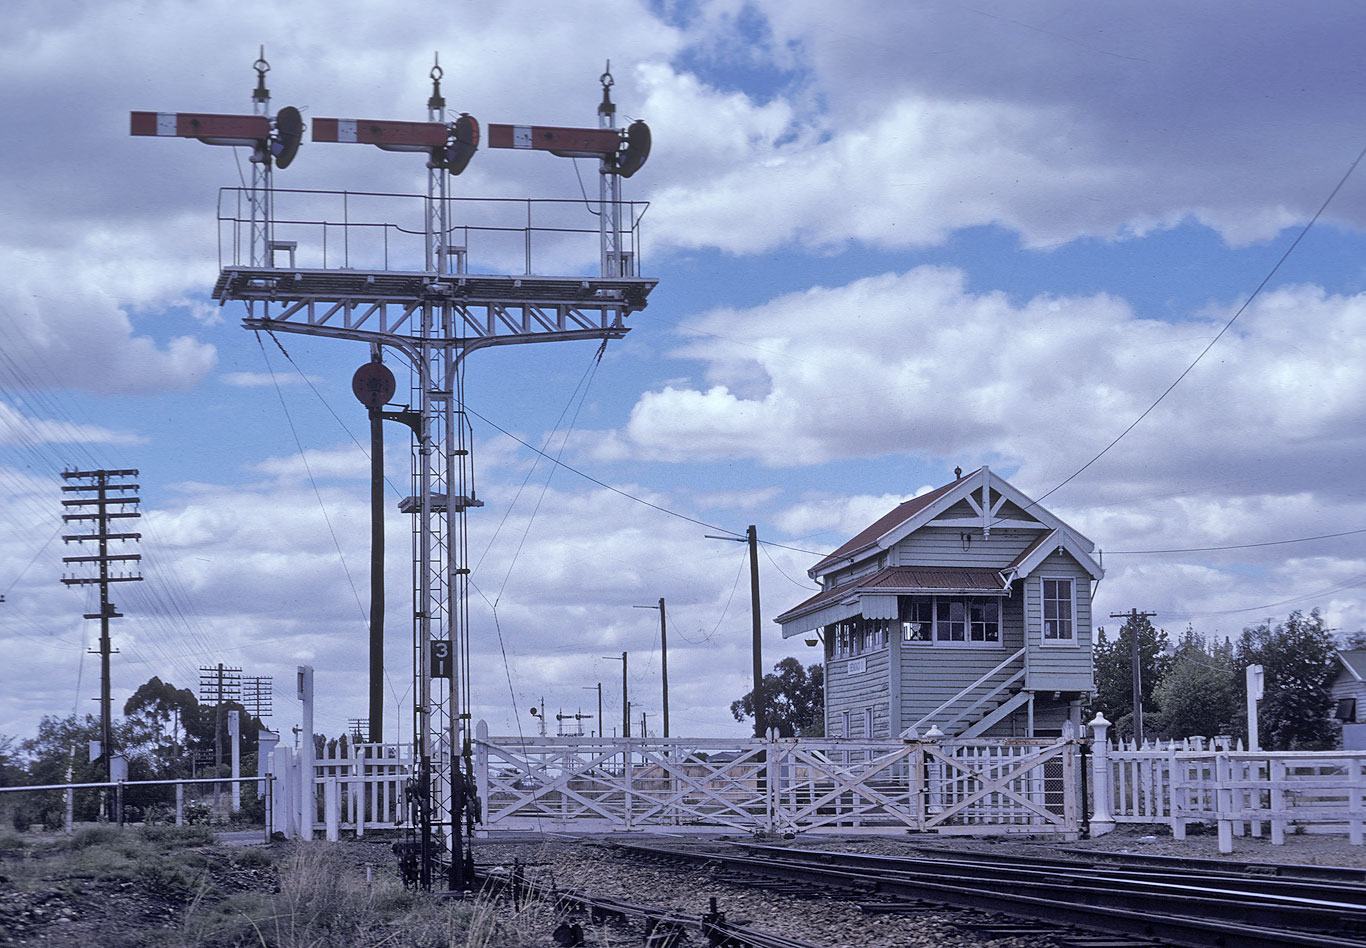
ABOVE: Showing the close proximity of C and D boxes, on the left is the up distant for C box, on the right is the down distant for D box, Feb 4 1989. (photos courtesy Noel Bamford)
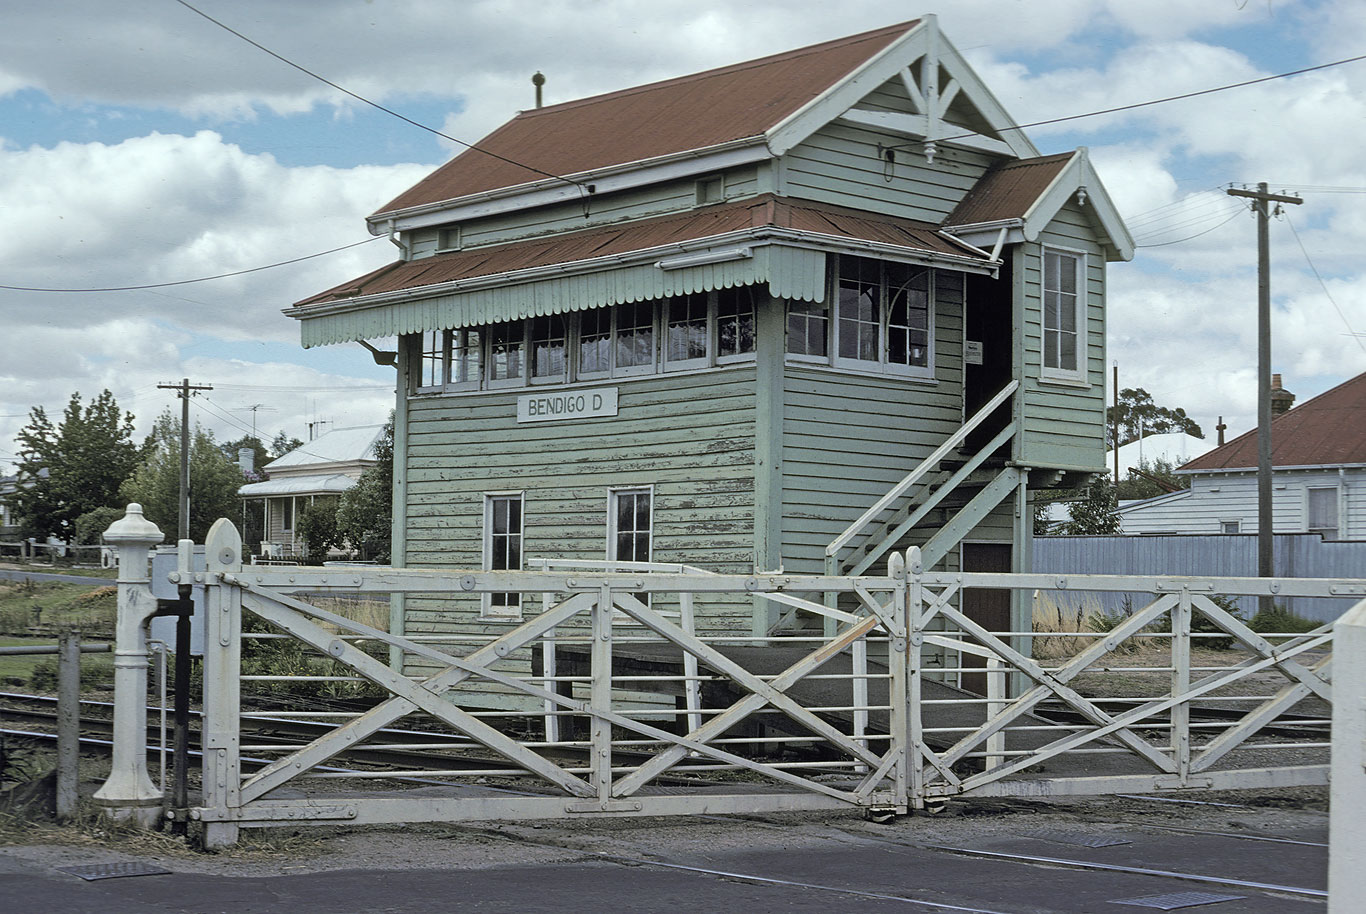
ABOVE & BELOW: Bendigo D box, also known as North Bendigo junction, controlled the junction of three lines. Post 31, below, signalled trains, left to right, to Eaglehawk, Echuca and Heathcote as well as access into the North Bendigo workshops and the Bendigo cattleyards. It was double track from Bendigo C box to D box, the lines to Eaglehawk and Echuca were worked by electric staff and the line towards Heathcote by Train staff and ticket. It also controlled the interlocked gates over Nolan street. photo date Feb 18 1982.
ABOVE: A down Swan Hill passes the up distant for D box. The distant signal is lower on the post than normal. Prior to 1960 this post had an up home signal that protected the McCrae Street hand gates, (it also had a down home signal.) The hand gates were replaced by flashing lights on April 7 1960. photo date: Nov 1982. (photo courtesy Noel Bamford)
