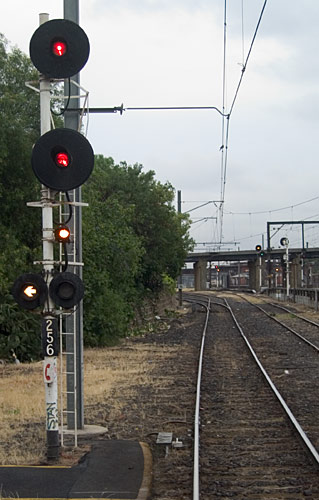
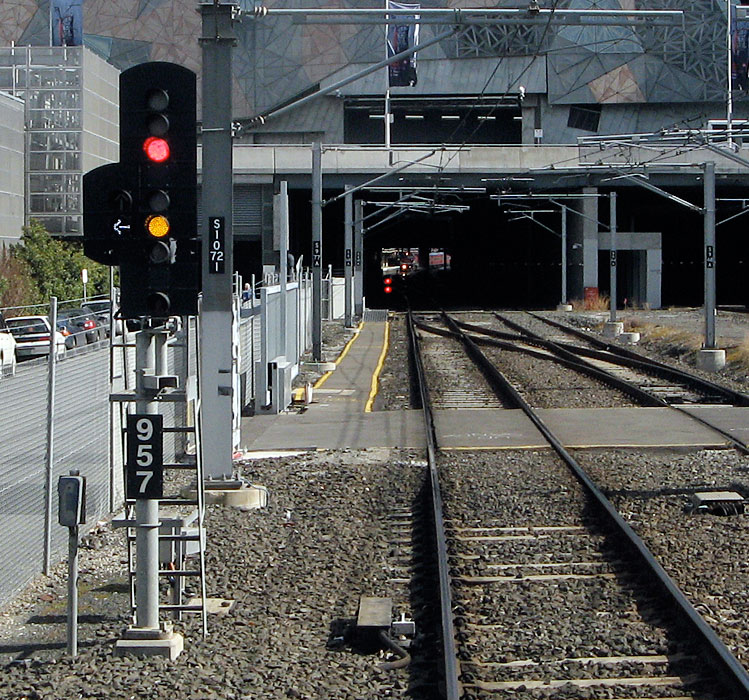
Route Indicators
| One of the big differences between 2 and 3 position signals is that 2 position signals normally give you exact information about the route to be a taken whereas 3 position signals merely tell you what speed to travel at. Because VR 3 position signals do not normally indicate which route is to be taken a variety of route indictors have evolved.
There is no standard type of route indicator, I have presented indicators in the order that they were introduced.
|
||||||||
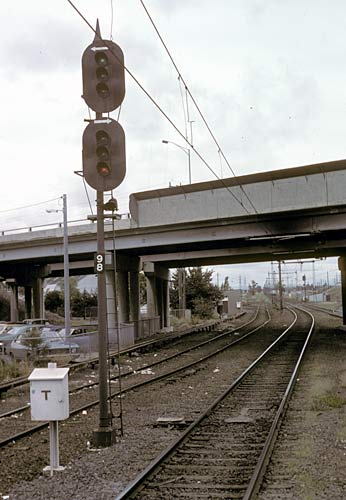 |
PAINTED ARROW TYPE:
Similar to the illuminated arrow type. This example, at Albion, shows that when a green or yellow is displayed on the top light you are going to the left (St Albans/Bendigo) if a green or yellow is displayed on the bottom light you are diverging to the right, to the Albion loop (Broadmedows) It should be noted that the position of the points cannot be seen from the signal. What is vital here is that a suburban train does not take a right hand arrow as the Albion loop line has no overhead wire! |
 |
||||||
|
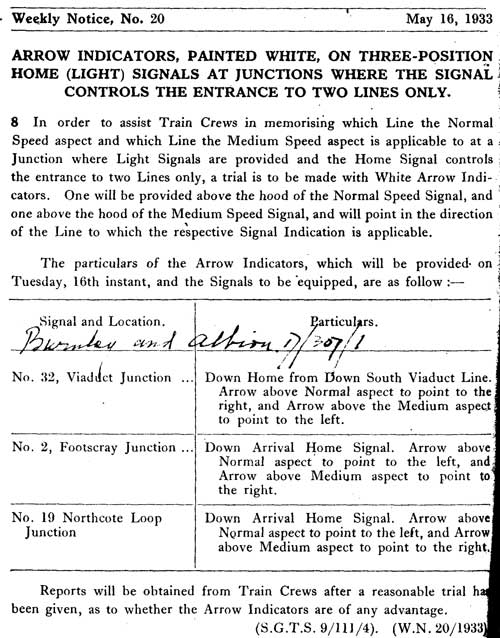
Weekly Notice extract courtesy of Keith Lambert
|
||||||||
|
Post 2 at Footscray is referenced in the circular shown above. This junction was abolished in the late 1970's with the quadruplication from Sth Kensington to Footscray.
|
 |
DUAL GAUGE INDICATORS
At locations where a signal protects the junction point for dual gauge track these indicators are often used. The letter "V" means the route is set for a Victorian (broad) gauge movement, the letter "S" means that the route is set for a Standard gauge movement. |
||||
| Home signal at No 1 platforn Spencer Street, 1987 | |||||
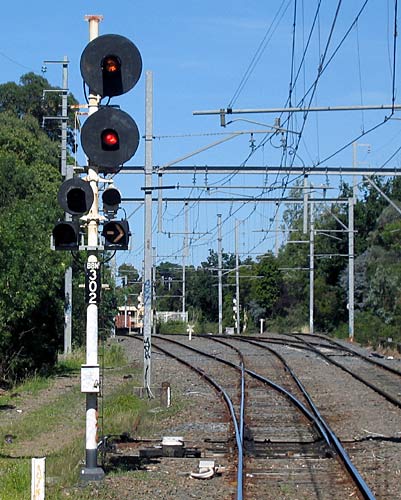 |
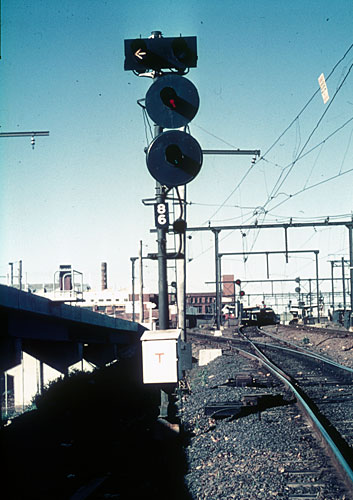
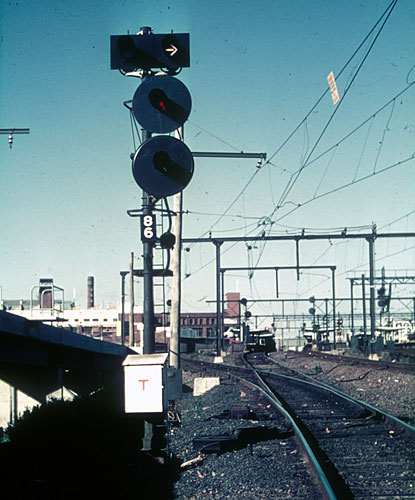
ILLUMINATED ARROW TYPE:
Often used when the same aspect can take you to two different routes, the arrows (left, right or pointing up) simply indicate which direction the points are laying for. This example, at Blackburn, where a top light can take you to either platform, is provided because if a train is to terminate at Blackburn it cannot arrive into the down platform so it is vital that a terminating train gets a right hand arrow. A major failing of this type of route indicator is that by the time the driver sees the arrow it is too late to stop short of the points should they be lying incorrectly, they are best suited to areas of relatively low speed. This type were introduced circa 1972, the first two locations being post |
|||||||
 |
||||||||
Route indicators working in conjunction with low speed signals are quite rare but there have been a few examples, the dual gauge indicator shown above and this signal near the old hump at North Melbourne which shows two arrows.
|
||||||||
 |
 |
|||||||
|
||||||||
 |
ILLUMINATED LETTER TYPE
Arrow indicators have fallen out of favour in the last few decades, usually replaced by illuminated letters as they provide more specific information as to the route to be taken. Modern "theatre" type indicators (as seen below) can be seen from a much greater distance than earlier types (shown at left) At junction locations that are more complex than a simple arrow could accomodate, letter indications are used. The signal at left controls the junction for the Ballarat and Bendigo lines at Sunshine. A medium speed aspect is displayed for both North and South lines.
|
||||||||
 |
 |
 |
|||||||
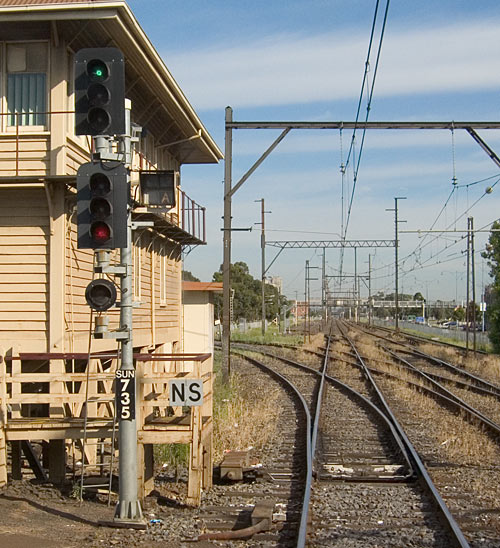
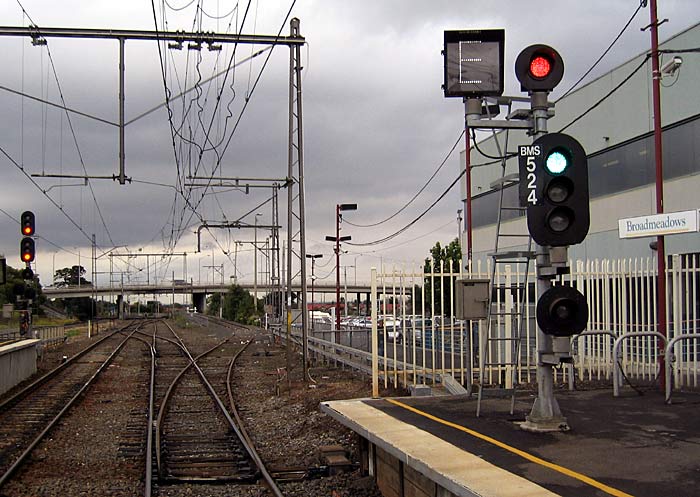
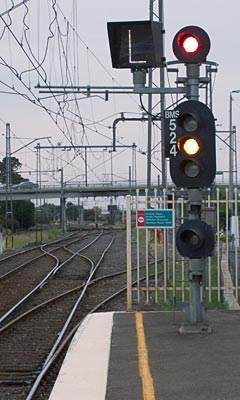
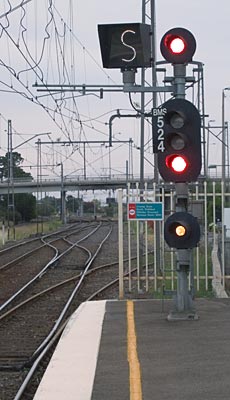
| The photos above show the up home signal at Broadmedows. No normal speed aspects can be shown as every mainline route from this signal involves at 40 km/h diverge. From here it is possible to go to Essendon, letter "E" or to go to the Albion goods line, letter "L" for Jacana Loop. When the low speed is used for the stabling siding a letter "S" is illuminated. As the points for the first two moves are out of view from the signal it is essential for a driver to know which way the route is set before accepting the signal.
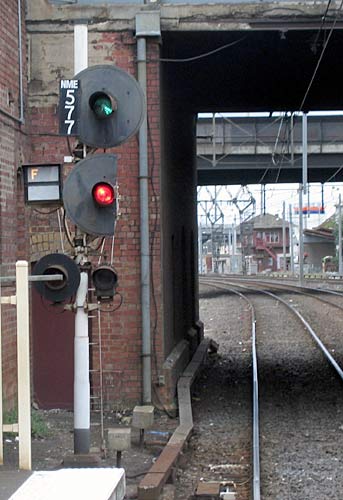
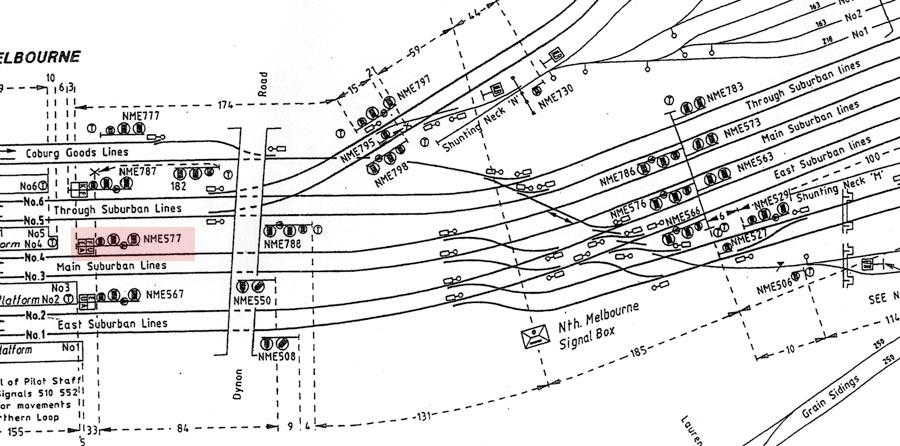
The signal at left, (NME 577 at North Melbourne platform 4) controls a major junction that is out of view whilst standing at the signal. If there was no route indicator there would be no way a driver would know if the points ahead were set correctly. 4 routes are available from this signal and all of the points are out of view. (The diagram below highlights NME577 and shows the routes that can be taken, The Upfield line is toward NME529)
|
|||||||||
 |
|||||||||
 |
|||||||||
 |
FEATHER TYPE INDICATORS
In an attempt to improve the long range visibility of route indicators these feather type, (widely used in the U.K.) were adopted in the late 1980's This up home signal at Laverton, can take you to three different tracks.
|
||||
 |
|||||
| The track from the up Sandringham platform (plat 1) at Richmond can take you direct to Flinders St via 2 different routes as well as being able to take you into the city loop. The second set of points are critical as they can take you to the loop or direct. In the diagram below green indicates the normal speed route, yellow sees you diverge through the first set of points and onto the up Caulfield through line and direct to Flinders St, for this you get the 45 degree feather and a medium speed aspect, red indicates diverging through two sets of points and into the Caulfield through ramp of the underground loop, for this you get the horizontal feather and a medium speed aspect (shown). The key requirement here is that a direct train not be routed via the loop and vice versa, the route indicator helps avoid an embarassing "wrong route" | |||||